Jump to content


Photo

F23 Gearbox Removal + Clutch Replacement Guide


  • Please log in to reply
16 replies to this topic

#1 Nev

Nev

    Nipper's Minion

  • PipPipPipPipPipPipPipPip
  • 11,587 posts
  • Gender:Male
  • Location:Bristol
  • Interests:Rock climbing, skiing, kayaking, surfing, mountaineering, budgies, chess, practical mechanics.

Posted 29 June 2011 - 08:40 AM

I have prepared a guide for removing an F23 from a VX220 Turbo. This guide might be usefulish to N/A owners too, as the process is very similar.

I have initially made guide available for download on my own website here. as a Word document.

Reviews, comments, textual corrections, mising instructions, tips and extra pictures are all welcomed please.

Edited by Nev, 29 June 2011 - 08:42 AM.


#2 out on the bike

out on the bike

    Super Member

  • PipPip
  • 447 posts
  • Gender:Male
  • Location:Lichfield
  • Interests:fast bikes and fast cars

Posted 30 June 2011 - 07:53 PM

Excellent guide thanks for putting this together Imnotworthy I have just had a quick look at it and will have a proper read of it at the weekend as it looks like I will now definitely be doing my clutch myself.Thanks again thumbsup

#3 Nev

Nev

    Nipper's Minion

  • PipPipPipPipPipPipPipPip
  • 11,587 posts
  • Gender:Male
  • Location:Bristol
  • Interests:Rock climbing, skiing, kayaking, surfing, mountaineering, budgies, chess, practical mechanics.

Posted 01 July 2011 - 08:12 AM

Your welcome, feel free to ring me if you get stuck or have problems. BTW I have updated the document a bit, so I'd suggest downloading it again.

#4 redvts

redvts

    Billy No Mates

  • PipPipPipPipPip
  • 1,472 posts
  • Gender:Male
  • Location:south shields

Posted 01 July 2011 - 08:27 AM

The list of tools is very helpful, I see you have added a bit about the exhaust :D

#5 Duncan VXR

Duncan VXR

    Scary Internerd

  • PipPipPipPipPipPip
  • 5,273 posts
  • Gender:Male
  • Location:Lincolnshire
  • Interests:Anything to do with making cars faster and better than the original

Posted 01 July 2011 - 08:34 AM

Nev you have too much time on your hands :D Good guide for anyone wanting a bit of DIY ;) Did not read every line but 3 pointers from the previous 15 I have done lol (6hrs job done possible when your used to it, inc coffee breaks) I use a pipe clamp before removing the clutch pipe to slave - saves most of the fluid loss and helps come bleeding time ;) Find getting it on axle stands can cause the car to float due to weigth at rear and cafefully placing a rear wheel over the rad housing sorts that out (only required if on your own) Pressure bleeder not really required unless again your on your own and keep the fluid high as the feed for clutch is quite high in the res Other than that its the usual fun fun fun DG

#6 Nev

Nev

    Nipper's Minion

  • PipPipPipPipPipPipPipPip
  • 11,587 posts
  • Gender:Male
  • Location:Bristol
  • Interests:Rock climbing, skiing, kayaking, surfing, mountaineering, budgies, chess, practical mechanics.

Posted 01 July 2011 - 08:37 AM

Nev you have too much time on your hands :D

Good guide for anyone wanting a bit of DIY ;)

Did not read every line but 3 pointers from the previous 15 I have done lol (6hrs job done possible when your used to it, inc coffee breaks)

I use a pipe clamp before removing the clutch pipe to slave - saves most of the fluid loss and helps come bleeding time ;)

Find getting it on axle stands can cause the car to float due to weigth at rear and cafefully placing a rear wheel over the rad housing sorts that out (only required if on your own)

Pressure bleeder not really required unless again your on your own and keep the fluid high as the feed for clutch is quite high in the res

Other than that its the usual fun fun fun

DG


Thx, will add your tips to the doc. I have lots of time cos I don't make babies !!

#7 Duncan VXR

Duncan VXR

    Scary Internerd

  • PipPipPipPipPipPip
  • 5,273 posts
  • Gender:Male
  • Location:Lincolnshire
  • Interests:Anything to do with making cars faster and better than the original

Posted 01 July 2011 - 09:05 AM

PMSL your not far wrong there my friend!!!!! As a treat may get time to make a new loom for the reack beast over the weekend....well maybe (currently oe loom is massive with lots not required so should save at least 0.023kg) I will get the car to 520kg DG

#8 out on the bike

out on the bike

    Super Member

  • PipPip
  • 447 posts
  • Gender:Male
  • Location:Lichfield
  • Interests:fast bikes and fast cars

Posted 14 July 2011 - 07:58 PM

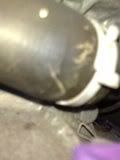
After doing my clutch last weekend there are a couple of things I would like to add that could be useful.The bolt that I had trouble finding is well hidden under the water pipes and I not only couldn't see it but couldn't actually get my hand to it I managed to get a picture of it with my mobile that I have added bellow.For reference the bit of purple tape in the picture is over the bleed turret covering the hole that the clutch pipe screws into which I put there to stop dirt going in.
Posted Image
Also when putting the box back in if you are on your own as I was I found it a lot easier to use 2 jacks on the gear box to get it lined up one on the left side and one on the right hand side of the gear box looking at it through the wheel arch as there isn't really any where central on the box to keep it level with only one jack while getting it into position.I also found an easy way to lock the flywheel as I had new pressure plate bolts I just put 2 of the old ones back in the flywheel and put one end of my 1m breaker bar across them with the other end against the floor I have a picture of this but I haven't had chance to put it on the pc yet.

And I would just like to add that Nev's guide is very well laid out and easy to understand and this is quite an easy but very time consuming job that can be done on your own but 2 pairs of hands would be a lot easier.Thanks again to nev for taking the time to make the guide thumbsup

#9 Lou_m

Lou_m

    Addicted to Hooning

  • PipPipPipPipPip
  • 1,904 posts
  • Gender:Male
  • Location:Fife
  • Interests:Cars, motorsport, cycling

Posted 23 May 2013 - 08:03 PM

Is the guide still available. I can't seem to find it on Nev's site?


#10 Nev

Nev

    Nipper's Minion

  • PipPipPipPipPipPipPipPip
  • 11,587 posts
  • Gender:Male
  • Location:Bristol
  • Interests:Rock climbing, skiing, kayaking, surfing, mountaineering, budgies, chess, practical mechanics.

Posted 26 June 2013 - 01:34 PM

I had to take the guide off my website as I ran out of space. Just PM me with your regular email address and I can email it directly to you.


Edited by Nev, 26 June 2013 - 01:35 PM.


#11 inigo

inigo

    Newbie

  • 2 posts
  • Location:Ipswich

Posted 17 January 2014 - 04:40 PM

F23 turret assembly.


Hi, Off topic but I can't start a new thread.


Can anyone help please.

I am trying to fix my stiff gear stick side to side motion.

It's been bad for years and I would lubricate the turret assembly to ease it but it's got so bad now. I can't get 1st or reverse without banging the lever over hard.


The shaft pin holding the turret on has worn itself a hole. I'm fairly certain the resulting slack is what's causing the stiffness.


I have found a matching F23 box in a local yard, but the turret has a vent unlike mine. Will it be ok to fit to my box.


If I remove the turret what would you recommend when refitting i.e. sealing/oiling?


This shows the vented and unvented turrets:

http://workshop-manu...assembly_(f23)/


Thanks for any help!


#12 Kieran McC

Kieran McC

    Scary Internerd

  • PipPipPipPipPipPip
  • 3,416 posts
  • Gender:Male
  • Location:Norwich
  • Interests:Fast cars,Track Days.

Posted 17 January 2014 - 04:44 PM

F23 turret assembly.


Hi, Off topic but I can't start a new thread.


Can anyone help please.

I am trying to fix my stiff gear stick side to side motion.

It's been bad for years and I would lubricate the turret assembly to ease it but it's got so bad now. I can't get 1st or reverse without banging the lever over hard.


The shaft pin holding the turret on has worn itself a hole. I'm fairly certain the resulting slack is what's causing the stiffness.


I have found a matching F23 box in a local yard, but the turret has a vent unlike mine. Will it be ok to fit to my box.


If I remove the turret what would you recommend when refitting i.e. sealing/oiling?


This shows the vented and unvented turrets:

http://workshop-manu...assembly_(f23)/


Thanks for any help!


Are the cables ok ?


#13 inigo

inigo

    Newbie

  • 2 posts
  • Location:Ipswich

Posted 17 January 2014 - 05:31 PM

Thanks for the reply,


They might have stretched I suppose, but the slack of the turret is really major compared to the scrapped one. You can feel the joints has "jack knifed" and is working against itself.

If the vented turret is suitable I might grab the cables too.


I've seen alot of threads about these being stiff from new. I think it's just a design flaw.


#14 aKra

aKra

    Member

  • Pip
  • 109 posts
  • Gender:Male
  • Location:The Netherlands

Posted 18 January 2014 - 02:06 PM

For future use, the document is located here.


#15 KUPERnick

KUPERnick

    Member

  • Pip
  • 12 posts

Posted 31 October 2018 - 12:59 PM

Hi,

Does anybody have this guide? All two links to the document are broken.


#16 aKra

aKra

    Member

  • Pip
  • 109 posts
  • Gender:Male
  • Location:The Netherlands

Posted 01 November 2018 - 11:57 AM

My excuses, I've moved my personal server and it's not public anymore.

Moved it to Google Docs!
https://docs.google....6DAr98rF31XHIU/


#17 KUPERnick

KUPERnick

    Member

  • Pip
  • 12 posts

Posted 02 November 2018 - 08:22 AM

Great! Thanx!


0 user(s) are reading this topic

0 members, 0 guests, 0 anonymous users