Ahhhh memories of rounded bolts, snapped bolts, rusted solid bolts and broken torx bits!!!
I hate to tell but the wishbones will indeed be a nightmare. Hit the plusgas hard for a week before trying!!

Vx220 Sc Refresh Project
Started by
GaryK
, Aug 03 2015 01:05 PM
103 replies to this topic
#41

gingerjon
-
-

- 587 posts
Super Duper Member
- Gender:Male
- Location:Hedge End
Posted 21 December 2015 - 10:44 PM
#42
GaryK
-
-
- 168 posts
Member
- Gender:Male
- Location:Bury St. Edmunds
Posted 21 December 2015 - 11:11 PM
I fully expected to be able to strip the suspension in that first four day weekend. I had visions of my dad passing me wishbones as quickly as I could drill out the bushes. Pffft! Now I call it a successful evening if I manage to remove a single bolt.
Still find it kinda therapeutic though...
Edited by GaryK, 21 December 2015 - 11:12 PM.
#43
GaryK
-
-
- 168 posts
Member
- Gender:Male
- Location:Bury St. Edmunds
Posted 23 January 2016 - 10:35 AM
All stripped!
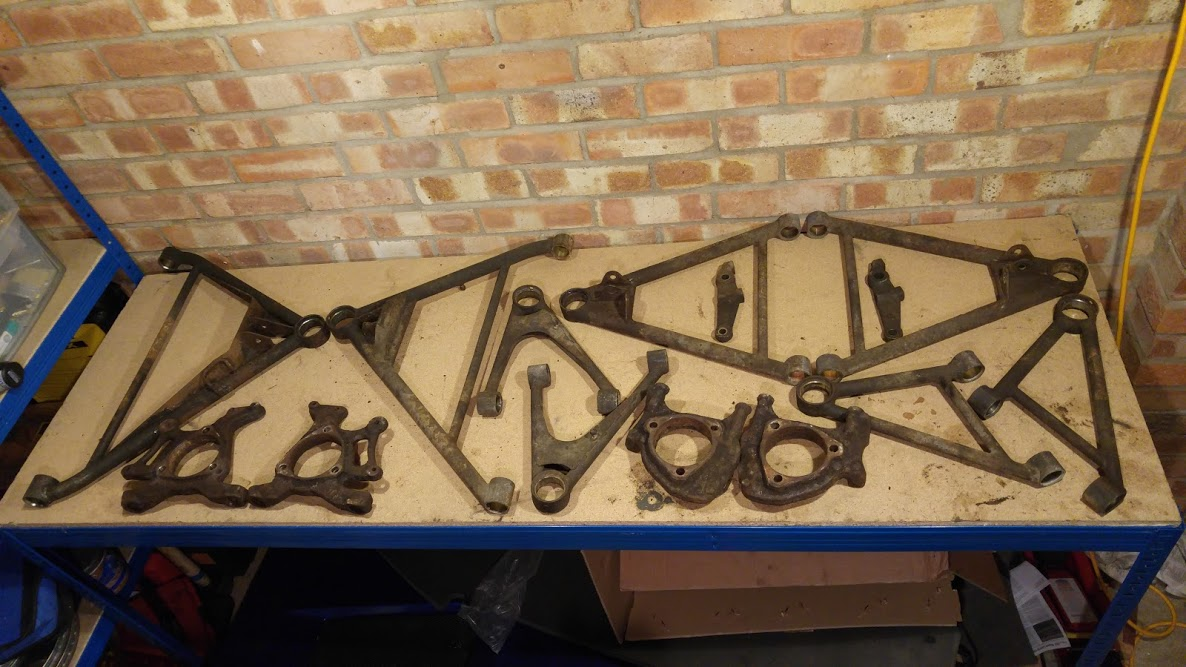
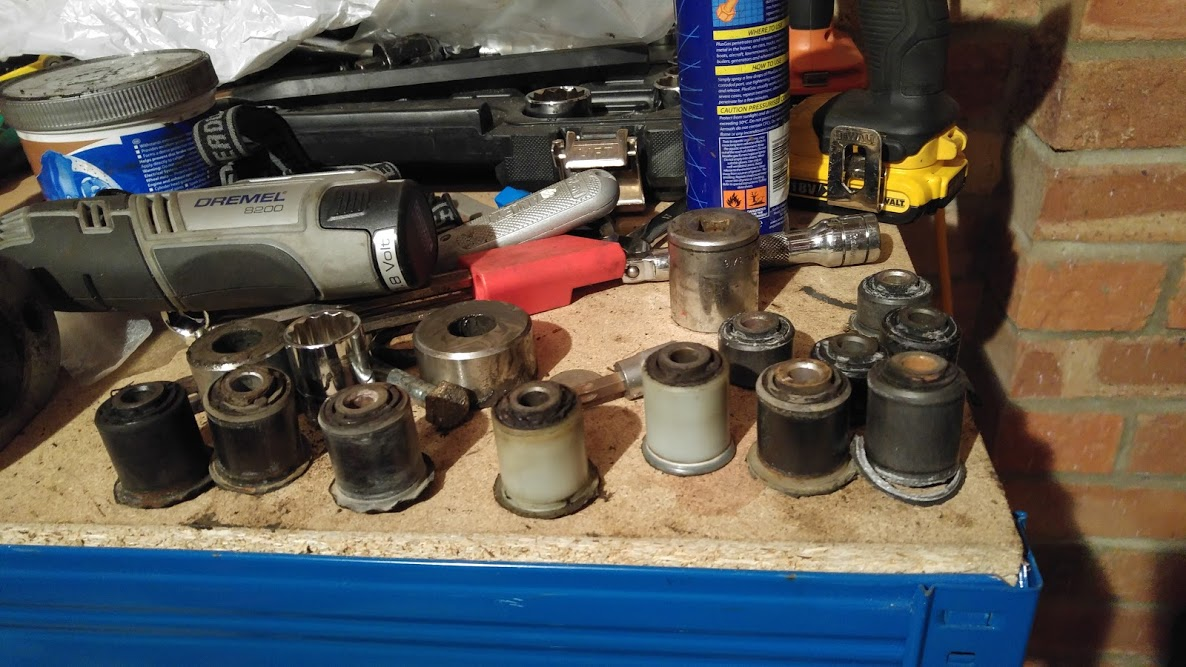
The EliseParts ball joint removal tool was very, very helpful. Using an impact wrench to alternate between the two bolts, it only took a minute or two on each ball joint. I didn’t have as much luck with the bushes – I tried drilling to weaken them, and the first one came out no problem, but I noticed I scored the inside edge of the sleeve. I tried another couple, but even with drilling, wasn’t able to press them out even with a vice, so I get a hydraulic press, which made light work of it. There was a right mishmash of old and new, robber and poly bushes:
Now I’m at the point of deciding whether to take off and paint the subframe… Might as well! Also, I’m glad I bought new bearings – the old ones, rears especially, feel proper rough/gritty in comparison. I’m spanking a lot of money on this and still haven’t got to the bottom of that annoying ticking sound which gives me the fear a bit. At least taking the subframe off would help me justify replacing the exhaust/manifold gaskets to remove them as suspects...
Edited by GaryK, 23 January 2016 - 10:37 AM.
#44
GaryK
-
-
- 168 posts
Member
- Gender:Male
- Location:Bury St. Edmunds
Posted 23 January 2016 - 10:40 AM
Amazing what five minutes with a sponge and wire brush can do:
#45
GaryK
-
-
- 168 posts
Member
- Gender:Male
- Location:Bury St. Edmunds
Posted 25 January 2016 - 08:15 AM
What's the best way to support the engine when removing the subframe, if you Don't have a hoist? I have plenty of jacks and axle stands...
#46
D-DAWG83
-

-
- 1,276 posts
Billy No Mates
- Gender:Male
- Location:Milton Keynes
- Interests:Cars, motorsport, music and films
Posted 25 January 2016 - 10:21 AM
Could be difficult without a hoist, but im sure people must have done it at some point with various axle stands etc, just a case of balancing it carefully. Suppose you have the front engine mount to help to an extent.
#47
Rosssco
-

-
- 4,180 posts
Scary Internerd
- Gender:Male
- Location:Aberdeen
Posted 25 January 2016 - 11:01 AM
What's the best way to support the engine when removing the subframe, if you Don't have a hoist? I have plenty of jacks and axle stands...
You dont need to. Just remove one side engine mount (with a trolley jack under the engine) / pair of subframe bolts at a time. The engine only attaches to the subframe by one torque mount, and will happily sit there with the subframe off.
#48
GaryK
-
-
- 168 posts
Member
- Gender:Male
- Location:Bury St. Edmunds
Posted 26 January 2016 - 01:19 AM
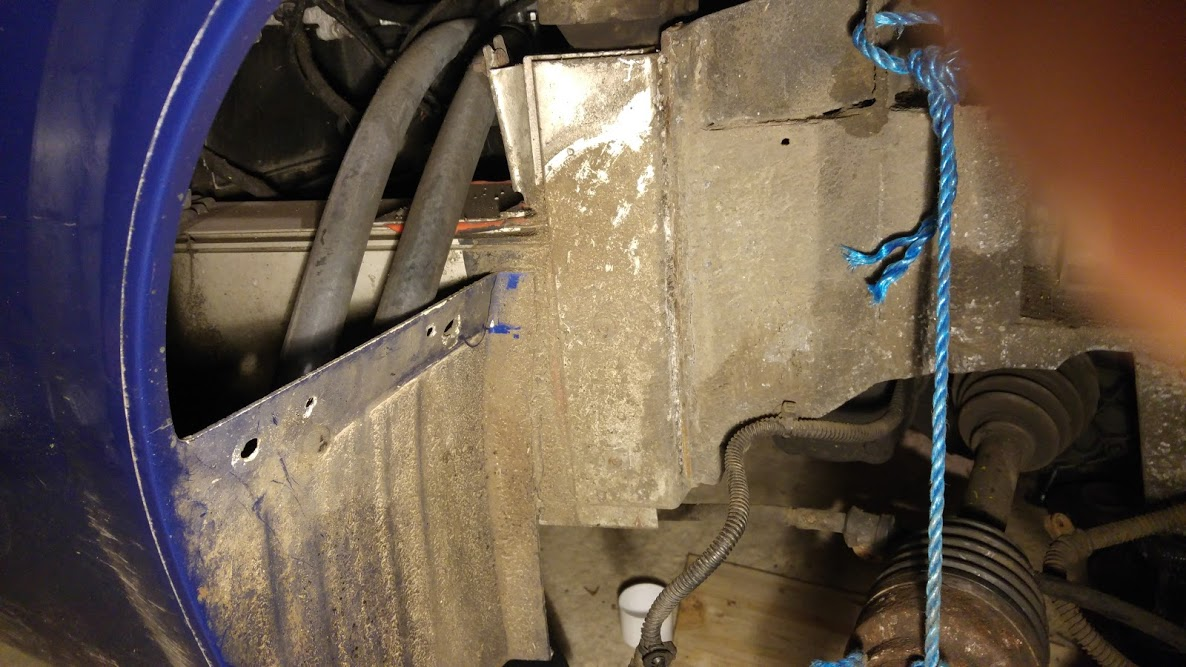
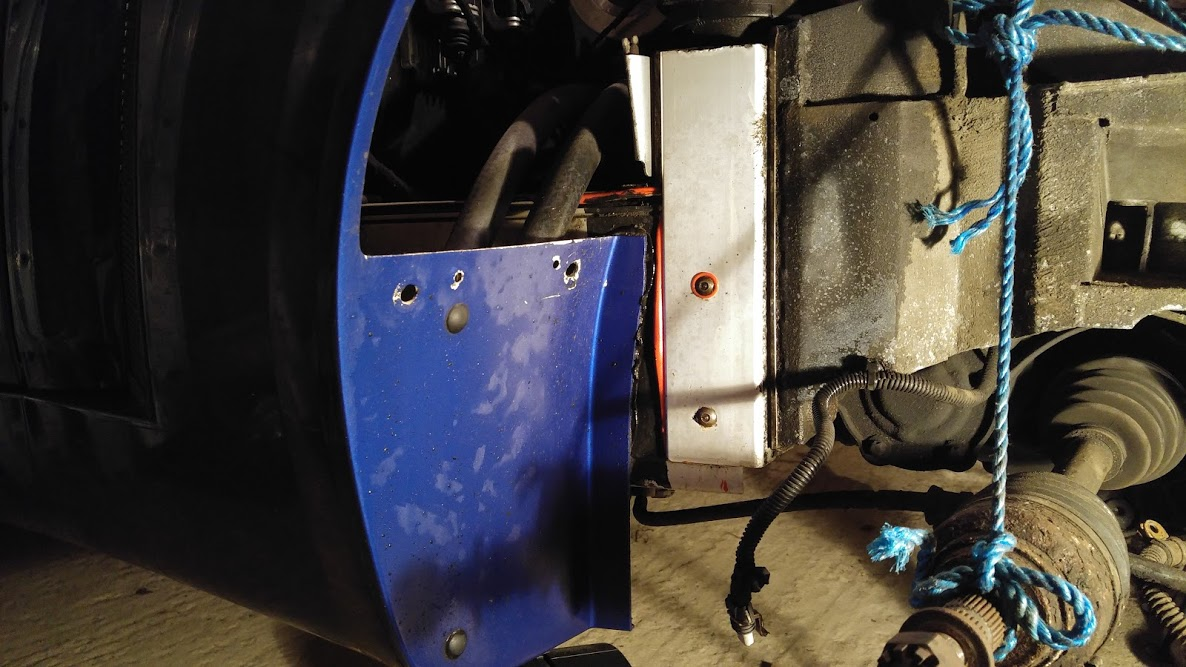
Done - cheers. This is what greeted me 
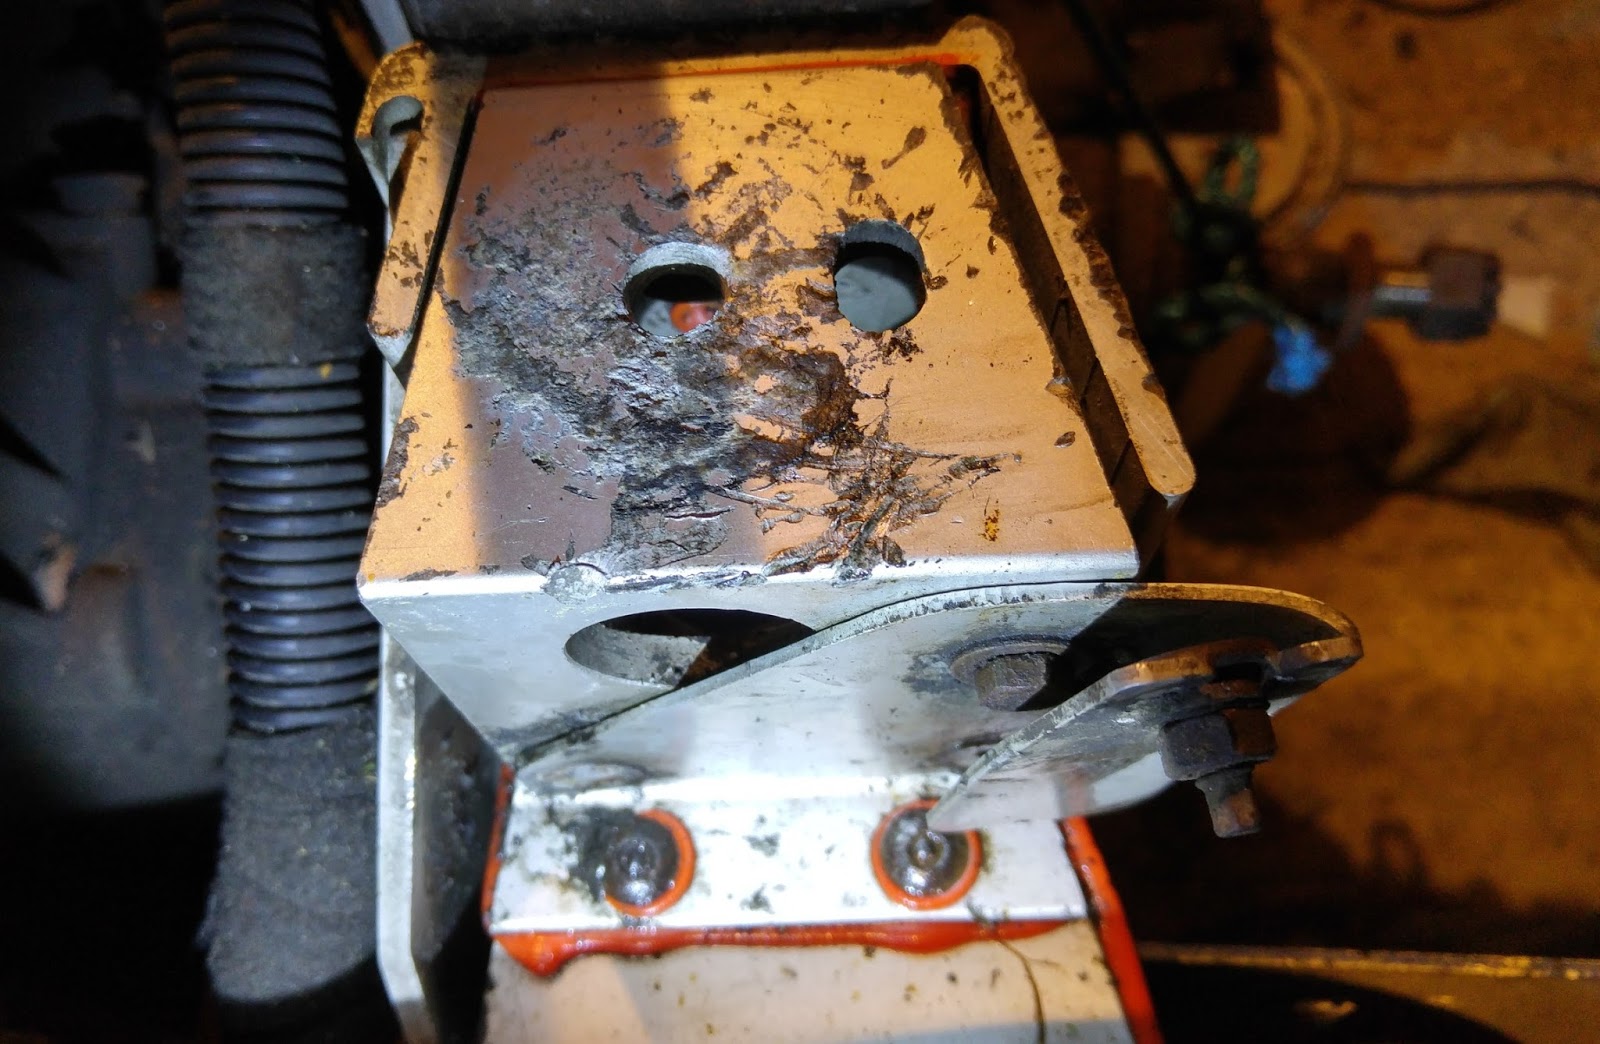
Some of that is galvanic corrosion, under where the mount was, but can't imagine where the rest of the damage came from. Nothing major but bloody ugly. Dunno what that plate is for on the front of the post - nothing on my car was connected to it, and that last remaining bolt spins in the rivnut  . Was about to take an angle grinder to it when I saw it was 1am and thought better of it.
#49
GaryK
-
-
- 168 posts
Member
- Gender:Male
- Location:Bury St. Edmunds
Posted 26 January 2016 - 09:12 AM
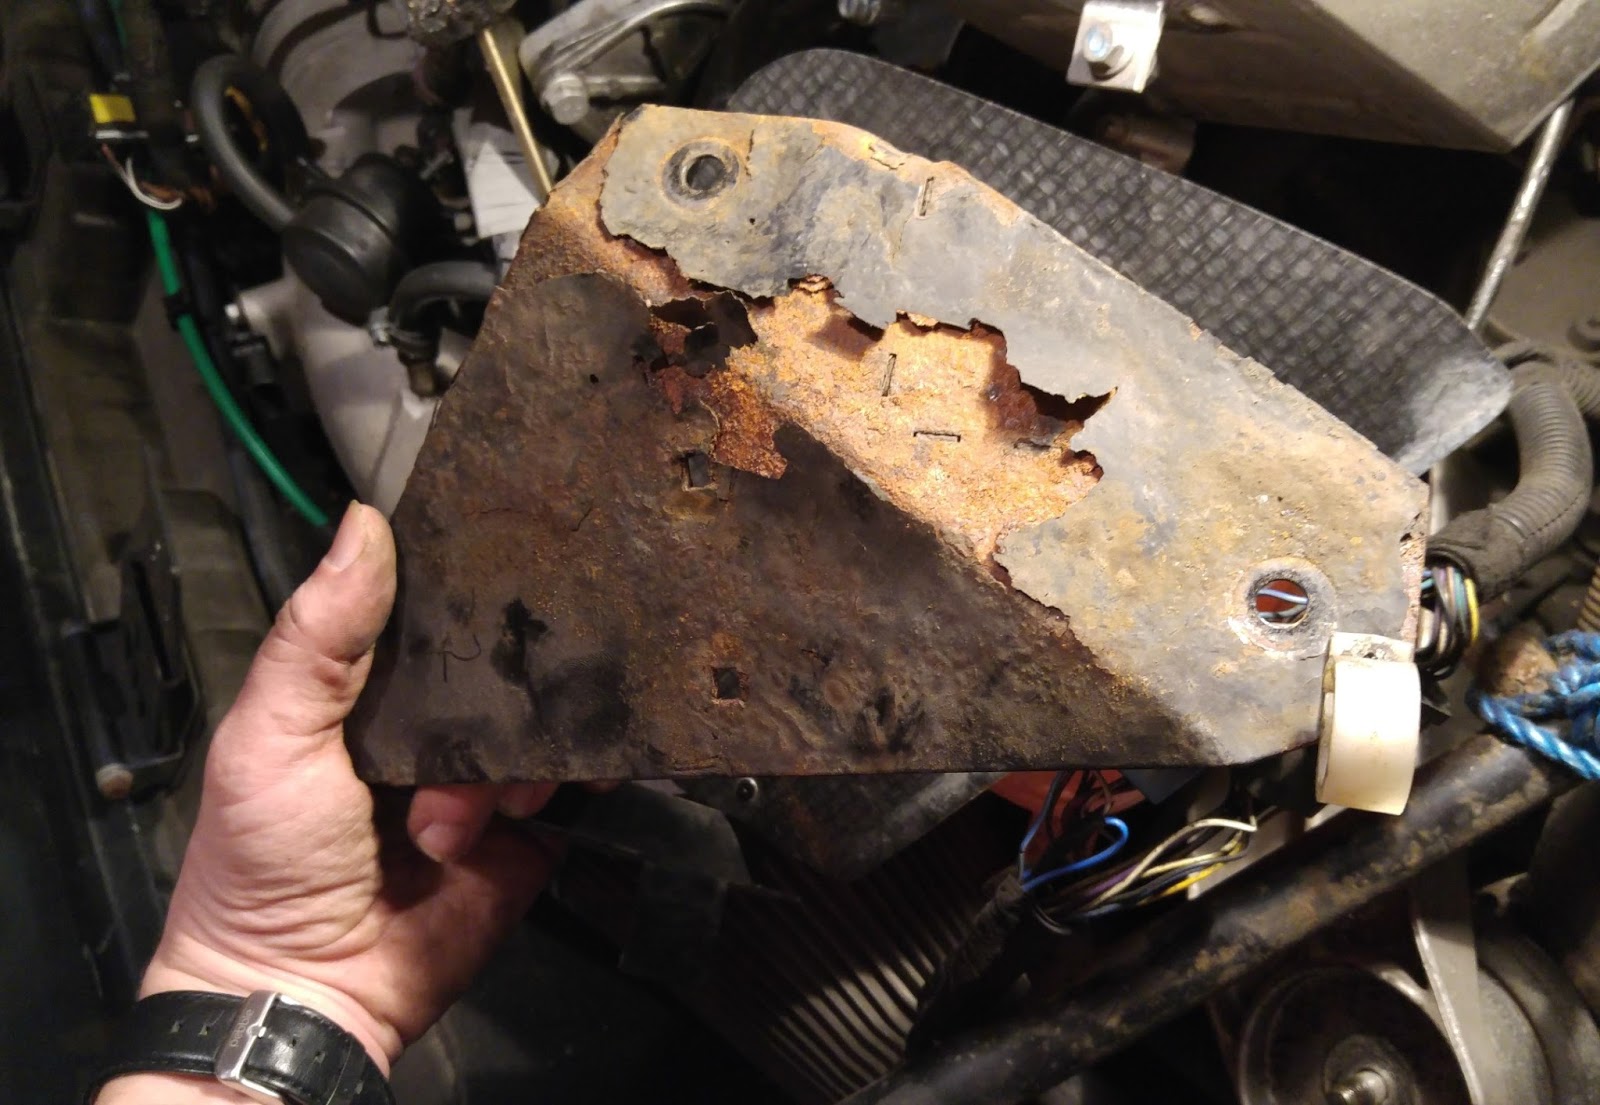
Something else for the powdercoaters! Going to take my roll bar supports along too, though they're not nearly as bad...
#50
Tony H
-

-
- 1,729 posts
Lotus on Crack
- Gender:Male
- Location:Medway
- Interests:Serbian turbo-folk
Posted 26 January 2016 - 09:15 AM
I'd guess that engine mount plinth has been worn from driving for a long time with a broke engine mount.
#51
D-DAWG83
-
-
- 1,276 posts
Billy No Mates
- Gender:Male
- Location:Milton Keynes
- Interests:Cars, motorsport, music and films
Posted 26 January 2016 - 01:45 PM
How is the shim face for the rear frame?
#52
GaryK
-
-
- 168 posts
Member
- Gender:Male
- Location:Bury St. Edmunds
Posted 26 January 2016 - 04:16 PM
Don't know yet - that plate with the spinning bolt it's preventing me from accessing the top bolt top... That's the reason I'm taking the subframe off though - to check that surface between subframe and chassis. The subframe itself generally looks pretty good, but I've seen the horror pics and thought as I've got everything stripped off anyway, I'd be mad not to check...
#53
D-DAWG83
-
-
- 1,276 posts
Billy No Mates
- Gender:Male
- Location:Milton Keynes
- Interests:Cars, motorsport, music and films
Posted 27 January 2016 - 07:29 AM
Is it a big job to strip the subframe off? Always thought id do it next year, as it was an engine out job, but as its not, i may give it a go.
#54
GaryK
-
-
- 168 posts
Member
- Gender:Male
- Location:Bury St. Edmunds
Posted 27 January 2016 - 08:27 AM
It seems pretty simple so far - no need to remove the engine. The subframe is held on by two large bolts on either side. Exhaust and cat off, disconnect brake pipes/hoses and fuel cutoff switch; take out & reconnect side engine mounts in turn to access top subframe bolts; finally remove lower subframe bolts. I have supported the engine with a jack and it is solid. I've disconnected one side so far and I can see the corrosion buildup is pretty bad behind there. Hope to get the whole subframe off this eve.
#55
vocky
-

-

- 11,969 posts
Moderator
- Gender:Male
- Location:Earth
Posted 27 January 2016 - 08:35 AM
that alloy bracket is to hold the standard air filter box in place, so you can simply remove it, well dremel it off 
#56
GaryK
-
-
- 168 posts
Member
- Gender:Male
- Location:Bury St. Edmunds
Posted 31 January 2016 - 09:03 PM
Subframe off! I'm glad I did. The corrosion buildup was pretty bad - maybe 3mm deep in places. I made a seriously stupid mistake in getting the frame off - I forgot to reconnect the O/S engine mount after taking it out to access the top subframe bolt. When the subframe came free, the engine moved a huge amount, and it took me three solid hours of jacking and unjacking different bits of the car before I could get it aligned properly. I thought the whole car was gonna fold in half for a moment... Anyway, panic over, and all is well.
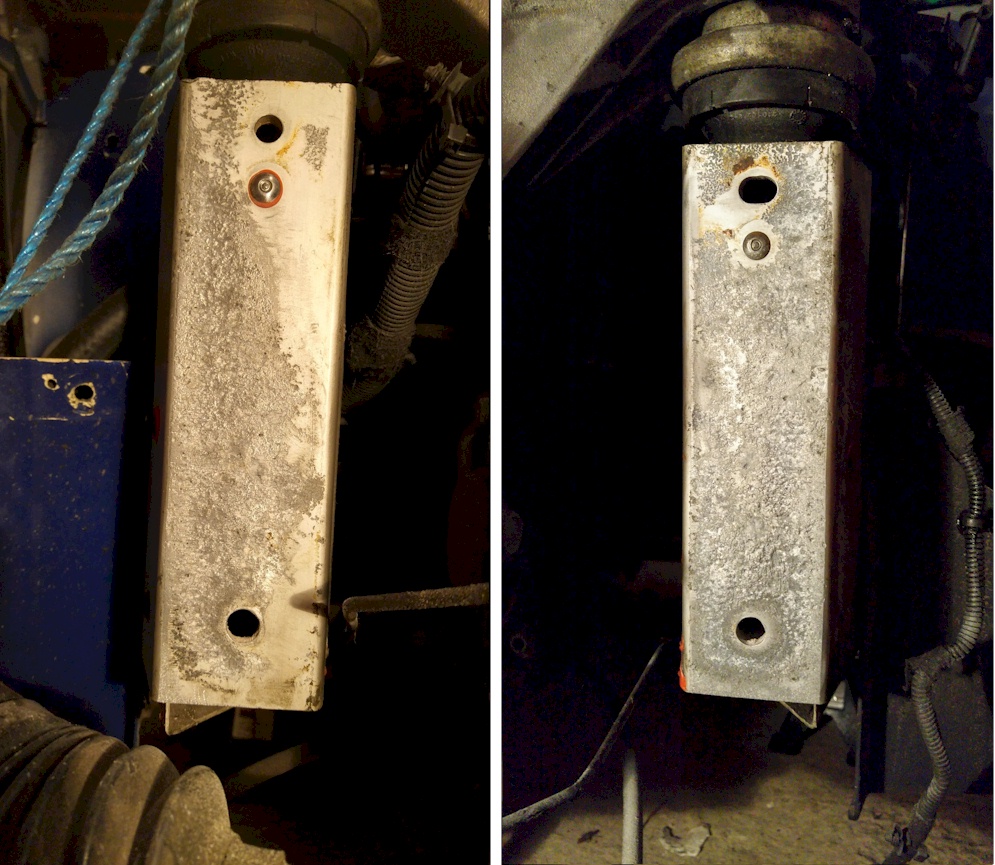
I did a before and after of the corrosion on the subframe pillars:
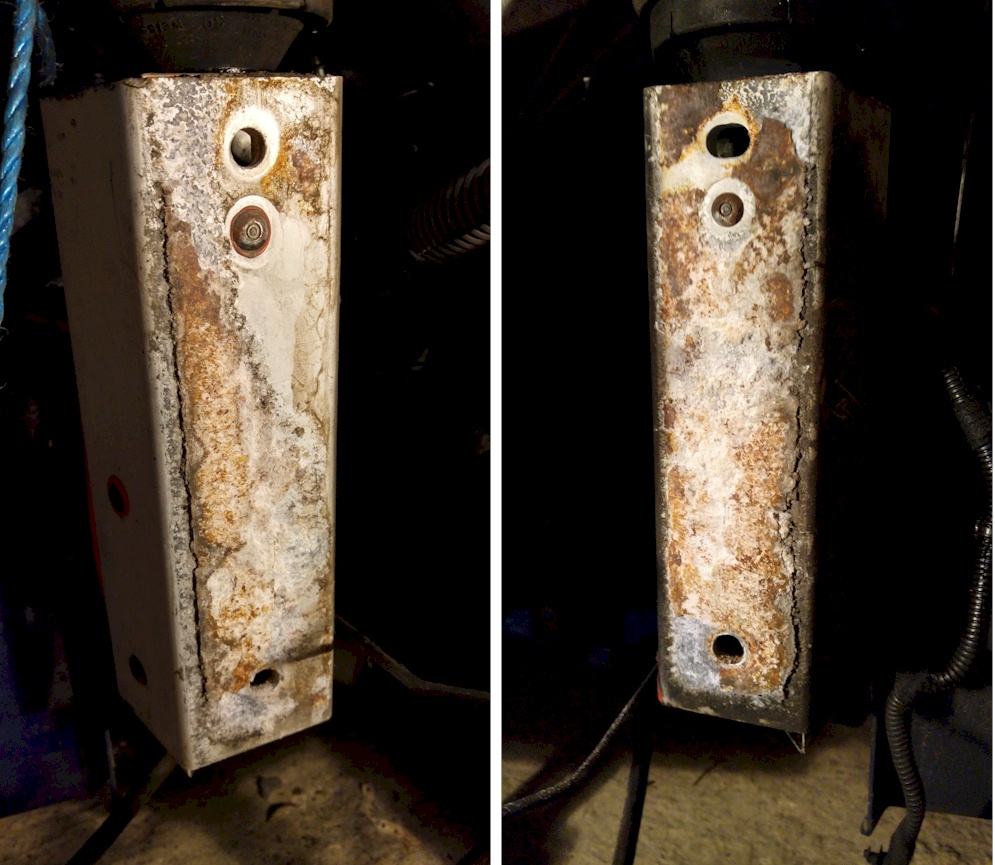
The buildup came off quite easily. The majority of it comes off in chunks with a chisel. The rest I took off with a drill-mounted wire brush. I think they came up pretty well - no worse than the others I've seen. There's almost no deformation on the subframe so that's a bonus.
I stretched the bolt on the O/S engine mount (it was the toughest bolt yet) so I will have to replace that. Bit of a pain. I've got one set of Powerflex bushes that I intend to put on the front mount. I've not inspected the state of the front/rear mounts but probably should while they're easy to access.
#57
GaryK
-
-
- 168 posts
Member
- Gender:Male
- Location:Bury St. Edmunds
Posted 02 February 2016 - 10:21 PM
I was planning on getting the two rollover supports blasted and coated because they're showing signs of rust where the current powder coat is coming away.
N/S was easy. However, on the O/S, the fuel evaporation box is held by a plate on the support... Is taking it off by undoing the hoses as straight forward as it looks or is it gonna p*ss fuel everywhere? Gravity suggests I'll be fine but I don't want to take an uneducated guess...

N/S was easy. However, on the O/S, the fuel evaporation box is held by a plate on the support... Is taking it off by undoing the hoses as straight forward as it looks or is it gonna p*ss fuel everywhere? Gravity suggests I'll be fine but I don't want to take an uneducated guess...
#58
D-DAWG83
-
-
- 1,276 posts
Billy No Mates
- Gender:Male
- Location:Milton Keynes
- Interests:Cars, motorsport, music and films
Posted 02 February 2016 - 11:46 PM
No fuel issue, you will be fine. Its a snug fit getting that housing/collector off, and involves removing some jublee clips. Id take a couple of photos showing how the pipes go for when you re-assemble the thing. Get a small screw driver head in that loop, and prize the clips open that way. You can clamp them back up too.
#59
GaryK
-
-
- 168 posts
Member
- Gender:Male
- Location:Bury St. Edmunds
Posted 03 February 2016 - 09:21 AM
Done - cheers 
#60
D-DAWG83
-
-
- 1,276 posts
Billy No Mates
- Gender:Male
- Location:Milton Keynes
- Interests:Cars, motorsport, music and films
Posted 03 February 2016 - 10:05 AM
Looking at removing the rear subframe for a clean up of the problem areas. Though i already have lots of other bits to do, its mighty tempting. Guessing you Duralac'd the hell out of the area when you reassembled it all. Did you use the original shims?


0 user(s) are reading this topic
0 members, 0 guests, 0 anonymous users

