Jump to content


Photo

Headlight Restoration For Really Bad Lights - Guide


  • Please log in to reply
18 replies to this topic

#1 gaffer1986

gaffer1986

    Scary Internerd

  • PipPipPipPipPipPip
  • 4,408 posts
  • Gender:Male
  • Location:Colchester

Posted 29 November 2015 - 12:41 PM

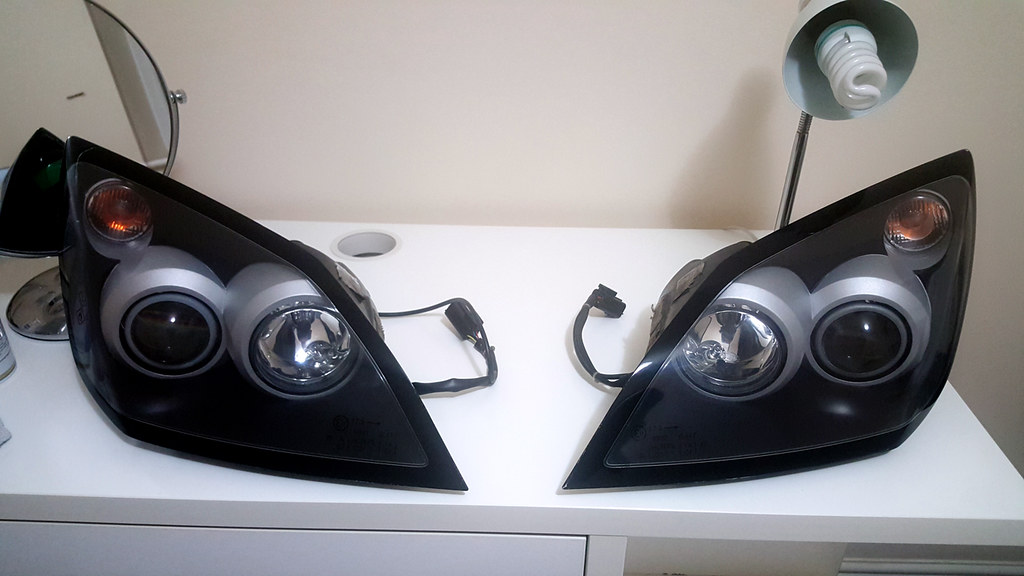
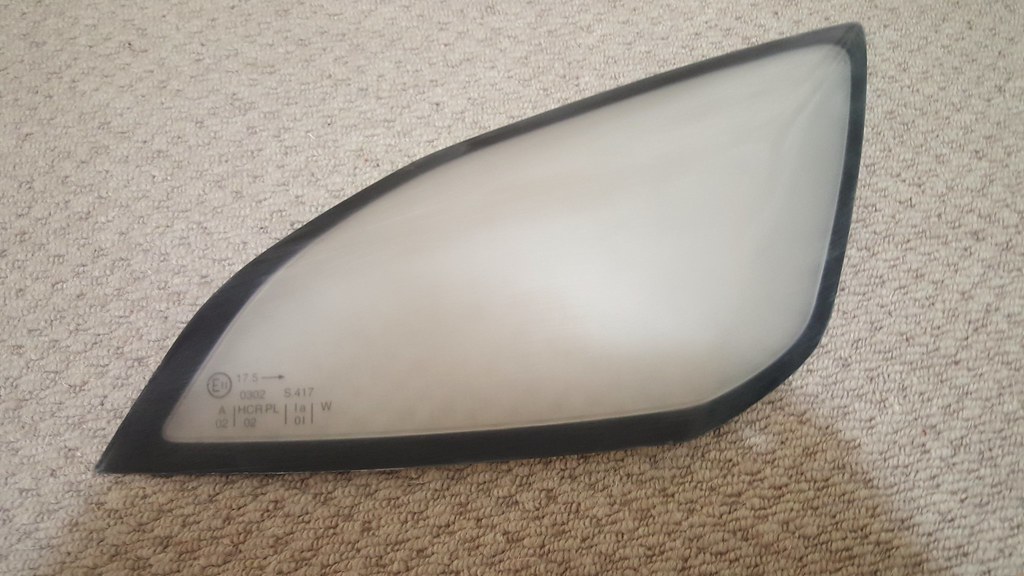
This method takes a long time and is to be performed on lights that are in extremely poor condition that is comparable with this image:


Posted Image
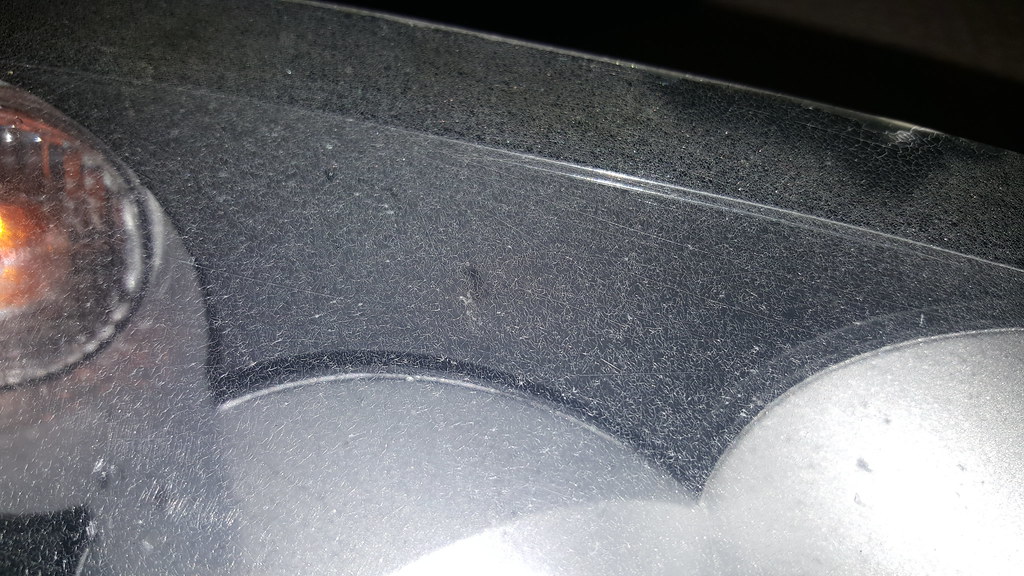
20150920_195234 by Richard Fanders, on Flickr


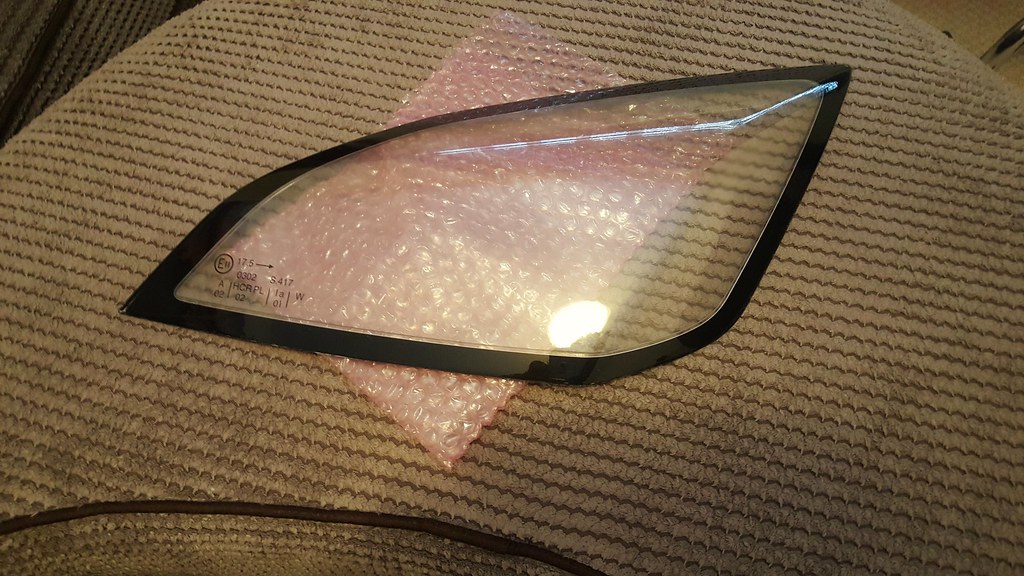
Prise apart the lens from the body, use a hair dryer to soften small sections of the adhesive and prise apart with a plastic lever careful not to scratch the black paint. A heat gun is not necessary as the hair dryer was easily hot enough to soften the adhesive.


Posted Image
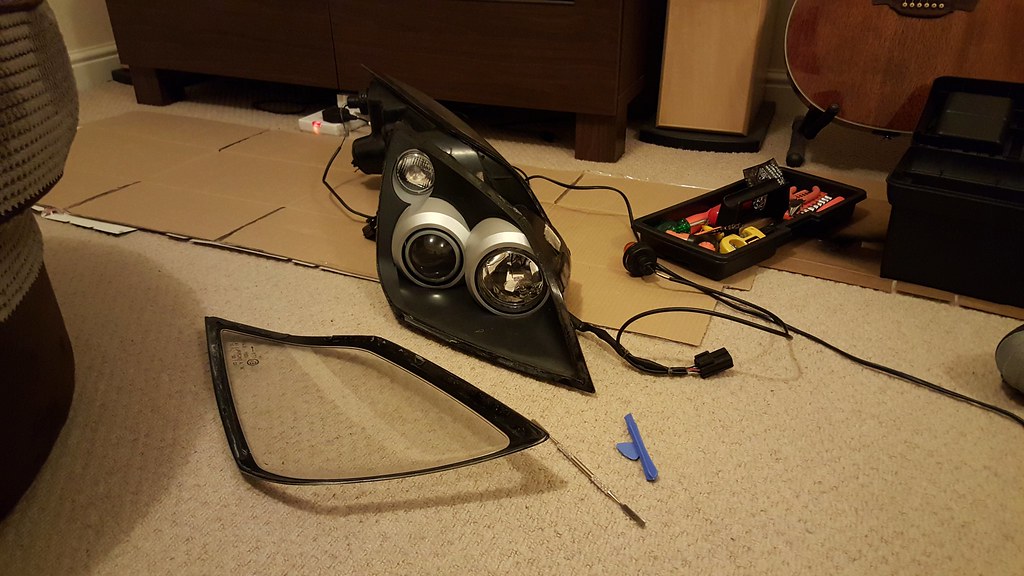
2015-09-29_09-45-31 by Richard Fanders, on Flickr


Get a sanding block and sand horizontally only (this is very important) with either 60, 120 or 180 grit sandpaper. You need to remove all the plastic coating that was cracked. 60 grit took me 10 mins 180 grit took me an hour.


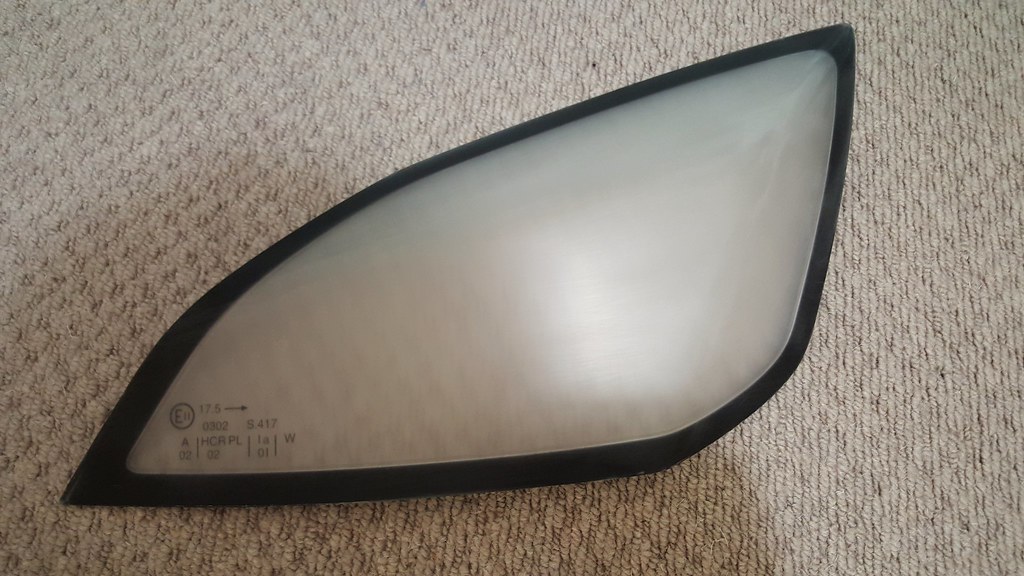
Here are the results from 60 grit:


Posted Image
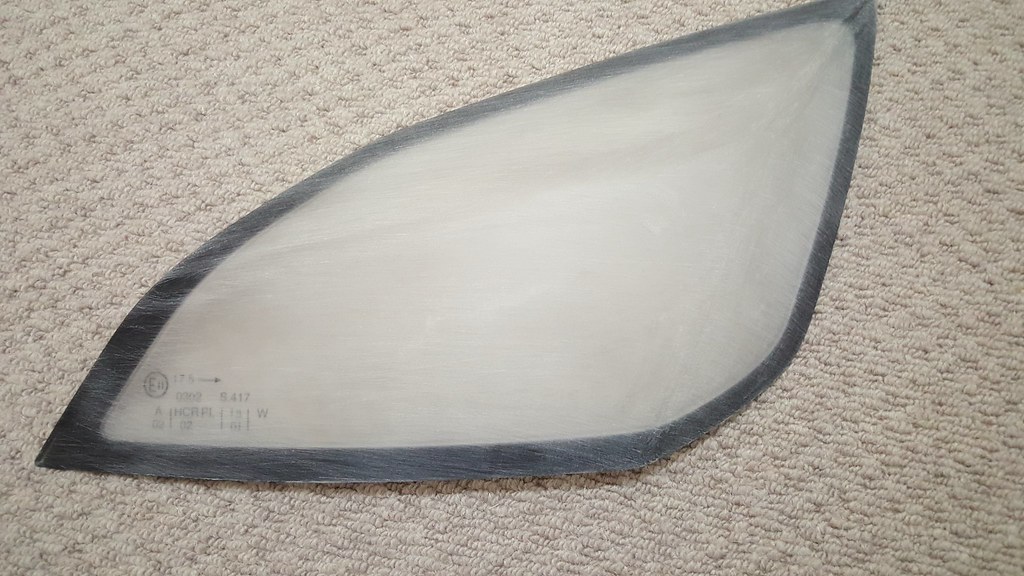
60 grit by Richard Fanders, on Flickr


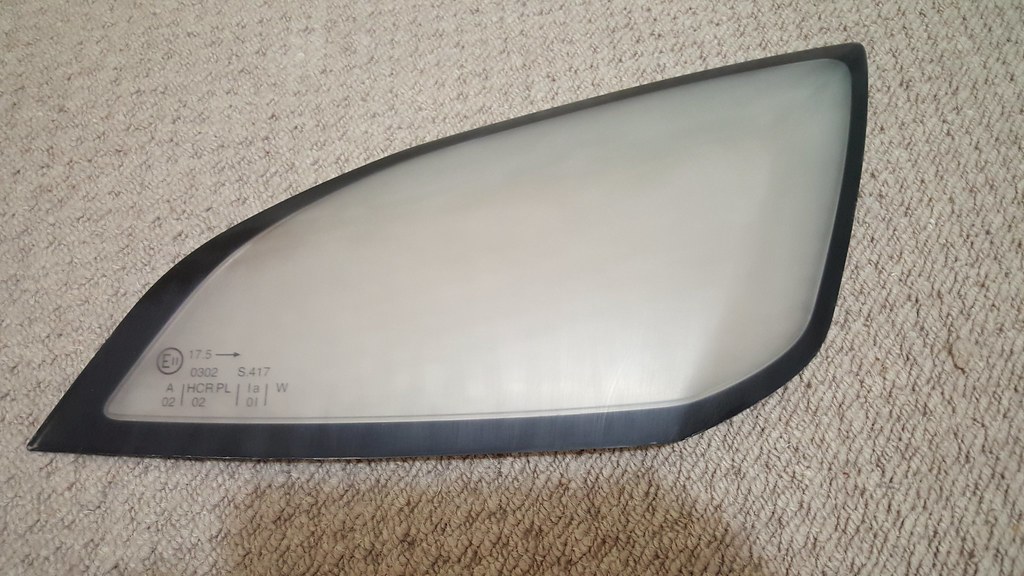
Here is 180 git, much finer but really struggles to take the plastic off and had to use a lot of sand paper:


Posted Image
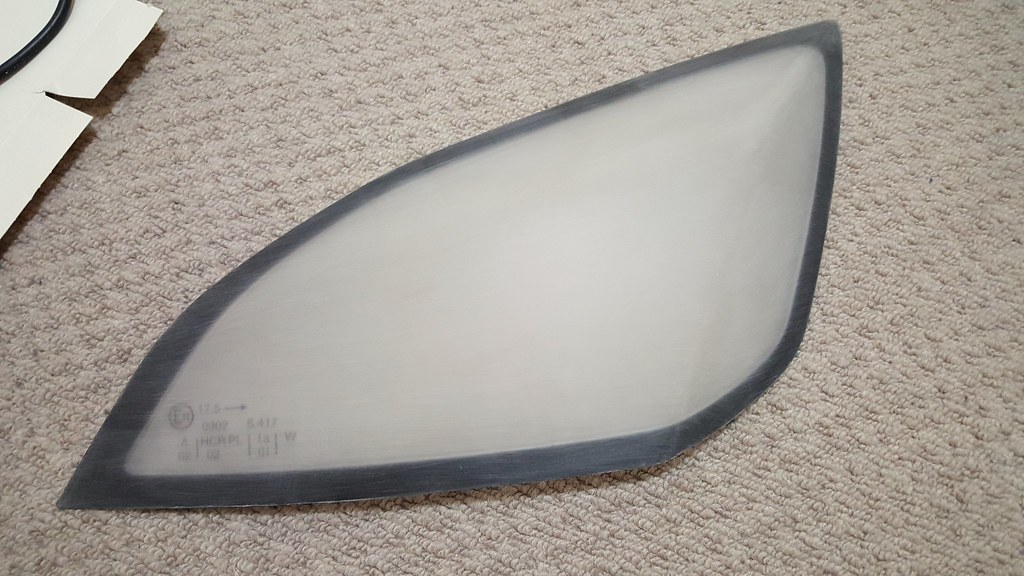
180 grit, horizontal cross hatch by Richard Fanders, on Flickr


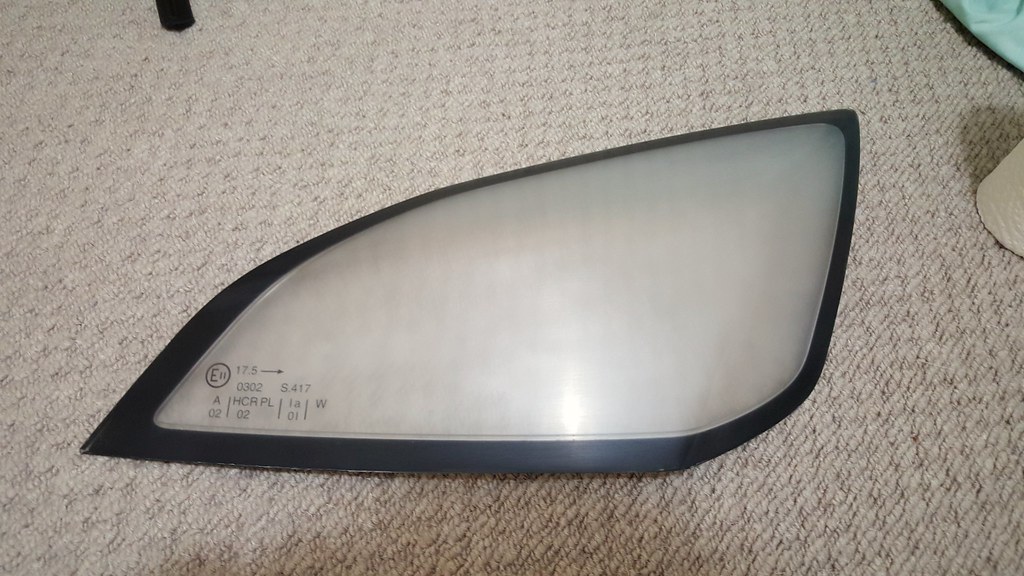
Then 320 dry sand paper:


Posted Image320 grit, horizontal by Richard Fanders, on Flickr


Then 600 wet sand paper:


Posted Image600 grit horizontal by Richard Fanders, on Flickr


800 wet sand paper:


Posted Image800 grit, vertical by Richard Fanders, on Flickr


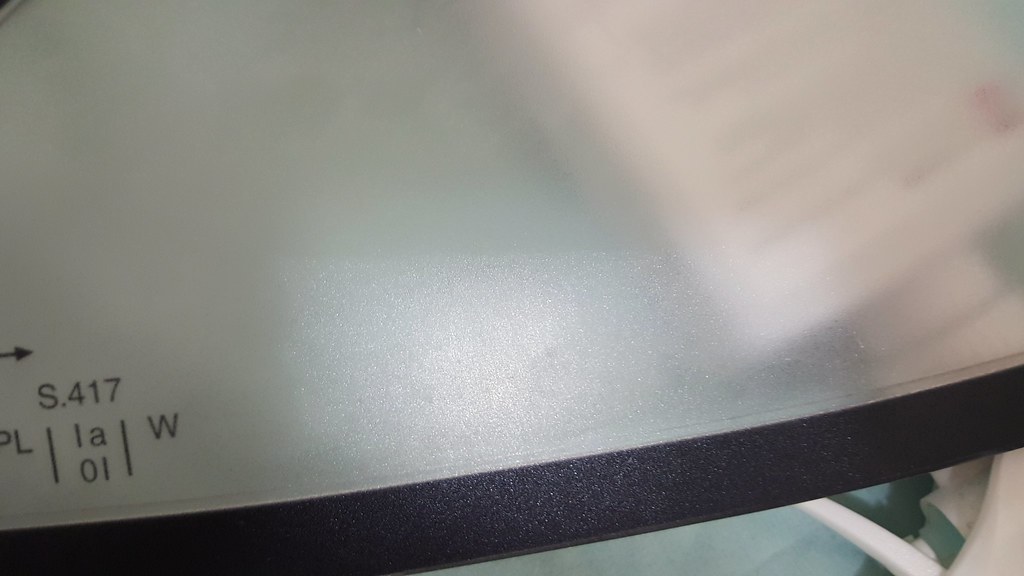
2500 wet sand paper:


Posted Image2500 grit by Richard Fanders, on Flickr


Very Important!

Now the very important part, notice that at every stage I alternate between horizontal and vertical sanding. This is call the "cross hatch" method. This is so you can ensure you have removed all the deeper scratches from the previous grade of sand paper. So if 320 with horizontal you can not stop sanding with 600 until you have converted all the horizontal scratches to vertical. 


To summarise:

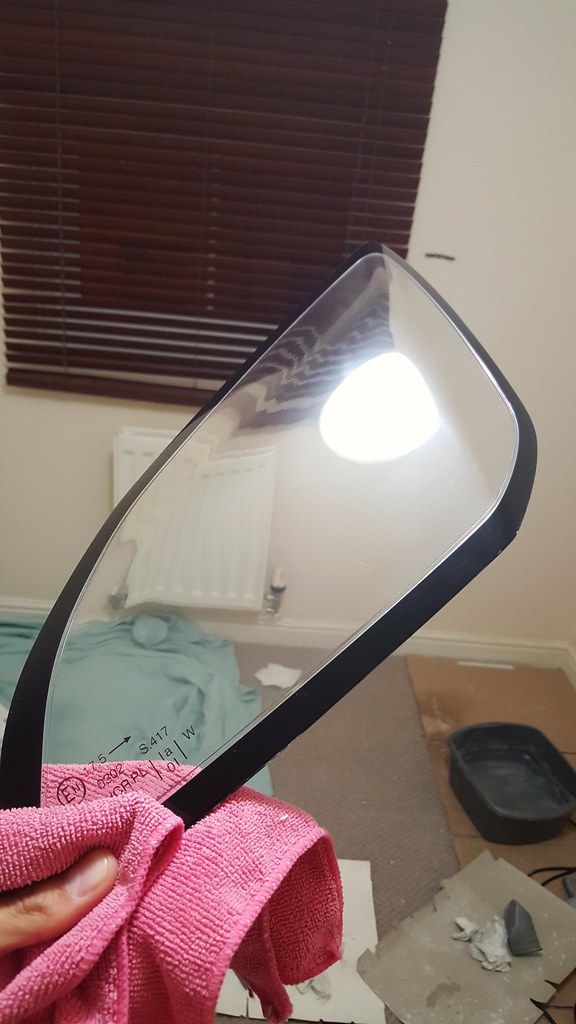
That's dry sanding with 180 then 320 grit then wet sanding with 600, 800 and finally 2500. Remember, cross hatch method and remove all the previous scratches or you will compromise your finish.


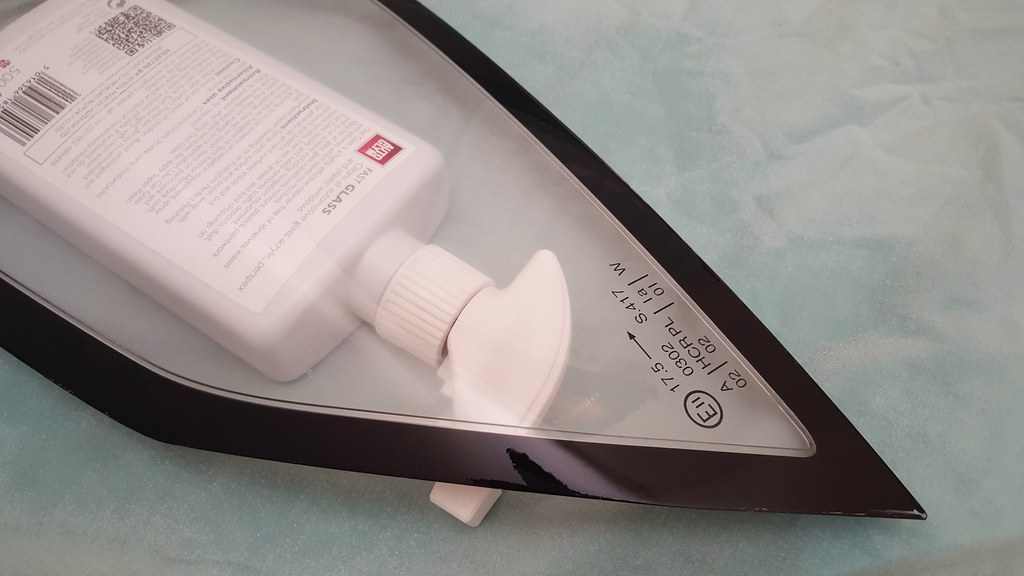
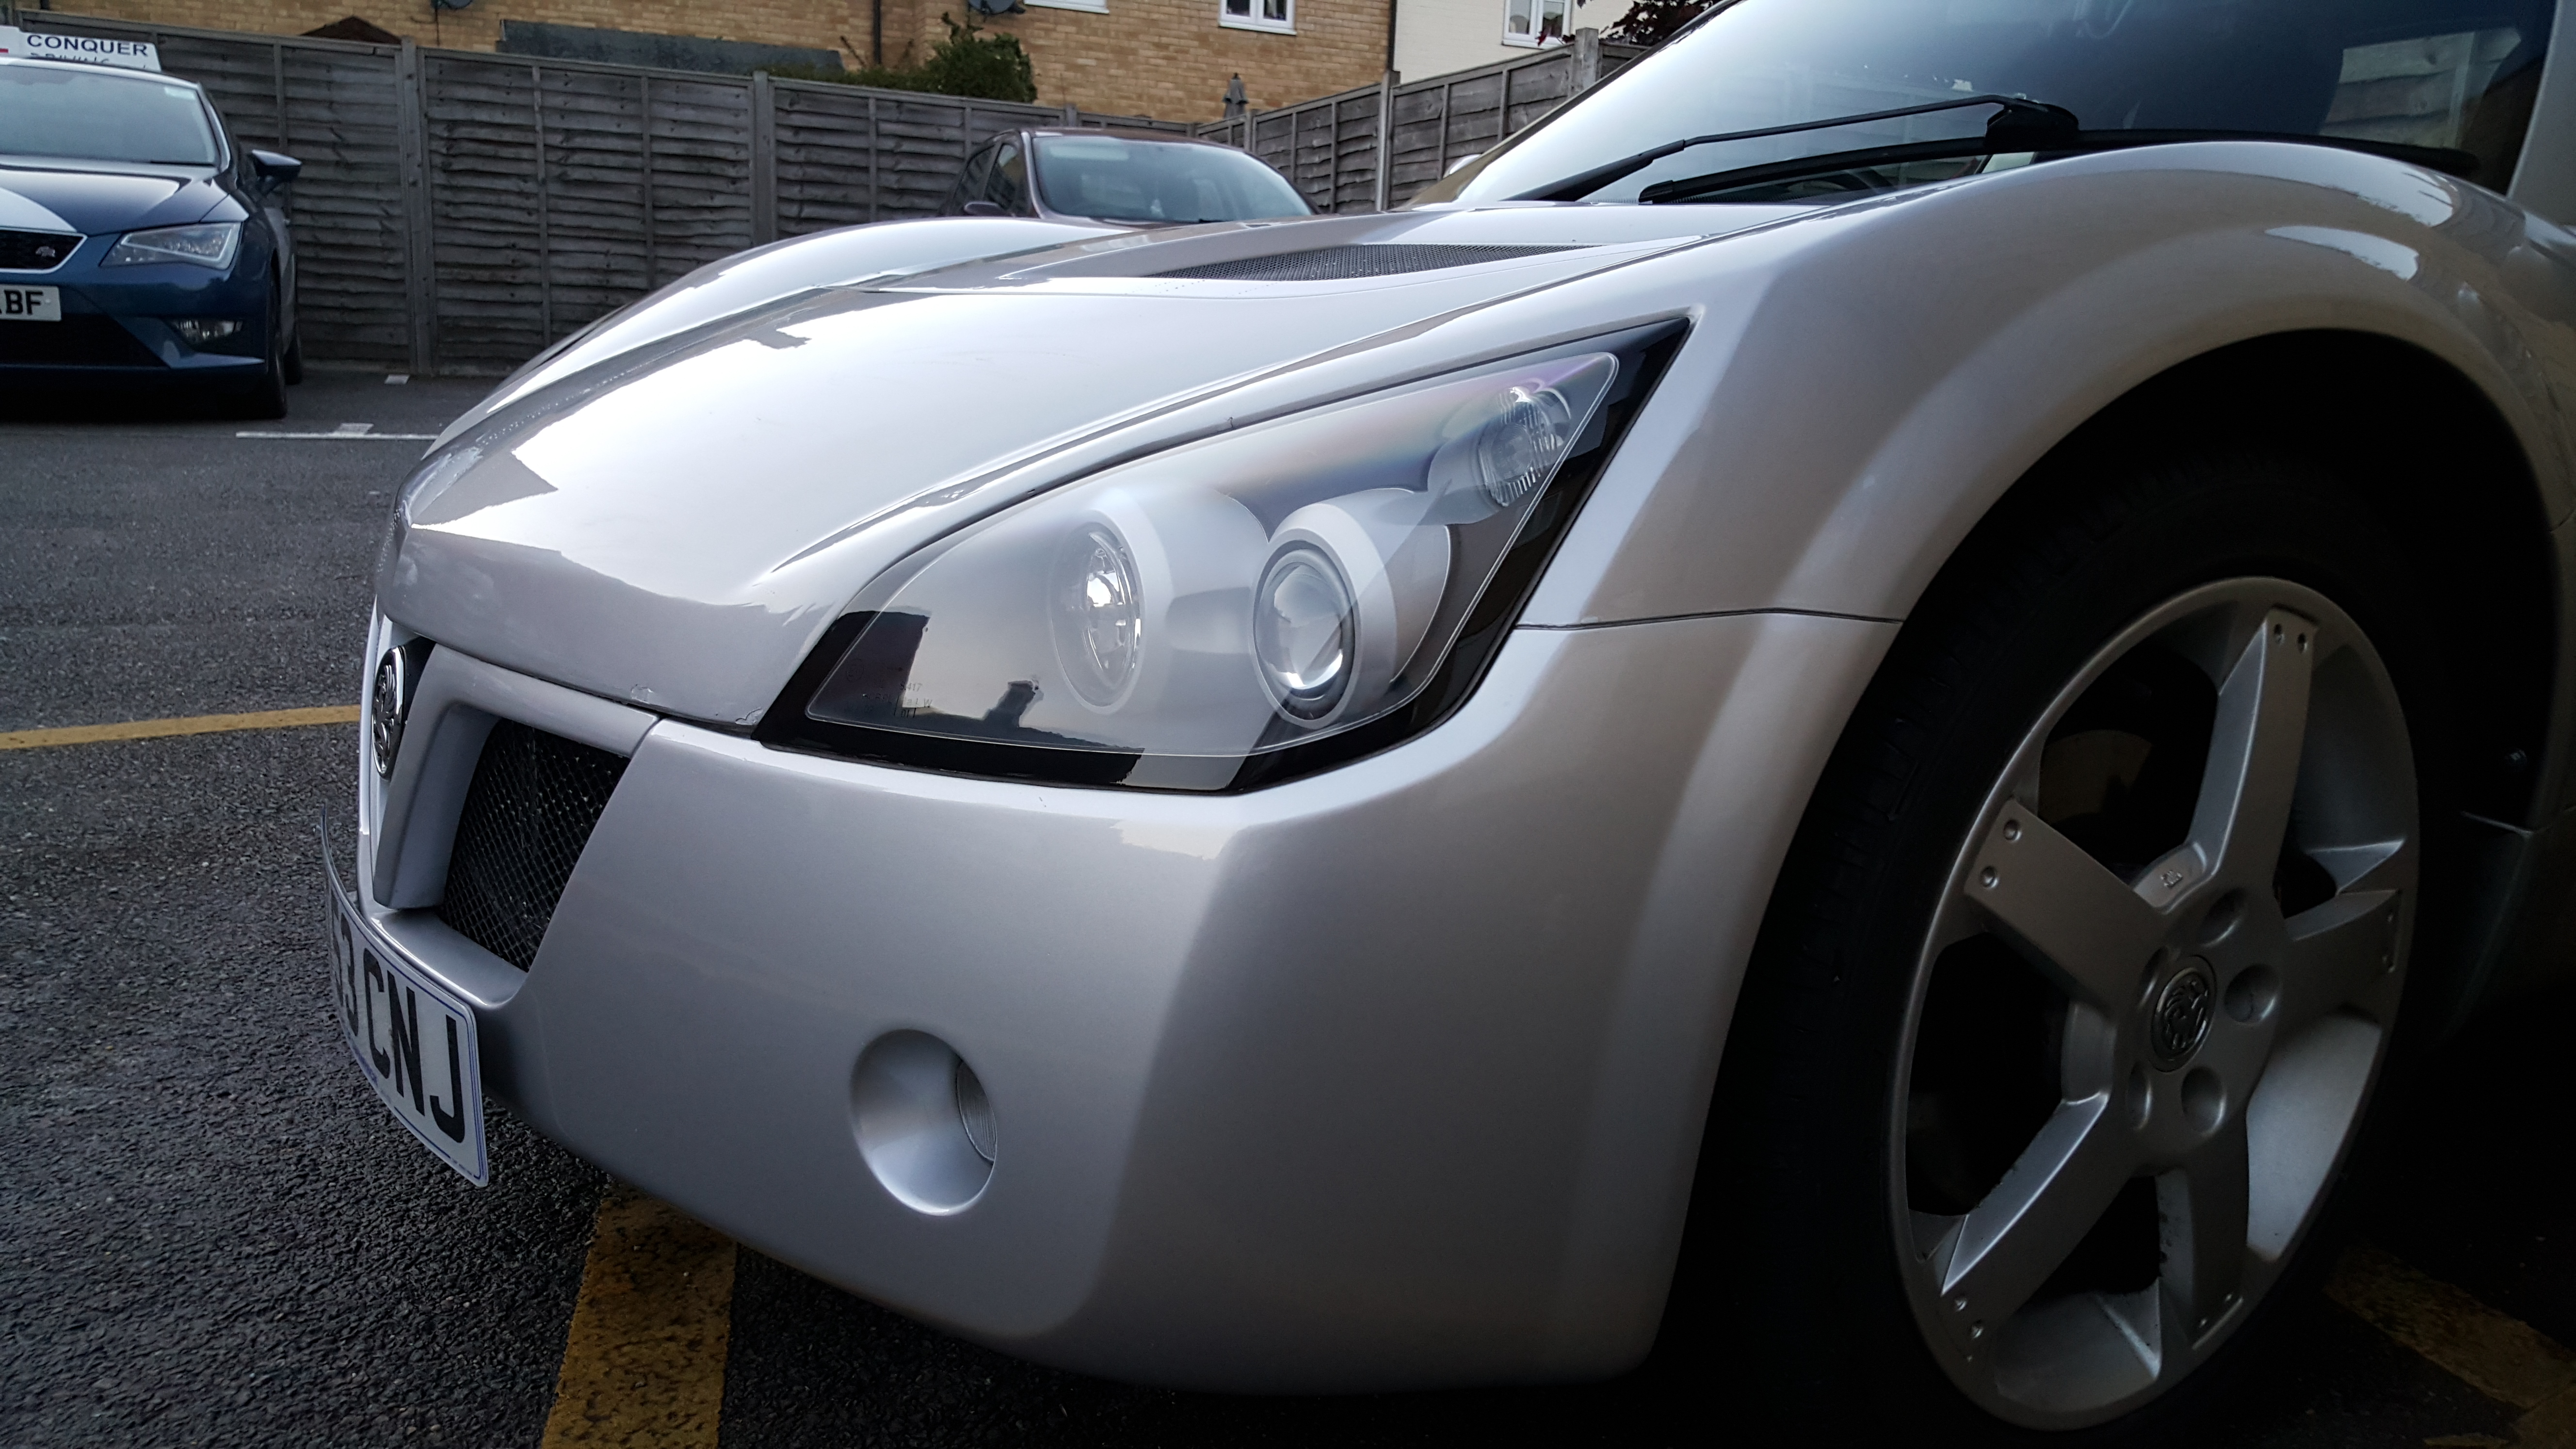
Now polish with Meguiars Headlight Restoration Kit:


Posted Image
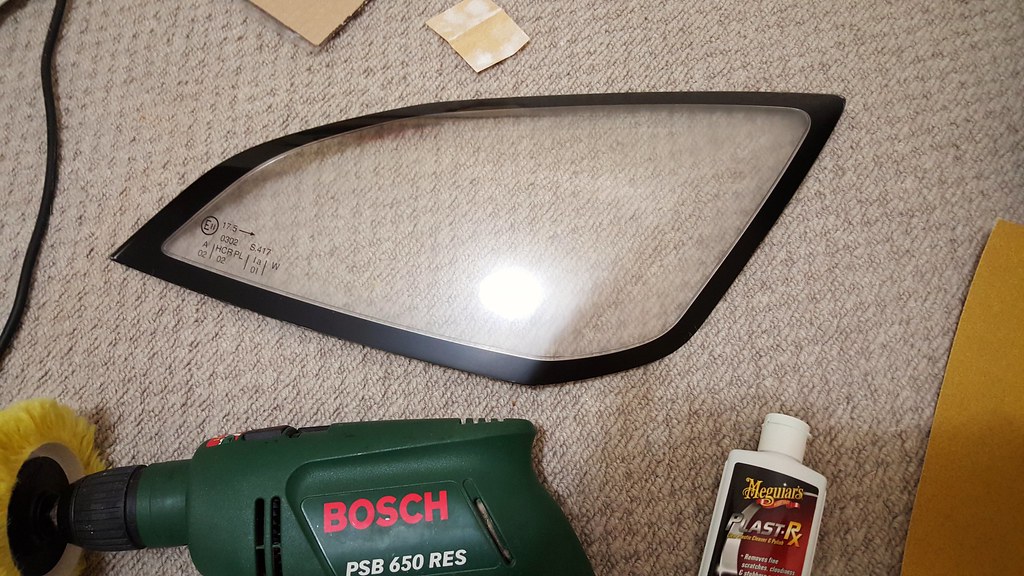
2015-10-03_11-17-56 by Richard Fanders, on Flickr


#2 gaffer1986

gaffer1986

    Scary Internerd

  • PipPipPipPipPipPip
  • 4,408 posts
  • Gender:Male
  • Location:Colchester

Posted 29 November 2015 - 12:45 PM

[font="arial, helvetica, sans-serif;"]You are now ready to protect the finish with a UV protection gloss clear lacquer. I used Rust-Oleum crystal clear gloss finish clear coat. I recommend masking the inside of the lens as I found some of the spay made its way to the inside which was really difficult to remove. Also be sure to use white spirit or something similar to clean all the dust from the lens.[/font]

[font="arial, helvetica, sans-serif;"] [/font]

[font="arial, helvetica, sans-serif;"]If you coats are too thin you get this effect which is not clear at all:[/font]


Posted ImageFourth coat orange peel by Richard Fanders, on Flickr


[font="arial, helvetica, sans-serif;"]If your coats are too thick it will run. So spray about 20 cm away moving you hand about the same speed as a very slow walk until it looks like this, don't worry about the orange peel and small bits of dust as you can remove them in the next stage:[/font]


Posted ImageFourth coat of Lacquer second time round. Thicker coats by Richard Fanders, on Flickr


[font="arial, helvetica, sans-serif;"]Build up about 5 coats leaving 30mins - 60mins between coats as they are thick coats. Then leave to dry for 24-48 hours.[/font]

[font="arial, helvetica, sans-serif;"] [/font]

[font="arial, helvetica, sans-serif;"] [/font]

[font="arial, helvetica, sans-serif;"]Next wet sand gently with 2500 grit to remove grit and orange peel. Wiping clean regularly to check all dust and orange peel are remove being careful not to remove all the lacquer. Then polish again with Meguiars headlight restoration kit for you final and deserved finish:[/font]


Posted Image2015-10-05_12-50-26 by Richard Fanders, on Flickr


Posted Image2015-10-06_09-51-07 by Richard Fanders, on Flickr


[font="arial, helvetica, sans-serif;"]To reattach simply clean off the old adhesive from both the lens and body. Use the butlyl headlight cover adhesive from eliseparts.com to reattached the lens the seal with tiger seal carefully.[/font]


Posted Imagelights by Richard Fanders, on Flickr


#3 gaffer1986

gaffer1986

    Scary Internerd

  • PipPipPipPipPipPip
  • 4,408 posts
  • Gender:Male
  • Location:Colchester

Posted 29 November 2015 - 12:48 PM

I couldn't post it in the guides section.


#4 jonnyboy

jonnyboy

    The hardtop guy

  • PipPipPipPipPipPipPip
  • 8,288 posts
  • Gender:Male
  • Interests:Lightweight sportscars, Brunettes, Petrol & Beer.

Posted 29 November 2015 - 12:52 PM

Very handy that good work.


#5 ChrisS1

ChrisS1

    Club OEM

  • PipPipPipPipPipPipPip
  • 8,360 posts
  • Gender:Male
  • Location:South Walers

Posted 29 November 2015 - 01:59 PM

Looks like a lot of work but results are great thumbsup

#6 myles

myles

    Sausagefest

  • PipPipPipPipPipPip
  • 2,082 posts
  • Gender:Male
  • Location:Knock, knock, knock, knock...........

Posted 29 November 2015 - 02:46 PM

Well done gaffer!

#7 phippsy

phippsy

    Super Member

  • PipPip
  • 472 posts
  • Gender:Male
  • Location:Essex

Posted 29 November 2015 - 07:17 PM

Top job mate looks like new.


#8 V220DR

V220DR

    Member

  • Pip
  • 78 posts
  • Gender:Male
  • Location:Mellor Brook, Blackburn

Posted 01 December 2015 - 08:29 AM

Looking good think this will be my job over the winter!

#9 gaffer1986

gaffer1986

    Scary Internerd

  • PipPipPipPipPipPip
  • 4,408 posts
  • Gender:Male
  • Location:Colchester

Posted 06 December 2015 - 03:01 PM

Looking good think this will be my job over the winter!

Let me know if you need any help :)

#10 Ormes

Ormes

    Scary Internerd

  • PipPipPipPipPipPip
  • 4,612 posts
  • Gender:Male
  • Location:Corsham (nr. Chippenham)

Posted 14 January 2016 - 07:54 PM

Nice guide :) thumbsup


#11 CAHILL

CAHILL

    Super Member

  • PipPip
  • 300 posts
  • Gender:Male
  • Location:Wakefield West Yorkshire

Posted 26 January 2016 - 10:33 PM

Great results!

#12 gaffer1986

gaffer1986

    Scary Internerd

  • PipPipPipPipPipPip
  • 4,408 posts
  • Gender:Male
  • Location:Colchester

Posted 26 January 2016 - 10:35 PM

Thanks!


Posted Image20151011_181603 by Richard Fanders, on Flickr


#13 Atom

Atom

    Member

  • Pip
  • 28 posts
  • Gender:Male
  • Location:Yorkshire

Posted 13 July 2018 - 03:28 PM

Amazing job 🙌

Dare I give it a go 😬

#14 gaffer1986

gaffer1986

    Scary Internerd

  • PipPipPipPipPipPip
  • 4,408 posts
  • Gender:Male
  • Location:Colchester

Posted 13 July 2018 - 05:05 PM

I've got to do it again as I sold my last car.

Sent from my Pixel 2 XL using Tapatalk


#15 Atom

Atom

    Member

  • Pip
  • 28 posts
  • Gender:Male
  • Location:Yorkshire

Posted 18 July 2018 - 09:19 PM

Any recommendations on how to restore the black band round the edge, mine has some cracks in it..

#16 gaffer1986

gaffer1986

    Scary Internerd

  • PipPipPipPipPipPip
  • 4,408 posts
  • Gender:Male
  • Location:Colchester

Posted 18 July 2018 - 09:39 PM

Black tigerseal sticks it together and makes it back.

Sent from my Pixel 2 XL using Tapatalk


#17 gaffer1986

gaffer1986

    Scary Internerd

  • PipPipPipPipPipPip
  • 4,408 posts
  • Gender:Male
  • Location:Colchester

Posted 18 July 2018 - 09:40 PM

If I remember correctly, long time ago now.

Sent from my Pixel 2 XL using Tapatalk


#18 jules_s

jules_s

    Iceman

  • PipPipPipPipPipPipPipPip
  • 15,275 posts
  • Gender:Male
  • Location:The Porker showroom
  • Interests:Plane spotting

Posted 18 July 2018 - 10:07 PM

Looked at this on the weekend - are you sure about a polish before the lacquer?

#19 gaffer1986

gaffer1986

    Scary Internerd

  • PipPipPipPipPipPip
  • 4,408 posts
  • Gender:Male
  • Location:Colchester

Posted 18 July 2018 - 10:35 PM

Yes, that's what I did and the results were very good. I would like to know how long they lasted. Is Paul around (current owner of the car). I think his user name has something to do with a jet ski.

Sent from my Pixel 2 XL using Tapatalk


0 user(s) are reading this topic

0 members, 0 guests, 0 anonymous users