Jump to content


Photo

Fog Light - Drl Conversion

drl fog light bracket

  • Please log in to reply
19 replies to this topic

#1 james.a

james.a

    Proud member of the Northants Pedantic Crew

  • PipPipPipPipPipPip
  • 2,032 posts
  • Gender:Male
  • Location:Northampton
  • Interests:Driving Trigger's broom since March 2010

Posted 29 February 2016 - 08:58 PM

Posted Image


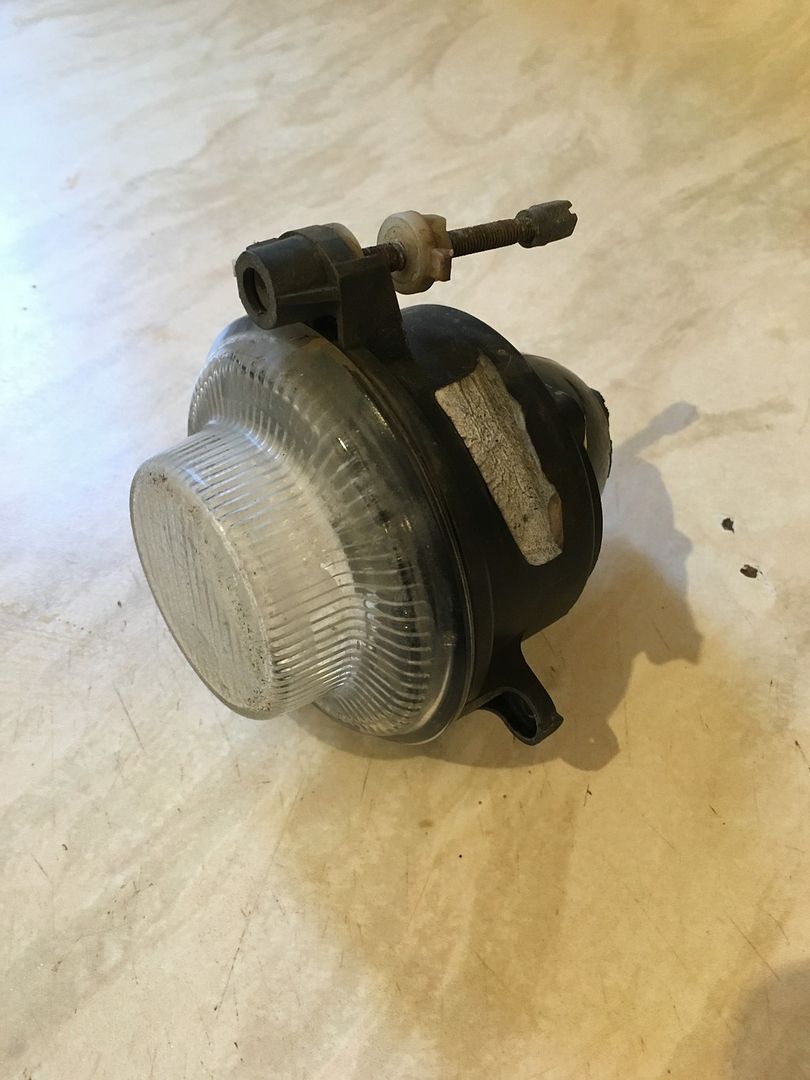
Been tooling around with getting rid of the battered and utterly knackered fog lights and replacing them with something a little fresher. Decided in the end to take the old fog light housing and using it as a basis for holding DRLs. 


Not written a guide before so here goes!


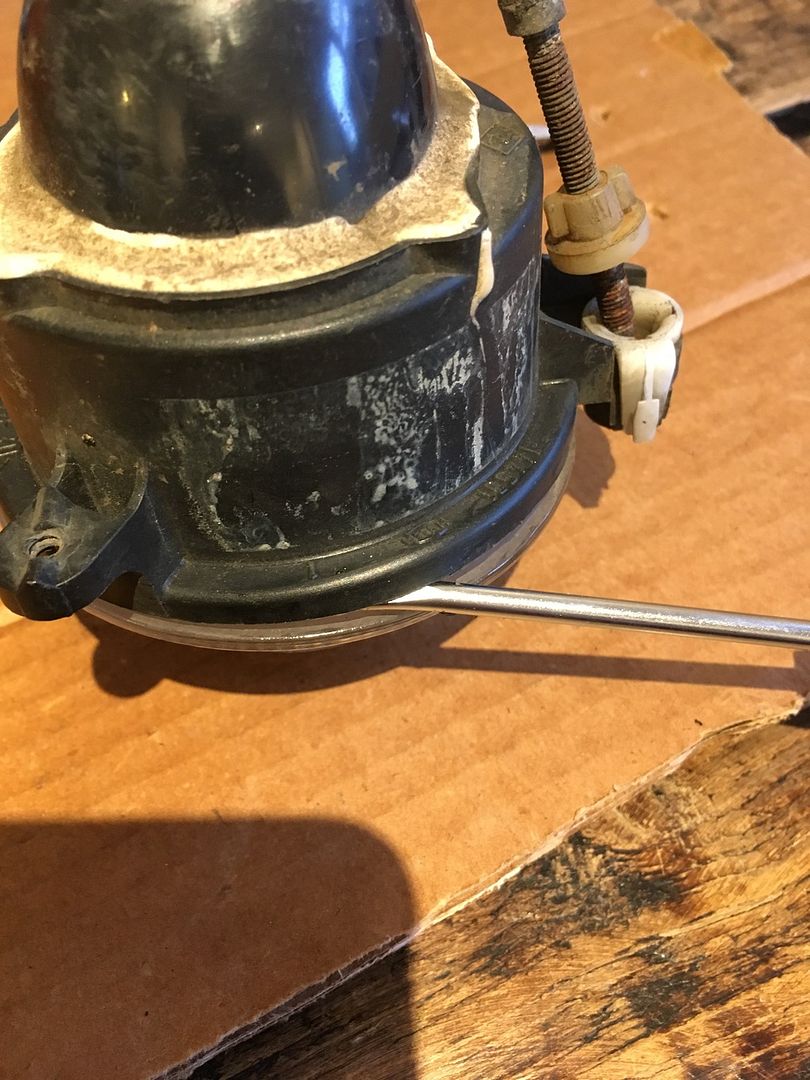
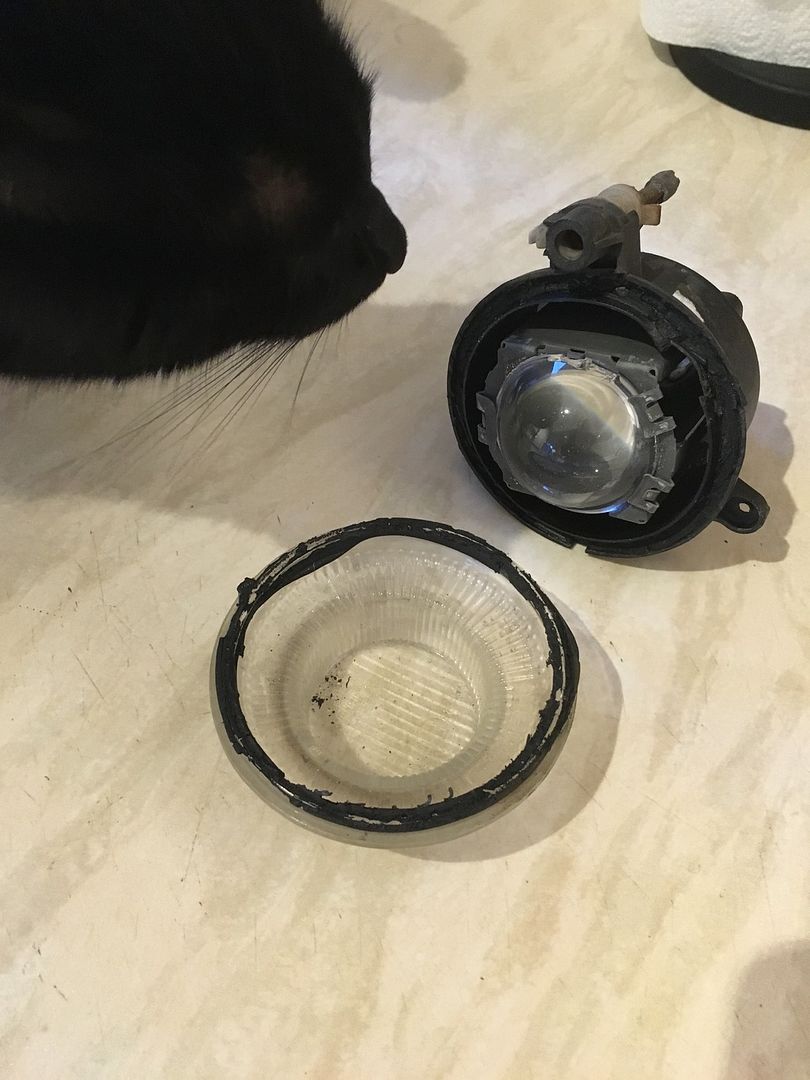
1.     Remove the glass lens from the original fog light housing. I found the best way of doing this was to heat the whole housing first for around 10 – 15 minutes in the oven to soften the glue. The slide in a small flat head screwdriver under the lip and push it around the edge to break the sealant and ease the glass off.


Posted Image


Posted Image


2.     Use a pair of pliers and a screwdriver to unclip the interior lens and remove (provide your own cat for this stage)


Posted Image


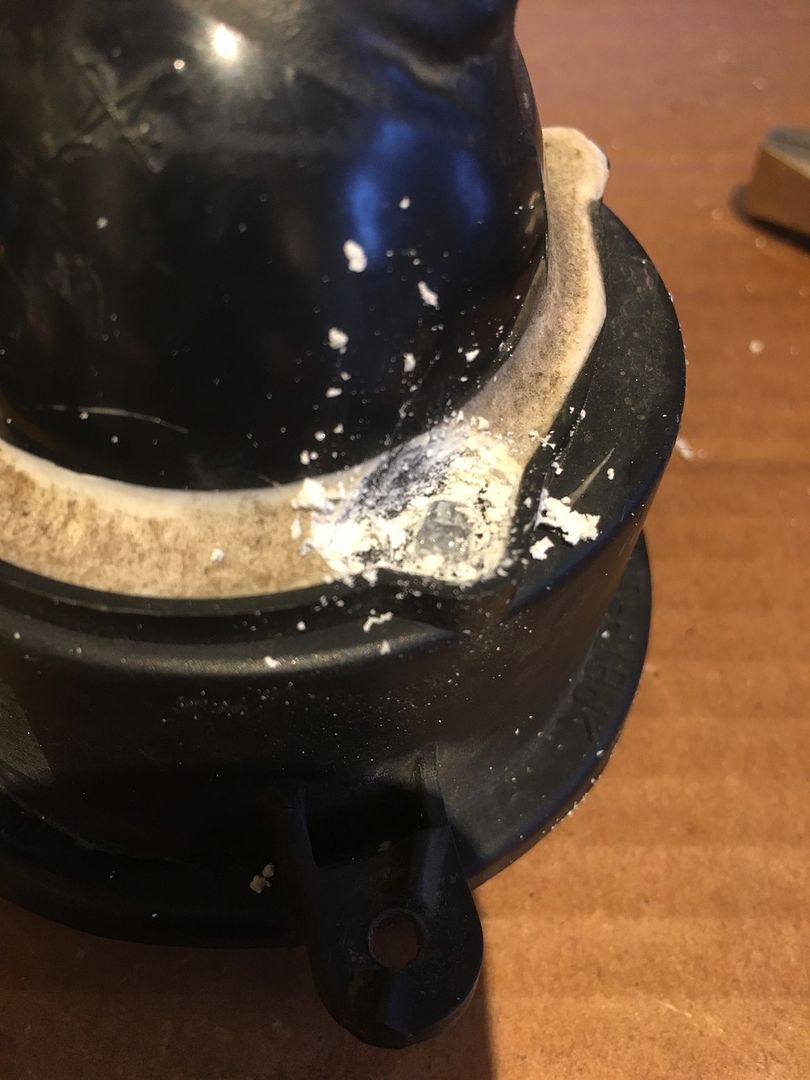
3.     Flip the housing over to show the white sealant on the back. Dig out the corners until metal lugs are seen. Ease these out to allow the metal lens housing to be removed


Posted Image


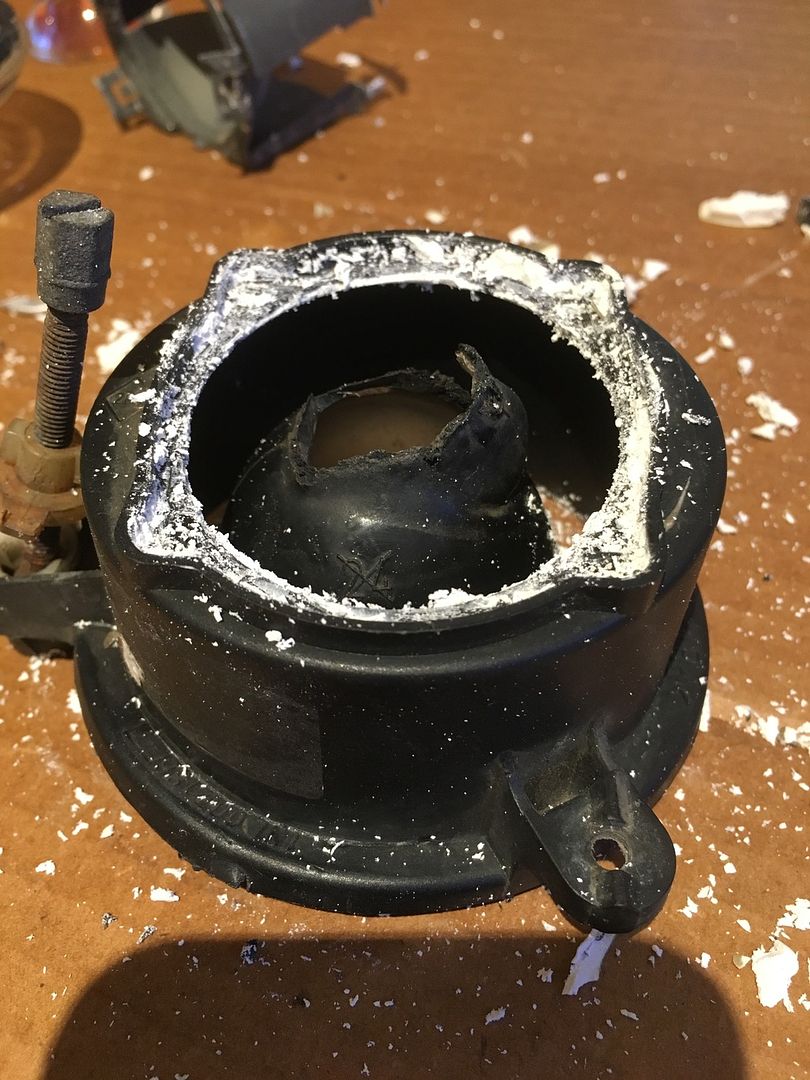
4.     Continue to remove the white sealant around the dome section at the rear so this can be removed. I cleaned the housing up at this point, removed the adjuster and gave it a bit of a treatment with WD40 then GT85 to keep it vaguely serviceable.


Posted Image


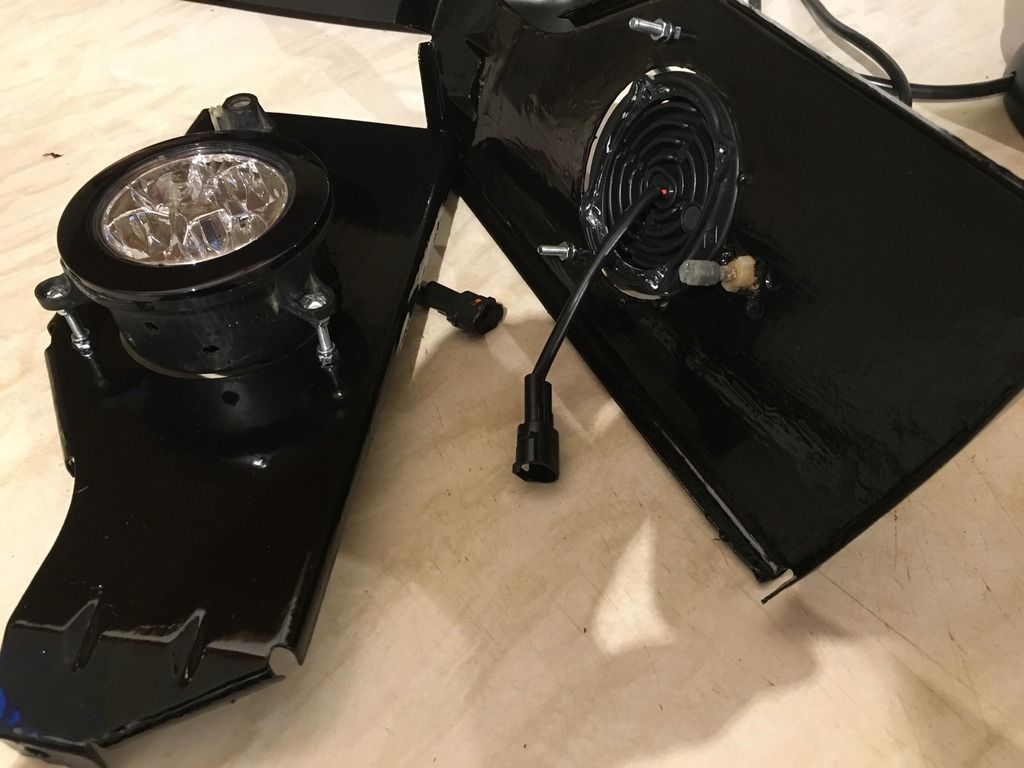
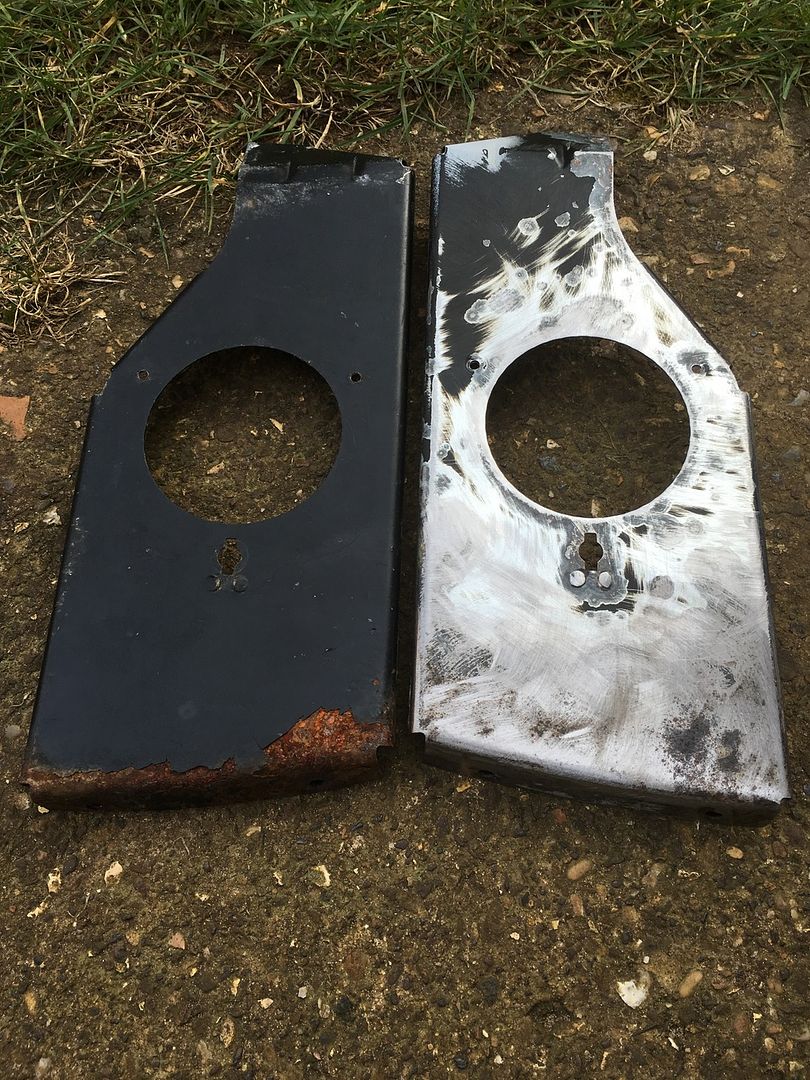
5.     To use the existing bracket, I had to angle grind the captive nuts off sand them down to remove any loose paint and then paint with some – thankfully blagged from the NPC stores - hammerite


Posted Image


6.     I found that to get the DRL to sit reasonably flush with the hole in the clam they had to be mounted a good way forward of the original housings. To that end I paid a trip to my local DIY mega store and joined the interminable queue of the damned whilst various orange aproned folks milled around doing things far more important than manning a till. On the list:


a.     4 4cm number four bolts

b.     12 number four nylock nuts

c.      M6 Roofing bolt x 6

d.     M6 Nyloc bolt x 6


Washers etc


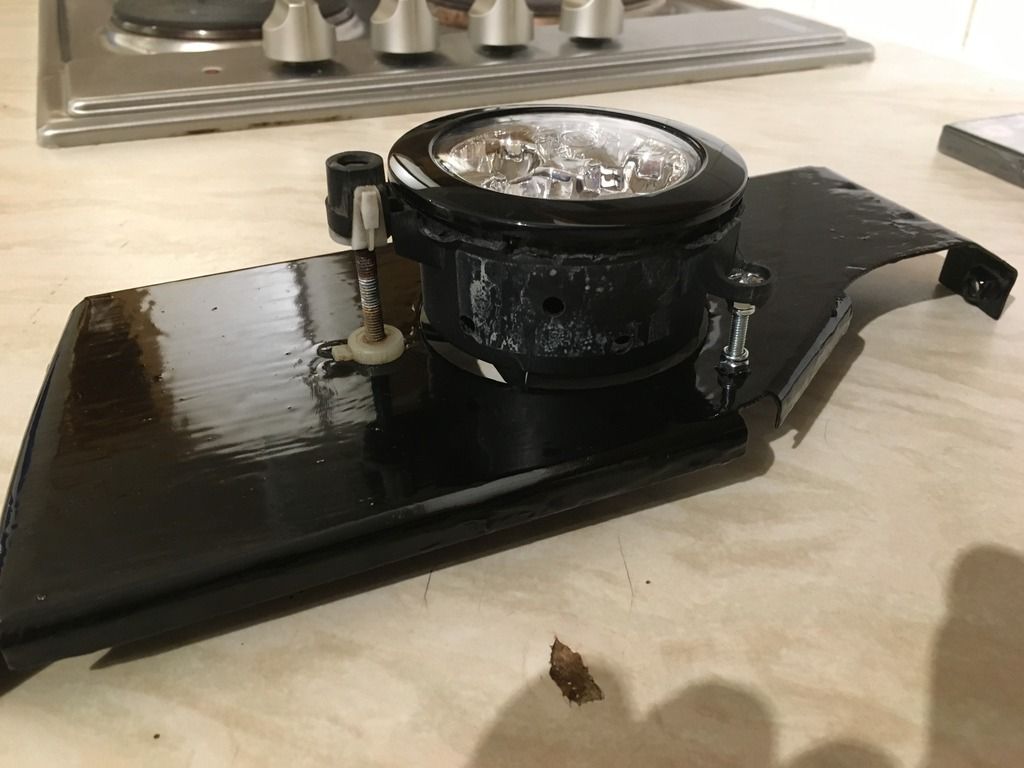
7.     Put the whole shebang together and tiger seal the DRL unit into the housing using tiger seal. These line up neatly with lugs on the back of the DRL unit.


Posted Image

8.     Adjust the length of the screws to get the shole unit to sit a couple of mm back from the fog light holes.


Edited by james.a, 29 February 2016 - 09:03 PM.


#2 karlb123

karlb123

    Super Member

  • PipPip
  • 322 posts
  • Gender:Male
  • Location:Wellingborough
  • Interests:Actual NPC engineer.

Posted 29 February 2016 - 09:07 PM

Very nice work James, making the NPC look less like gaffa tape & hammer wielding cavemen and more like craftsmen/engineers.


#3 james.a

james.a

    Proud member of the Northants Pedantic Crew

  • PipPipPipPipPipPip
  • 2,032 posts
  • Gender:Male
  • Location:Northampton
  • Interests:Driving Trigger's broom since March 2010

Posted 29 February 2016 - 09:09 PM

lol my painting is still a bit slap it on but it shouldn't rust for a bit


#4 chez

chez

    Super Member

  • PipPip
  • 478 posts
  • Gender:Male
  • Location:Northants
  • Interests:Cars, music, DJing, football, cricket, golf....... The stars

Posted 29 February 2016 - 09:16 PM

Nice work

#5 Nelly Vx

Nelly Vx

    3/3 Of a Queen

  • PipPipPipPipPipPip
  • 5,928 posts
  • Gender:Male
  • Location:north wales

Posted 29 February 2016 - 09:51 PM

Great job James, do you have a pic with them fitted back in the clam ? :-)

#6 james.a

james.a

    Proud member of the Northants Pedantic Crew

  • PipPipPipPipPipPip
  • 2,032 posts
  • Gender:Male
  • Location:Northampton
  • Interests:Driving Trigger's broom since March 2010

Posted 29 February 2016 - 09:54 PM

Not yet mate. It's in being resprayed at the moment. This has been a bit of a side project whilst it's away. May see if I can pop over to the garage tomorrow and fit them to see how the depth alignment works.

#7 RabnaKS

RabnaKS

    If anyone can talk Bllx, I can!💣

  • PipPipPipPipPipPip
  • 2,717 posts
  • Gender:Male
  • Location:Wakefield West Yorkshire
  • Interests:MTB, VX220, oh & cars, golf, sarcasm with humour!

Posted 29 February 2016 - 10:12 PM

Not yet mate. It's in being resprayed at the moment. This has been a bit of a side project whilst it's away. May see if I can pop over to the garage tomorrow and fit them to see how the depth alignment works.

Interesting way round it! Like the idea, look forward to seeing it in place. Are they proper DRL or like mine, don't dim when you put your main lights on, which is not genuine DRL?

#8 fezzasus

fezzasus

    Whipping Boy

  • PipPipPipPipPipPipPip
  • 7,689 posts
  • Gender:Male
  • Location:Oxford

Posted 01 March 2016 - 09:06 AM


Not yet mate. It's in being resprayed at the moment. This has been a bit of a side project whilst it's away. May see if I can pop over to the garage tomorrow and fit them to see how the depth alignment works.

Interesting way round it! Like the idea, look forward to seeing it in place. Are they proper DRL or like mine, don't dim when you put your main lights on, which is not genuine DRL?


That's not what defines a DRL.


They only need to dim when they are 40 mm or less from the indicator or dipped beam modules.


Edited by fezzasus, 01 March 2016 - 09:06 AM.


#9 james.a

james.a

    Proud member of the Northants Pedantic Crew

  • PipPipPipPipPipPip
  • 2,032 posts
  • Gender:Male
  • Location:Northampton
  • Interests:Driving Trigger's broom since March 2010

Posted 01 March 2016 - 01:35 PM


Not yet mate. It's in being resprayed at the moment. This has been a bit of a side project whilst it's away. May see if I can pop over to the garage tomorrow and fit them to see how the depth alignment works.

Interesting way round it! Like the idea, look forward to seeing it in place. Are they proper DRL or like mine, don't dim when you put your main lights on, which is not genuine DRL?


Not sure at the moment, the aim would be ideally to have them switched using the redundant fog light switch, but I know if I wire them up directly to that switch then they will only light when the side lights are on which defeats the object somewhat. 


The kit came with wiring to link to ignition and then go off when the main lights are triggered. 


#10 james.a

james.a

    Proud member of the Northants Pedantic Crew

  • PipPipPipPipPipPip
  • 2,032 posts
  • Gender:Male
  • Location:Northampton
  • Interests:Driving Trigger's broom since March 2010

Posted 01 March 2016 - 07:22 PM

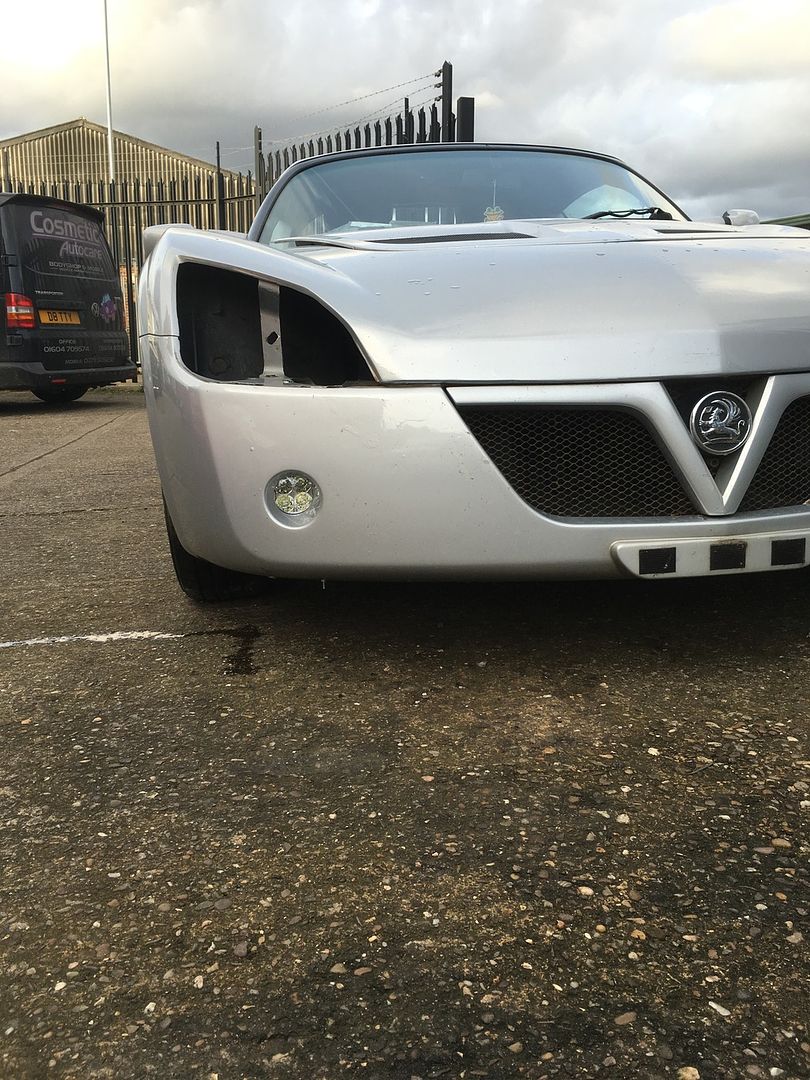
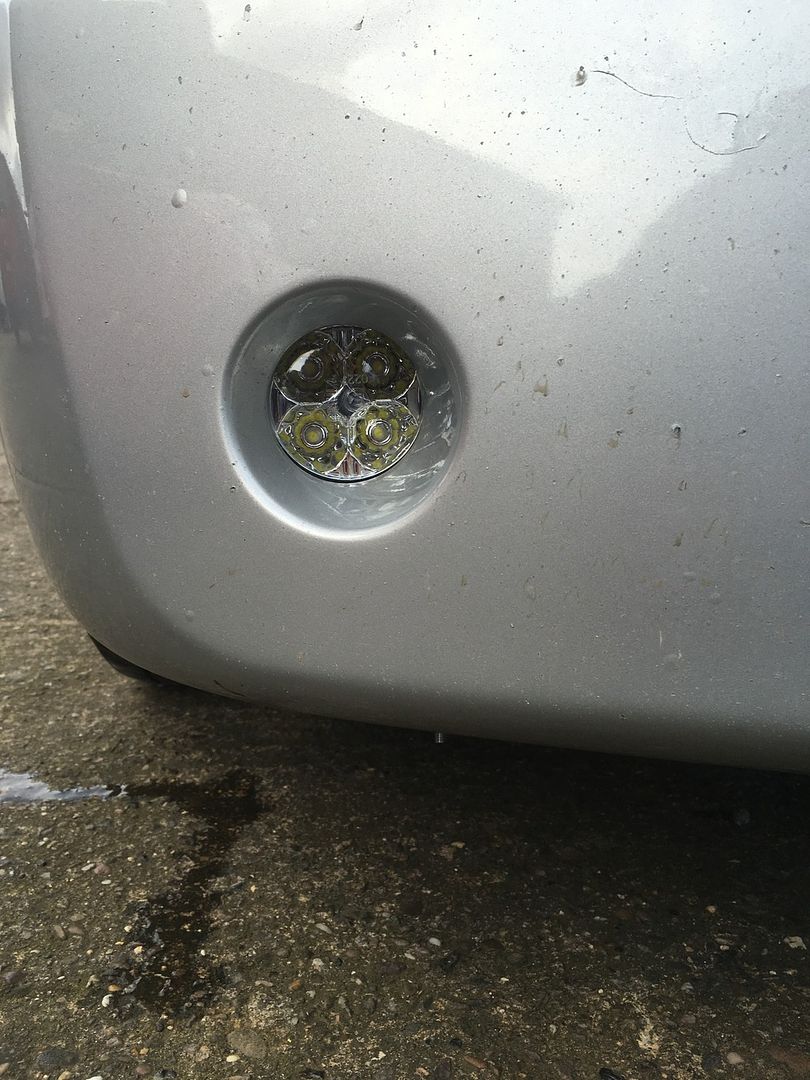
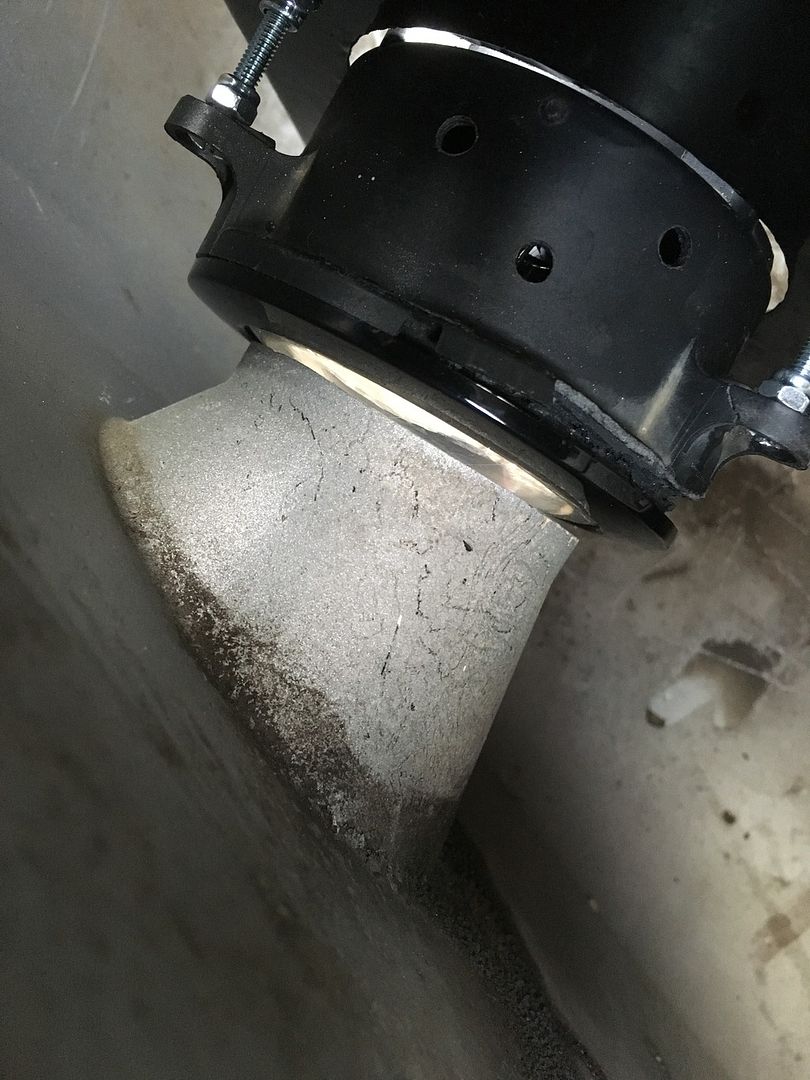
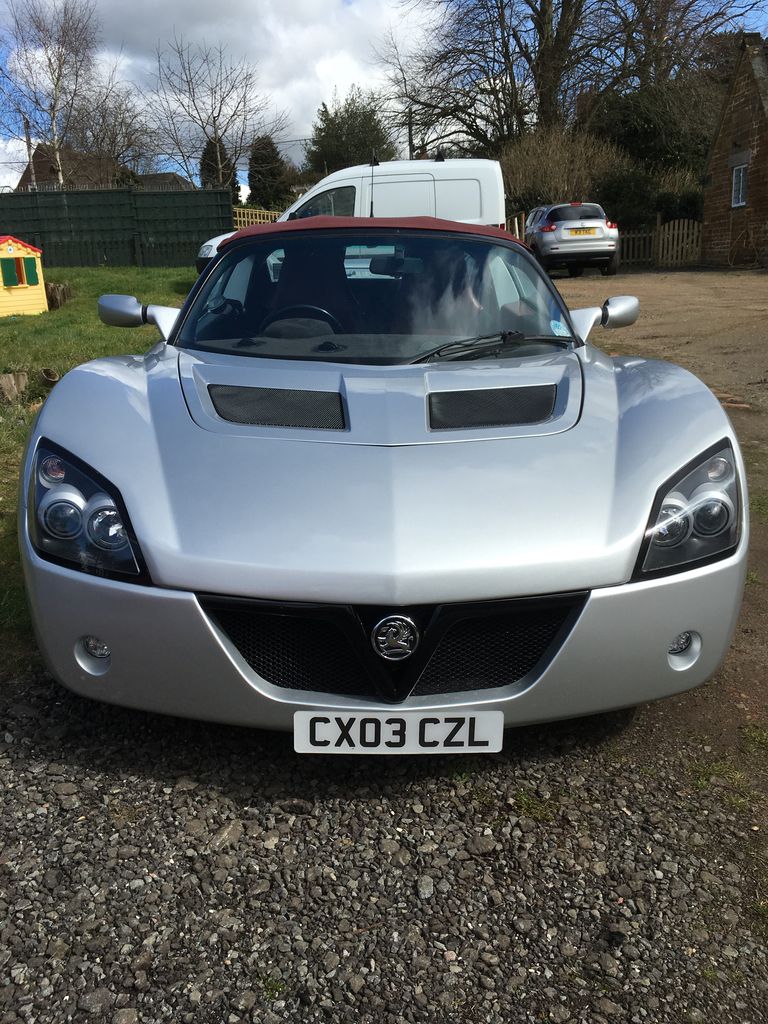
Put the DRL into the car today for a trial fitting. Not plumbed in yet and will need to use the adjuster to bring the bottom back a little but otherwise looks ok


Posted Image


Posted Image


Gap from the top looking down on the inside of the clam


Posted Image


#11 Wolfstone

Wolfstone

    Iceman

  • PipPipPipPipPipPipPipPip
  • 12,984 posts
  • Gender:Male
  • Location:Jordan (The country. Not Katie Price)
  • Interests:Northants Pedantic Crew global domination of the media.

Posted 01 March 2016 - 07:44 PM

Someone nicked your headlight....and front plate. Lidlvx. :lol:

#12 james.a

james.a

    Proud member of the Northants Pedantic Crew

  • PipPipPipPipPipPip
  • 2,032 posts
  • Gender:Male
  • Location:Northampton
  • Interests:Driving Trigger's broom since March 2010

Posted 21 March 2016 - 07:28 PM

Not yet mate. It's in being resprayed at the moment. This has been a bit of a side project whilst it's away. May see if I can pop over to the garage tomorrow and fit them to see how the depth alignment works.

Interesting way round it! Like the idea, look forward to seeing it in place. Are they proper DRL or like mine, don't dim when you put your main lights on, which is not genuine DRL?
They have three settings, dip by 60%, 40% or go off completely when lights switched on. I chose dip by 40% as they are very bright otherwise. They are fitted and were on in time for the peaks meet (just) will put up some pics and wiring instructions in the next few days.

#13 Harry Hornet

Harry Hornet

    Scary Internerd

  • PipPipPipPipPipPip
  • 4,969 posts
  • Gender:Not Telling
  • Location:x

Posted 21 March 2016 - 07:41 PM


Not yet mate. It's in being resprayed at the moment. This has been a bit of a side project whilst it's away. May see if I can pop over to the garage tomorrow and fit them to see how the depth alignment works.

Interesting way round it! Like the idea, look forward to seeing it in place. Are they proper DRL or like mine, don't dim when you put your main lights on, which is not genuine DRL?
They have three settings, dip by 60%, 40% or go off completely when lights switched on. I chose dip by 40% as they are very bright otherwise. They are fitted and were on in time for the peaks meet (just) will put up some pics and wiring instructions in the next few days.


..very shiny, saw you miles away on M1 even amongst the traffic....good work...  


#14 chez

chez

    Super Member

  • PipPip
  • 478 posts
  • Gender:Male
  • Location:Northants
  • Interests:Cars, music, DJing, football, cricket, golf....... The stars

Posted 21 March 2016 - 09:57 PM


Not yet mate. It's in being resprayed at the moment. This has been a bit of a side project whilst it's away. May see if I can pop over to the garage tomorrow and fit them to see how the depth alignment works.

Interesting way round it! Like the idea, look forward to seeing it in place. Are they proper DRL or like mine, don't dim when you put your main lights on, which is not genuine DRL?
They have three settings, dip by 60%, 40% or go off completely when lights switched on. I chose dip by 40% as they are very bright otherwise. They are fitted and were on in time for the peaks meet (just) will put up some pics and wiring instructions in the next few days.  
  ..very shiny, saw you miles away on M1 even amongst the traffic....good work..  
Yes they definitely make the VX more visible...... Not a silver joke by the way! Lol

Edited by chez, 21 March 2016 - 09:58 PM.


#15 gav89

gav89

    Member

  • Pip
  • 215 posts
  • Gender:Male

Posted 22 March 2016 - 03:58 PM

Great job James, do you have a pic with them fitted back in the clam ? :-)

 Heres a guide I did with plenty of photos ......

http://www.vx220.org...e/#entry1828698


#16 james.a

james.a

    Proud member of the Northants Pedantic Crew

  • PipPipPipPipPipPip
  • 2,032 posts
  • Gender:Male
  • Location:Northampton
  • Interests:Driving Trigger's broom since March 2010

Posted 26 January 2017 - 10:57 AM

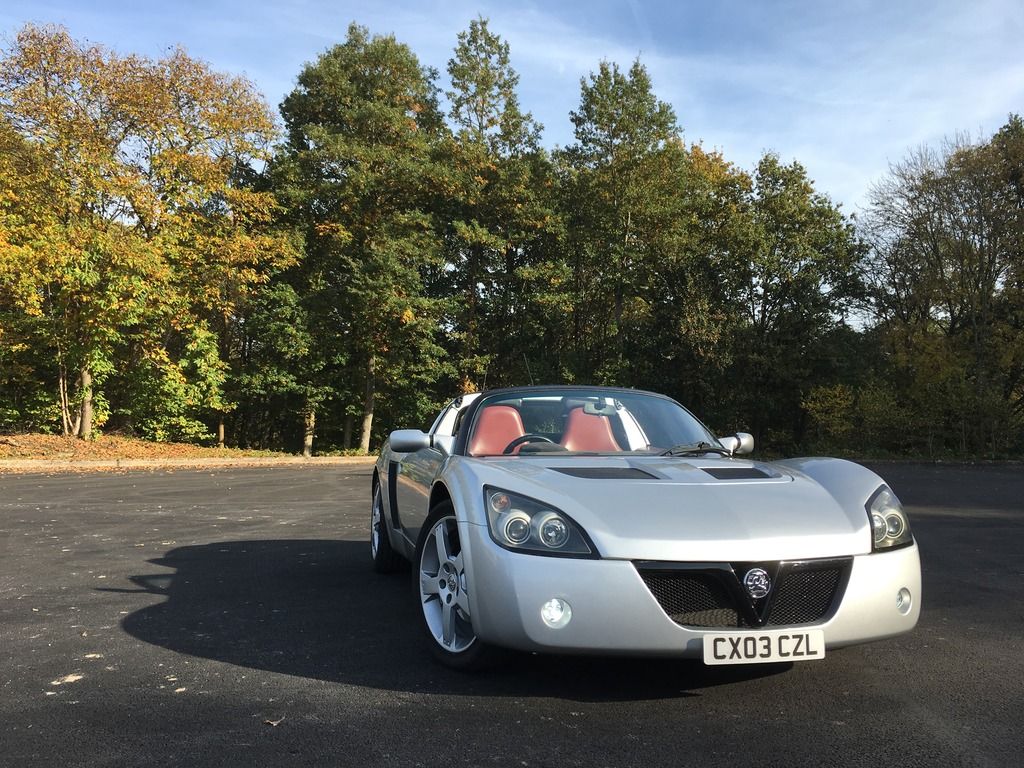
Posted Image

Realised I'd never put one up of them actually in situ and on!

#17 james.a

james.a

    Proud member of the Northants Pedantic Crew

  • PipPipPipPipPipPip
  • 2,032 posts
  • Gender:Male
  • Location:Northampton
  • Interests:Driving Trigger's broom since March 2010

Posted 26 January 2017 - 11:00 AM

And off

Posted Image

Edited by james.a, 26 January 2017 - 11:01 AM.


#18 Wolfstone

Wolfstone

    Iceman

  • PipPipPipPipPipPipPipPip
  • 12,984 posts
  • Gender:Male
  • Location:Jordan (The country. Not Katie Price)
  • Interests:Northants Pedantic Crew global domination of the media.

Posted 26 January 2017 - 01:59 PM

LidlVX is now SainsburysVX. Looks great James. Not only the DRLs but the car as a whole. :thumbsup:

#19 MartinS

MartinS

    I only bought it for one summer. 14 years ago and now its gone&#

  • PipPipPipPipPipPip
  • 5,173 posts
  • Gender:Male
  • Location:Rustington, West Sussex
  • Interests:Track days
    Pubs
    Sausages

Posted 27 January 2017 - 04:40 PM

They look good but you need to put some protective film on them. I lost 2 fog lights to stones.


Martin S


#20 james.a

james.a

    Proud member of the Northants Pedantic Crew

  • PipPipPipPipPipPip
  • 2,032 posts
  • Gender:Male
  • Location:Northampton
  • Interests:Driving Trigger's broom since March 2010

Posted 27 January 2017 - 04:53 PM

Completely agree Martin. I applied some helicopter tape to the lenses with a hairdryer- didn't tell the missus - to give them some extra coverage.


Also tagged with one or more of these keywords: drl, fog light, bracket

0 user(s) are reading this topic

0 members, 0 guests, 0 anonymous users