 so first things first, buy loads of bits from the states and courtenays, then remove the front clam
pics to follow tomorrow
so first things first, buy loads of bits from the states and courtenays, then remove the front clam
pics to follow tomorrow 

Moderator
Posted 25 September 2009 - 05:34 PM
so first things first, buy loads of bits from the states and courtenays, then remove the front clam
pics to follow tomorrow
Whipping Boy


Posted 25 September 2009 - 05:37 PM

I Fancy Joe

Posted 25 September 2009 - 05:37 PM

Recovering VX owner
Posted 25 September 2009 - 06:17 PM
front clam... i think id better remind you.. the engine is at the back

Newbie

Posted 25 September 2009 - 06:20 PM
 Good that you get a bit more practice first.
Moderator
Posted 25 September 2009 - 06:23 PM
well as your vx is so mint I need plenty of practicegood as mine's next
Good that you get a bit more practice first.
Moderator
Posted 25 September 2009 - 06:25 PM
stage 2 sc needs a charge cooler, so front clam has to come offfront clam... i think id better remind you.. the engine is at the back
My first thought too. Maybe Vocky means how to add a charge cooler to make a stage1 s/c into a stage2?
Edited by vocky, 25 September 2009 - 06:27 PM.
Super Duper Member
Posted 25 September 2009 - 06:28 PM
well as your vx is so mint I need plenty of practicegood as mine's next
Good that you get a bit more practice first.
Recovering VX owner
Posted 25 September 2009 - 06:32 PM
Probably because if you did the engine bits first you would look at running the charge cooler pipes after and say sod it.stage 2 sc needs a charge cooler, so front clam has to come off
this thread will be showing owners how to convert a 2.2 na straight to stage 2 sc

Super Moderator

Posted 26 September 2009 - 11:04 AM
Moderator
Posted 26 September 2009 - 12:58 PM


Edited by vocky, 26 September 2009 - 01:00 PM.
Moderator
Posted 26 September 2009 - 06:23 PM
I will be changing the timing chain as well so the rear clam is coming off.
The next job is to remove the old intake system, then move the ecu - pics tomorrow
Ex-VXer
Posted 26 September 2009 - 06:54 PM
Newbie
Posted 26 September 2009 - 06:59 PM
 (hurry up)
Iceman
Posted 26 September 2009 - 09:51 PM
 Hold on, weren't you only days ago gloating about your entirely standard n/a?
Ex-VXer
Posted 26 September 2009 - 11:07 PM
Are you planning on going s/c Percival?
Hold on, weren't you only days ago gloating about your entirely standard n/a?
Scary Internerd
Posted 28 September 2009 - 07:23 AM
Newbie
Posted 28 September 2009 - 08:09 AM
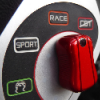
RaceMode
Posted 28 September 2009 - 09:13 AM
RobSC :)
Posted 28 September 2009 - 01:40 PM
doesn't fit , keep finding this turbo thing in the way?


0 members, 0 guests, 0 anonymous users

