Jump to content


Photo

Handbrake Cable Replacement Guide


  • Please log in to reply
12 replies to this topic

#1 Mangham54

Mangham54

    Wannabe....

  • PipPipPipPipPipPipPipPip
  • 12,034 posts
  • Gender:Male
  • Location:Baaaaarrrrnnnnssssllleeeeyyyy

Posted 16 June 2010 - 07:32 AM

Right after searching and finding nothing I thought I would post up my handbrake cable change:

It really is an easy job, but faffy without a pit or lift.

1. Jack and support rear wheels on bricks (don't have axle stands) with front wheels chocked on both sides (with jack on each side for safety)

Posted Image

2. Remove undertray from the car
Posted Image

3. Loosen off the adjustment bolts on each side of the car with a 19mm spanner
Posted Image


4. Remove retaining 'R' pin on the lower side of the crescent moon shaped attachment between the primary and secondary cables - I used a 3mm allen key jabbing it into the end and pulling it free.

Posted Image

5. Remove the Securing bolt (that had the R clip in it before) from the top of the crescent and the secondary cable should then free itself fropm the primary cable.

Posted Image

Edited by Mangham54, 16 June 2010 - 07:39 AM.


#2 Mangham54

Mangham54

    Wannabe....

  • PipPipPipPipPipPipPipPip
  • 12,034 posts
  • Gender:Male
  • Location:Baaaaarrrrnnnnssssllleeeeyyyy

Posted 16 June 2010 - 11:48 AM

6. The next thing to do is then undo the P clips that secure the cable onto the wishbone (they are a bugger to get at from underneath (definitely easier through the wheel arch - if wheels are removed ---> Big benefit for those with axle standsPosted Image ) However if you slide under the car from the rear to about waist deep you can access them.

The P-clip may need the rubber edges pusing away from the nut (10mm) to allow it to bite on the edges without rounding off (definitely replace these if possible as they are likely to have corroded badly).

Posted Image

Posted Image

Posted Image

7. You are now ready to fit the new handbrake cable to where the old one came off (following a refitting in exactly the same order as above - see pic below of the new Elise-Shop cable £28.95 + VAT = Bargain):

Posted Image

- > Cresent to primary cable then run the new cables towards the P clips and fit.

NB. Also take Ouchie's advice and fit a thin peice of foam along the tunnel for the gear cables - unfortunately I only had some 7mm thick stuff - brother had stolen my 12mm x 2mm tape so will have to do it at a later date) (see red and black arrow)

Posted Image

8. One thing to note on the Elise-Shop replacement cable the positioning for the P-clips is about 6-7cm to close to the centre - not really a big issue, cut the required length of outer sheathing from your old cable and gaffer tape it in place Posted Image You can see the issue on this pic:

Posted Image

Edited by Mangham54, 16 June 2010 - 11:51 AM.


#3 Mangham54

Mangham54

    Wannabe....

  • PipPipPipPipPipPipPipPip
  • 12,034 posts
  • Gender:Male
  • Location:Baaaaarrrrnnnnssssllleeeeyyyy

Posted 16 June 2010 - 11:48 AM

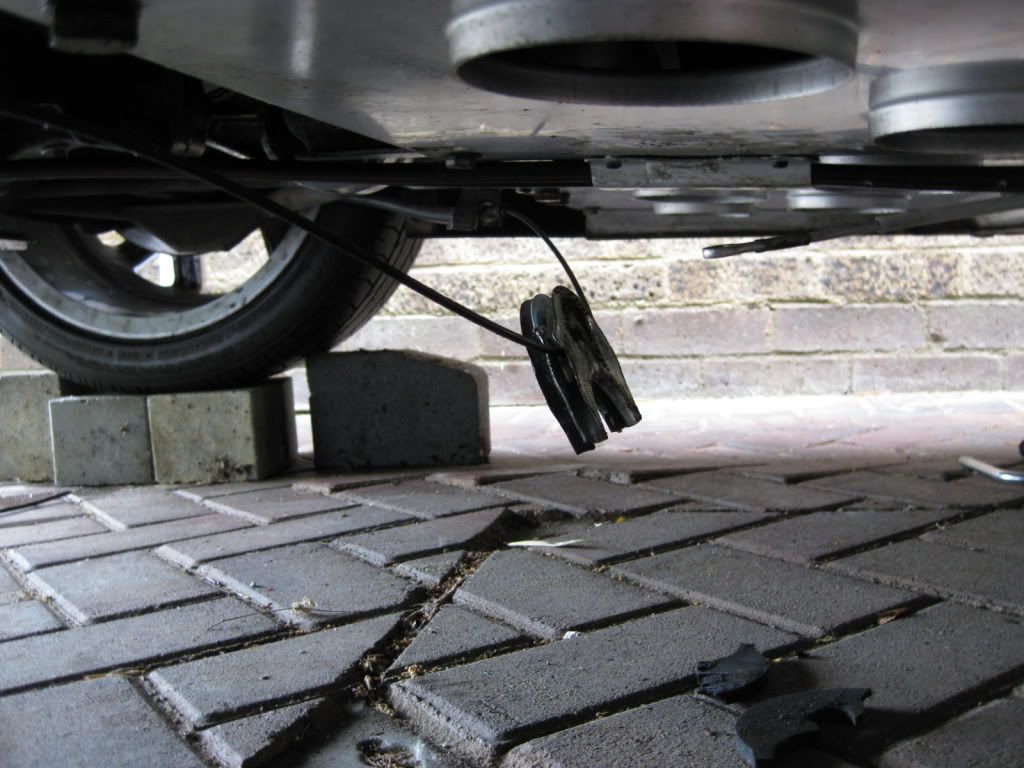
9. Then loosely fit the P-clip in place and then it is time to attack the caliper ends..... So you will then need to jack a side up at a time off the bricks to remove the wheel (don't think I need to tell/show you how to do this)

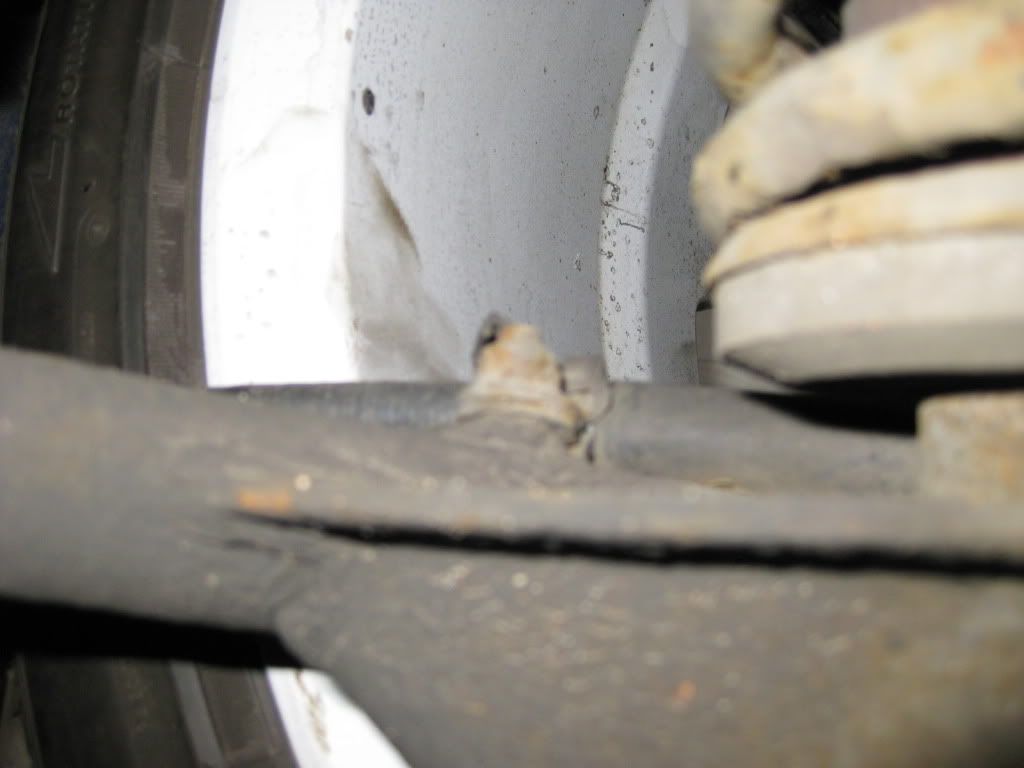
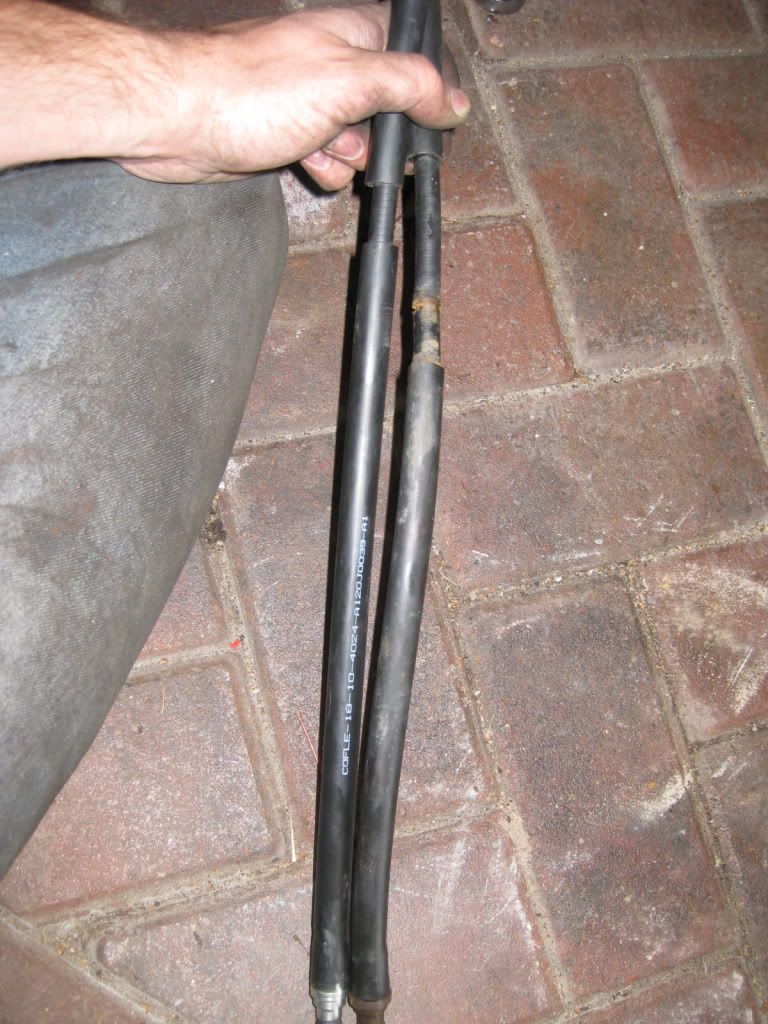
10. You then will need to remove the old handbrake cable off the caliper and pull it out of the hole just below the caliper on the hub.

Posted Image

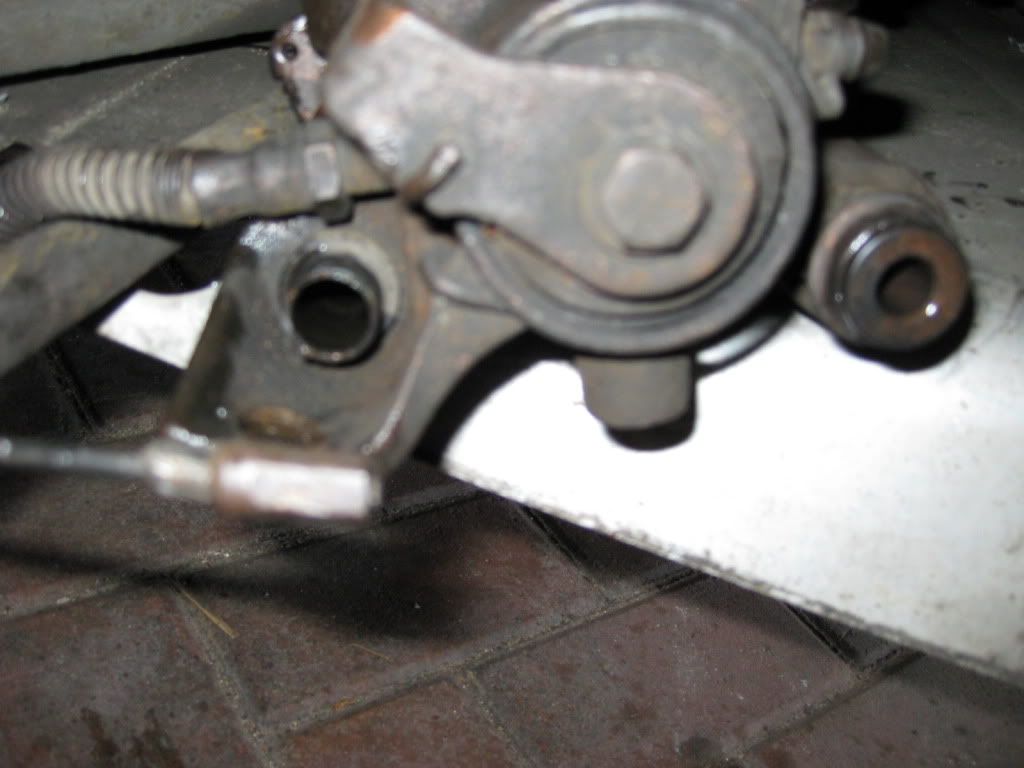
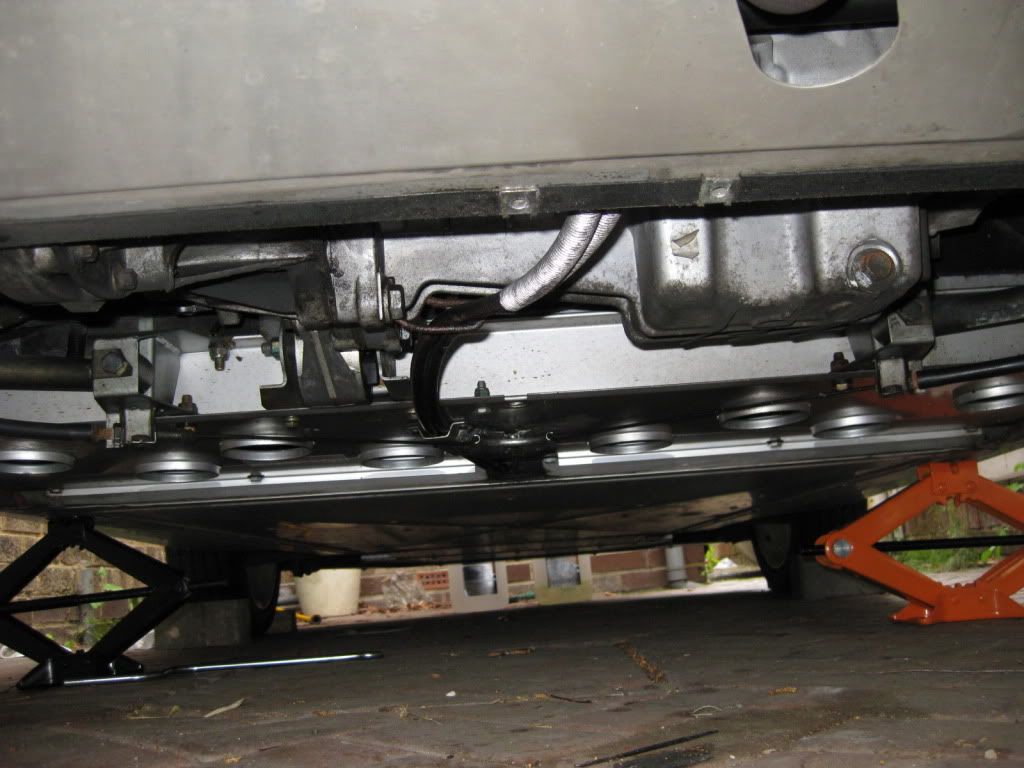
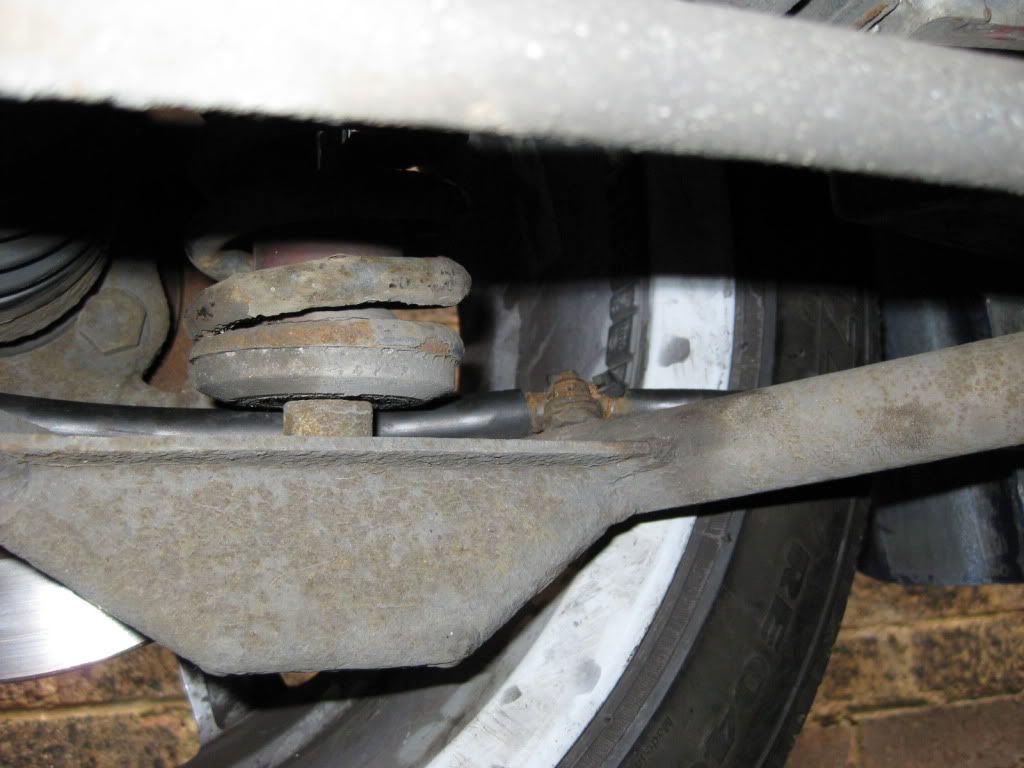
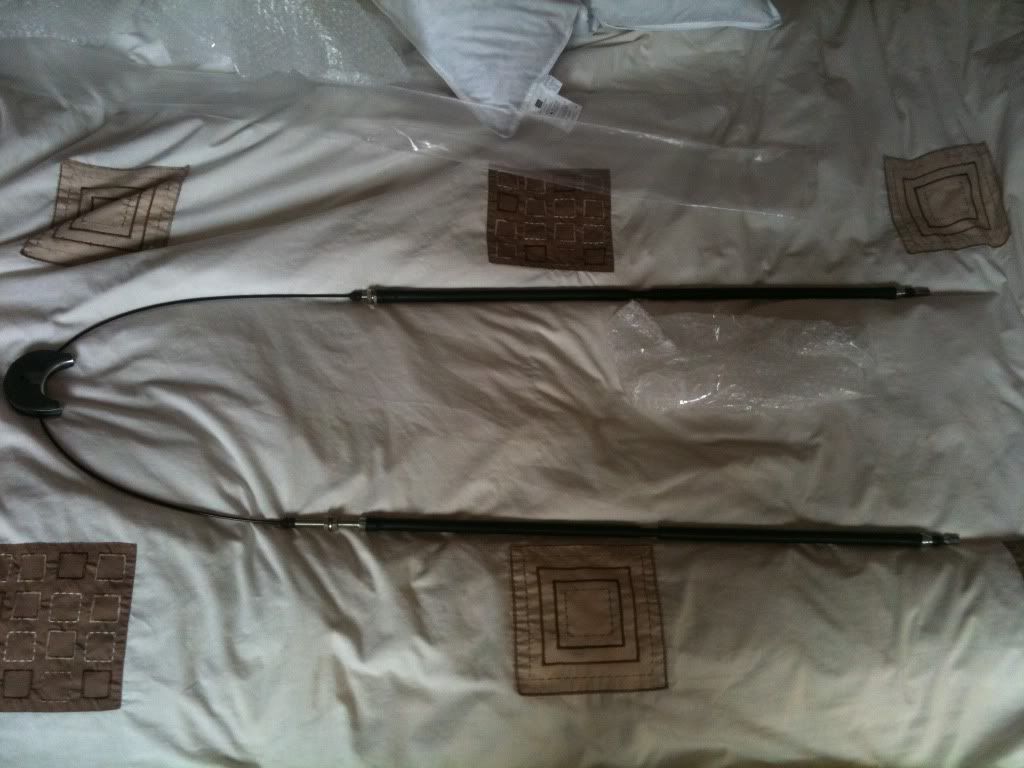
11. Run the new cable along the wishbone, through the hole and attached the end to the caliper.

-> You shouldn't need to adjust anything on the caliper or pads as they should be aligned correctly (so long as you provide enough slack on the cable itself -- See later point)

Then secure the cable with the P clip so that it doesn't foul on the wheel/tyre or hub or wishbone and then repeat on the opposing caliper.

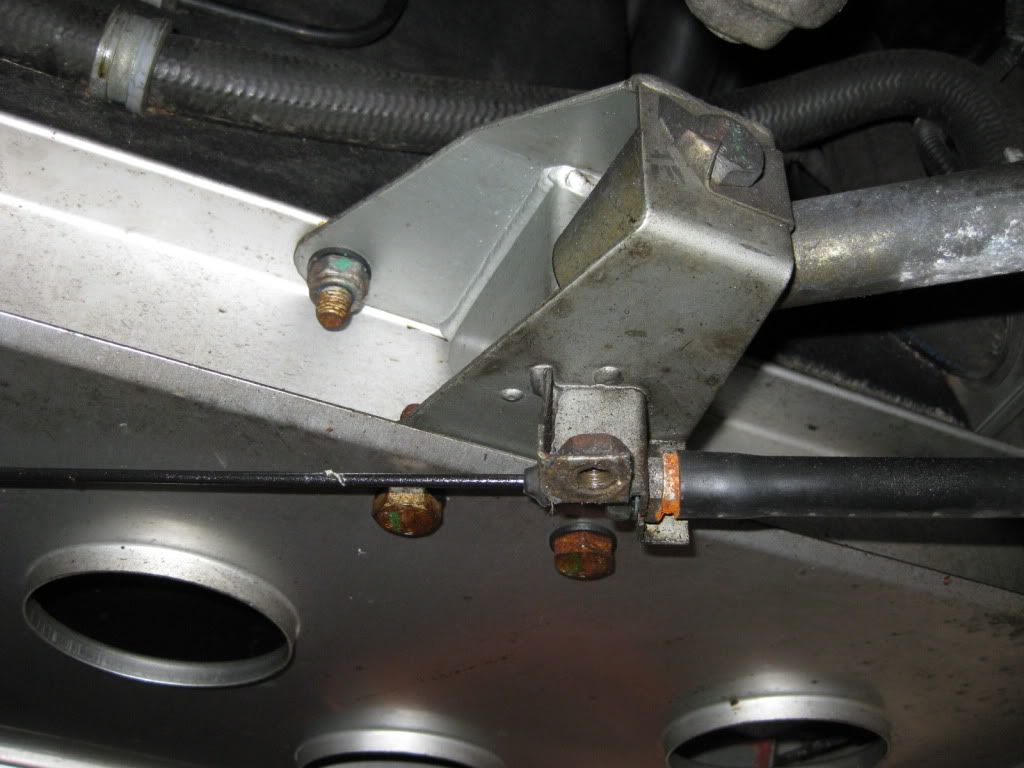
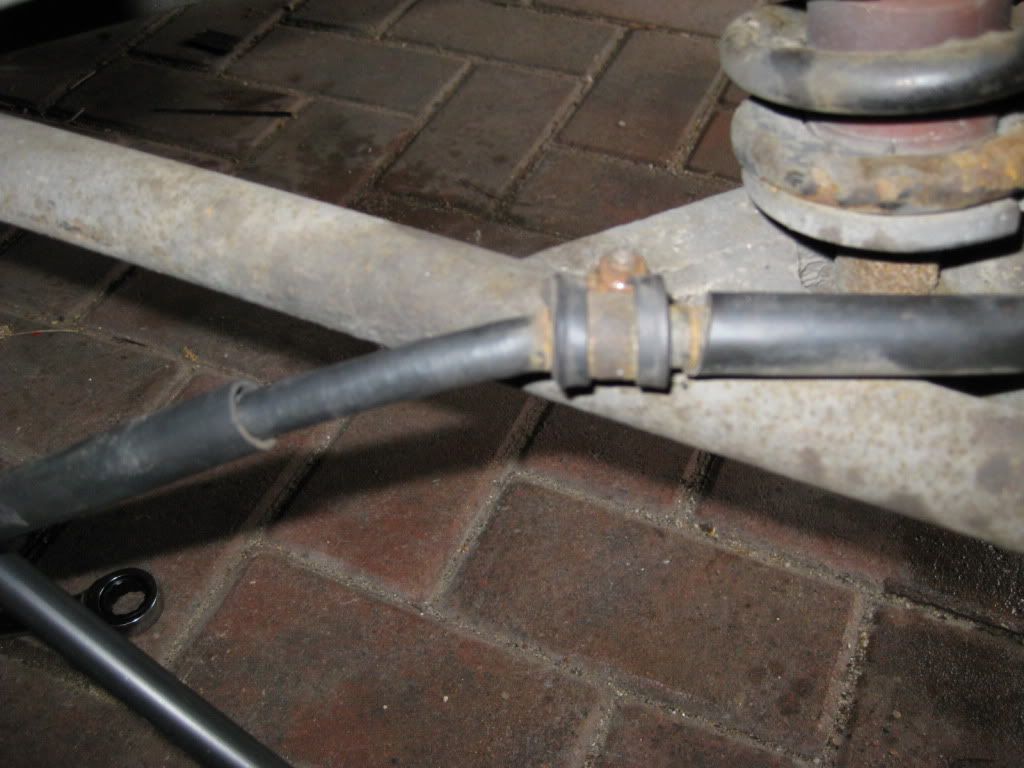
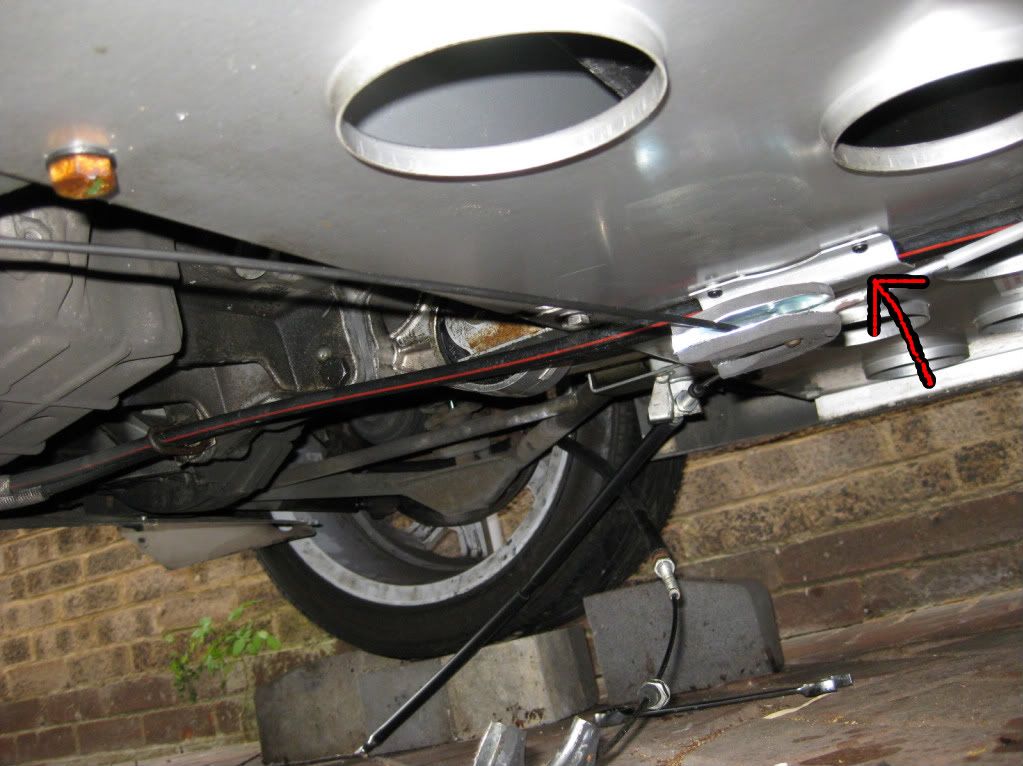
12. Now it is time to adjust the cable to make sure there is enough slack for the caliper to return properly, but not so much that the handbrake runs a silly number of clicks to activate. The adjustment is done on the passenger side (or drivers side depending on which way round you have fitted the cable - it is quite clear one of the mountings has two bolts and washers - this is the one you need).

Posted Image

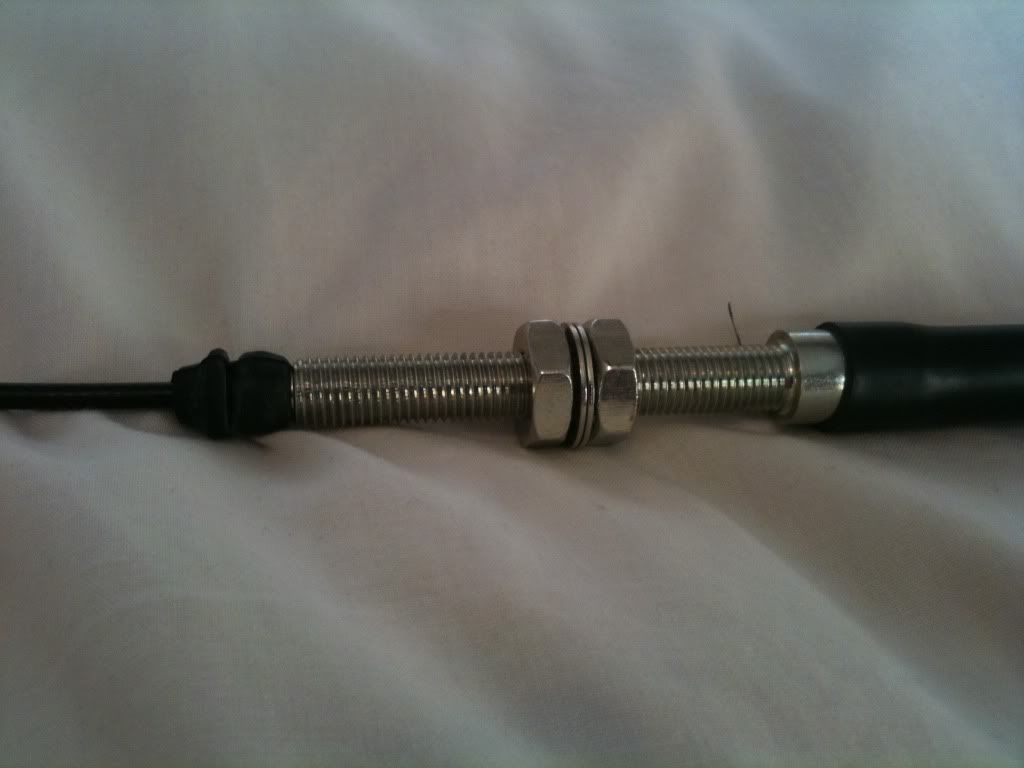
To adjust my tip (don't kill me if it isn't quite right for you is to pull the cable towards the wheel until the cable is tense and then wind up the securing bolt on the wheel side of this bracket and then let i back off just enough to see the crescent drop 2-3mm:

Posted Image

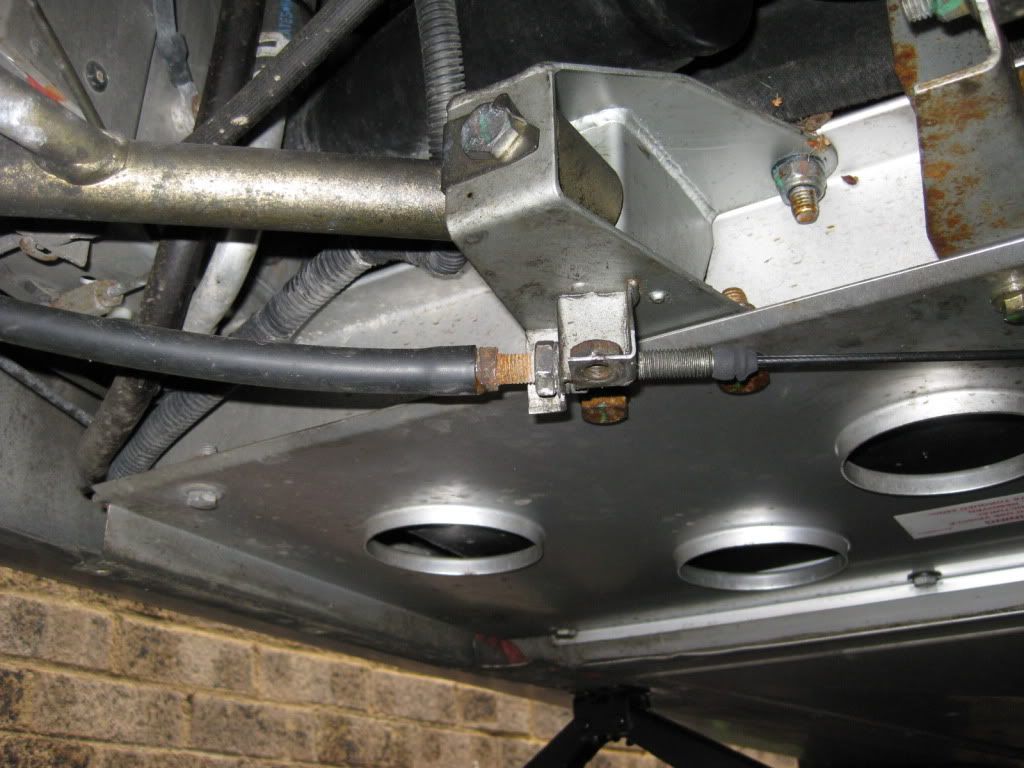
Then you need to tighten all the bolts up and you are done. Posted Image

Edited by Mangham54, 16 June 2010 - 11:50 AM.


#4 Mangham54

Mangham54

    Wannabe....

  • PipPipPipPipPipPipPipPip
  • 12,034 posts
  • Gender:Male
  • Location:Baaaaarrrrnnnnssssllleeeeyyyy

Posted 16 June 2010 - 11:56 AM

Well not quite... You still need to refit the wheels and undertray! Posted Image

Edited by Mangham54, 16 June 2010 - 11:56 AM.


#5 Ouchie

Ouchie

    Monkey no mates

  • PipPipPipPipPipPip
  • 4,805 posts
  • Gender:Male
  • Location:Gloucestershire

Posted 16 June 2010 - 12:08 PM

In the last pic you can see the oil cooler hanging just above the wishbone mount. Another source of a rattle if it touches the mount :beat: 3 years to find that one, grrrr.

#6 Mangham54

Mangham54

    Wannabe....

  • PipPipPipPipPipPipPipPip
  • 12,034 posts
  • Gender:Male
  • Location:Baaaaarrrrnnnnssssllleeeeyyyy

Posted 16 June 2010 - 12:11 PM

In the last pic you can see the oil cooler hanging just above the wishbone mount. Another source of a rattle if it touches the mount Posted Image 3 years to find that one, grrrr.


Already cable tied it tight on one of the beams just by it.... Seems to have stood the test of use and heat in the last 5-6 weeks Posted Image

#7 jameso

jameso

    Scary Internerd

  • PipPipPipPipPipPip
  • 2,336 posts
  • Gender:Male
  • Location:West Midlands

Posted 21 May 2011 - 09:01 AM

Maybe a daft question but presume the handbrake should not be applied while you do all this? J

#8 techieboy

techieboy

    Supercharger of Doom

  • 22,914 posts
  • Gender:Male
  • Location:Bedford

Posted 21 May 2011 - 11:19 AM

Handbrake off. Makes it much easier to disconnect the cable from the caliper. thumbsup

#9 Mangham54

Mangham54

    Wannabe....

  • PipPipPipPipPipPipPipPip
  • 12,034 posts
  • Gender:Male
  • Location:Baaaaarrrrnnnnssssllleeeeyyyy

Posted 21 May 2011 - 12:07 PM

Handbrake off. Makes it much easier to disconnect the cable from the caliper. thumbsup


:yeahthat:

But make sure you chock the front wheels well.

#10 ghand

ghand

    Drunken lampposts only

  • PipPipPipPipPipPipPip
  • 9,215 posts
  • Gender:Male
  • Location:St helens merseyside
  • Interests:Whisky.Keeping reptiles.Cars.
    The odd bike ride, fell walk and weights
    Oh and more whisky

Posted 21 May 2011 - 12:23 PM

While you have the cable off make sure the caliper arm moves freely by hand they can seize up inside and the hand brake seems to work but its only pulling on one side.

#11 jameso

jameso

    Scary Internerd

  • PipPipPipPipPipPip
  • 2,336 posts
  • Gender:Male
  • Location:West Midlands

Posted 21 May 2011 - 12:36 PM

Thanks great guide

#12 Judderman

Judderman

    Need to get Out More

  • PipPipPipPip
  • 869 posts
  • Gender:Male
  • Location:Llandovery, South Wales
  • Interests:Shooting, Driving on Welsh Roads, Gaming Xbox/PC

Posted 13 July 2012 - 02:03 PM

so for adjustment i just need to tighten/adjust the bolts in the last image with the handbreak off?

#13 techieboy

techieboy

    Supercharger of Doom

  • 22,914 posts
  • Gender:Male
  • Location:Bedford

Posted 13 July 2012 - 02:09 PM

Correct.


0 user(s) are reading this topic

0 members, 0 guests, 0 anonymous users