TazN, check this link, they are used as they are key'ed for the chassis.
http://www.lotustalk...434/index7.html

Someone say Plasti Dip?


Posted 13 May 2013 - 10:42 AM
TazN, check this link, they are used as they are key'ed for the chassis.
http://www.lotustalk...434/index7.html
Scary Internerd

Posted 13 May 2013 - 01:55 PM
Yep, when I got under the car again this morning I cleaned the area up and it was very obvious that it has an indentation for it to snugly fit into. Very interesting thread though.
Both inner's are now in place and the N/S outer is on. Just wrestling with the O/S outer as it's providing the same problems as I mentioned earlier in the thread. Not too sure how I solved it as when I went down this morning it just went straight together. I can almost see the car being on the ground once again but the weather is saying otherwise 
Need to get Out More

Posted 13 May 2013 - 07:34 PM
Only slide the outer bolt in after you put the toe link outer joint right up to the upright connection.
This way you reduce the angle the toe link makes compared to the upright.
Otherwise the outer ball of the toe link can't rotate far enough with the bolt through it to come completely vertical and you can't get it to slide into the upright.
Bye, Arno.
Scary Internerd
Posted 15 May 2013 - 07:32 PM
Right just about fed up of this toe link kit. Tried fitting it again tonight, thought I'd remove the one I'd manage to fit and put the opposite side to a similar position/length. Ended up putting a small nick in the dust cover take it this now needs to be replaced?
Toe links are from elise shop, will the EP covers be fine/fit?
http://www.elisepart...it-dust-covers/
Sorely tempted to buy 2nd hand oem and fit them so I can just take it to the garage to fit.
iTB lover

Posted 15 May 2013 - 07:58 PM
Scared

Posted 15 May 2013 - 08:06 PM
I would replace yes. The EP ones will be fine.
Don't assume a garage will fit them properly either!
Scary Internerd
Posted 15 May 2013 - 08:44 PM
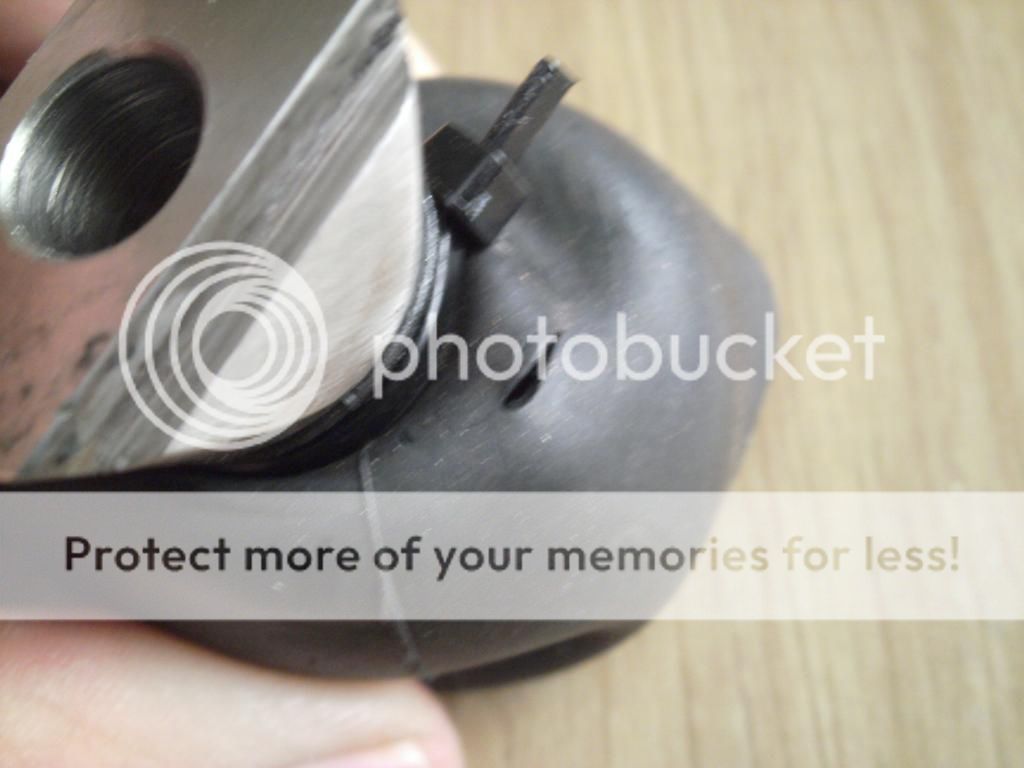
Shear bracket is bolted on with the m6 (I think) bolts provided.
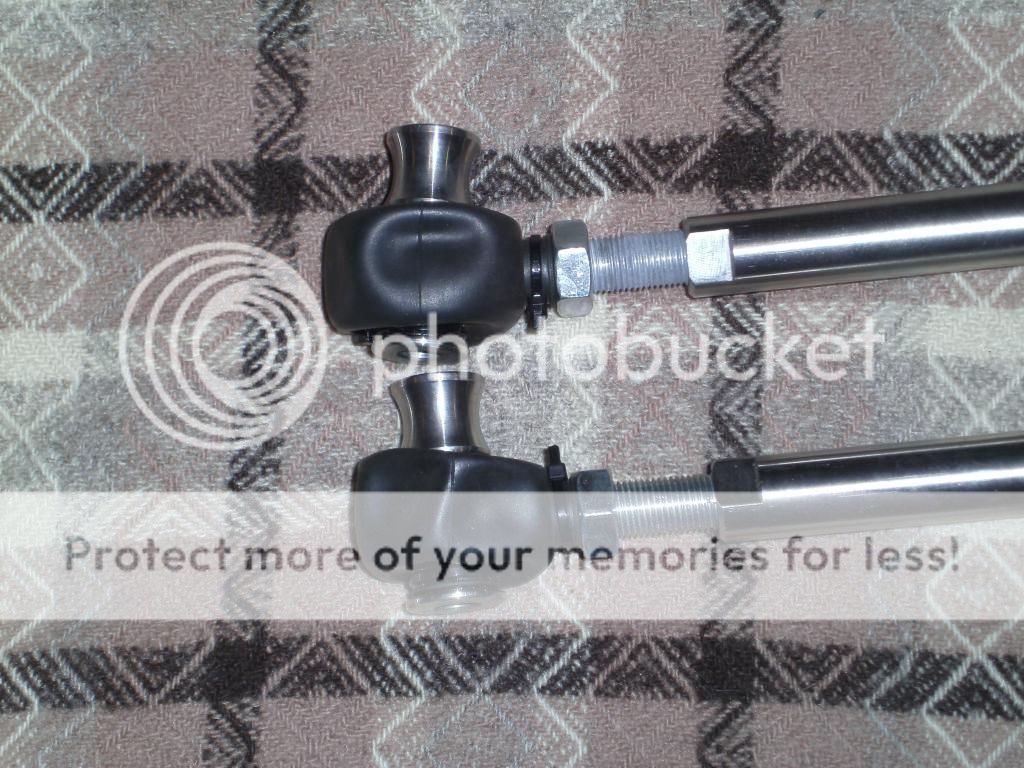
After calming down I've re looked at the toe links, one of my outer ends sits at an obvious angle compared to the other. I would imagine this difference to be the cause of one side not fitting... I presume they don't rotate (except on the thread) as mine have been solid since I got them so cant see how to adjust for this. - Excuse the funky patterned blanket on the floor!
Any advice on how to remove the inserts without destroying the rubber cover?
Scary Internerd
Posted 15 May 2013 - 08:49 PM
iTB lover
Posted 15 May 2013 - 08:52 PM
iTB lover
Posted 15 May 2013 - 08:54 PM
Or put the bolt through and waggle it. My EP ones were a bit stiff initially but this and some lube soon sorted that.It's a spherical joint that's designed to twist as the suspension goes up and down. Put a bolt through it and align it to vertical... It may be stiff so encourage it with a small adjusting tool (hammer)..
Iceman

Posted 15 May 2013 - 08:54 PM
Scared
Posted 15 May 2013 - 08:57 PM
Did you not fit the rubber boots yourself?
Scary Internerd
Posted 15 May 2013 - 09:02 PM
 so simple >_<
bolt in and had to really wiggle it to get it to move but both outer ends now have some movement in them. Thinking about it now though I can see how they need to move otherwise the rear wheel would be at a set height constantly....
Jules I forget which it is though I believe ES send both insert types encase you order the wrong ones.
Scary Internerd
Posted 15 May 2013 - 09:04 PM
Iceman
Posted 15 May 2013 - 09:05 PM

iTB lover
Posted 15 May 2013 - 09:08 PM
Edited by Sticky, 15 May 2013 - 09:09 PM.
Scary Internerd
Posted 15 May 2013 - 09:12 PM
I thought they must move but when looking at them they didn't want to budge and I was scarred of forcing it and breaking something.
Cheers for the tip on bracket, they should be all sorted. I just need to drill few more holes, I managed to snap a drill bit on Sunday....
Scary Internerd
Posted 15 May 2013 - 09:19 PM
iTB lover
Posted 15 May 2013 - 09:46 PM
Check, check and check again before you drill the holes. Make sure you assemble it using the correct spacers and pull it into line otherwise the bracket might shift slightly when you go to nip it up and the holes will be in the wrong place...

Scared
Posted 15 May 2013 - 09:46 PM
I tightened mine before drilling the holes for the bracket for the above reason, you don't want the bracket trying to dictate where the rod end goes.


0 members, 1 guests, 0 anonymous users

