Jump to content


Photo

Simple Coupe Rear Conversion


  • Please log in to reply
41 replies to this topic

#1 MAXR

MAXR

    I’m jealous of Batman’s driving skills

  • PipPipPipPipPipPip
  • 2,719 posts
  • Gender:Male
  • Location:Hampshire/Berkshire
  • Interests:Tennis, Golf, classic Ferrari's

Posted 28 July 2018 - 03:14 PM

For a while, I have had what I thought, was a good idea for a cheap, good-looking coupe back conversion for the VX. Up till now, the ones available to my eye & many others just does not look like a factory designed conversion or what I think the designer who penned the VX220 would have created.


I did buy a JJJ coupe rear lid & roof with an air vent for my car but, sold it on because it looked ghastly & the quality of the items were just pants. It also looked at best, after a lot of labour & tweaking, just average. The fit & finish never did it for me. The lines did not flow quite as well as it should have & it looked awkward.


I have a specific requirement for my track car, which is to get heat away from the engine in two ways. Firstly, getting more air into the engine bay & also by removing the hot air.


I did not want a tipping clam or fancy brackets to fabricate. But good access & an easy removal of the clam was essential. I don’t do spanner work at the track because I can’t! actually, I can’t do it at home either! lol.


I was amongst the first to cut great big holes in the back of the car for track use. It seemed like a good idea after I had seen a few other’s cars that had done the dremmel thing. Again, it looks awful. It weakens the clam & cracks quickly set in. Vast quantities of mesh tend to look cheap with all sorts of wonderful shapes that have been tried. Some shapes work better than others, but it still doesn’t look great.


I recently purchased from a young man (Joe) a used rear clam as my rear clam is badly damaged & with way too many holes with mesh. I carried out the initial mock-up on my old rear clam so that I could learn from any mistakes before doing it for real on the new Joey clam.


The main idea was to utilise the existing lid & its surround including the locking mechanism. The hinge system close to the rear window bulkhead could be utilised with a simple raised metal bracket.


IMG_5904_zps4mztobnd.jpg


The rollover cover front edge & outer shell would be mostly incorporated into the new buttresses & lid surround. I am keeping the two standard lid grills, but these could be replaced with drilled Perspex if you want to be able to see out of the rear window more. Having measured the top brake light, I think it could also be retained, just.


IMG_5908_zpsglrkcpqb.jpg


IMG_5901_zpswr0ymrkb.jpg


IMG_5900_zpsh9ugrx2i.jpg


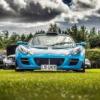
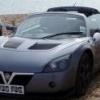
The photos show what I have come up with so far. Simple, nothing fancy. The new buttresses with petrol cap & the opposite side will flow & follow the curvature of the original but will be swept back to the rear of the boot corner. Again, the curvature of the roof & its crease will continue down the buttress.


IMG_5906_zpsnx6m4tet.jpg


IMG_5899_zpsk1qcoyrh.jpg


I may just have fabricated, an aluminium 10mm angled frame for both sides, which will follow the buttress edges & newly located lid frame. They will then have black aluminium mesh fitted for better cooling.


My boot lid has the underside fibreglass braces cut off, this was done years ago, so it flexes sufficiently to curve to the roof shape. However, the standard boot lid may require several cut lines put into the underside fibreglass bracing to allow it to be curved to match the roof shape. Once the correct curvature is made to the lid (it does not require a lot!) then the underside bracing will need to have some new fibreglass & resin to maintain the shape. It will then function just like the old lid. The boot bulkhead could be extended up to meet the cross frame & to form an enclosed boot area. I will be removing the boot bulkhead for heat to escape, but not through big holes cut out in the back, but through where the OEM rear lights would have been.


IMG_5911_zpslkiqm2xl.jpg


For those interested, the rear light mesh vents, they were produced by utilising a pair of Robin fibreglass covers. I dremmelled out openings leaving a border which follows the lines of the car. The mesh & frame will be painted black. I will, however, be using a different mesh as I don't like the mesh I have used in the test. Also, the rear lights will be round LED Halo lights, not the one shown. The back of the light will be cut out fully with an aluminium bracket to mount the light on. It should leave plenty of space around for hot air to exit. 


IMG_5910_zpshklnrfty.jpg


IMG_5909_zpsfxyoymjq.jpg


#2 TazN

TazN

    Scary Internerd

  • PipPipPipPipPipPip
  • 2,931 posts
  • Gender:Male
  • Location:Suffolk
  • Interests:Video Games, Airsoft, American Football, Cars

Posted 28 July 2018 - 03:30 PM

Max, for a long time I have considered exactly the same idea of reusing the bootlid in a coupe conversion. Never got round to it so will be very interest in how this project goes, good luck!

#3 haggi961

haggi961

    1cobrav8 is my god

  • PipPipPipPipPipPipPip
  • 6,003 posts
  • Gender:Male
  • Location:Richmond, N.Yorks
  • Interests:Keeping fit and in shape, and pretty much anything to do with an engine.

Posted 28 July 2018 - 04:00 PM

Looks really good and better then most I’ve seen but I really can’t see the point of this as
It’s not letting anymore cold air in. The idea of the coupe conversion is the roof scoop Into the engine cover with the air flow into the engine bay.

#4 MAXR

MAXR

    I’m jealous of Batman’s driving skills

  • PipPipPipPipPipPip
  • 2,719 posts
  • Gender:Male
  • Location:Hampshire/Berkshire
  • Interests:Tennis, Golf, classic Ferrari's

Posted 28 July 2018 - 04:23 PM

Looks really good and better then most I’ve seen but I really can’t see the point of this as
It’s not letting anymore cold air in. The idea of the coupe conversion is the roof scoop Into the engine cover with the air flow into the engine bay.


Mine will have either a small roof scoop or side vents along the buttresses as mentioned. Looking at how it fits now, I could even raise/tilt the leading edge of the lid & frame an inch up to leave a gap along the roof top.


Another option is to fit two extractors, one in the light meshed areas. I don't run wheel arch liners & have 3 large nacca ducts in the tray


I will get a mould produced of the new replacement buttresses & roll cover, which could fit over the existing or to replace them.


#5 pete-r

pete-r

    I never drive faster than I can see

  • PipPipPipPipPipPip
  • 2,771 posts
  • Gender:Male
  • Location:South Wales

Posted 28 July 2018 - 07:50 PM

I really like what you are doing with the lights, I want to make some cheaper track lights so it's not such a bit issue if a cone takes one out.

#6 hairy

hairy

    Moonlander

  • PipPipPipPipPipPip
  • 5,827 posts
  • Gender:Male
  • Location:Bristol
  • Interests:cars, beer, nature

Posted 28 July 2018 - 09:15 PM

I don't know how you would fix them, but how about some side scoops feeding into the gaps between body and cover. Needs someone clever with fibreglass - FLD?


#7 Ivor

Ivor

    Billy No Mates

  • 1,864 posts
  • Gender:Male
  • Location:west Wales
  • Interests:Sheep & Ducatis
    and now bees

Posted 29 July 2018 - 06:04 AM

Looks really good and better then most I’ve seen but I really can’t see the point of this as
It’s not letting anymore cold air in. The idea of the coupe conversion is the roof scoop Into the engine cover with the air flow into the engine bay.

Gets rid of the flat rear windshield which creates a huge vortex and a lot of drag?
Agree about the air scoop though, a bit

#8 MAXR

MAXR

    I’m jealous of Batman’s driving skills

  • PipPipPipPipPipPip
  • 2,719 posts
  • Gender:Male
  • Location:Hampshire/Berkshire
  • Interests:Tennis, Golf, classic Ferrari's

Posted 29 July 2018 - 10:40 AM

Just in case anyone wants to know, the standard unmodified lid & its cut out surround does fit perfectly when angled towards the roof. It does curve with the roll over bar curvature perfectly. I have just tried it with a unmodified Na lid & surround.

Ive just ordered up the materials to form the new buttresses & surround. This should be interesting!

#9 Tony H

Tony H

    Lotus on Crack

  • PipPipPipPipPip
  • 1,729 posts
  • Gender:Male
  • Location:Medway
  • Interests:Serbian turbo-folk

Posted 29 July 2018 - 02:39 PM

Orrrr .... make the entire clam out of mesh?


#10 MAXR

MAXR

    I’m jealous of Batman’s driving skills

  • PipPipPipPipPipPip
  • 2,719 posts
  • Gender:Male
  • Location:Hampshire/Berkshire
  • Interests:Tennis, Golf, classic Ferrari's

Posted 30 July 2018 - 06:35 PM

Does anyone know where to get the exact same grill mesh as is fitted to the engine lid? I'd like to get a close match.

#11 -Dab-of-Oppo-

-Dab-of-Oppo-

    Cuntpuffin

  • PipPipPipPipPipPip
  • 3,646 posts
  • Gender:Male
  • Location:Nr. Fordingbridge, Hampshire

Posted 30 July 2018 - 11:11 PM

[url=https://www.ebay.co.uk/itm/1x-Black-Aluminium-Grille-Grill-Mesh-Net-Vent-Bumper-12x5mm-100x25cm/401093592040?hash=item5d630a83e8:g:XMAAAOSwq~tZSnPV[This[/url] is the tried and tested stuff I used, pretty much indestinguishable from original. Comes from Poland but was fast delivery.

#12 MAXR

MAXR

    I’m jealous of Batman’s driving skills

  • PipPipPipPipPipPip
  • 2,719 posts
  • Gender:Male
  • Location:Hampshire/Berkshire
  • Interests:Tennis, Golf, classic Ferrari's

Posted 31 July 2018 - 06:48 AM

[url=https://www.ebay.co.uk/itm/1x-Black-Aluminium-Grille-Grill-Mesh-Net-Vent-Bumper-12x5mm-100x25cm/401093592040?hash=item5d630a83e8:g:XMAAAOSwq~tZSnPV[This[/url] is the tried and tested stuff I used, pretty much indestinguishable from original. Comes from Poland but was fast delivery.


Cheers! 👍🏻

#13 MAXR

MAXR

    I’m jealous of Batman’s driving skills

  • PipPipPipPipPipPip
  • 2,719 posts
  • Gender:Male
  • Location:Hampshire/Berkshire
  • Interests:Tennis, Golf, classic Ferrari's

Posted 06 August 2018 - 01:56 PM

Next, cold air to the engine bay.

I guess a roof scoop would have been a much easier modification. However, I’m going to opt for bigger side intakes just because I personally think it will look quite a neat & inoffensive addition.

The changes will work for a track car, but I don’t think it will work with the window runners. The changes do not affect the door locking mechanism. The door handle scoop will be rotated & fitted underneath the new door intake. Door seals & interior trim are not effected.

I now need to remove a section of the door pillar upright to match the scoop, which looks straightforward.

Im still not sure if I will use the carbon fibre side pods? I may produce an intake similar to a standard Na with mesh grill. I’ll do a mock up.

02D09BB3-4B9B-4AE1-B177-261DAB369C72_zps

FA64DC85-9364-47E9-B028-BFBFEB2B4617_zps

EF9CE242-7B08-4394-836E-60CEED1D3A41_zps

8C2C32D6-2279-4E92-AE03-AEEA9ECF85C7_zps

FA64DC85-9364-47E9-B028-BFBFEB2B4617_zps

#14 tommobot

tommobot

    Need to get Out More

  • PipPipPipPip
  • 1,007 posts
  • Gender:Male
  • Location:Stratford Upon Avon

Posted 06 August 2018 - 03:43 PM

Can't quite see what your plan is for the doors, are you keeping pushing the top and bottom out or recessing the middle in?


Either way, I'm liking the look of it!


#15 MAXR

MAXR

    I’m jealous of Batman’s driving skills

  • PipPipPipPipPipPip
  • 2,719 posts
  • Gender:Male
  • Location:Hampshire/Berkshire
  • Interests:Tennis, Golf, classic Ferrari's

Posted 06 August 2018 - 04:05 PM

The door will close flush. The reason why in the photos the door is not shut is because the main vertical door frame that the door closes onto has to be cut out to allow the door itself to close properly & for the new door intake to flow correctly into the rear panel. Once done, it will look seamless. I will have photos soon.

This is just a trial as I have new doors being fitted. My car is being fully resprayed once completed. But I have several other hair brained ideas to try first. I’ve just ordered some new Lexan windows, which are FIA/MSA approved & as scratch proof as glass, apparently? They also do rear windows & windscreens. The only problem with s a 14 week production time!

I also don’t need the windows to open as I’m fitting 3 new vents which are from the fog light openings with vents out, possibly with electric inline fans.

I’m even adding a proper firewall, some sound deadening back & new CF door cards. I’m turning soft, must be my age!

#16 FLD

FLD

    WANNABE MY LOVER

  • PipPipPipPipPipPipPipPip
  • 13,717 posts
  • Gender:Male
  • Location:Near nantwich
  • Interests:Tugging my todger.

Posted 06 August 2018 - 04:48 PM

This I like the look of. A quick look at mine and I'd be tempted to smooth off the bottom fold line of the door so it's more flush with the sill and then scoop the whole bottom of the door in where it meets the ears. If you can incorporate the handle into the undercut part and smooth off the old one it will look great. LOTS of work in both these projects if you want it to look right and not like a dremelled car but you've made a damn good start.

#17 MAXR

MAXR

    I’m jealous of Batman’s driving skills

  • PipPipPipPipPipPip
  • 2,719 posts
  • Gender:Male
  • Location:Hampshire/Berkshire
  • Interests:Tennis, Golf, classic Ferrari's

Posted 06 August 2018 - 07:08 PM

Ok,

I’m going to start another thread so that if anyone wants to do a search in the future for side air intake modification, then they will be able to find this.


You must take a look, I’m impressed so far.
Max

#18 MAXR

MAXR

    I’m jealous of Batman’s driving skills

  • PipPipPipPipPipPip
  • 2,719 posts
  • Gender:Male
  • Location:Hampshire/Berkshire
  • Interests:Tennis, Golf, classic Ferrari's

Posted 09 August 2018 - 11:15 AM

Quick update:


I have done my Blue Peter bit & made a mock-up of one possible version of the coupe back for track use. Obviously, the buttress would either need to be extended back down to the deck or the new vented mesh grill areas extended to meet the deck. The new buttress mesh areas would be fixed to the buttresses & existing lid surround by the new aluminium metal frame of the buttress grill. This option would make a VERY quick & easy conversion with no paint required, just dremmel work & a new raised bracket for the hinge.


The only area that will need to be repaired is at the base of the tilted lid surround. But, this could easily be done by a localised repair & painting the gutter channel in satin black with an aerosol. The rubber boot seal covers it all anyway!


IMG_6085_zpsd45b1idq.jpg


IMG_6086_zps4orgrsbd.jpg


IMG_6084_zpsd8osj3pf.jpg


IMG_6083_zpsv6wlo76p.jpg


IMG_6082_zpsky6o07tz.jpg


IMG_6080_zpszwx4ypwo.jpg


#19 MAXR

MAXR

    I’m jealous of Batman’s driving skills

  • PipPipPipPipPipPip
  • 2,719 posts
  • Gender:Male
  • Location:Hampshire/Berkshire
  • Interests:Tennis, Golf, classic Ferrari's

Posted 10 August 2018 - 10:28 AM

Ok, I'm Done on the fastback conversion. The lid has not been aligned properly in the photos, just dropped in with no bump stops.


Here are the basics. 


Dremmel 15mm distance along the boot opening ALL the way around using a diamond dremmel disc (50mm approx.) Don’t use the cheap discs, they flex too much going around corners & do not cut as cleanly as the diamond disc! You MUST use a dremmel guide to get a perfect 15mm lip! Don't attempt it without.


Mark the center line on the rollover cover & lid surround to align later.


Remove the small (5mm) lip of the top edge of the lid frame where it will rest on the rollover cover.


Take a notch out of the rollover cover along the existing crease line. I will be removing mine across the whole width.


Retain the boot bulkhead cross member & lock as it stops the sides from twisting outwards. if you don't require it, just cut it out later, not now. I will probably be removing mine for access, but I will fit a hollow round tube brace with flattened ends, which can be bolted or removed easily.


Mark first, a line 30mm below the spring lock bulge on the boot bulkhead all the way across. Then, draw vertical lines either side of the boot opening, approx 100mm away & down to your horizontal line which is 30mm below the lock bulge.


The best option I found for cutting out the lock brace is once you cut your 15mm border all around the boot opening (make sure once cut you hold it in place with some masking tape, so that it doesn’t get damaged). Now, inside the boot dremmel 30 mm from the underside of the deck and outwards along the boot bulkhead by the 100mm either side. 


Next, cut it out. you should now have a 15mm lip around the boot frame with the cross member attached with 100 tabs sticking out either side & the lock bulge with part of the boot bulkhead attached.


Measure down 75mm from the top outer surface of the 15mm lip around the lid frame & mark a line onto the tabs sticking out on the bulkhead cross member. Remove the area above the 75mm line & up to the lid frame. Again, put masking tape on the tabs as it will scratch the paintwork fitting it in! I would mask the outside face of the buttress & the deck with thick polythene & tape to prevent accidental scratches. It is worth it!


You should now be able to get the boot frame & cross member back in. Be careful & have help when you do this. The 100mm tabs sticking out will be useful to rivet to the bulkhead & to hold the new lid frame & support the lid. Clearly the boot bulkhead will require making good with either an aluminium plate riveted or fibre glass repair. Once the carpet is in, no one will ever know.


Fit the notched rollover bar cover under the tilted lid. It will be nice & tightly held down by the lid frame resting on it. Even at this stage it is really solid.


The 15mm lips around the boot frame, I intend to fit a H section edge rubber with tail to finish it off or it can be glassed down,


The boot area is enlarged now & once the bulkhead carpet is fitted, will look just like a standard boot.


On the engine lid surround, DON'T cut off the two bolts & brackets by the rear window.  However, cover them with gaffer tape as they WILL scratch your paint when trying to slide in the deck tilted!!!! They will be utilised with a brace across & down to the engine bulkhead for the lid hinge. Obviously, you will just reuse the existing lid hinge system, locking mechanism & release cable system...Bonus!


You should remove the existing inner buttress skin & some of the top of the buttress. I will be doing to allow better cooling. Also, you can see the old buttress with the boot lid is open, I would remove it for that reason alone.


I will be having the buttress meshed areas produced for me by a local company that I have used before. If there is interest, I can get them to make a proper jig to allow additional ones to be made. It will be made in aluminium & I will be painting mine black. The lower outer face of the existing buttress has a gap now. BUT, I will probably incorporate it into the buttress mesh grill to retain the VX existing buttress kink. If that is done, you will NOT have to do ANY paintwork for this conversion either....BIG BONUS!


The whole job will take approx 3-4 hours at most AND can easily be done with the rear clam in place. This conversion will cost you £0. Apart from the grills, which I would expect to cost no more than £200. The buttress grill, by the way, will slide over the 15mm lip of the lid frame using a U channel with a 4mm gap (space for a bit of tiger seal) The lower section of the grill will have H section rubber with a tail fitted to leave a clean finish on the deck surface. Don't forget to roller some paint onto the cut edges of the fibreglass before fitting the rubber seals. 


I hope this has been useful. I hope several of you will also think it looks good. I will be chuffed to see some around. Please feel free to ask any questions or if you require any help or clarification on the method.


Thanks


Max


IMG_6108_zpsr4dz357g.jpg


IMG_6110_zpsgeayh4s8.jpg


IMG_6114_zps6dedhbtj.jpg


IMG_6126_zpsid1wwp4q.jpg


IMG_6124_zpsupswd8sd.jpg


IMG_6122_zpsbjkvtnxa.jpg


IMG_6127_zpsgn1yxpqi.jpg


IMG_6161_zps5ca3gnjc.jpg


IMG_6162_zpstoca0xza.jpg


IMG_6156_zpsyxbzll3x.jpg


IMG_6150_zpswhbl5nlg.jpg


IMG_6180_zpsltq6coro.jpg


IMG_6183_zpsbsrge7fi.jpg


IMG_6174_zpsafgayoop.jpg


IMG_6176_zpsr5qbum8d.jpg


IMG_6178_zpseqynaljw.jpg


IMG_6170_zpshq1eylir.jpg


#20 The Batman

The Batman

    Super Moderator

  • 30,267 posts
  • Gender:Male
  • Location:FLD mum's bed

Posted 10 August 2018 - 06:41 PM

that looks better


maybe its the fact its not awful orange :lol:


0 user(s) are reading this topic

0 members, 0 guests, 0 anonymous users