There will definately be less downforce at the rear at higher speeds without the rear diffuser fitted

Under-tray Spacers
Started by
NickB787
, Aug 11 2009 08:07 AM
40 replies to this topic
#21

starlight
-

-

- 1,790 posts
I used to have a Europa, and had a VX220T once...
- Gender:Male
- Location:Warwickshire, UK
- Interests:Oily bits...
Posted 12 August 2009 - 11:32 AM
#22
Nev
-

-
- 11,587 posts
Nipper's Minion
- Gender:Male
- Location:Bristol
- Interests:Rock climbing, skiing, kayaking, surfing, mountaineering, budgies, chess, practical mechanics.
Posted 12 August 2009 - 02:07 PM
I am shocked and flabberghasted that MaxR still has his heater installed ! 
#23
alanoo
-

-
- 1,324 posts
Billy No Mates
- Gender:Male
- Location:Near Paris, France
Posted 12 August 2009 - 02:07 PM
You mean "more lift"  honestly I won't track the car without undertrays... one bad gravel at wrong time and car/engine/loom could be dead
they are here for protection too
honestly I won't track the car without undertrays... one bad gravel at wrong time and car/engine/loom could be dead
they are here for protection too 
honestly I won't track the car without undertrays... one bad gravel at wrong time and car/engine/loom could be dead
they are here for protection too
#24
vocky
-

-

- 11,969 posts
Moderator
- Gender:Male
- Location:Earth
Posted 12 August 2009 - 02:13 PM
I am shocked and flabberghasted that MaxR still has his heater installed !
there is NO heater in Max's vx
#25
NickB787
-
-
- 7,813 posts
Gone but not forgotten
- Gender:Male
- Location:Bedford
Posted 12 August 2009 - 09:26 PM
I am shocked and flabberghasted that MaxR still has his heater installed !
there is NO heater in Max's vx
Sorry
 I thought that was Max's on the z forum for a Harrop build
#26
vocky
-
-
- 11,969 posts
Moderator
- Gender:Male
- Location:Earth
Posted 12 August 2009 - 10:01 PM
it is, but the white hose is direct from the crashbox to the cabin, no heater box fitted
#27
NickB787
-
-
- 7,813 posts
Gone but not forgotten
- Gender:Male
- Location:Bedford
Posted 18 August 2009 - 08:48 AM
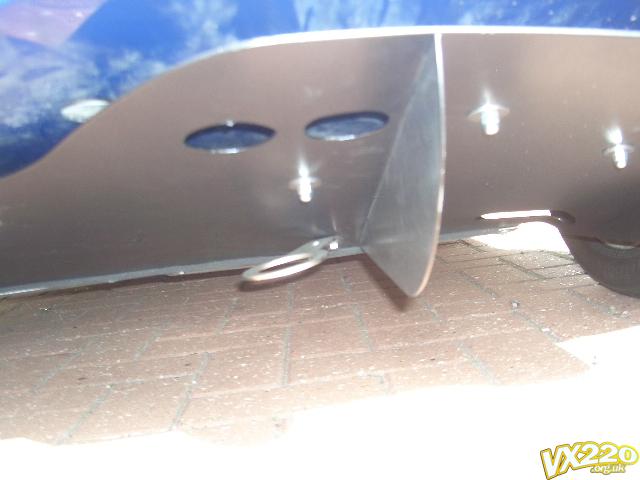
Put the rubber spacers on, they are only 25mm but they seem fine. Now I can remove the undertray and work on the car and leave the spacers in position, a lot quicker also only cost £2.00 each  [attachment=21338:CIMG2101.JPG]
[attachment=21338:CIMG2101.JPG]
Edited by NickB777, 18 August 2009 - 09:04 AM.
#28
RobNA
-
-
- 2,856 posts
RobSC :)
- Gender:Male
- Location:St Albans
Posted 18 August 2009 - 10:52 AM
Good stuff
#29
Jameshs
-

-
- 3,511 posts
Scary Internerd
- Gender:Male
- Location:Copthorne, Nr Gatwick
- Interests:Cars and Rock Climbing
Posted 18 August 2009 - 11:31 AM
Put the rubber spacers on, they are only 25mm but they seem fine. Now I can remove the undertray and work on the car and leave the spacers in position, a lot quicker also only cost �2.00 each
[attachment=21338:CIMG2101.JPG]
anymore pictures?
#30
VIX
-

-
- 9,497 posts
Whipping Boy
- Gender:Male
- Location:Milton Keynes
Posted 18 August 2009 - 03:34 PM
I must have missed the bit about rubber spacers. I presume they won't melt, it does get kinda hot down there ...Put the rubber spacers on

#31
NickB787
-
-
- 7,813 posts
Gone but not forgotten
- Gender:Male
- Location:Bedford
Posted 18 August 2009 - 04:47 PM
[attachment=21340:CIMG2103.JPG]
Not in any direct contact with anything hot so should be OK
#32
NickB787
-
-
- 7,813 posts
Gone but not forgotten
- Gender:Male
- Location:Bedford
Posted 18 August 2009 - 04:54 PM
I used covered nuts to stop the threads rusting

Edited by NickB777, 18 August 2009 - 05:00 PM.
#33
VIX
-
-
- 9,497 posts
Whipping Boy
- Gender:Male
- Location:Milton Keynes
Posted 18 August 2009 - 05:09 PM
Look good. So they bolt into the clam and the diffuser bolts into the spacers. Cunning ...
I only mention the heat as I popped out earlier for about 30 mins and when I got back I went to check the diffuser was tight and it was quite hot.
Quick release fasteners for the undertrays also look cunning!
http://www.vx220.org...ers-t78942.html

I only mention the heat as I popped out earlier for about 30 mins and when I got back I went to check the diffuser was tight and it was quite hot.
Quick release fasteners for the undertrays also look cunning!
http://www.vx220.org...ers-t78942.html
Edited by VIX, 18 August 2009 - 05:10 PM.
#34
NickB787
-
-
- 7,813 posts
Gone but not forgotten
- Gender:Male
- Location:Bedford
Posted 18 August 2009 - 05:16 PM
Look good. So they bolt into the clam and the diffuser bolts into the spacers. Cunning ...
I only mention the heat as I popped out earlier for about 30 mins and when I got back I went to check the diffuser was tight and it was quite hot.
Quick release fasteners for the undertrays also look cunning!
http://www.vx220.org...ers-t78942.html
I did think about these also wing nuts, maybe if I can get some covered wing nut, don't know if they do them.
One thing about this method of locking is if I want more airflow I just go and get a bigger spacer and don't pay £££. I also think I probably don't need the 2 rear ones only the 5 which lock to the clam directly this would make certain the 4 air holes in the rear of the clam are free from any obstruction, as I have one covered on each side at the moment.
I have used it already and not noticed any heat issues I will check it out next time I go for a run
#35
VIX
-
-
- 9,497 posts
Whipping Boy
- Gender:Male
- Location:Milton Keynes
Posted 18 August 2009 - 05:39 PM
My winter tidying up list is getting longer! 
#36
Jameshs
-
-
- 3,511 posts
Scary Internerd
- Gender:Male
- Location:Copthorne, Nr Gatwick
- Interests:Cars and Rock Climbing
Posted 19 August 2009 - 09:50 AM
Looks amazing, how did you secure the arch spats??
#37
Crazyfrog (Fab)
-

-

- 22,801 posts
Iceman
- Gender:Not Telling
Posted 19 August 2009 - 09:58 AM
[attachment=21338:CIMG2101.JPG]
look like they are bended and fixed the original way am i right nick
hey we go james
#38
siztenboots
-

-
- 26,614 posts
RaceMode
- Gender:Not Telling
- Location:Surrey
- Interests:french maids
Posted 19 August 2009 - 10:01 AM
similar aim to nick , have something that was a 5 minute job to adjust on track without tools
cut up some threaded rod same as MMG screws supplied, to 100mm sections, plus some lock nuts two per stud, washers and wing nuts. Makes getting diffuser on really easy as the studs are already in position and you can do it one handed.
I have replaced the subframe bolts with longer and remove the captive nut , and converted it to a stud fixing, again with lock nuts for adjustment

lowered to 60mm

cut up some threaded rod same as MMG screws supplied, to 100mm sections, plus some lock nuts two per stud, washers and wing nuts. Makes getting diffuser on really easy as the studs are already in position and you can do it one handed.
I have replaced the subframe bolts with longer and remove the captive nut , and converted it to a stud fixing, again with lock nuts for adjustment
lowered to 60mm
#39
NickB787
-
-
- 7,813 posts
Gone but not forgotten
- Gender:Male
- Location:Bedford
Posted 20 April 2010 - 11:01 AM
update on my solution to spacing the diffuser
don't bother with the ones I used they all failed the metal and rubber sections come apart,
have to look at some other way, maybe Sizetenboots method
#40
Crazyfrog (Fab)
-
-
- 22,801 posts
Iceman
- Gender:Not Telling
Posted 20 April 2010 - 11:04 AM
update on my solution to spacing the diffuser
don't bother with the ones I used they all failed the metal and rubber sections come apart,
have to look at some other way, maybe Sizetenboots method
 ...... are you off work nick
in france they are flying in special route at the moment
a real nightmare


1 user(s) are reading this topic
0 members, 1 guests, 0 anonymous users

