Jump to content


Photo

Wiring Led Rear Lights


  • Please log in to reply
369 replies to this topic

#21 -Dab-of-Oppo-

-Dab-of-Oppo-

    Cuntpuffin

  • PipPipPipPipPipPip
  • 3,646 posts
  • Gender:Male
  • Location:Nr. Fordingbridge, Hampshire

Posted 22 April 2012 - 03:02 PM

Done a bit of reading up on the Lotus lights and it would seem there is a lot of ifs and buts to consider. :wacko:

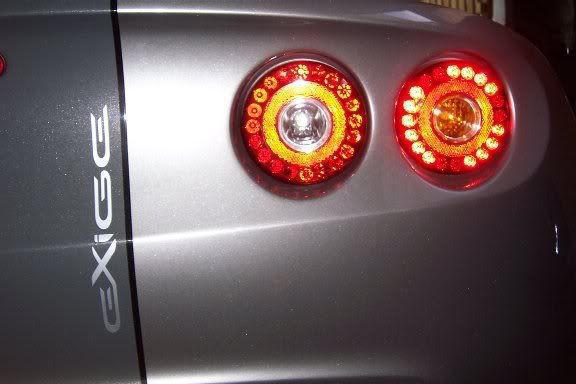
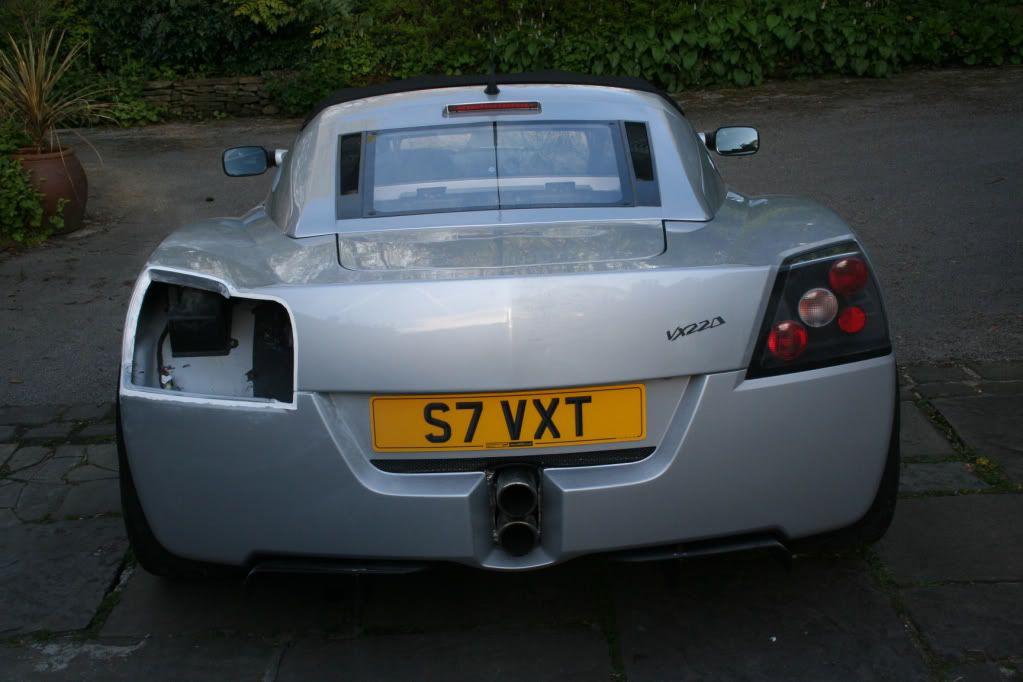
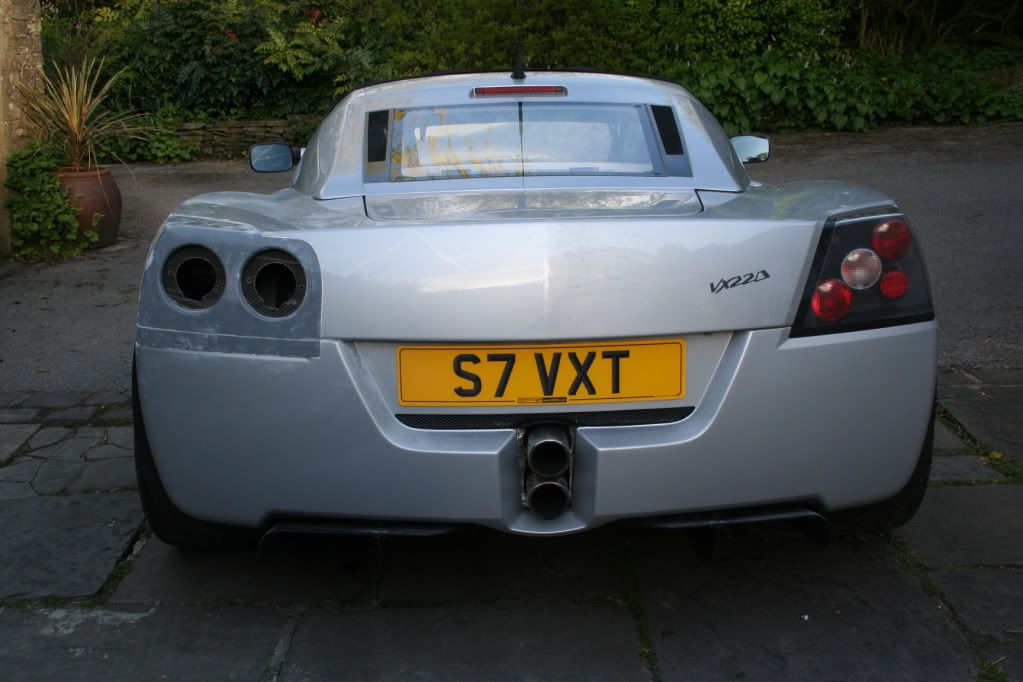
My understanding is that in essence any of them can be directly fitted but if the model number starts with an A then you may have problems with AM radio interference and voltage spikes if you don't fit some additional inductor jump harnesses like these.- http://www.elise-sho...s-p-347811.html

If the model number starts with C and possibly B then these changes should have been integrated inside allready. Even without the said harness the only other possible problems would be with partial dim lighting of the brake lights when the side lights are on and increased chance of one or more individual LED failures within the ring. This is all based on fitment in the variations of the Elise though so our cars may be completly different again. Even when fitted properly there have been several reported failures resulting in this - :(

Posted Image

Just type LED lights in on SELOC and you'll be bombarded with threads discussing this.

These issues and the fact I am not keen in general on tail lights that just get brighter under braking rather than having a seperate dedicated brake light come on is enough to sway me further away from using Lotus units in my own mod.

#22 Darcini

Darcini

    There must be some way outa here

  • PipPipPipPipPipPip
  • 2,508 posts
  • Gender:Male
  • Location:Macclesfield

Posted 22 April 2012 - 06:22 PM

Hmmm, heard there were problems, didn't realise to quite that extent though.
Hopefully I've a good set, part number does start with an A though........
Thanks for the info Dab, much appreciated.
I suppose I have the option of wiring the lights so one unit acts as the tail light and the other as the brake light.


Few pics for clarification

Posted Image
Posted Image

I used an old Thorney clam as the basis for the plug
Posted Image

First pull from the mould, had to add an additional spacer as the lights were sitting too proud
Posted Image

You can see the angle of the lights required to compensate for the curve of the rear clam
Posted Image

#23 techieboy

techieboy

    Supercharger of Doom

  • 22,914 posts
  • Gender:Male
  • Location:Bedford

Posted 22 April 2012 - 06:30 PM

Light units have resistors in by the look of the label as it's talking about 12V.

#24 -Dab-of-Oppo-

-Dab-of-Oppo-

    Cuntpuffin

  • PipPipPipPipPipPip
  • 3,646 posts
  • Gender:Male
  • Location:Nr. Fordingbridge, Hampshire

Posted 22 April 2012 - 06:51 PM


Posted Image


So your going for something like these? I was thinking more having them housed behind the original lenses which I actually like and think suit the car. Personally I'm really not a fan of the filled in body coloured surrounds. Will you be blending them into the clam in silver or keeping a join line and perhaps having a different colour enclosure?

Posted Image

Posted Image

#25 haggi961

haggi961

    1cobrav8 is my god

  • PipPipPipPipPipPipPip
  • 6,003 posts
  • Gender:Male
  • Location:Richmond, N.Yorks
  • Interests:Keeping fit and in shape, and pretty much anything to do with an engine.

Posted 22 April 2012 - 07:06 PM

Looking good that is and everything your doing is exactly what i want to do to mine just havnt had the funds to get it done just yet. its good to see what its all going to look like. Here is where i got my idea for it http://www.lotuscars...styling/rs6.jpg http://www.lotuscars.../rbf/jindra.php

#26 mbes2

mbes2

    Someone say Plasti Dip?

  • PipPipPipPipPipPipPip
  • 8,508 posts
  • Gender:Male
  • Location:Feering, Essex
  • Interests:"Keep it standard"
    "Yes, I built it"

Posted 22 April 2012 - 07:14 PM

This was the one I was thinking of https://fbcdn-sphoto...760027585_o.jpg

#27 -Dab-of-Oppo-

-Dab-of-Oppo-

    Cuntpuffin

  • PipPipPipPipPipPip
  • 3,646 posts
  • Gender:Male
  • Location:Nr. Fordingbridge, Hampshire

Posted 22 April 2012 - 07:16 PM

Looking good that is and everything your doing is exactly what i want to do to mine just havnt had the funds to get it done just yet. its good to see what its all going to look like.
Here is where i got my idea for it
http://www.lotuscars...styling/rs6.jpg
http://www.lotuscars.../rbf/jindra.php

This was the one I was thinking of

https://fbcdn-sphoto...760027585_o.jpg


Yellow and silver car look a mess IMO really like the black ones lights though.

#28 Darcini

Darcini

    There must be some way outa here

  • PipPipPipPipPipPip
  • 2,508 posts
  • Gender:Male
  • Location:Macclesfield

Posted 22 April 2012 - 07:39 PM

The black cars lights look to be almost surface mounted, suspect they will be pointed outwards at an odd angle, the opposite to crossed eyes whatever that is called. Look I'm going for is pretty much as the pic of the original clam, along with the lower cut outs should avoid the rather slabby look of some of the other examples, all IMHO of course. So as Techie pointed out, the 12v would indicate that resistors are an intrinsic part of the units, so that's a positive. Cheers all.

#29 Darcini

Darcini

    There must be some way outa here

  • PipPipPipPipPipPip
  • 2,508 posts
  • Gender:Male
  • Location:Macclesfield

Posted 13 May 2012 - 09:50 PM

Quick update, suspect I've passed the point of no return :o
Posted Image

Trial fit, ready for bonding in and filling
Posted Image

Not sure what will be best for bonding, tiger seal or similar might be a bit too flexible
Posted Image

#30 Bumblebee

Bumblebee

    .....

  • PipPipPipPipPipPipPip
  • 7,592 posts
  • Gender:Female
  • Location:York

Posted 13 May 2012 - 09:54 PM

These would look nice as some one mentioned with the lense cover over the top

#31 haggi961

haggi961

    1cobrav8 is my god

  • PipPipPipPipPipPipPip
  • 6,003 posts
  • Gender:Male
  • Location:Richmond, N.Yorks
  • Interests:Keeping fit and in shape, and pretty much anything to do with an engine.

Posted 13 May 2012 - 09:55 PM

I appraise you for having the balls to do this but i think you have made the right move as that is going to look the dog bollocks when done. Could you not of left the old brackets to bolt them in with.

Edited by haggi961, 13 May 2012 - 10:02 PM.


#32 CocoPops

CocoPops

    SuperCharged Karting Super Hero

  • 17,177 posts
  • Gender:Male
  • Location:Thatcham, Berks

Posted 13 May 2012 - 09:56 PM

Liking your work so far thumbsup

#33 Bumblebee

Bumblebee

    .....

  • PipPipPipPipPipPipPip
  • 7,592 posts
  • Gender:Female
  • Location:York

Posted 13 May 2012 - 10:00 PM

http://thumbsnap.com/5PCFf5oE http://thumbsnap.com/xpYNOLYi?src=tsd

#34 haggi961

haggi961

    1cobrav8 is my god

  • PipPipPipPipPipPipPip
  • 6,003 posts
  • Gender:Male
  • Location:Richmond, N.Yorks
  • Interests:Keeping fit and in shape, and pretty much anything to do with an engine.

Posted 13 May 2012 - 10:09 PM

Might be worth asking this guy to see how he has fixed his in http://www.vx220.org...bre-taillights/

#35 Darcini

Darcini

    There must be some way outa here

  • PipPipPipPipPipPip
  • 2,508 posts
  • Gender:Male
  • Location:Macclesfield

Posted 13 May 2012 - 10:14 PM

Have to remove the existing bracket behind the original light as the recesses for the new lights foul it, they extend inwards more than you think. Look carefully and you'll see the two new lights (or at least you will when they are in) are quite a bit wider than the oem unit/cover so wouldn't work like that. :)

#36 techieboy

techieboy

    Supercharger of Doom

  • 22,914 posts
  • Gender:Male
  • Location:Bedford

Posted 13 May 2012 - 10:16 PM

The carbon fibre direct replacement units look crap anyway. If it has to be done, then your way is the neatest and most OEM looking way to do it. thumbsup Fookin brave though. :wacko:

Edited by techieboy, 13 May 2012 - 10:17 PM.


#37 haggi961

haggi961

    1cobrav8 is my god

  • PipPipPipPipPipPipPip
  • 6,003 posts
  • Gender:Male
  • Location:Richmond, N.Yorks
  • Interests:Keeping fit and in shape, and pretty much anything to do with an engine.

Posted 13 May 2012 - 10:20 PM

Right i see. Are you going to get the lights smoothed into the clam then sprayed all the same colour or are you leaving the the shape of the light unit.

#38 Darcini

Darcini

    There must be some way outa here

  • PipPipPipPipPipPip
  • 2,508 posts
  • Gender:Male
  • Location:Macclesfield

Posted 13 May 2012 - 10:21 PM

Fookin brave though. :wacko:


Must admit there was quite a bit of sphincter twitch when I went in with the Dremmel.....

#39 Bumblebee

Bumblebee

    .....

  • PipPipPipPipPipPipPip
  • 7,592 posts
  • Gender:Female
  • Location:York

Posted 13 May 2012 - 10:21 PM

I'm looking forward to the final result :)

#40 Darcini

Darcini

    There must be some way outa here

  • PipPipPipPipPipPip
  • 2,508 posts
  • Gender:Male
  • Location:Macclesfield

Posted 13 May 2012 - 10:22 PM

Right i see. Are you going to get the lights smoothed into the clam then sprayed all the same colour or are you leaving the the shape of the light unit.


Smoothed and sprayed the body colour :thumbsup:


0 user(s) are reading this topic

0 members, 0 guests, 0 anonymous users