Brand new one ready to go on  (if I ever get around to starting this
  , or more importantly, I am actually capable of finishing it)

Diy Sos
Started by
sworks
, Apr 18 2014 06:31 PM
289 replies to this topic
#21

sworks
-
-

- 1,564 posts
Billy No Mates
- Location:Kent
Posted 15 May 2014 - 01:57 PM
#22
fezzasus
-

-
- 7,689 posts
Whipping Boy
- Gender:Male
- Location:Oxford
Posted 15 May 2014 - 02:03 PM
You can do it, it's easy really. I casually did one a couple of weekends ago in 30 hours or so. start to finish.
#23
sworks
-
-
- 1,564 posts
Billy No Mates
- Location:Kent
Posted 15 May 2014 - 02:05 PM
I would imagine your spannering skills are a little better than mine Tom
Fancy casually doing mine then  Only kidding. Pretty sure I have a good idea, just need to ask some questions from time to time that's all
#24
fezzasus
-
-
- 7,689 posts
Whipping Boy
- Gender:Male
- Location:Oxford
Posted 15 May 2014 - 02:09 PM
all I'd say is:
1. Make sure the bolts at the bottom of the boot come out
2. Strip all the loom tape off the wiring loom and locate the connectors where you want them, you'll see you only need to extend five wires in total (three injectors one on the MAP, one on the fuel vent). Just cutting and extending without seeing if there's enough length already will introduce more points of potential failure.
#25
sworks
-
-
- 1,564 posts
Billy No Mates
- Location:Kent
Posted 15 May 2014 - 02:12 PM
Thanks mate
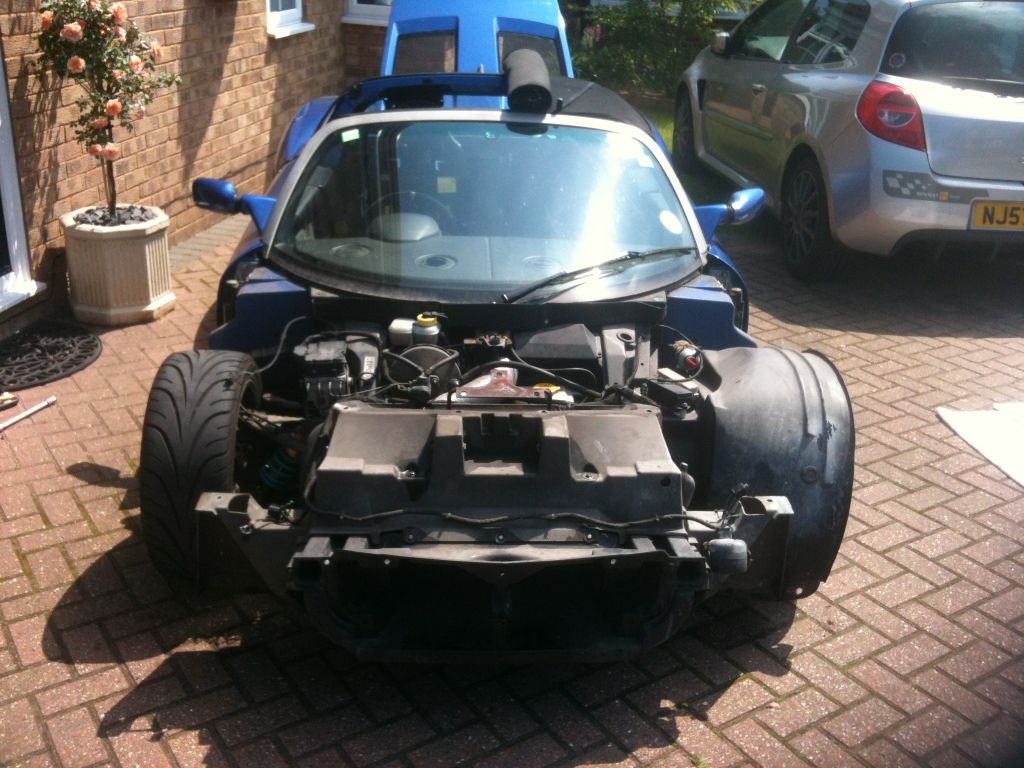
Had the clam off a few times, so hoping all bolts should come out fairly easily. Going to sort the CC and pipe work this weekend and hopefully do it in stages.
Think I have just about every guide and image printed off in a folder ready, as am prepared
#26
sworks
-
-
- 1,564 posts
Billy No Mates
- Location:Kent
Posted 18 May 2014 - 04:24 PM
Relatively productive day, despite some stubborn bolts. Had to cut these off, including the the two at the front and bottom of the clam (the bolts that screw in horizontally towards the outside of the car). For anyone that has had to cut these (the plate they screw into was spinning, so next to useless) how did you re-secure these when the clam goes back on?
#27
fezzasus
-
-
- 7,689 posts
Whipping Boy
- Gender:Male
- Location:Oxford
Posted 19 May 2014 - 07:23 AM
Jack nuts.
#28
FLD
-

-
- 13,717 posts
WANNABE MY LOVER
- Gender:Male
- Location:Near nantwich
- Interests:Tugging my todger.
#29
sworks
-
-
- 1,564 posts
Billy No Mates
- Location:Kent
Posted 19 May 2014 - 08:24 AM
Perfect thanks. Assume these work in a similar way to cavity fixings for plasterboard walls!?
#30
Steve.i.am
-

-
- 990 posts
Need to get Out More
- Gender:Male
- Location:Sussex
- Interests:Bends
Posted 19 May 2014 - 08:24 AM
I put a dayco belt on mine. Now done 3000 miles no problems at all.
#31
sworks
-
-
- 1,564 posts
Billy No Mates
- Location:Kent
Posted 19 May 2014 - 08:47 AM
Thanks Steve. 
Guess they are all much of a muchness. Pretty much consumable items at their price anyway
#32
sworks
-
-
- 1,564 posts
Billy No Mates
- Location:Kent
Posted 01 June 2014 - 11:22 AM
Any hints or tips for getting the 3 bolts/screws out that hold the rad surround to the crash box (the 3 that are closest the windscreen): 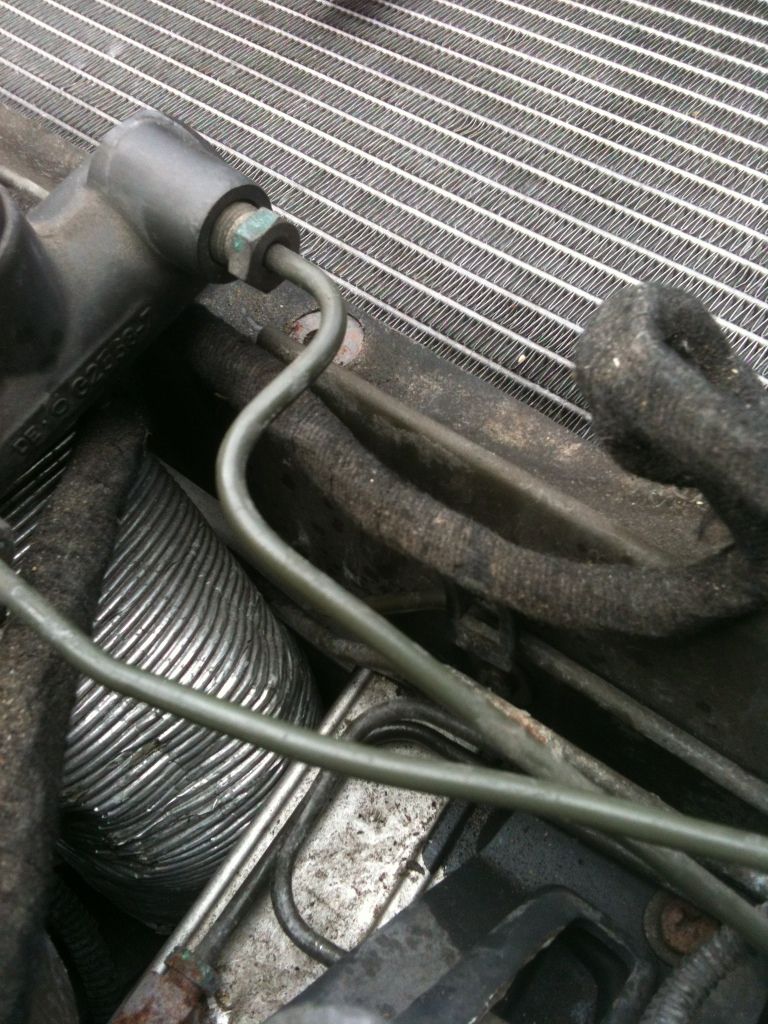
The one on the offside is virtually impossible to get at due to brake lines (and some bright spark thought Phillips headed bolt was a good idea)
Thanks
The one on the offside is virtually impossible to get at due to brake lines (and some bright spark thought Phillips headed bolt was a good idea)
Thanks
#33
fezzasus
-
-
- 7,689 posts
Whipping Boy
- Gender:Male
- Location:Oxford
Posted 01 June 2014 - 11:36 AM
Small ratchet with a philips head.
#34
sworks
-
-
- 1,564 posts
Billy No Mates
- Location:Kent
Posted 01 June 2014 - 11:42 AM
That's what I'm trying. Brake lines make one of them impossible to get at. Will just keep trying i guess.
Cheers
#35
fezzasus
-
-
- 7,689 posts
Whipping Boy
- Gender:Male
- Location:Oxford
Posted 01 June 2014 - 11:45 AM
The bolts go into c clips so worst case you can dremel them off.
I didn't refit the one under the brake servo because life's too short.
#36
sworks
-
-
- 1,564 posts
Billy No Mates
- Location:Kent
Posted 01 June 2014 - 12:30 PM
Cheers Tom. Dremel has been out and put to good use. Just no way of getting a cutting disk anyway near the pain bolt.
#37
Steve.i.am
-
-
- 990 posts
Need to get Out More
- Gender:Male
- Location:Sussex
- Interests:Bends
Posted 01 June 2014 - 01:10 PM
Had same problem. I dremelled the c clip in half and undid it by turning that. Didn't put that bolt back in on re-assembly either.
#38
fezzasus
-
-
- 7,689 posts
Whipping Boy
- Gender:Male
- Location:Oxford
Posted 01 June 2014 - 01:11 PM
Just had a look at mine, assuming you're working using the same halfords kit as most people you'll need the small ratchet, small extension bar, adaptor for the screw heads and a large cross head. That should do it.
#39
fezzasus
-
-
- 7,689 posts
Whipping Boy
- Gender:Male
- Location:Oxford
Posted 01 June 2014 - 01:11 PM
and probably a tea while the penetrating oil does its job.
#40
sworks
-
-
- 1,564 posts
Billy No Mates
- Location:Kent
Posted 01 June 2014 - 01:27 PM
Dremel, hacksaw, sharp chisel, a mallet and a little swearing et voila (the bugger is most definitely not going back on!!!!!): 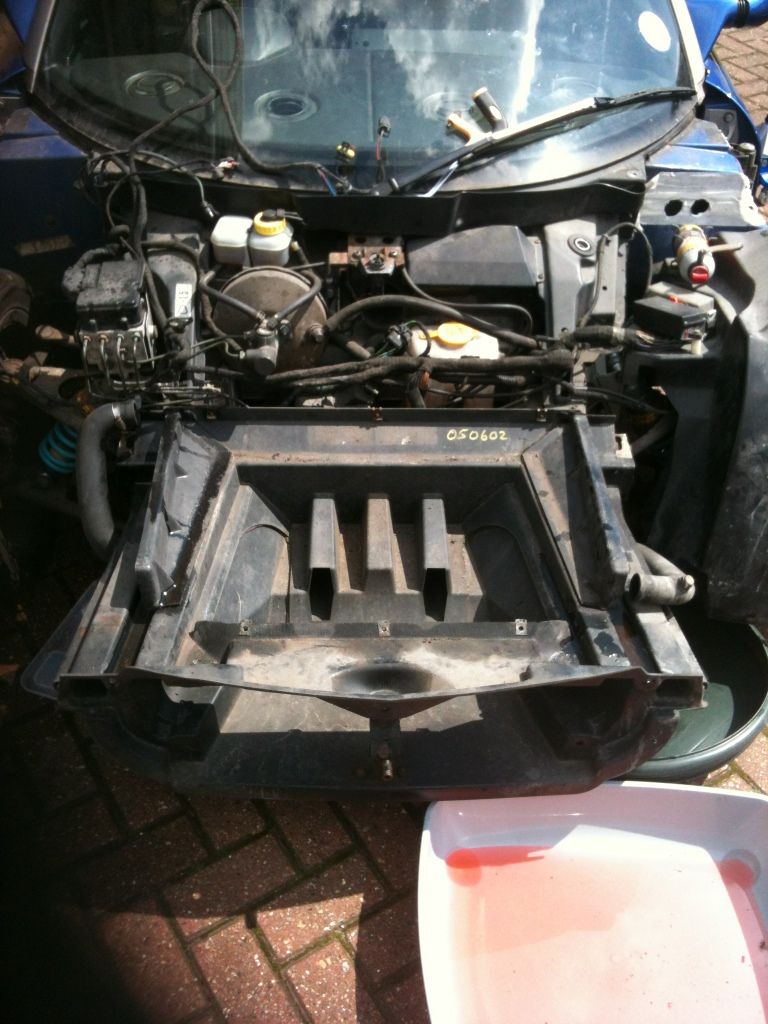


4 user(s) are reading this topic
0 members, 4 guests, 0 anonymous users

