Jump to content


Photo

Project Fracas - 6Sp A20Nft


  • Please log in to reply
1266 replies to this topic

#481 Doctor Ed

Doctor Ed

    Need to get Out More

  • PipPipPipPip
  • 1,188 posts
  • Location:Germany

Posted 03 September 2016 - 04:23 PM

So I've had a bit of a rough time finding a steering hub for this thing, particularly as TÜV is rather particular with stuff like this, so I needed it all to be above board. Matching hub and wheel with the right serial numbers, and associated certifications etc. this is the TÜV certification link for momo stuff if anyone cares:

http://www.der-graue...en/kba70142.pdf

Now everyone talks about the vx being a Corsa B setup, so looking at that cert above, that would be a 6607 hub. Now it's probably worth noting that every single damn Vauxhaull of the late 90s runs a 6605 hub, and the Corsa B is literally the only model which uses the 6607.

But I thought I'd trust the crowd and go for the Corsa B unit...

...doesn't work

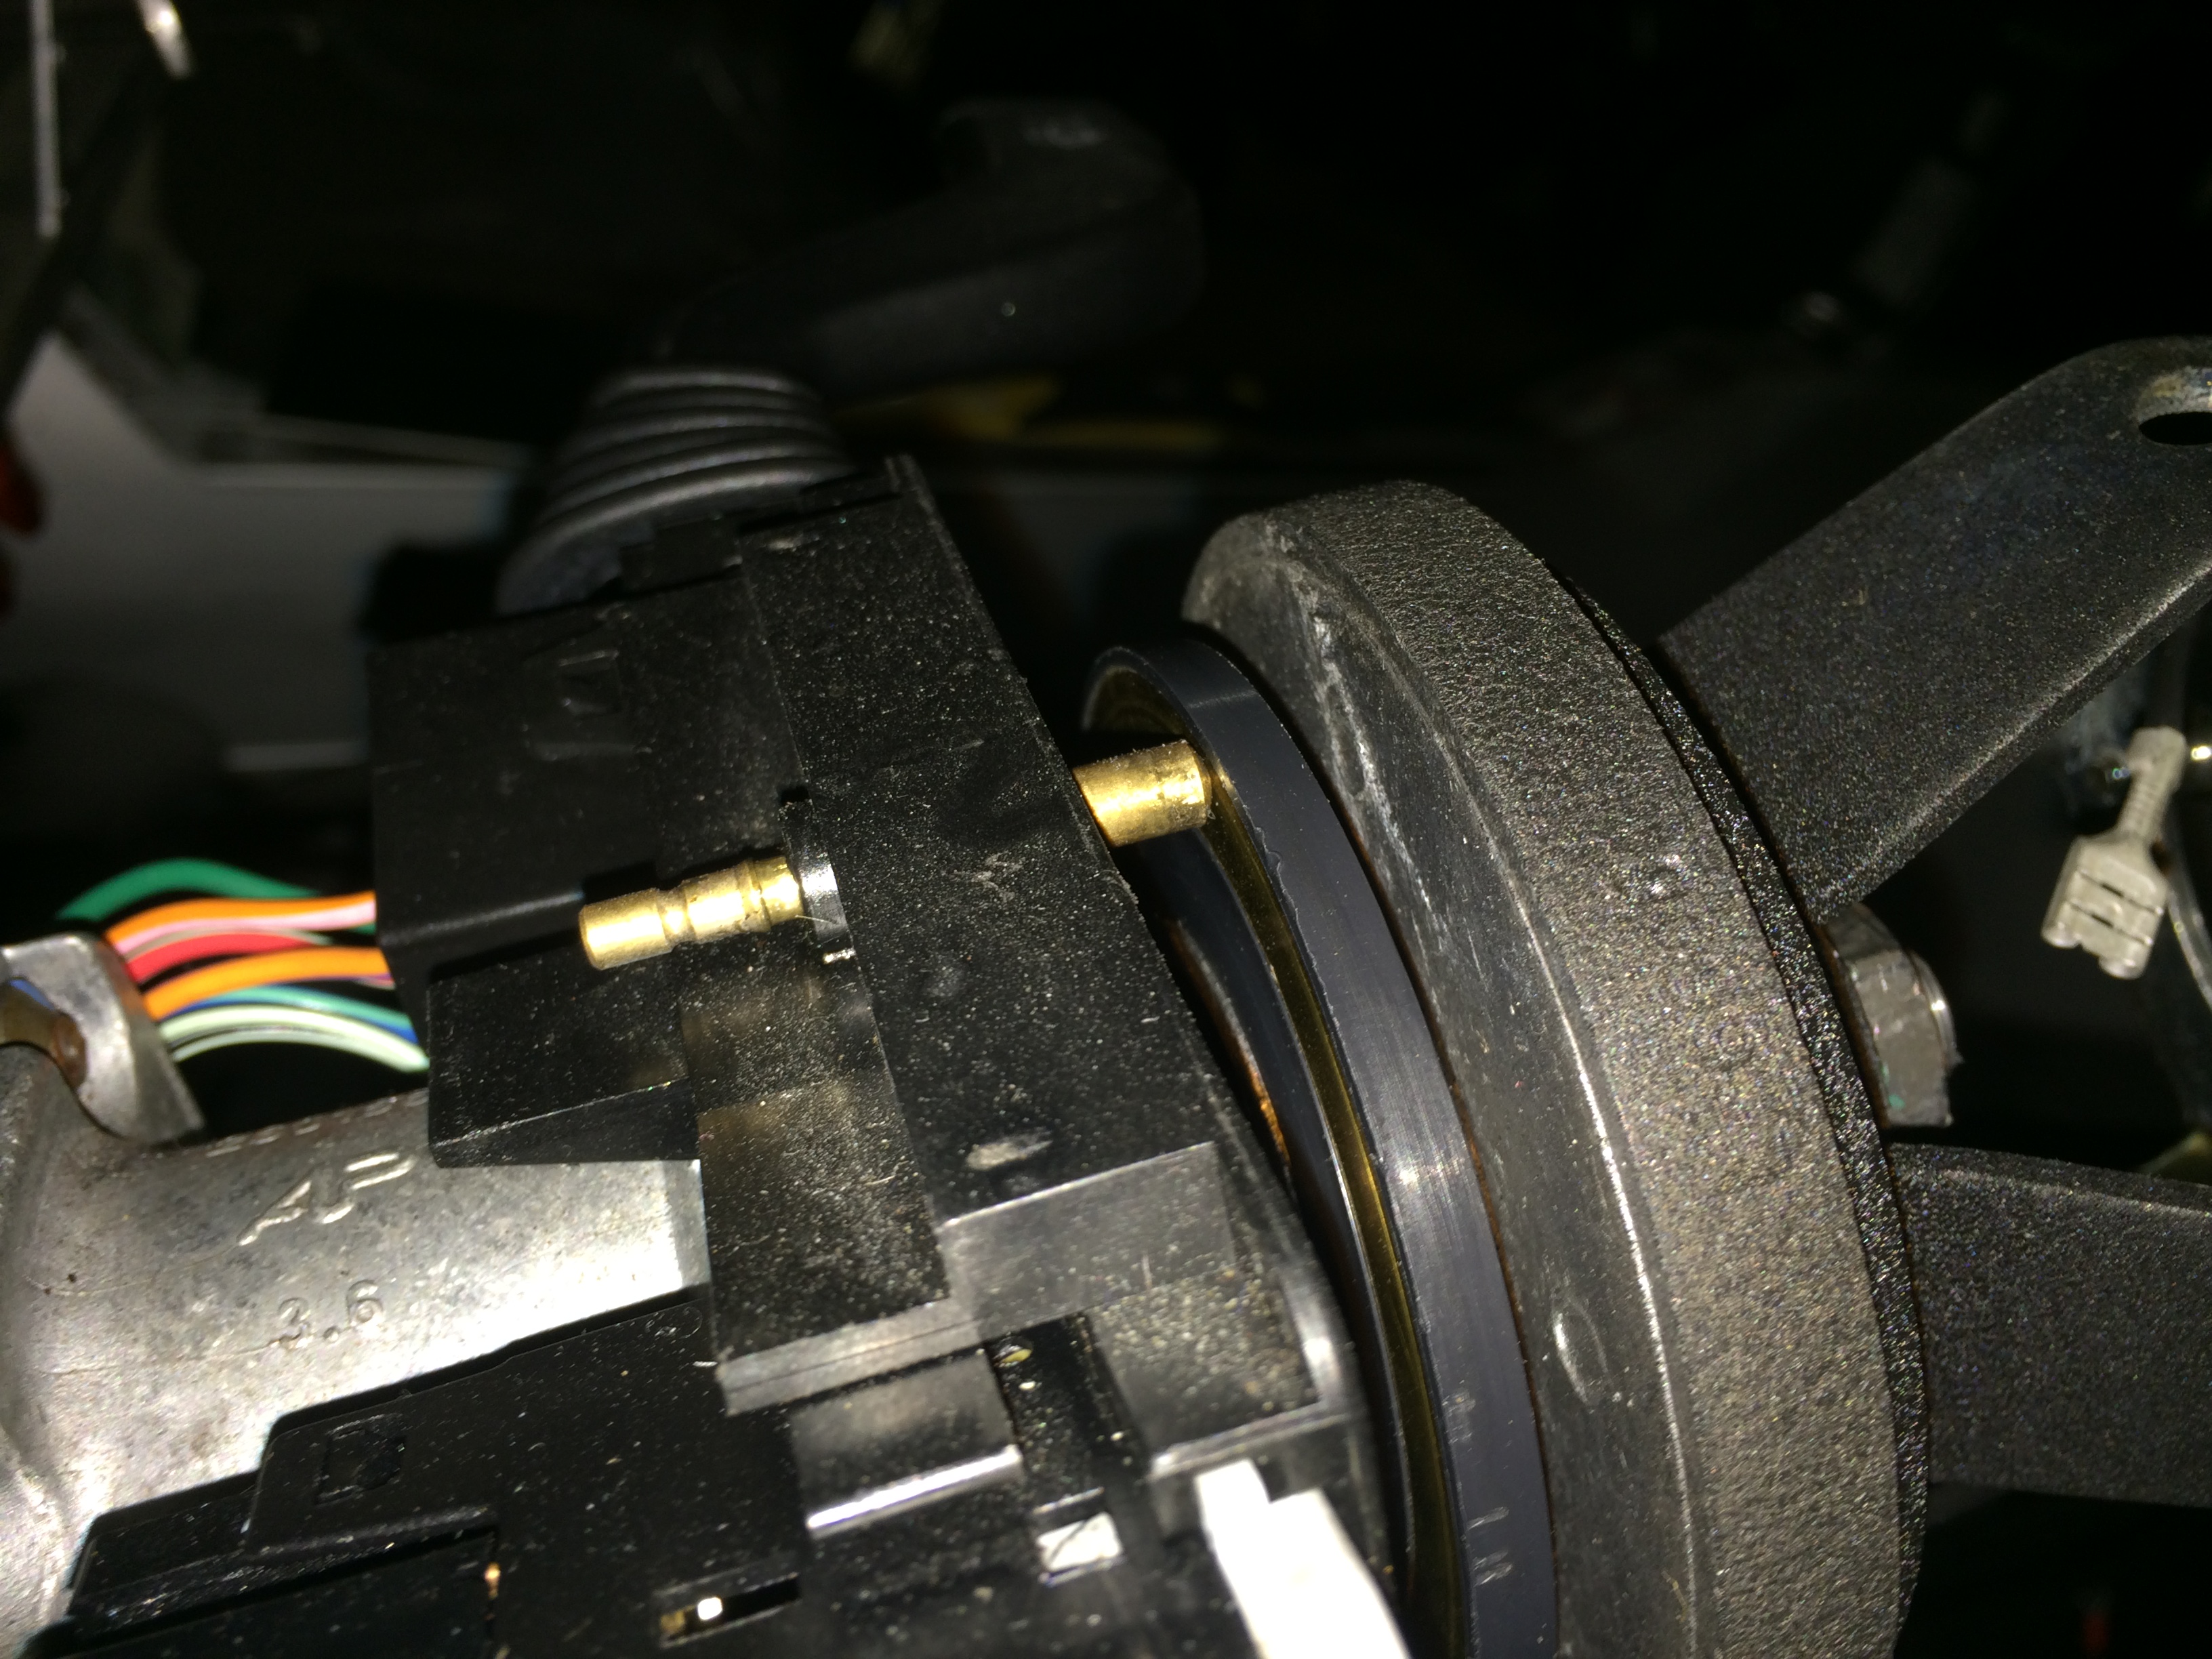
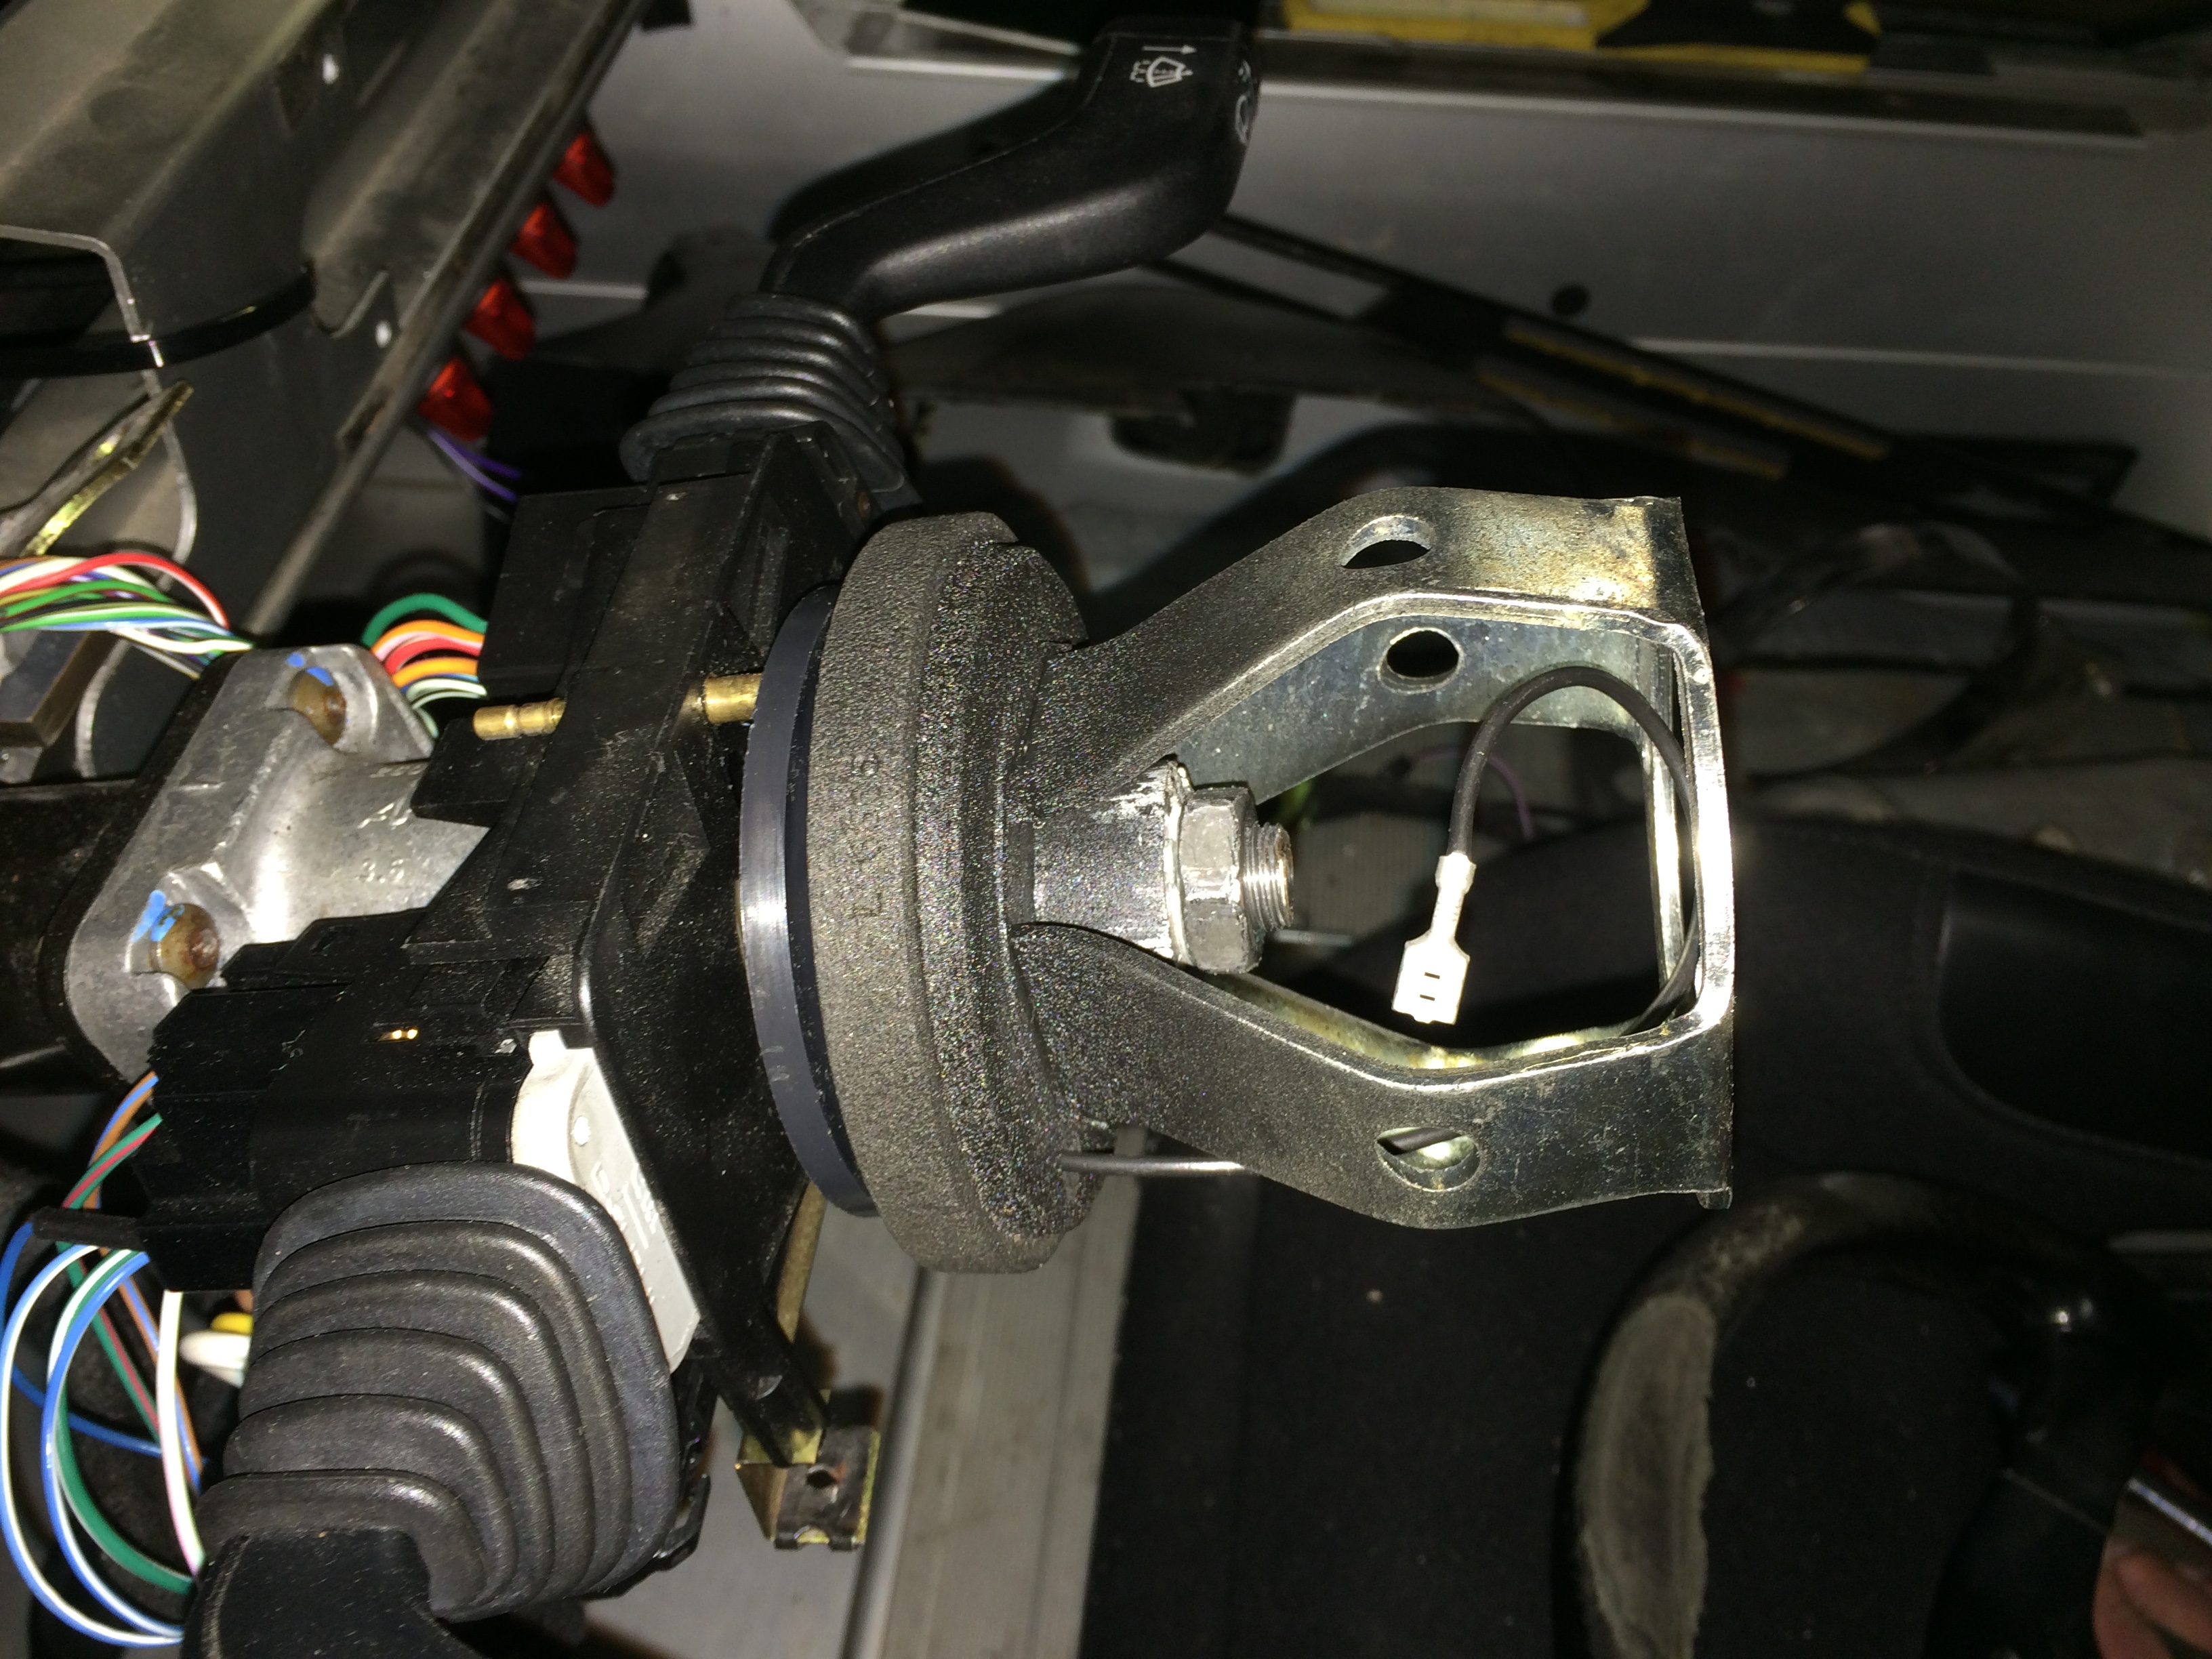
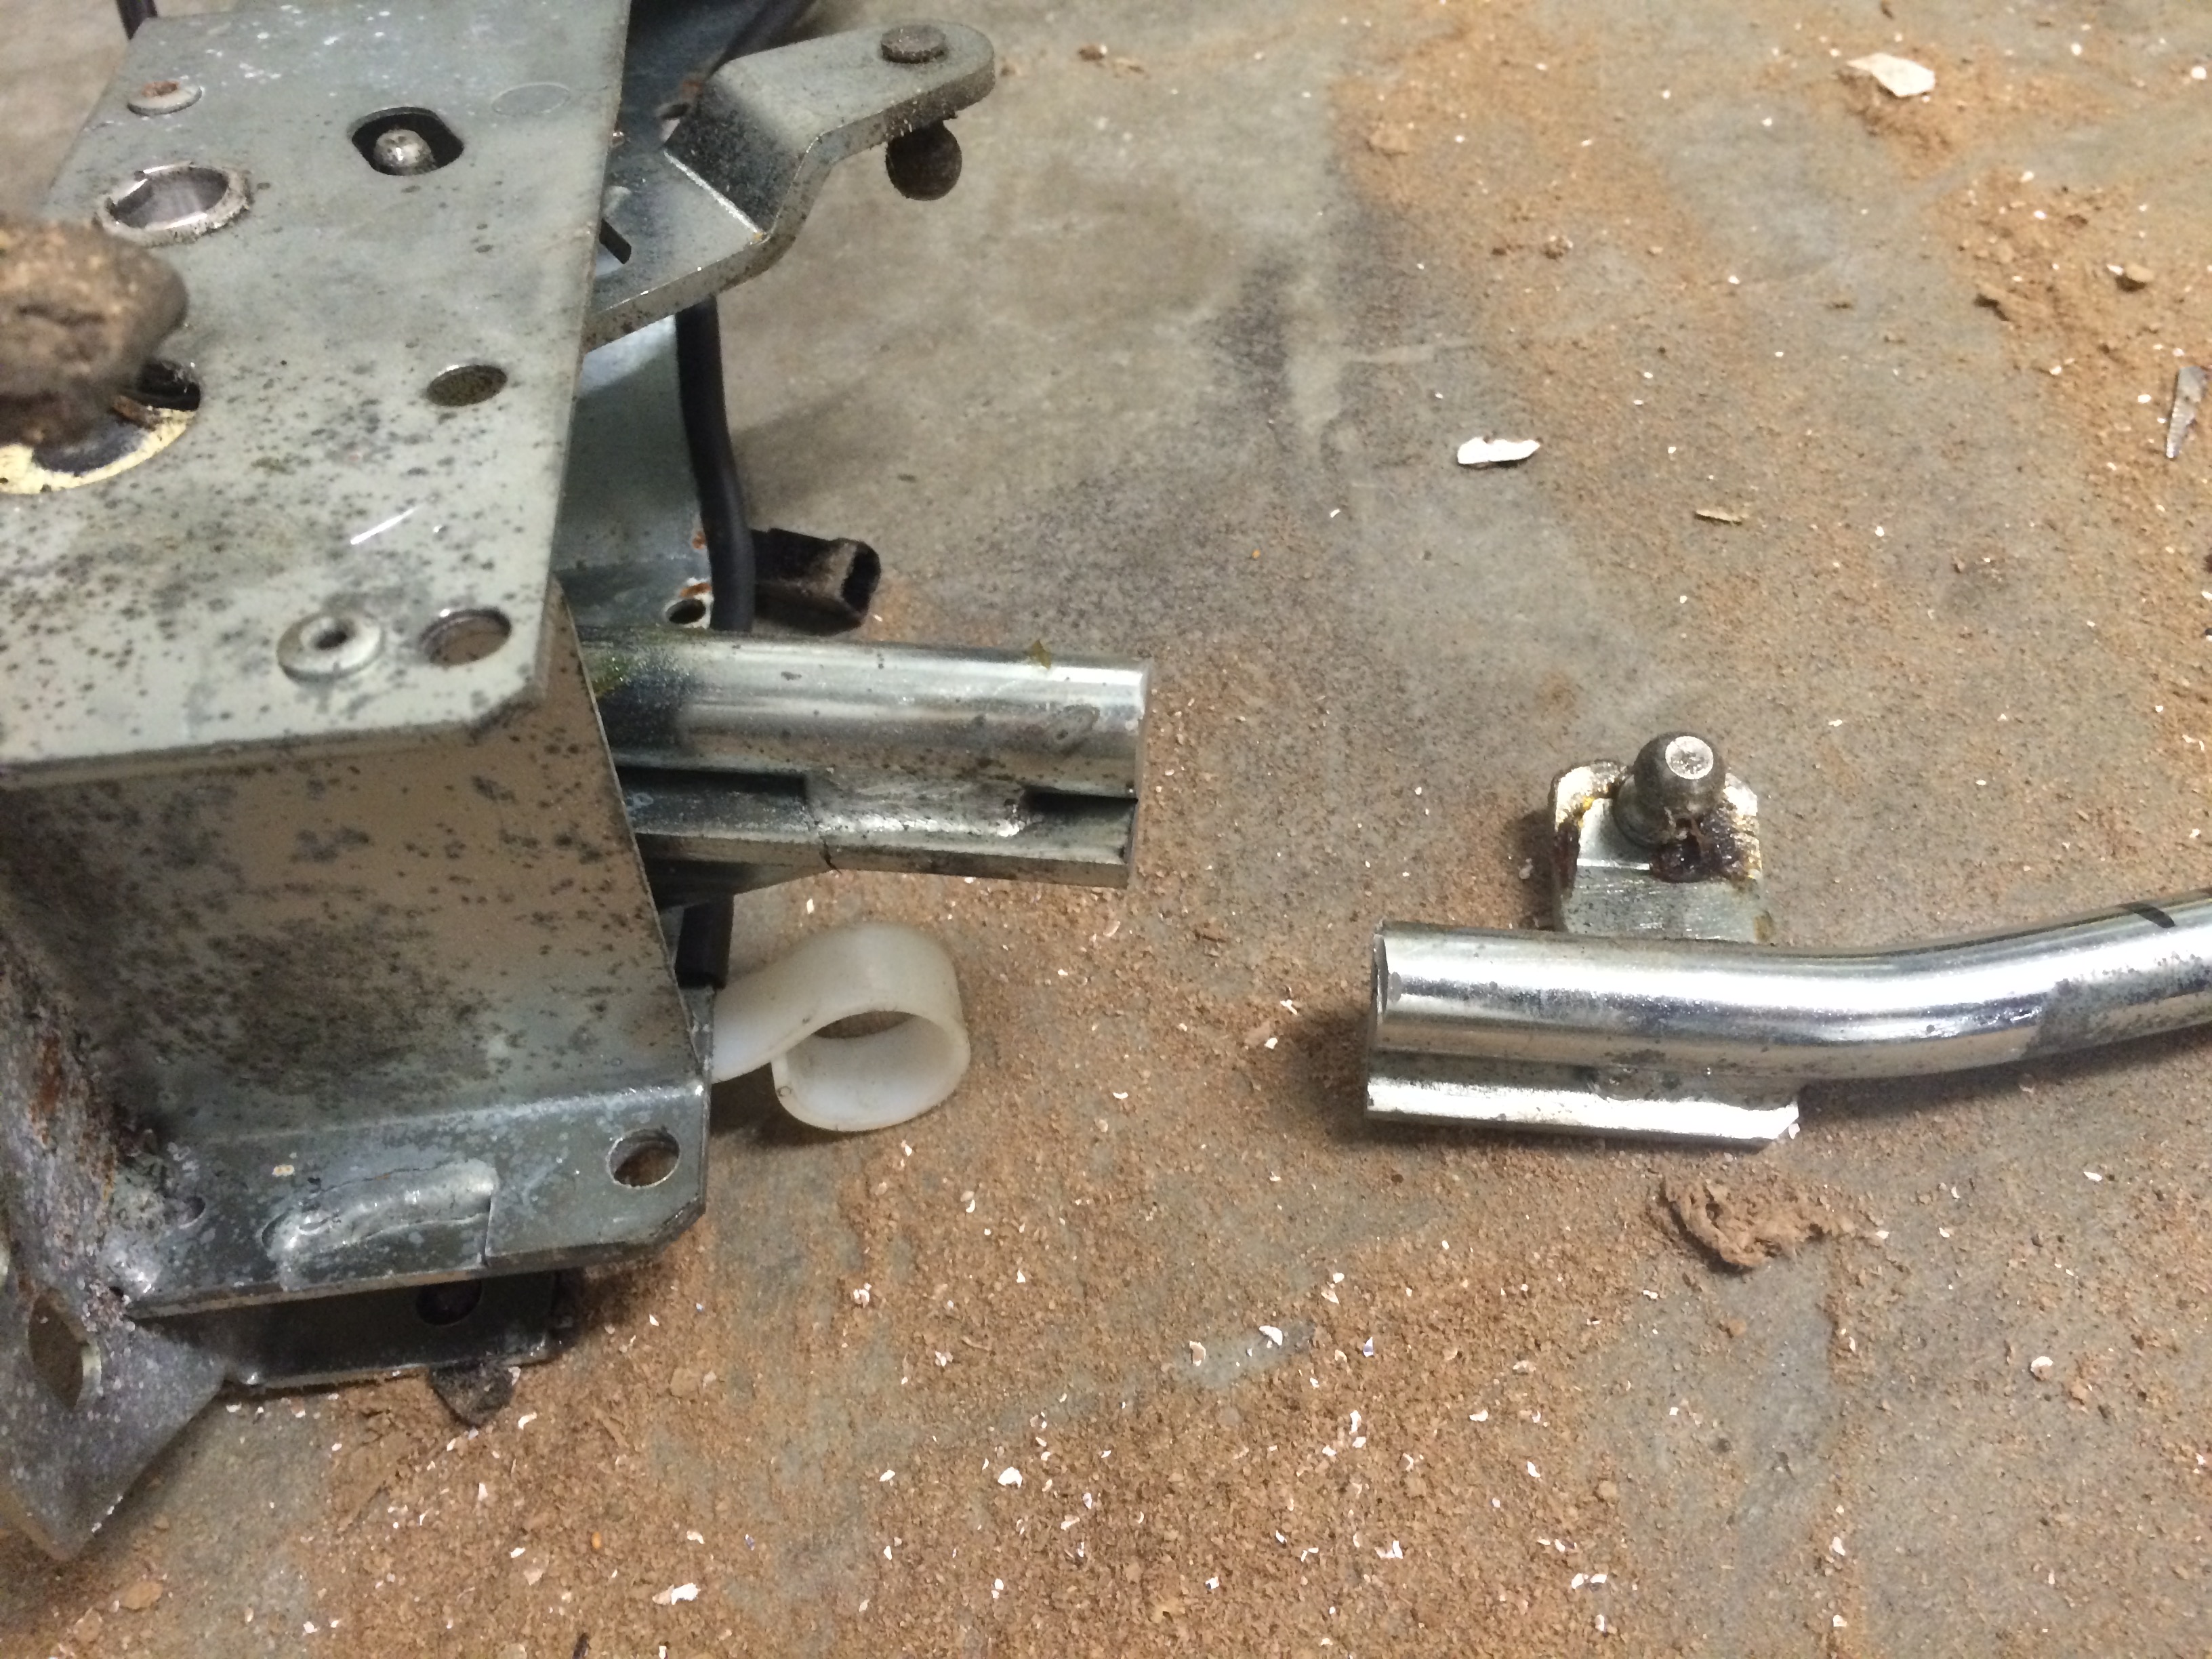
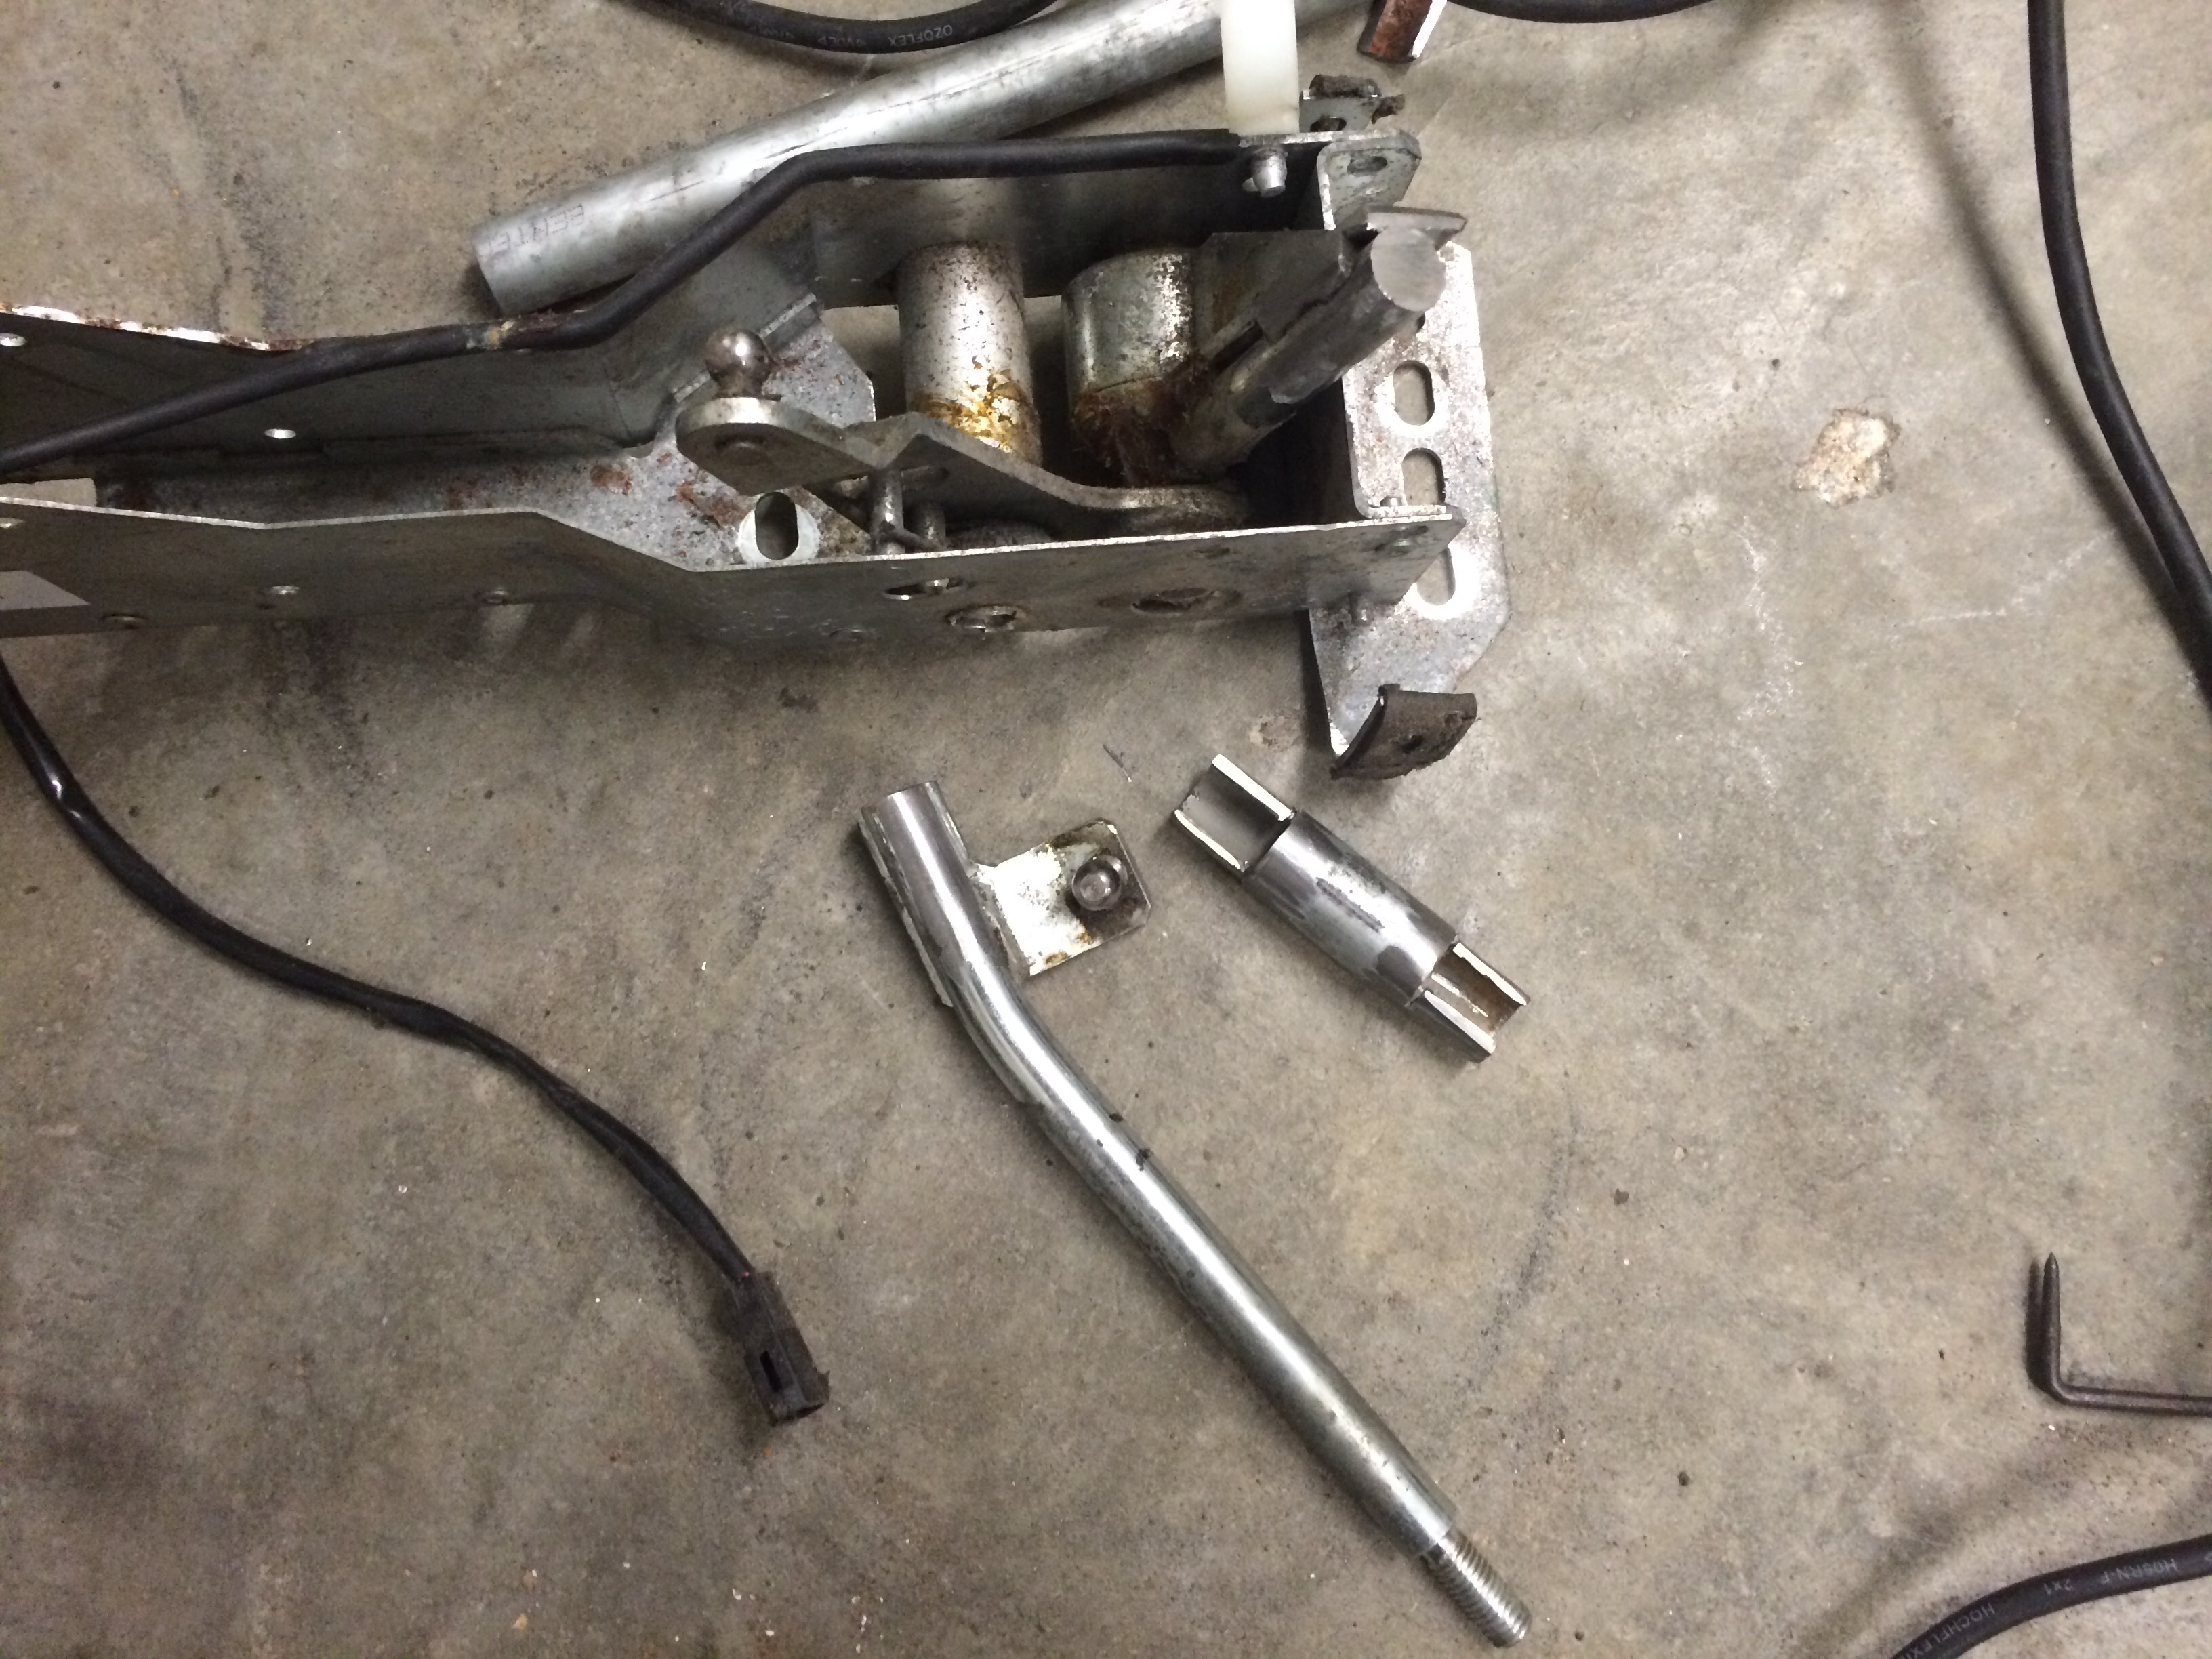
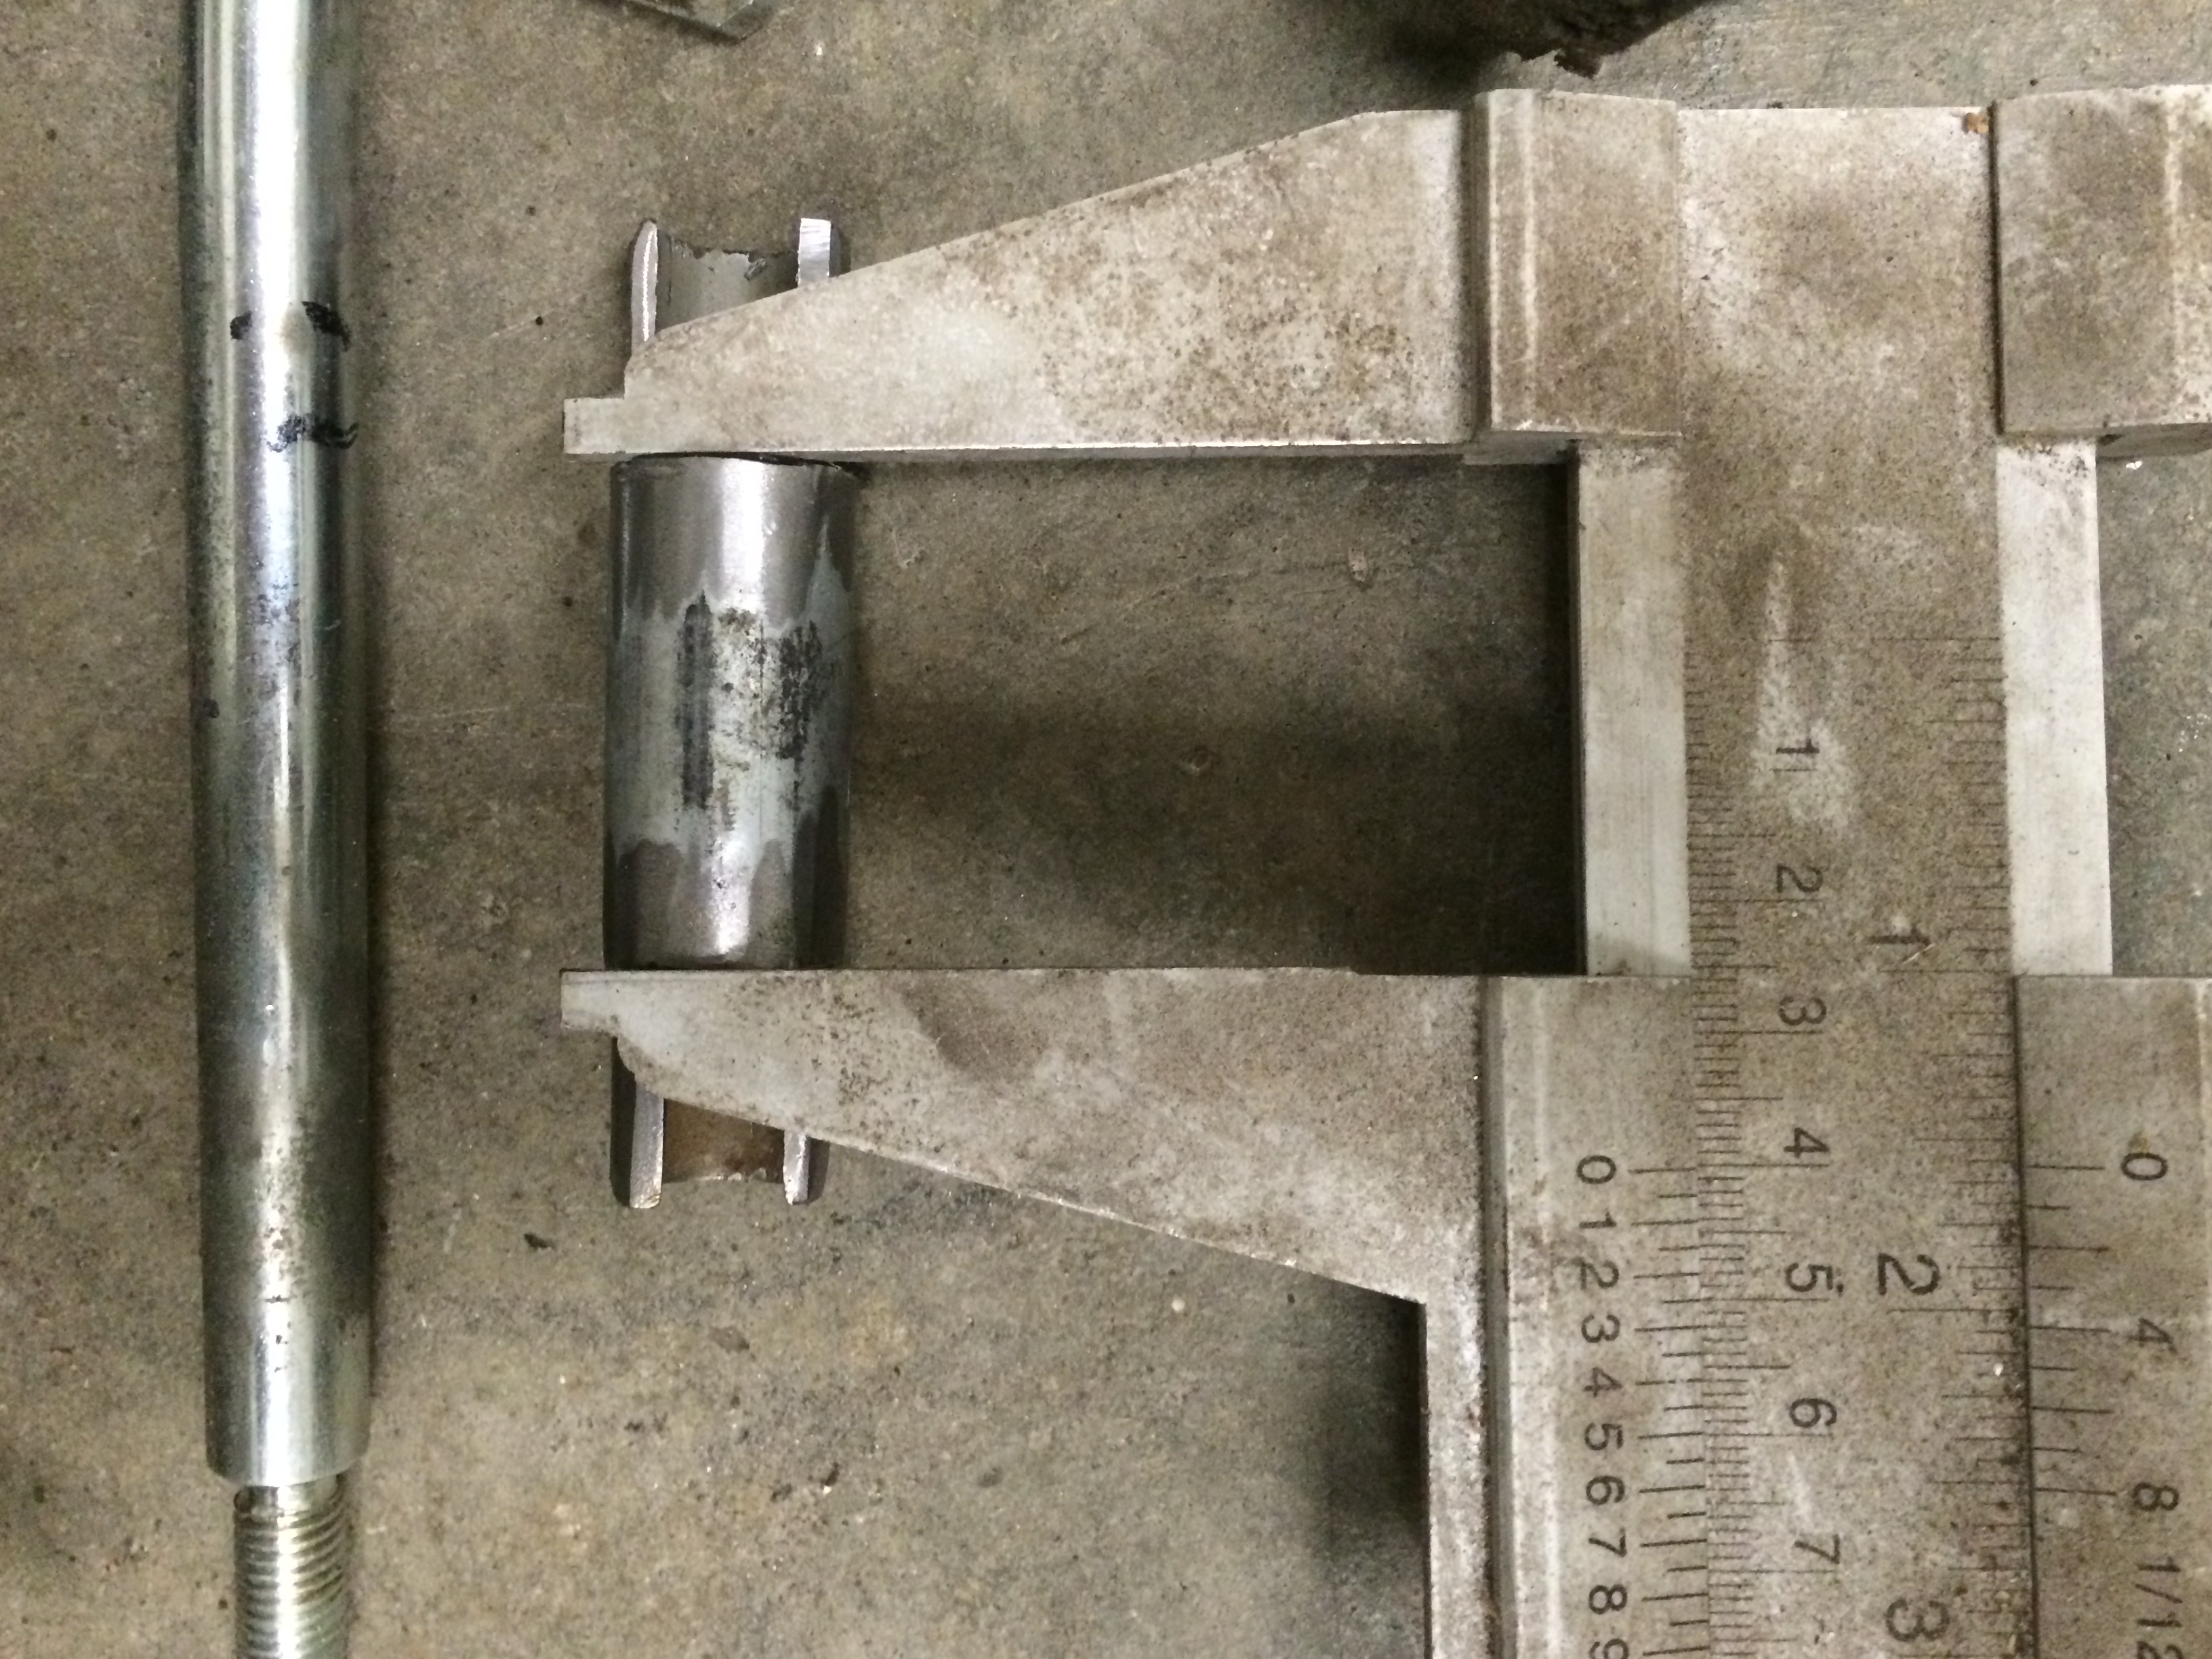
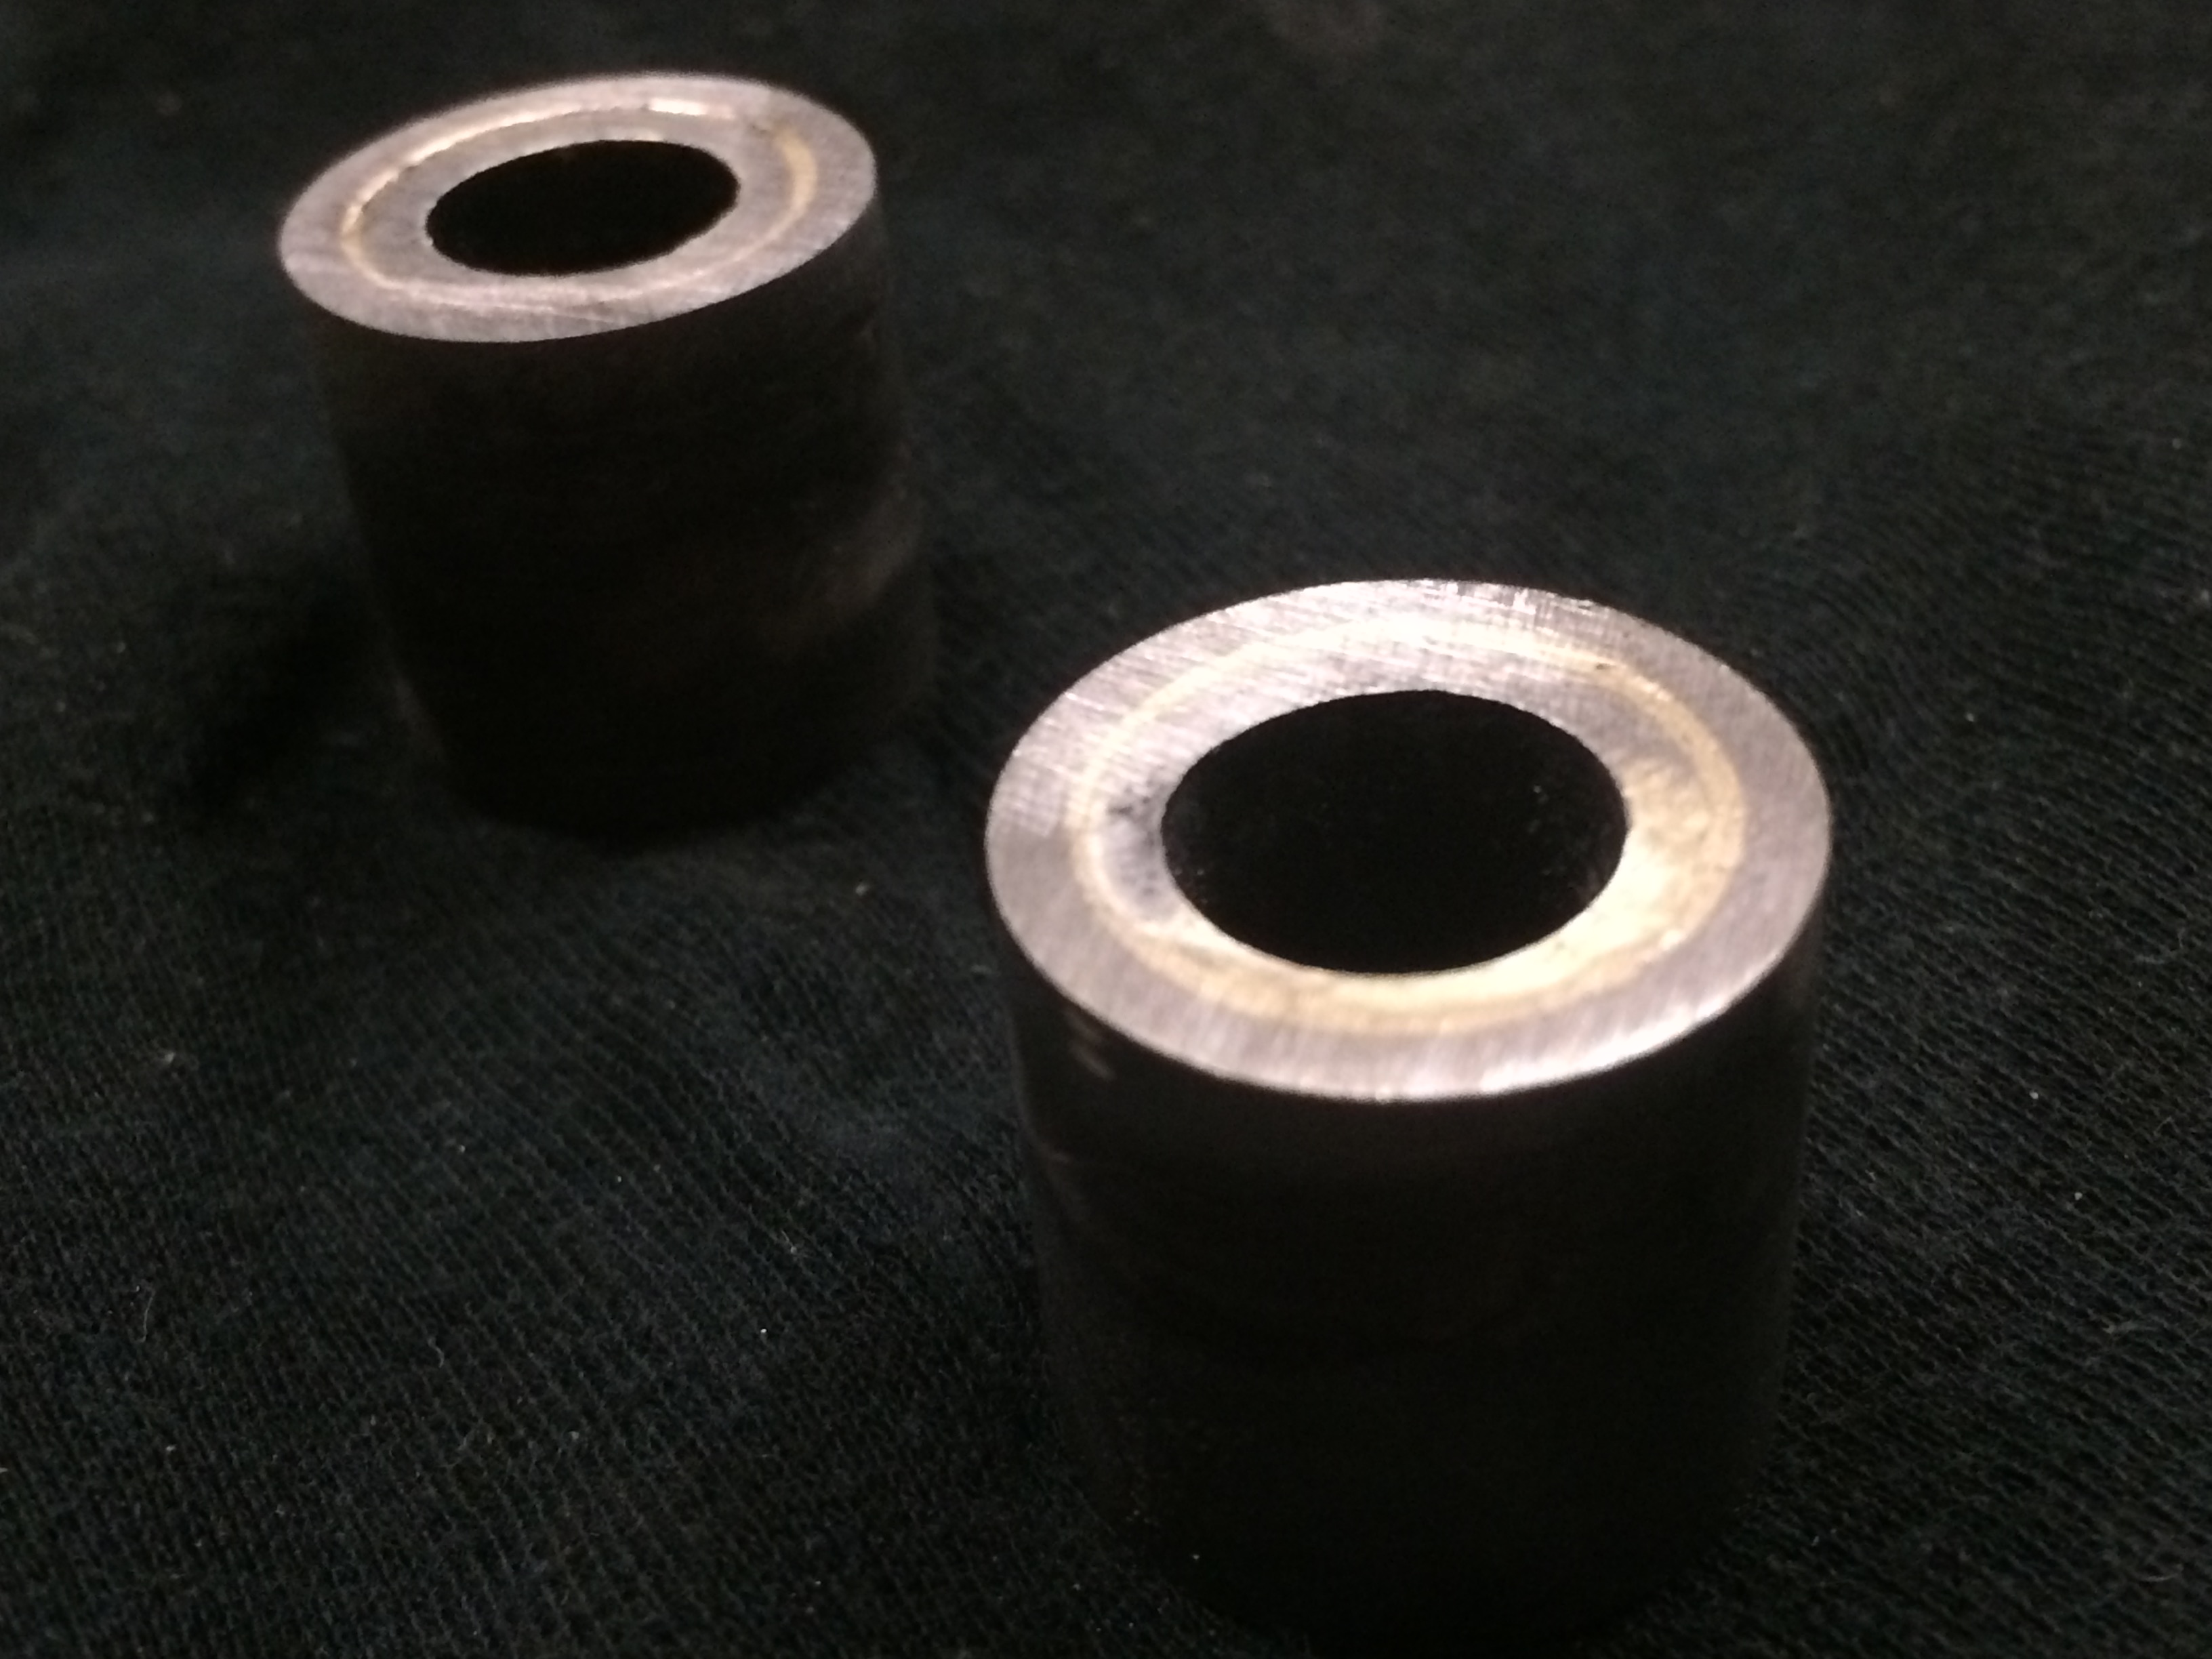
Basically the indicator cancel tab on the 6607 is too short to reach the mechanism. So I stumped up and bought a 6605 hub. Lo-and-behold this sucker fits and works just fine. So 6605, for a Corsa A/C or practically any other Vauxhaull of the period. (L or C prefix signifies a medium or long hub, I got the L6605)

Posted Image

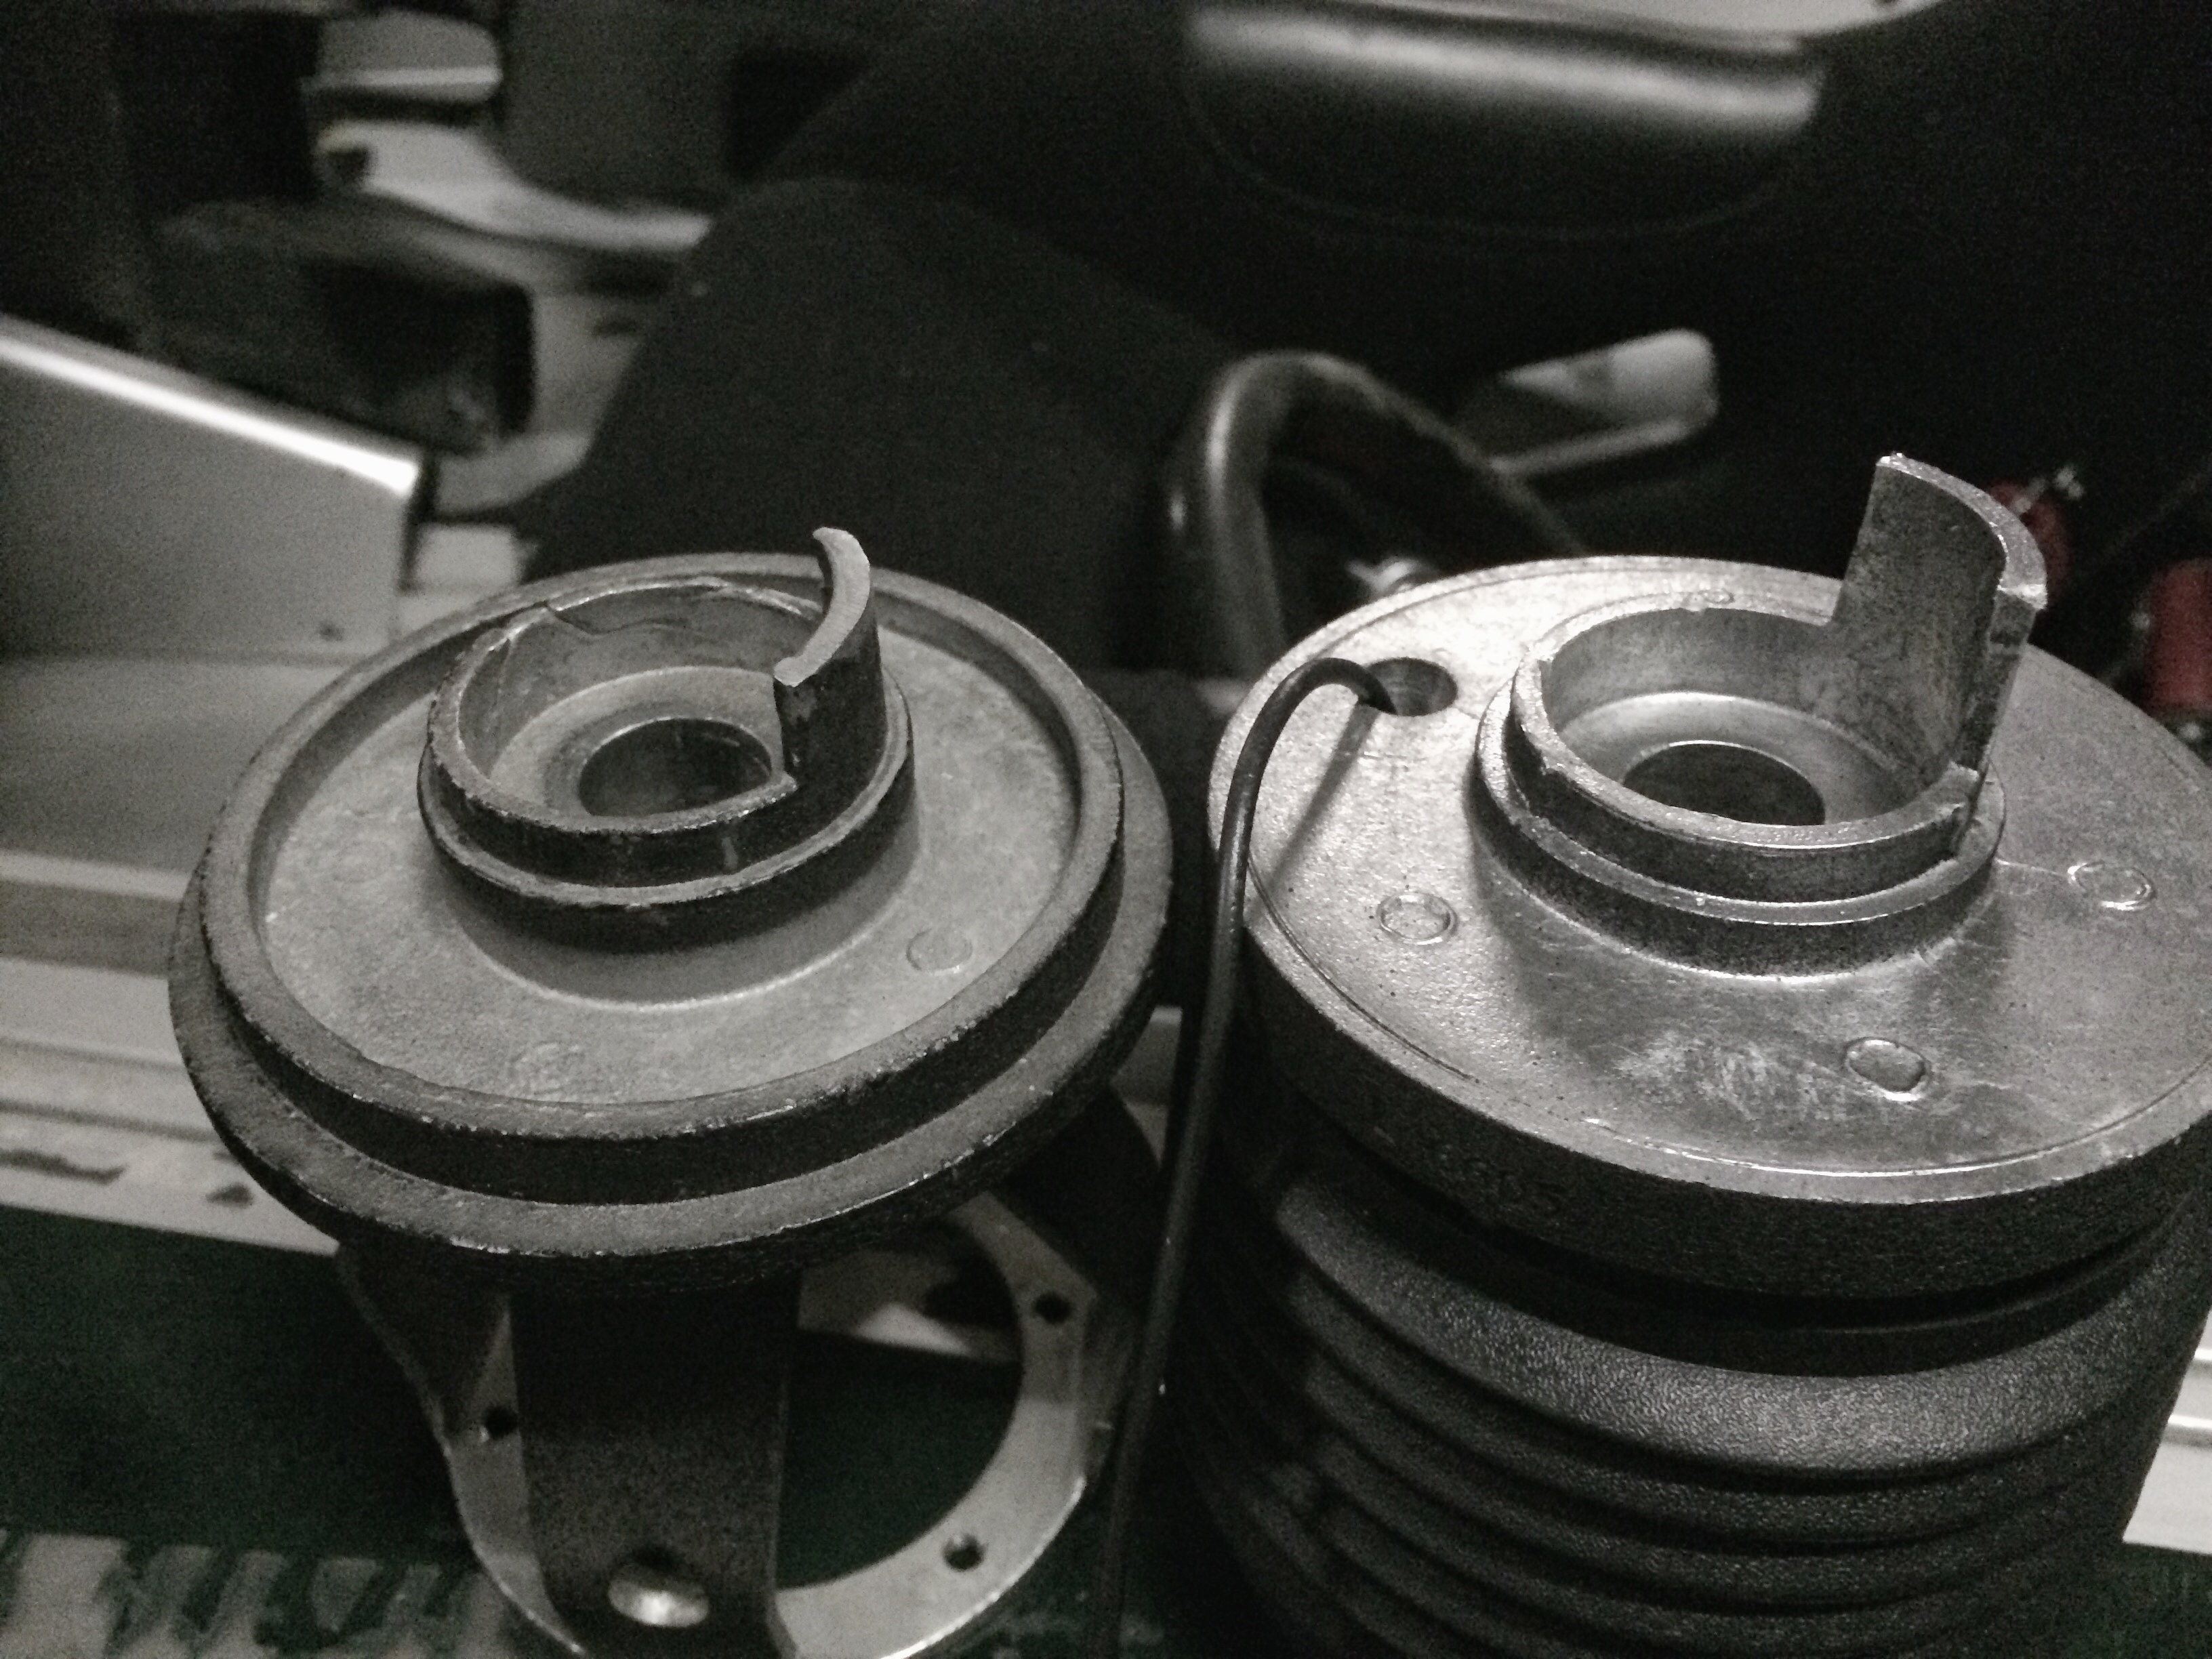
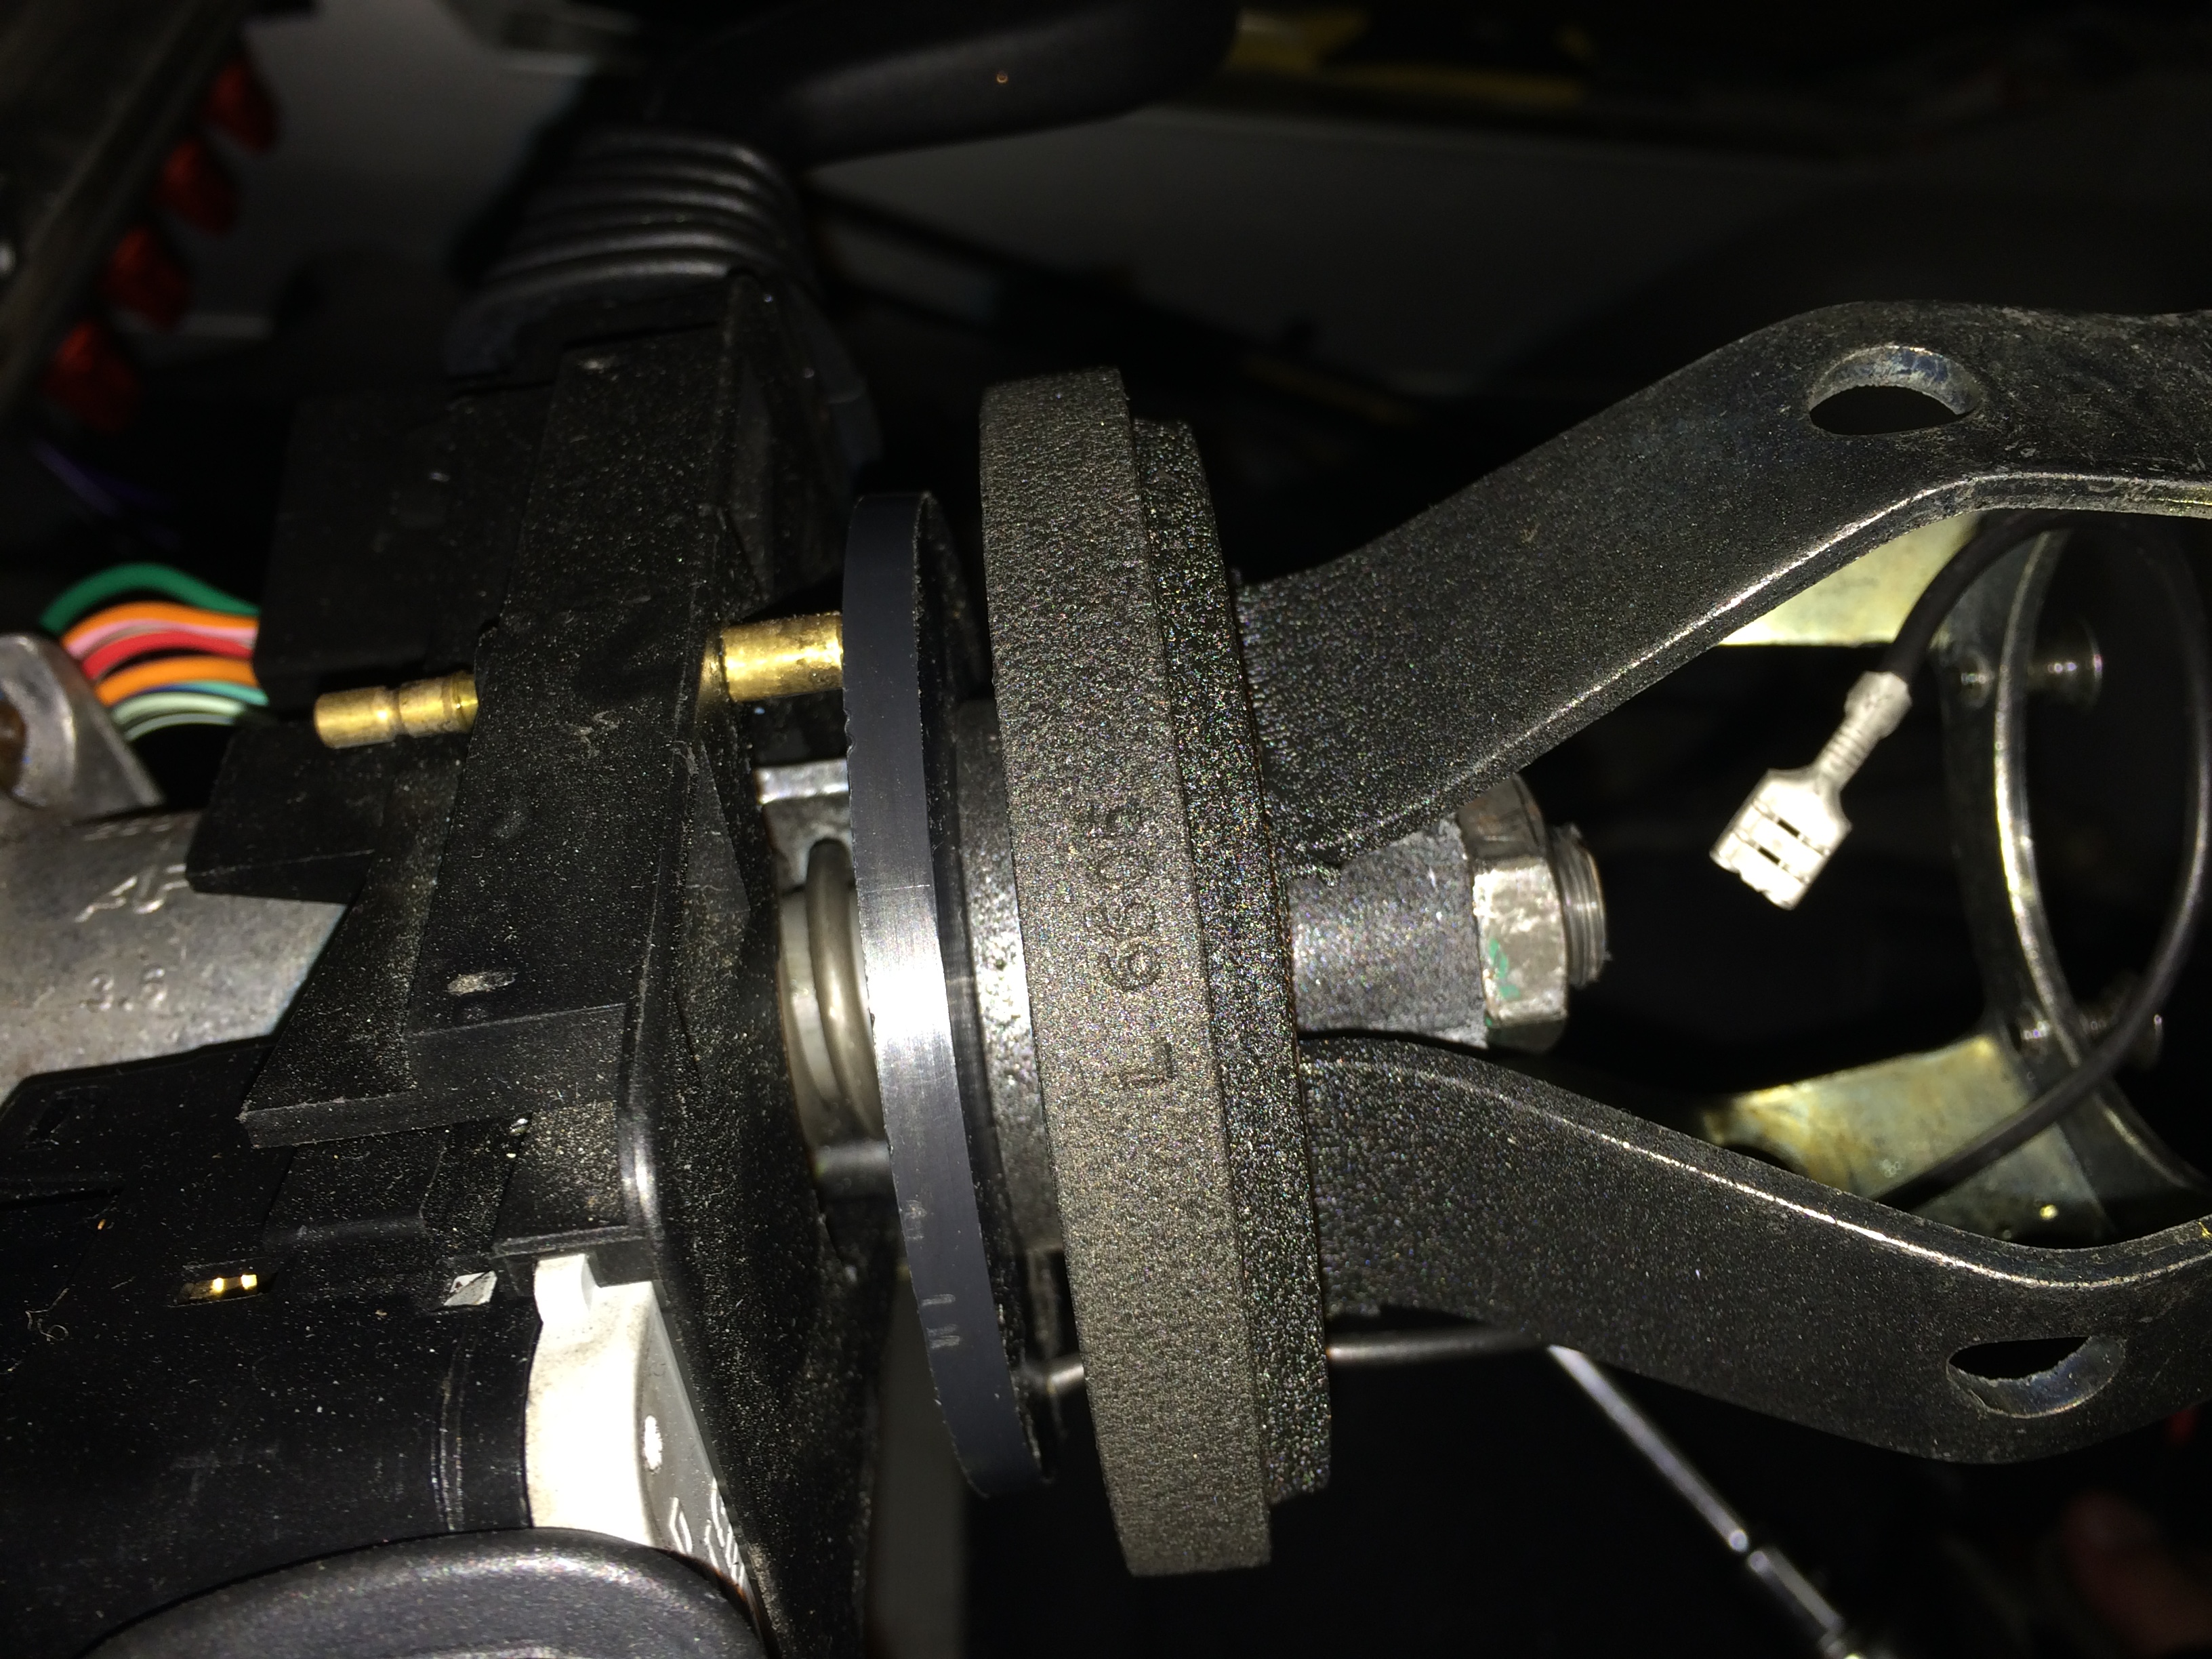
above - 6607 on left. 6605 on right. The 6607 has the shorter indicator tab, and doesn't reach the mechanism

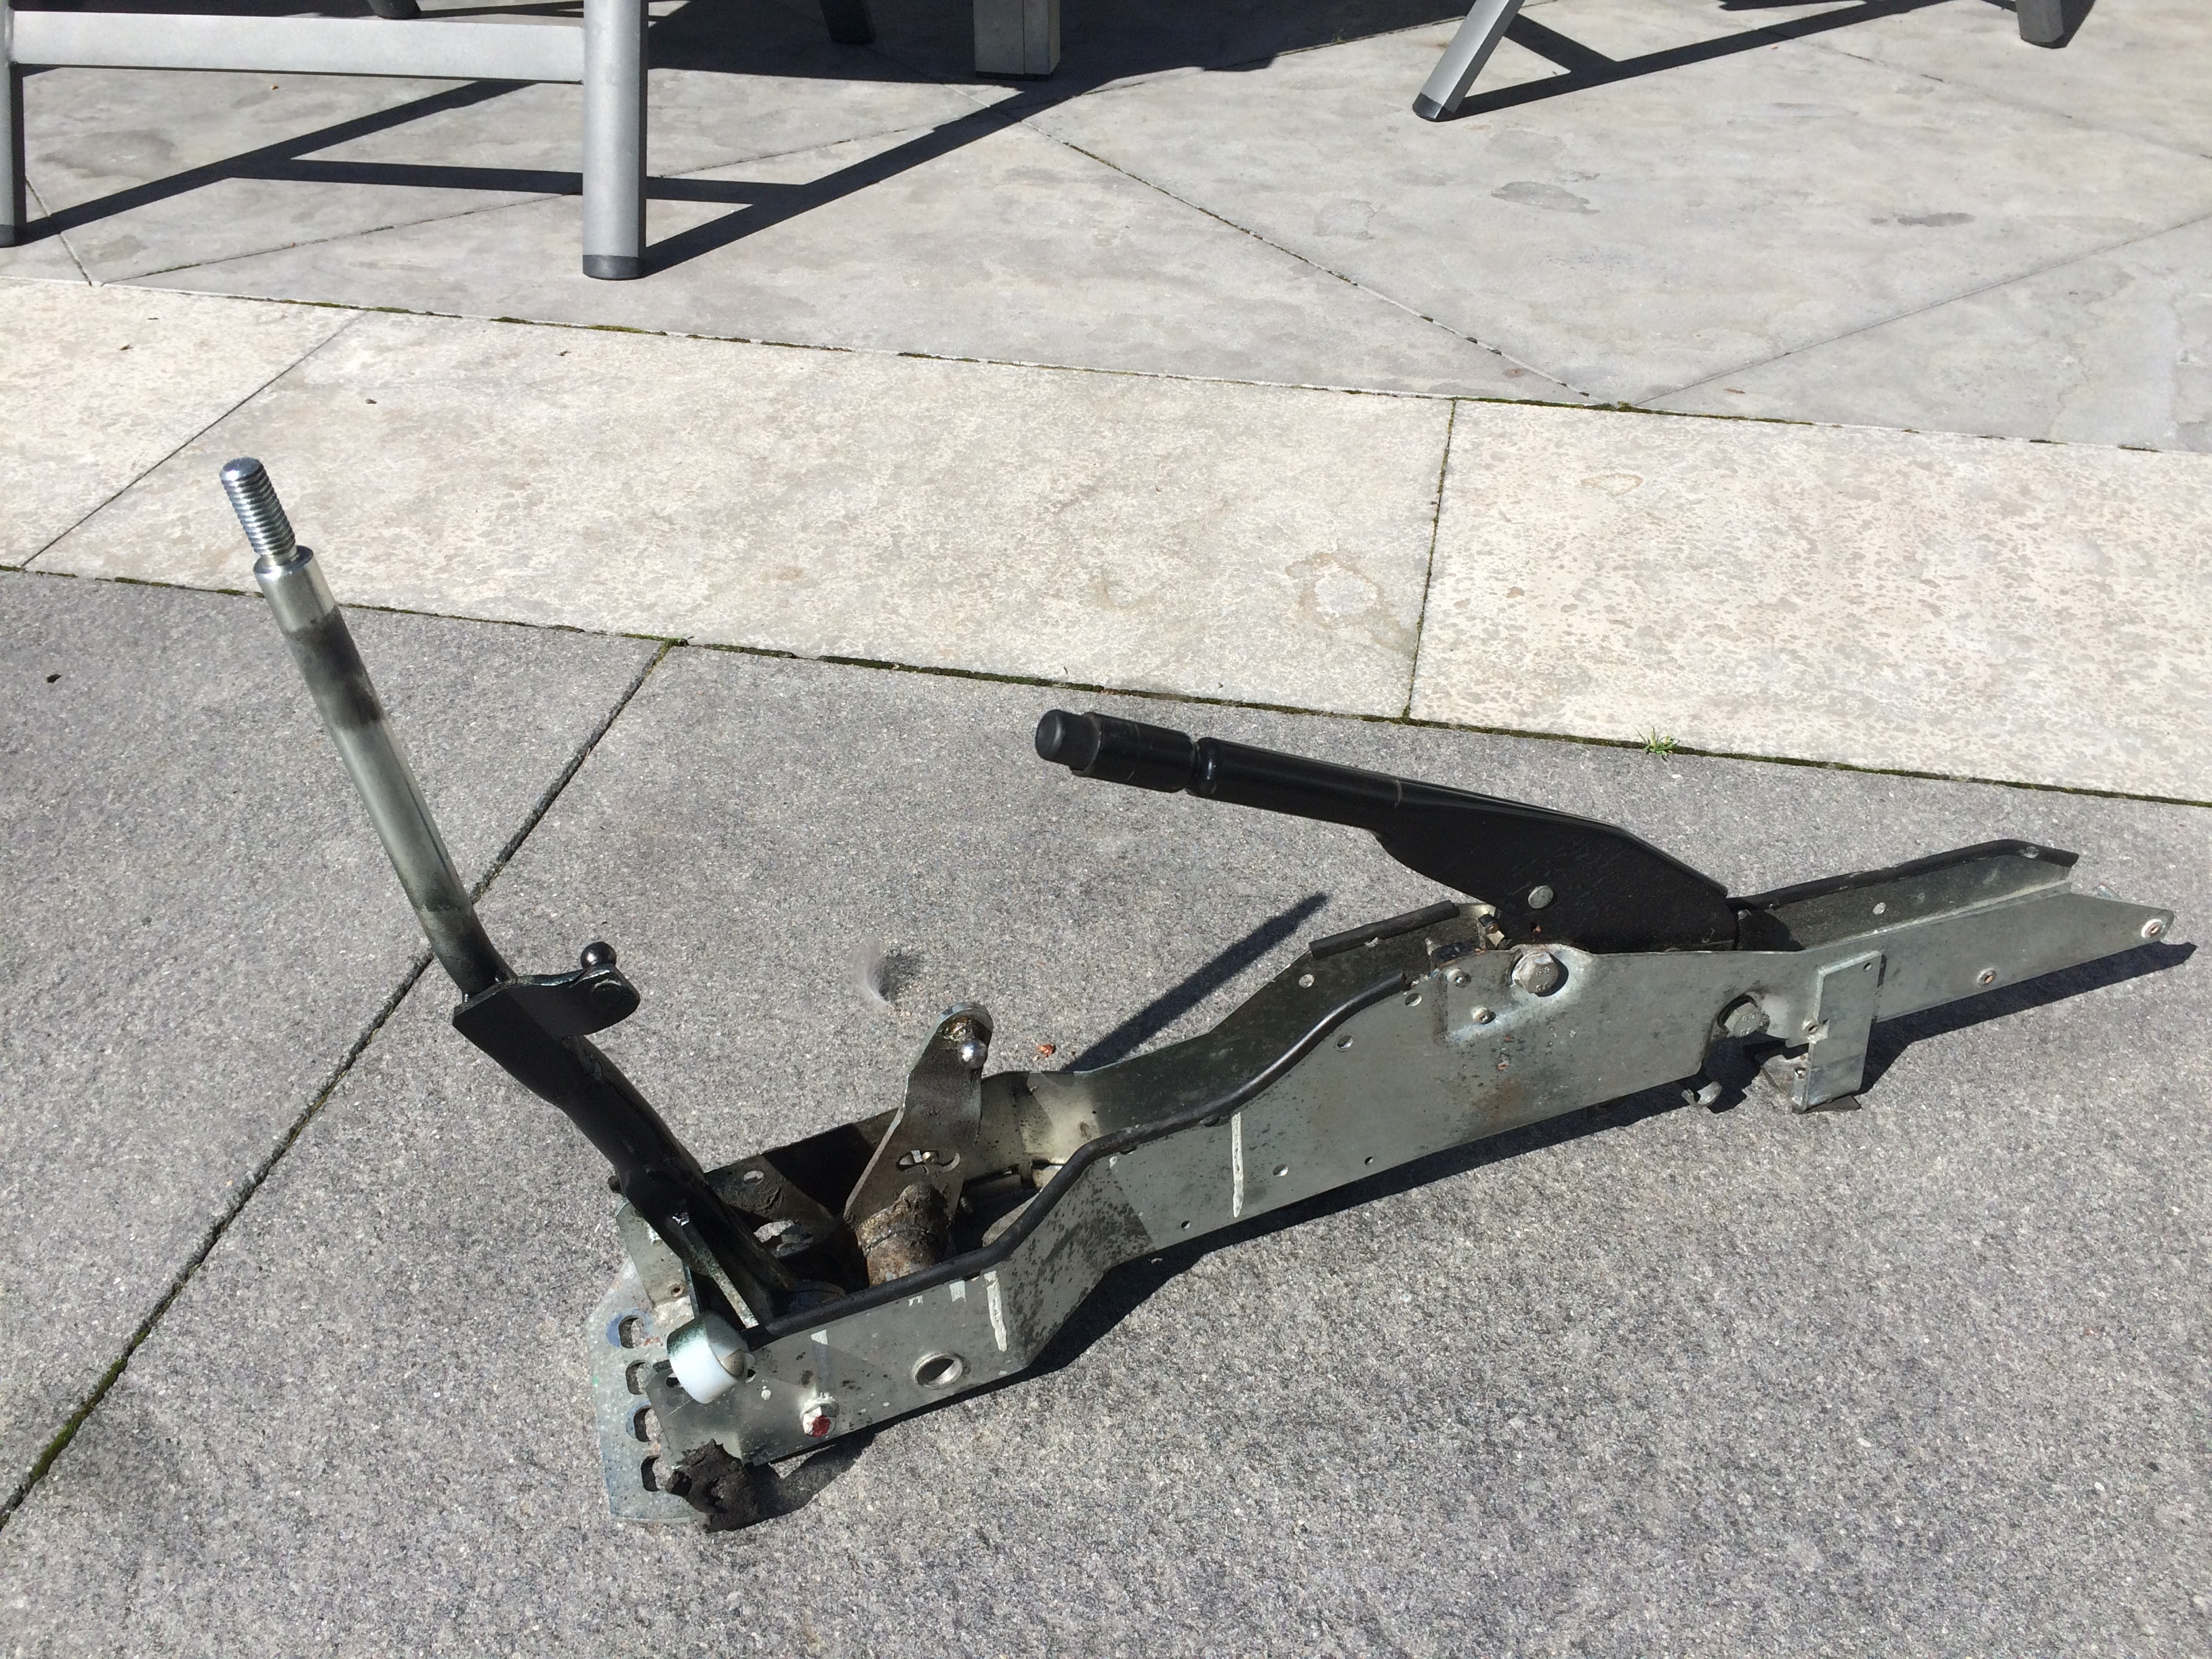
Of interest to players at home, it's interesting that the vx steering column came fitted with an airbag and associated squib/slip ring assembly. As I pulled it apart I thought it was weird how that assembly was held in: indexed in position by this random spring loaded brass pin... lol... Vauxhaull just used some old non-airbag column assembly with traditional slipring setup in place, left the pin in, and made the squib fit over the top, roughly repurposing the pin. Pretty lazy engineering, but it makes retrofitting back to a non airbag aftermarket slipring setup remarkably easy!

Posted Image

Posted Image

Posted Image

Posted Image

Posted Image

#482 Doctor Ed

Doctor Ed

    Need to get Out More

  • PipPipPipPip
  • 1,188 posts
  • Location:Germany

Posted 05 September 2016 - 12:43 PM

short shifter time!
 
center console is getting put in shortly, so needed to get this little bugger done and out of the way. dads got a day off, sproglets are in day-care, wife is at work... sounds like angle-grinder-welder-day!
 
40mm sleeved extension to the fore/aft selector arm. the side-side gate selector has been modified at the box end to a similar ratio, so its should all move relatively evenly
 
Posted Image
 
Posted Image
 
Posted Image
 
Posted Image
 
Posted Image


#483 Doctor Ed

Doctor Ed

    Need to get Out More

  • PipPipPipPip
  • 1,188 posts
  • Location:Germany

Posted 07 September 2016 - 07:13 PM

Random progress pic

S2 rollbar is back in. Rigged up some temp rear stays to set it square (sat 5-6mm out of square when just torqued down by itself. Did some straining to pull it straight, but the stays are needed to keep it within a mm or so). Needed to get the rear right so I could check clearance to the windscreen. I've got the jig to set the windscreen position, but I also wanted to double check it using a separate base point. Plus it'd be embarrassing if I bond it all together and the bloody roof doesn't fit.

So temp rear stays are in, roll bar sits square, and roof/jig positions of the windscreen agree with each other, reassuring. I'm going to go back over it all again in a day or so and double check everything, but if all looks good, the windscreen will be going in for good :)

Posted Image

#484 Doctor Ed

Doctor Ed

    Need to get Out More

  • PipPipPipPip
  • 1,188 posts
  • Location:Germany

Posted 08 September 2016 - 11:13 AM

digging this brazing thing at present. had some 45% silver braze left over, and decided to get all fancy with some small sleeves i needed. couldve tig'd it, but this works just as well
 
Posted Image
 
Posted Image
 
yes im bored


#485 Nev

Nev

    Nipper's Minion

  • PipPipPipPipPipPipPipPip
  • 11,587 posts
  • Gender:Male
  • Location:Bristol
  • Interests:Rock climbing, skiing, kayaking, surfing, mountaineering, budgies, chess, practical mechanics.

Posted 08 September 2016 - 07:12 PM

You put the silver between the sleeves and heated it up ?


It's quite a good solution for certain things, I'll bear it in mind.


Edited by Nev, 08 September 2016 - 07:12 PM.


#486 Doctor Ed

Doctor Ed

    Need to get Out More

  • PipPipPipPip
  • 1,188 posts
  • Location:Germany

Posted 08 September 2016 - 07:27 PM

Explains it better than I could: A few key things though: - strength is in shear, not plain tensile strength - draws via capillary action into small gaps beautifully With that in mind, its perfect for bonding slip fit assemblies etc. not so good for other types of joints

Edited by Doctor Ed, 08 September 2016 - 07:33 PM.


#487 Doctor Ed

Doctor Ed

    Need to get Out More

  • PipPipPipPip
  • 1,188 posts
  • Location:Germany

Posted 08 September 2016 - 07:56 PM

Lol, i love how Dominik keeps checking this thread... Waiting patiently for the moment when I announce "the motor is in" !! Nearly there mate. I've got a design for a modified rear bulkhead currently at the water jet cutters, then the intercooler core is going in. the associated pipework is sitting in as yet assembled/welded bits of tube in a box. Stumbling point is getting the ass-end of the donor apart, and getting the subframe out and transferred over. Then reassemble the rear suspension, get the wheels on, and drop the sucker to the floor. Then the motor goes in. It's like literally the last thing in my list.

#488 BadCop

BadCop

    Member

  • Pip
  • 96 posts
  • Location:Germany

Posted 09 September 2016 - 06:35 AM

Lol, i love how Dominik keeps checking this thread... Waiting patiently for the moment when I announce "the motor is in" !!


Rather worried you visit my shop too soon, we are renovating at the moment :D


#489 Doctor Ed

Doctor Ed

    Need to get Out More

  • PipPipPipPip
  • 1,188 posts
  • Location:Germany

Posted 13 September 2016 - 02:39 PM

Posted Image

#490 Aerodynamic

Aerodynamic

    Billy No Mates

  • PipPipPipPipPip
  • 1,455 posts

Posted 27 October 2016 - 05:19 PM

According to thesepictures below it looks like the Vx220 roll bar is as strong as the S2 roll bar if not stronger, except for the cutouts for the headrests.

But what if you weld in a piece to fill this cutout out?! Then it should be just as stong as the S2 bar.


so a quick comparison...  :happy:


first up weights:

vx220: 7.9kg (including headrests)

S2 Elise: 6.1kg (complete)


(remember the headrests alone weigh 1.2kg)


and some pics of them semi fixed to a chunk of wood, and the S2 compressed with a ratchet strap (which after about 10mm of over compression, sprung back to the right width unassisted)


Posted Image


Posted Image


Posted Image


#491 Doctor Ed

Doctor Ed

    Need to get Out More

  • PipPipPipPip
  • 1,188 posts
  • Location:Germany

Posted 09 November 2016 - 09:48 AM

the vx bar is a disaster due to the cutouts. the tube size dwarfs the S2, sure, but the stress risers at the cutouts are enormous. yes, you could weld filler plates into the cutouts, but then youre just trying to polish a turd. to compensate for overlapping material, heat, etc, youd have to over engineer youre reinforcement, then its turns into an obnoxiously big and cumbersome thing. far far simpler to just swap it out :)


#492 Aerodynamic

Aerodynamic

    Billy No Mates

  • PipPipPipPipPip
  • 1,455 posts

Posted 09 November 2016 - 05:09 PM

Hi Ed, where have you beenall this time?

Do you know which material the roll  bar is made of?

Do you Think the welding process will ake the material somuch weaker due to the welding, but if you leave the plate for the ctouts left inside

then this will also stabilaze the portion over the cutouts.

I was thinking of adding a Cage but I will wait with this till I got  car through Swedish SFRO, to make it leagel with the Honda Engine.

O it the mean time I thought I weld in some materials around this cutouts, weld in a harness bar and a "A" between center top of the roll bar and

seatbelt Points.

This should make the roll bar a lot stronger than it currently is, or do you disagree to this?


Do you know how much of work it is to remove OEM roll bar?

Do you use Facebook?


Br, Per


#493 Nev

Nev

    Nipper's Minion

  • PipPipPipPipPipPipPipPip
  • 11,587 posts
  • Gender:Male
  • Location:Bristol
  • Interests:Rock climbing, skiing, kayaking, surfing, mountaineering, budgies, chess, practical mechanics.

Posted 17 January 2017 - 12:41 PM

Hi Ed, is there any news on this?


#494 Doctor Ed

Doctor Ed

    Need to get Out More

  • PipPipPipPip
  • 1,188 posts
  • Location:Germany

Posted 12 April 2017 - 11:55 AM

there will be :)

life got in the way a little over the past few months, but it, and the weather, has improved significantly, so time to get this going!


#495 Doctor Ed

Doctor Ed

    Need to get Out More

  • PipPipPipPip
  • 1,188 posts
  • Location:Germany

Posted 12 April 2017 - 12:10 PM

Hi Ed, where have you beenall this time?

Do you know which material the roll  bar is made of?

Do you Think the welding process will ake the material somuch weaker due to the welding, but if you leave the plate for the ctouts left inside

then this will also stabilaze the portion over the cutouts.

I was thinking of adding a Cage but I will wait with this till I got  car through Swedish SFRO, to make it leagel with the Honda Engine.

O it the mean time I thought I weld in some materials around this cutouts, weld in a harness bar and a "A" between center top of the roll bar and

seatbelt Points.

This should make the roll bar a lot stronger than it currently is, or do you disagree to this?


Do you know how much of work it is to remove OEM roll bar?

Do you use Facebook?


Br, Per


hey mate,


the material just behaves/cuts/welds like a normal mild steel, i dont think its anything in particular. you could weld a sleeve/skin over the cutouts, and with sufficient overlap i think it would be perfectly strong enough. heat treating due to welding isnt really an issue with mild steel in this application, id just make sure whatever youre welding is adeqautely designed to spread load well, and doesnt point load the joints. i just couldnt be bothered, and the S2 bar was cheap enough to make the decision easy. (that said, i got the wrong version of the S2 bar, and the roof mounts i had to make and weld... which was a PITA and ended up being wrong anyway due to a channel profile in the rollbar cover /exterior panel i handnt counted on. so i need to remake, reweld the roof mounts. sonoffabitch :(


an 'A' from the middle/top to the seatbelt points... yeah, nahh. just triangulate it from one corner down to the floor/foot of the hoop. i need to get my seat back as far as possible, so cant do this (seat ends up inside the roll hoop, no space for a diagonal)


removing the bar involces separating it from the rear bulkhead/window. which is bonded with some insane urethane. i removed 2 now, and ones was a complete and utter bitch, the other much easier, both took a day (non destructive removal - i needed to reuse the bulkhead). it would be easier if you dont want to keep the bulkhead! also, one side sill/B pillar panel needs to be released so it can be flexed open to let the hoop be removed. or you can cut it, and fiberglass repair it once the roll bar is back in. both options suck. 


both options still suck less than facebook ;)


Edited by Doctor Ed, 12 April 2017 - 12:12 PM.


#496 Aerodynamic

Aerodynamic

    Billy No Mates

  • PipPipPipPipPip
  • 1,455 posts

Posted 12 April 2017 - 04:55 PM

Hi Thank you Ed. I tried but never remove The roll bar. Anyway I welded in some pieces in the cutouts and bought a Bolt in harness bar. Will not do any "A" support. How is your project going? Br, Per

#497 Doctor Ed

Doctor Ed

    Need to get Out More

  • PipPipPipPip
  • 1,188 posts
  • Location:Germany

Posted 12 April 2017 - 05:59 PM

snap frozen in time basically... picking up now from where i left off :)


#498 Doctor Ed

Doctor Ed

    Need to get Out More

  • PipPipPipPip
  • 1,188 posts
  • Location:Germany

Posted 21 April 2017 - 05:02 AM

So, back into it.

Short term goal is to get it reassembled, running and tüv'd as a vx220, and all that before the end of August *cough*
Perhaps at the very least have the engine in and the mechanicals functioning. I've got a date with a local spray booth to get the sills and b columns done sometime in the next month or so, and that'll let me reassemble things like windscreen, firewall and roll bar etc, permenantly.

Status as of yesterday... 3 months of WD and cycling butane torch, I got the rear subframe off the donor in one piece, and only two snapped bolts that needed weld-extraction. Rear suspension/wishbones etc ready to go in. I need to swap out the hubs with new skf replacements due to an ABS sensor stuff up, but then it'll be able to roll on it's own 2 wheels

Posted Image

Posted Image

Posted Image

So on the immediate to do list:
- strip remaining needed bits off the donor chassis and fcuk it off
- replace wheels hubs x4 with new skf's
- install brakelines, and finish master cyl/abs hardlines
- finish installing suspension, attach wheels, lower to ground, and tighten all the goddamn fasteners
- get the sill painted
- modify OEM seat brackets to lower the standard drivers seat
- build modified firewall/insert for W2A core

That'll keep me busy for a bit!

#499 Mopeytitan

Mopeytitan

    Billy No Mates

  • PipPipPipPipPip
  • 1,908 posts
  • Gender:Male
  • Location:Yeovil, Somerset
  • Interests:Cars, Motorbikes, well anything mechanical.
    My dogs (love my dogs).
    F1.

Posted 21 April 2017 - 02:09 PM

What's the bit sat in the subframe in the second pic?

#500 Doctor Ed

Doctor Ed

    Need to get Out More

  • PipPipPipPip
  • 1,188 posts
  • Location:Germany

Posted 21 April 2017 - 10:50 PM

Intake filter / Airbox


0 user(s) are reading this topic

0 members, 0 guests, 0 anonymous users