Jump to content


Photo

Project Fracas - 6Sp A20Nft


  • Please log in to reply
1266 replies to this topic

#1041 Doctor Ed

Doctor Ed

    Need to get Out More

  • PipPipPipPip
  • 1,188 posts
  • Location:Germany

Posted 08 September 2018 - 09:59 AM

had 5 mins (after embracing my inner bogan) to do a bit more pulling and chocking the body into position. all a bit of fiddly fine adjusting try to find a place where its sits properly, and the intrinsic bows and asymmetry are more or less pulled out. it keeps changing a cm or so every time i fiddle with it, but every time its an improvement. this time though, i did something, and it suddenly made the hips and arches a bit narrower and straighter. actually a good thing, but it gave the wheels a bit more poke... suddenly theyre nearly flush... lol, might even need to massage the arch return a little if it stays like this.
 
IMG_0612.JPG
 
IMG_0613.JPG


#1042 Bargi

Bargi

    Scary Internerd

  • PipPipPipPipPipPip
  • 4,483 posts
  • Gender:Male
  • Location:London

Posted 08 September 2018 - 06:56 PM

had 5 mins (after embracing my inner bogan)


Not sure how many will understand that :D
Put Holden across the back, will fill out that fat arse nicely
Don't forget to put HSV somewhere on it as well

#1043 Doctor Ed

Doctor Ed

    Need to get Out More

  • PipPipPipPip
  • 1,188 posts
  • Location:Germany

Posted 09 September 2018 - 08:23 AM

lol... an HSV Badge and a Chevy Bow-Tie would finish it off nicely eh ;)

i didn't want to stick a lotus badge on it, and thought the GMC badge fit the space well. A further consideration was that it'll still be registered as an Opel, and not being the most ordinary looking nor unremarkable car, i can imagine it'll have its plate run by the cops (at least more often than normal) ... i don't want to invite being pulled over because the registration system says Opel, and the badge says Lotus. just trying to avoid problems

#1044 Doctor Ed

Doctor Ed

    Need to get Out More

  • PipPipPipPip
  • 1,188 posts
  • Location:Germany

Posted 13 September 2018 - 08:34 AM

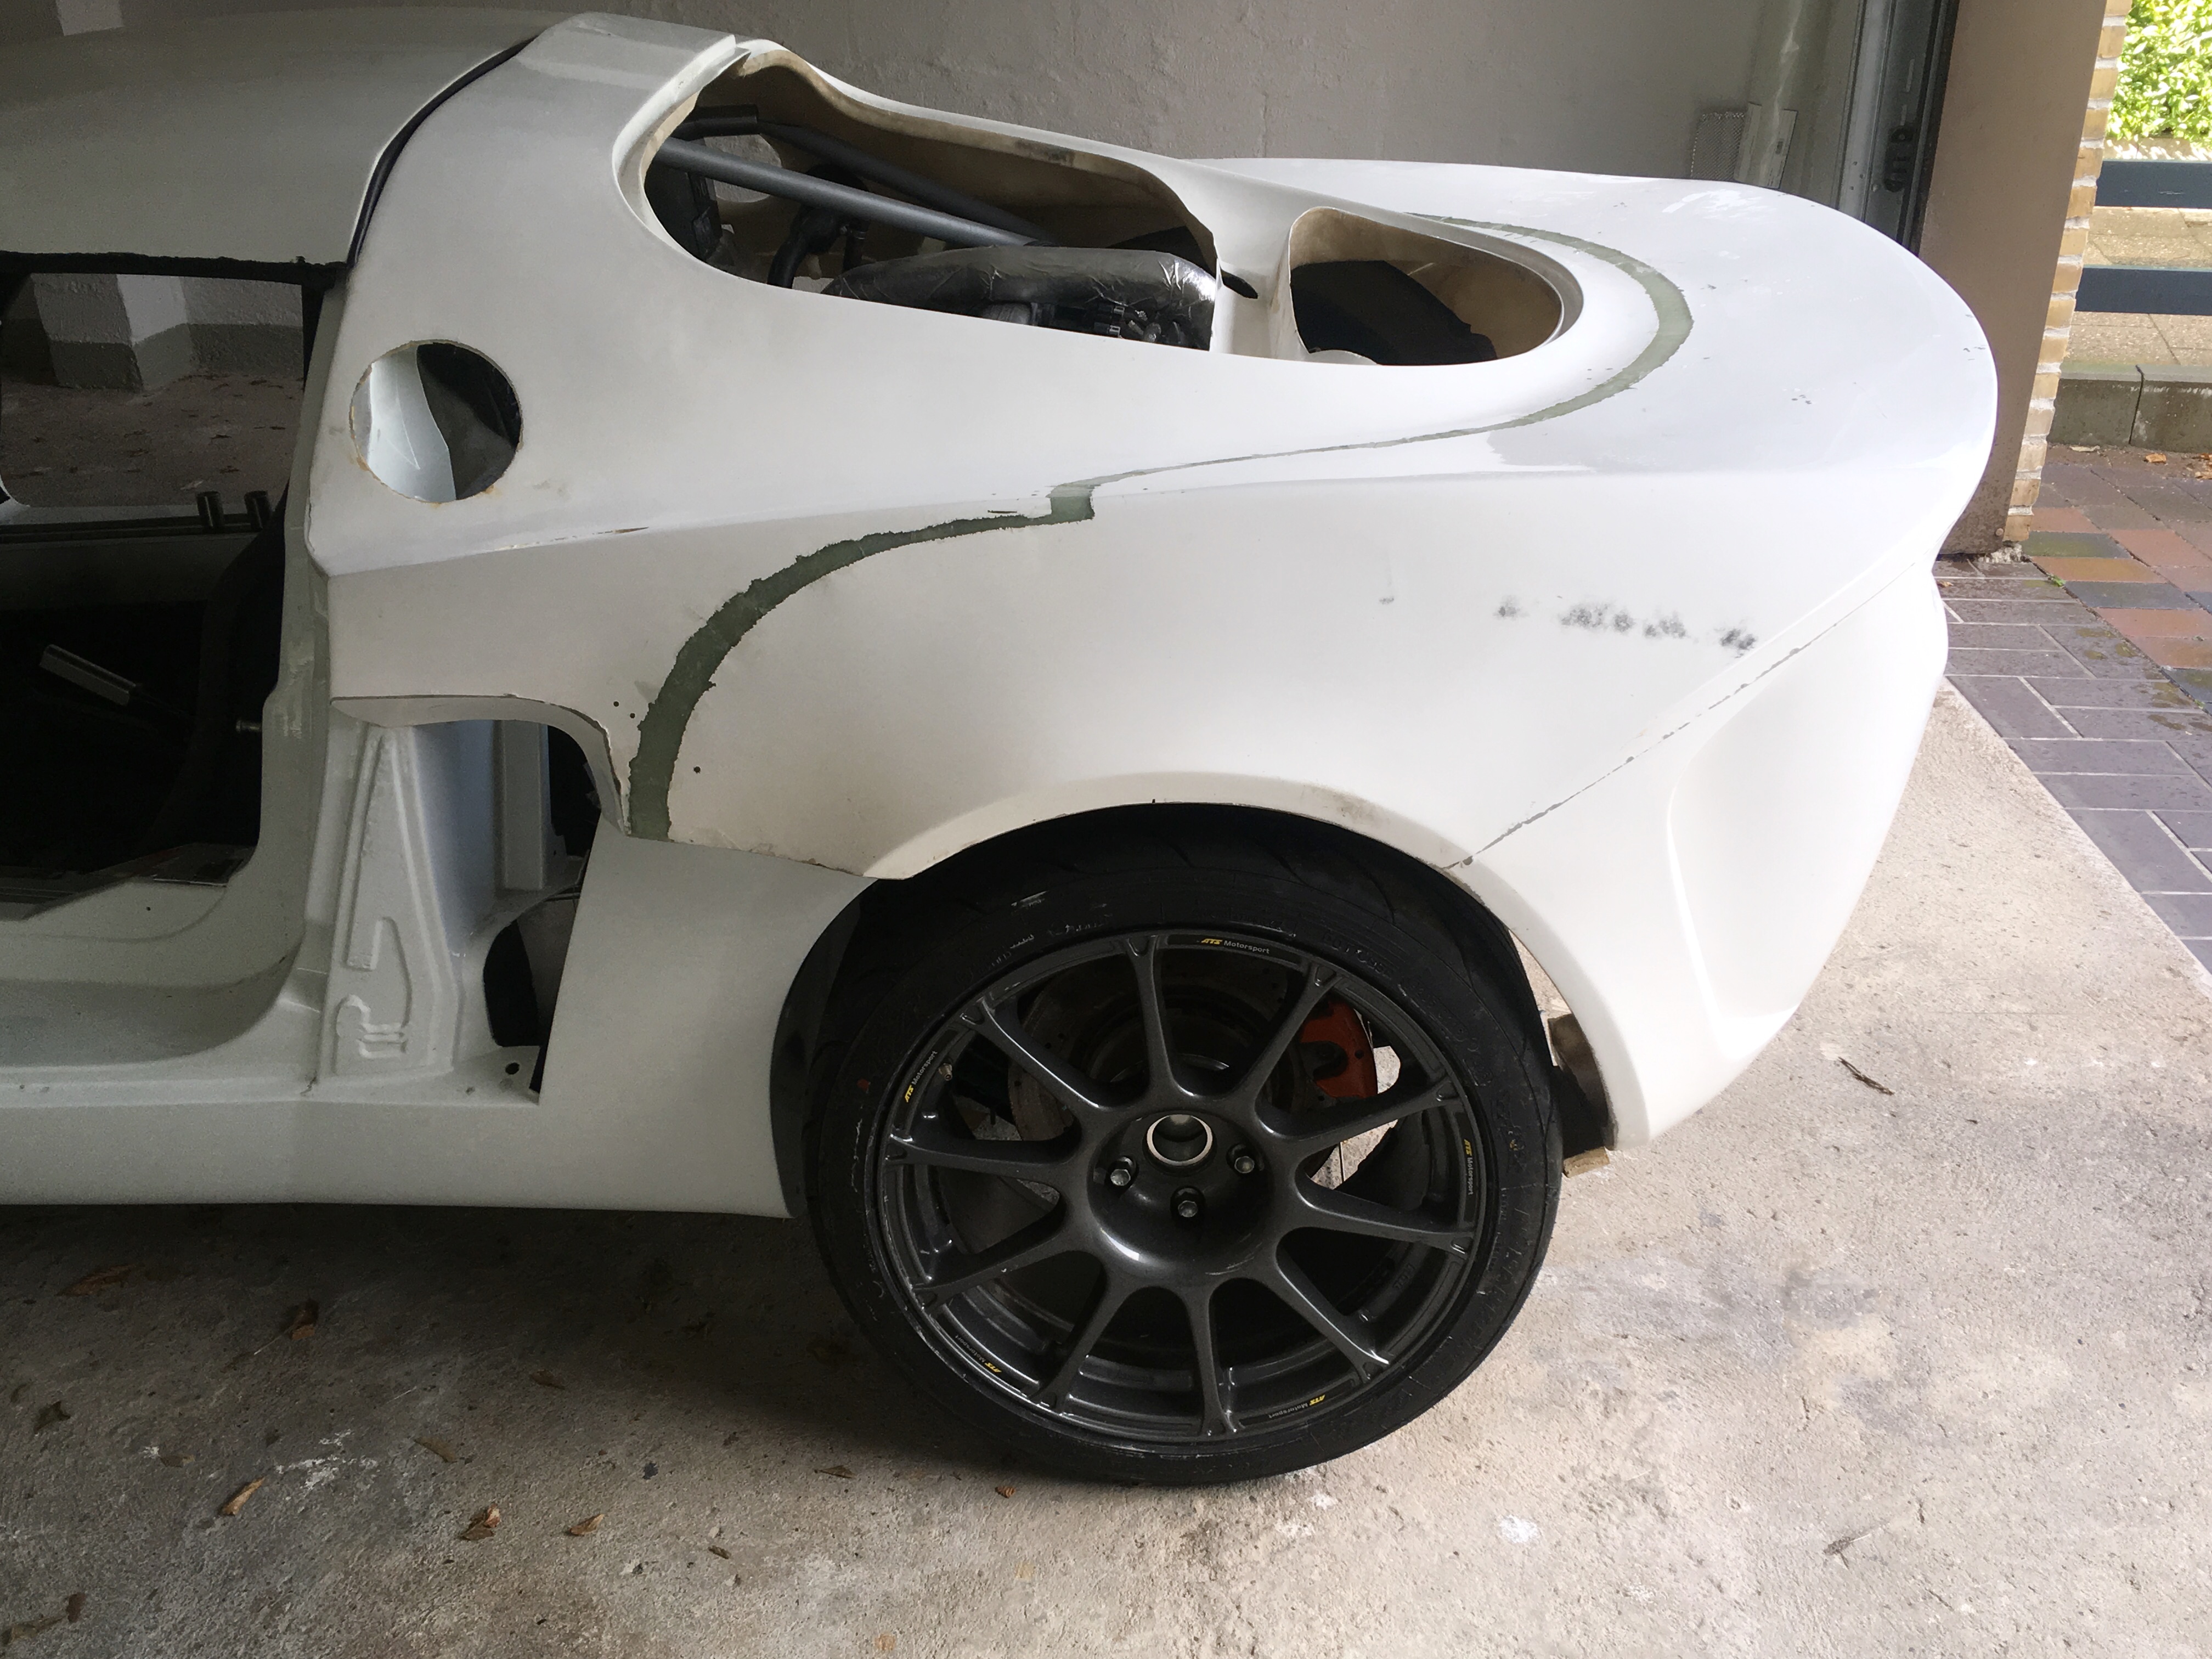
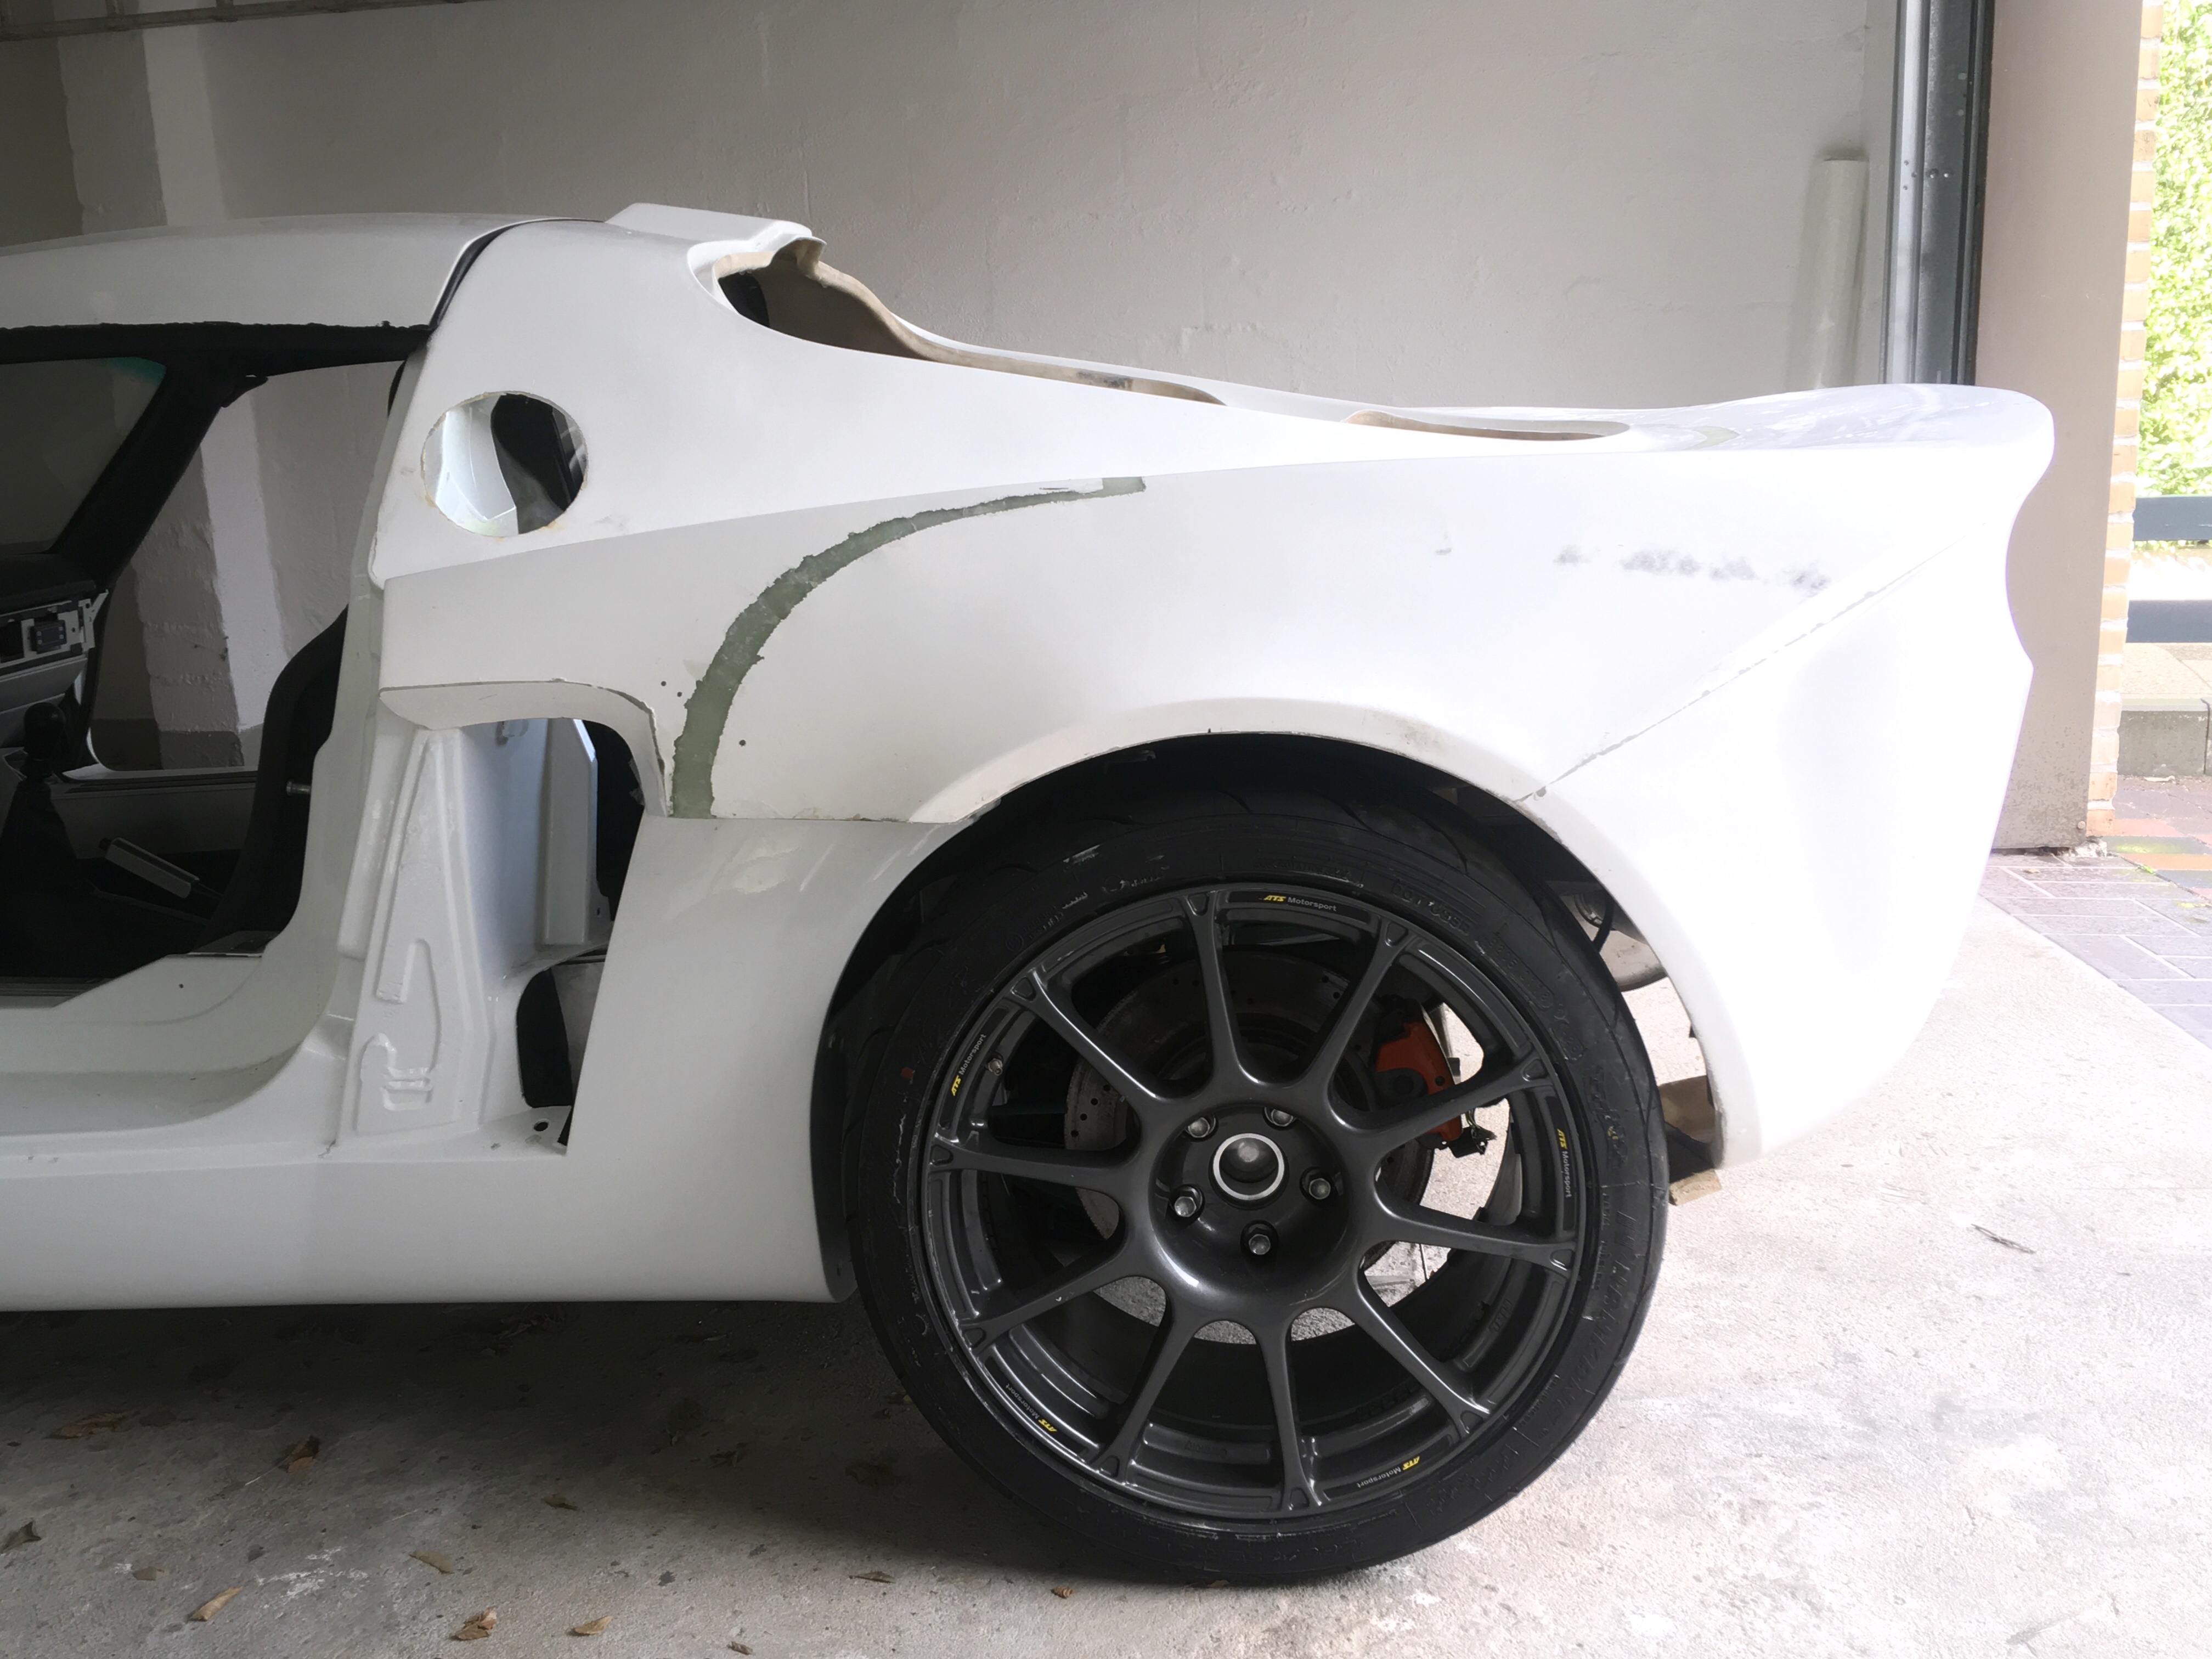
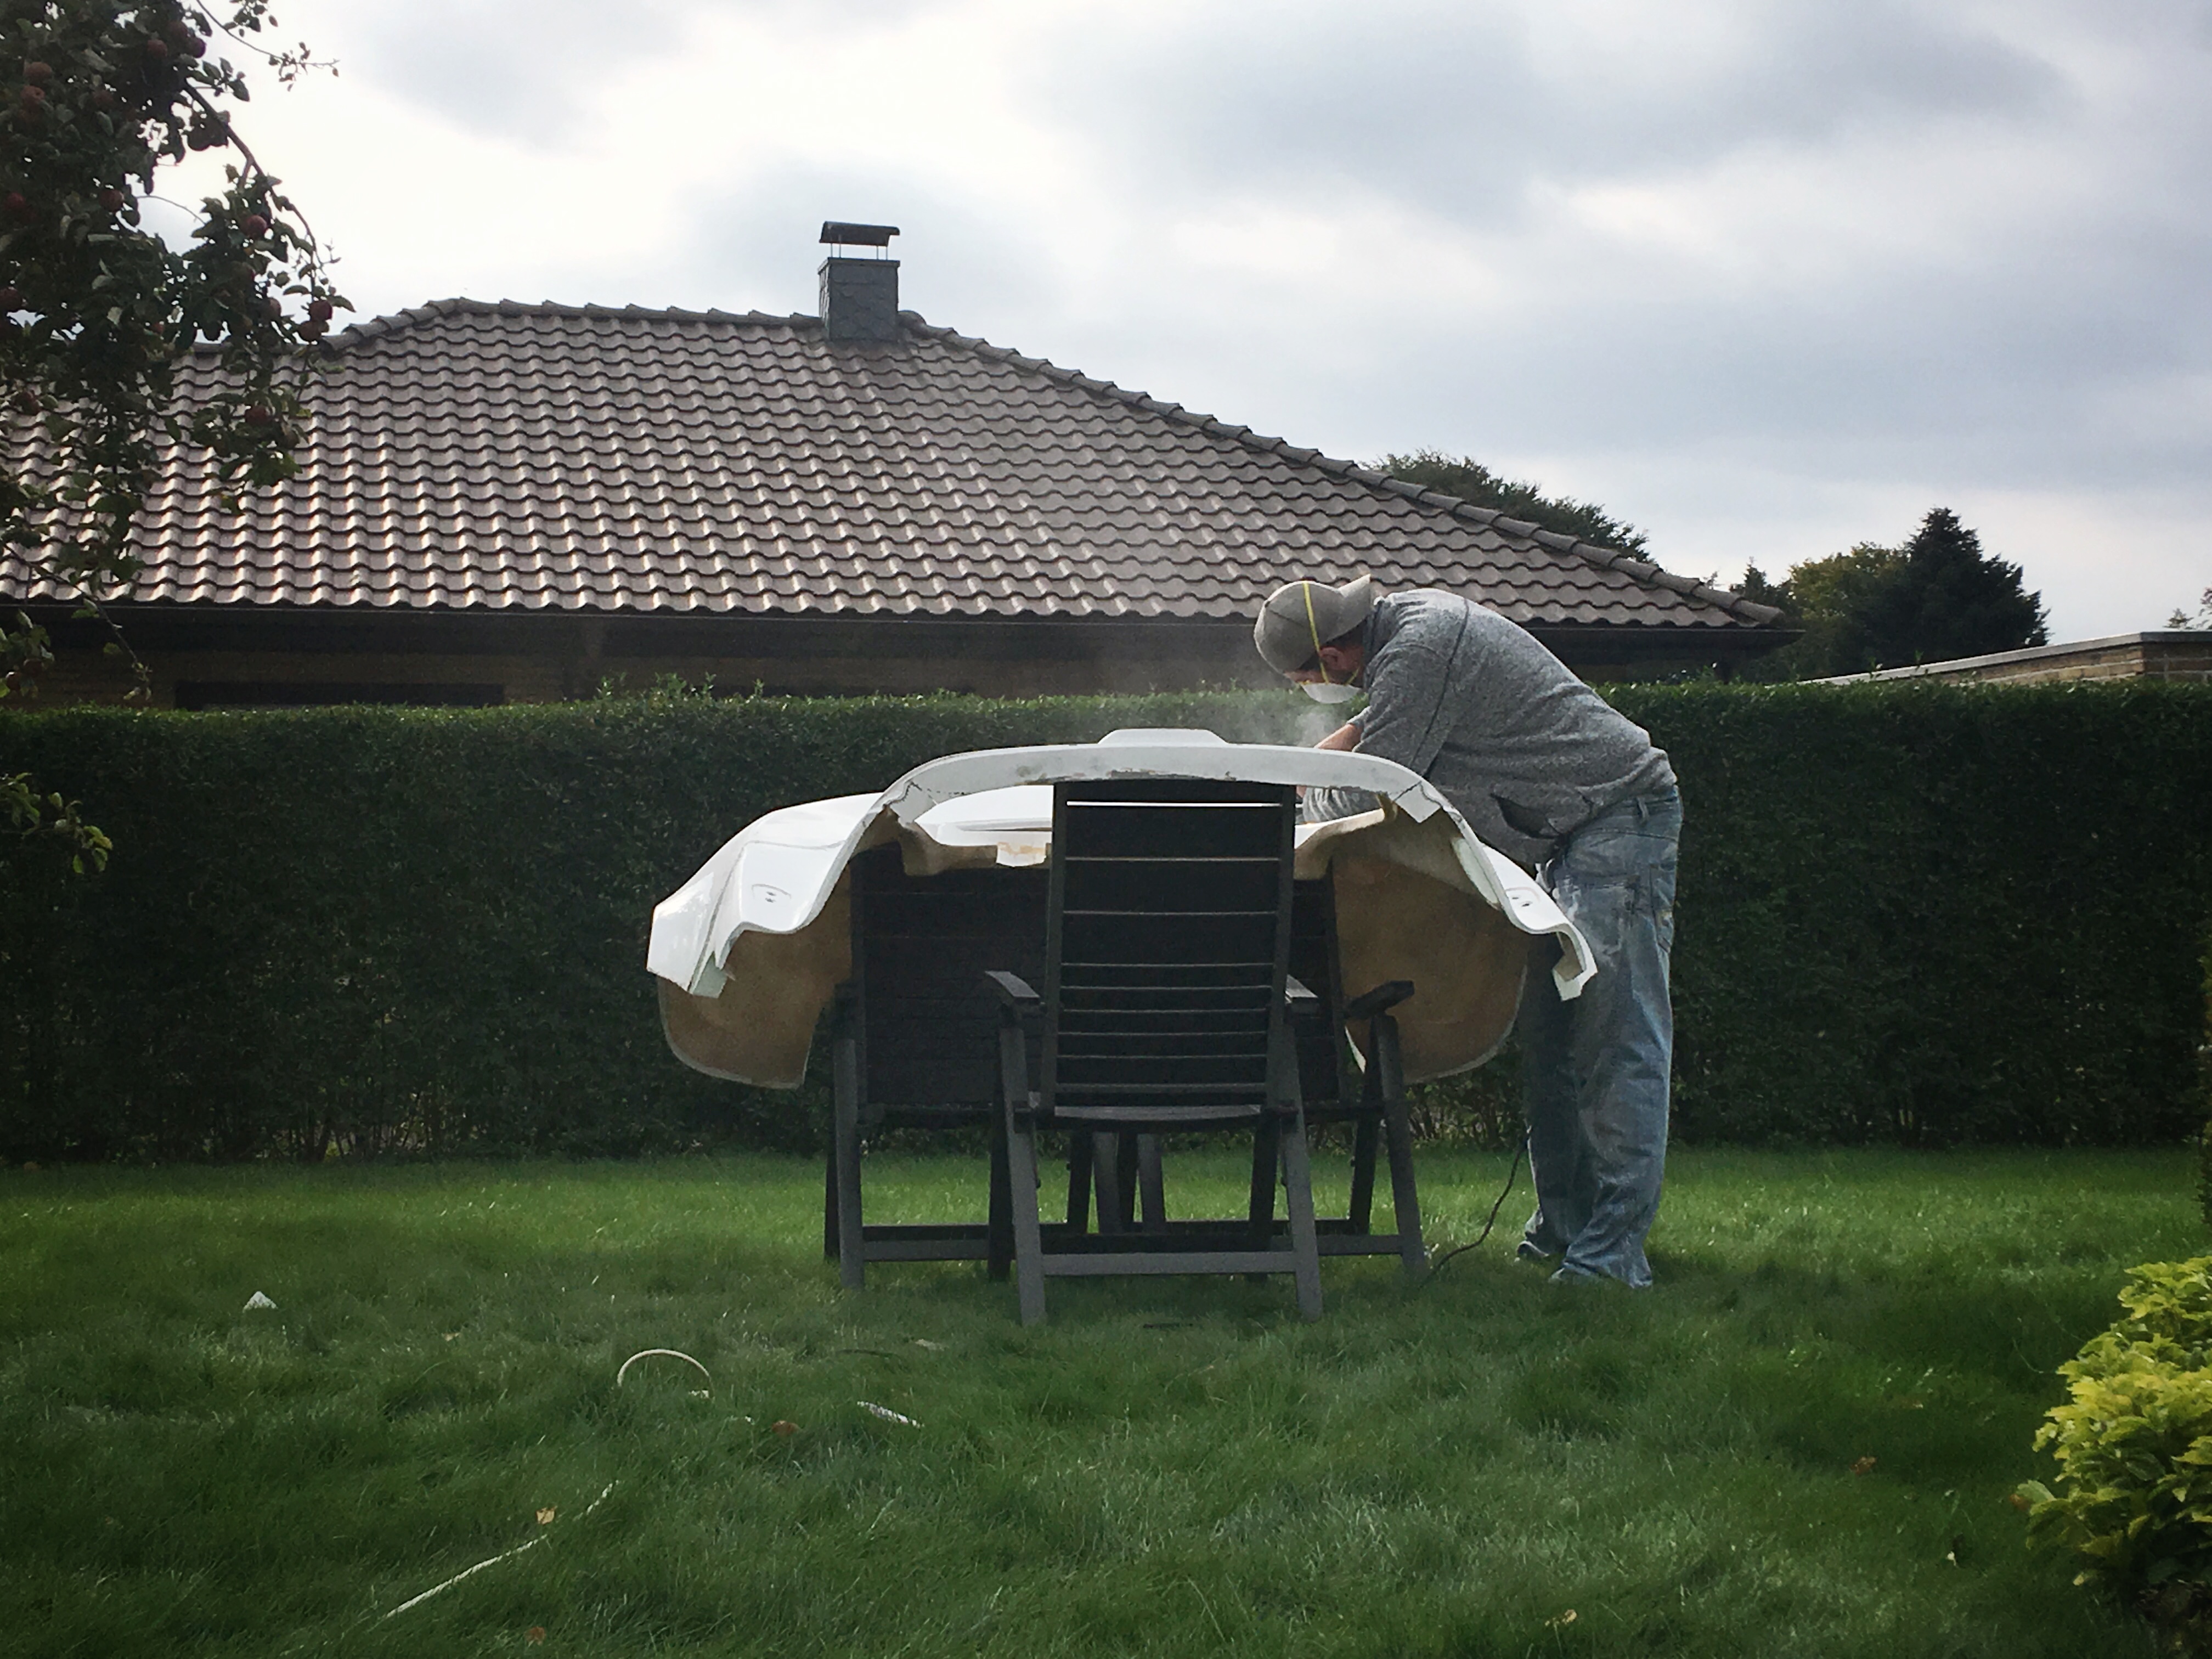
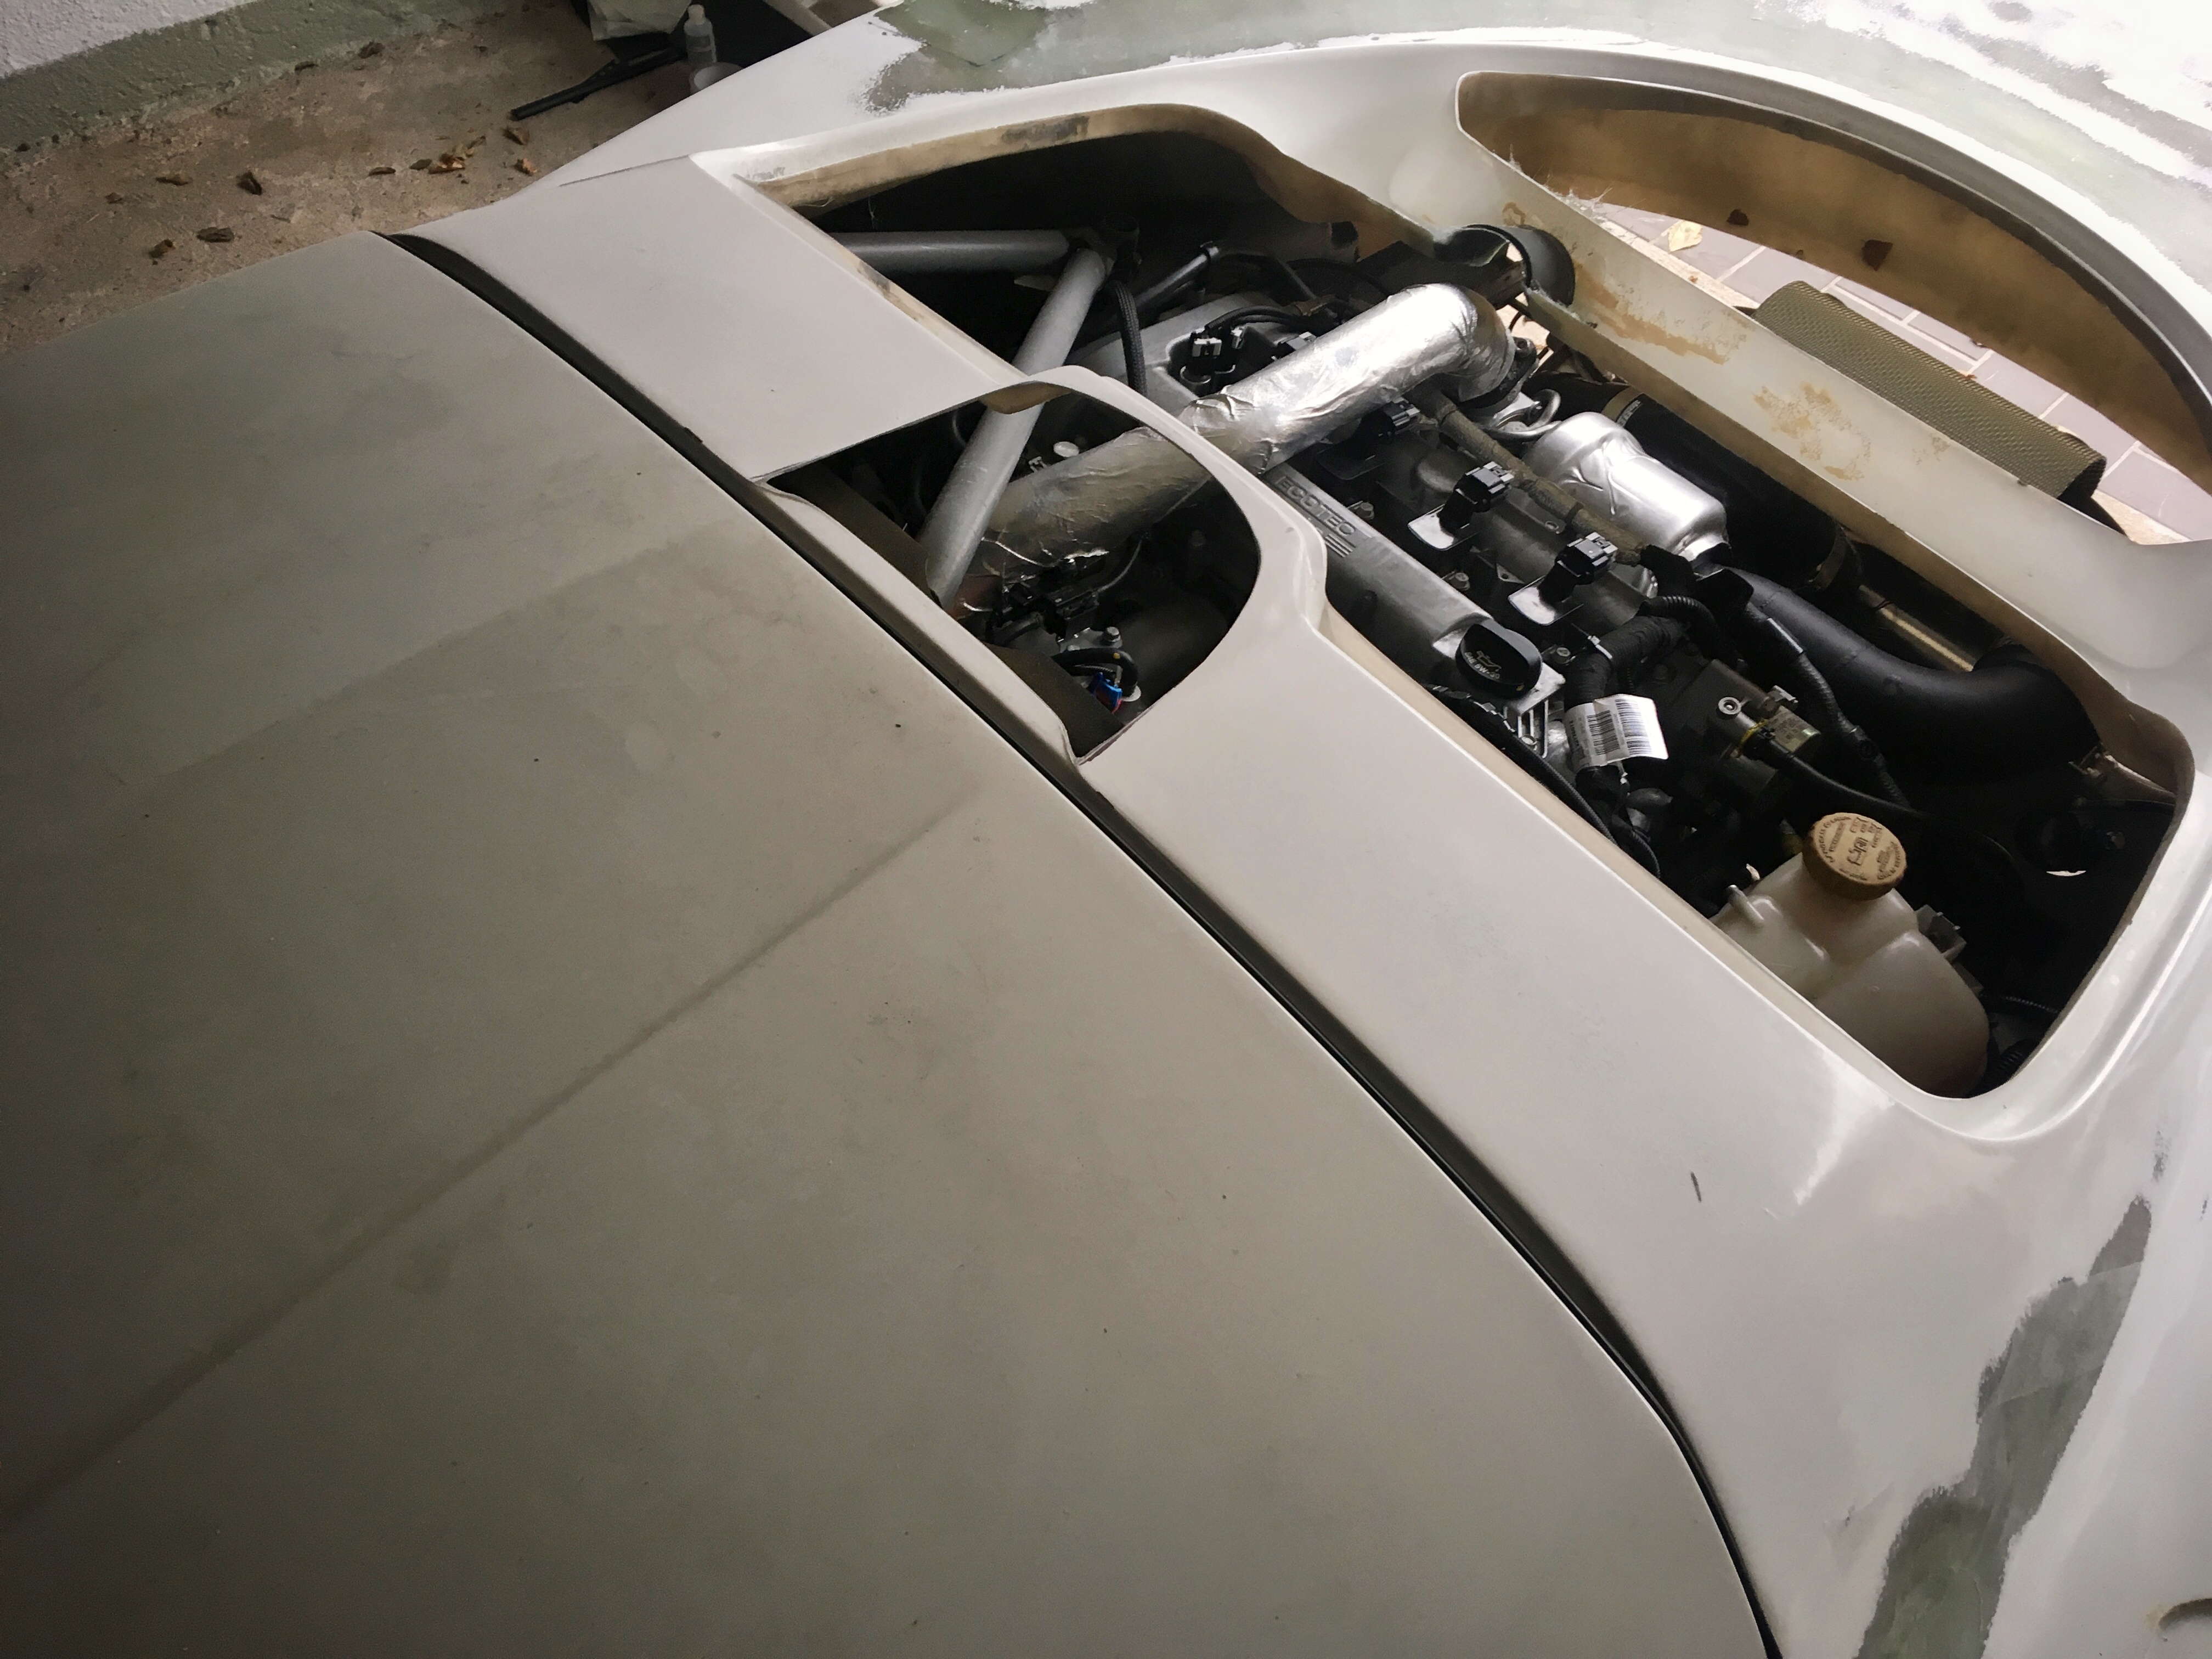
ill save you all the steps involved in getting here, but ...

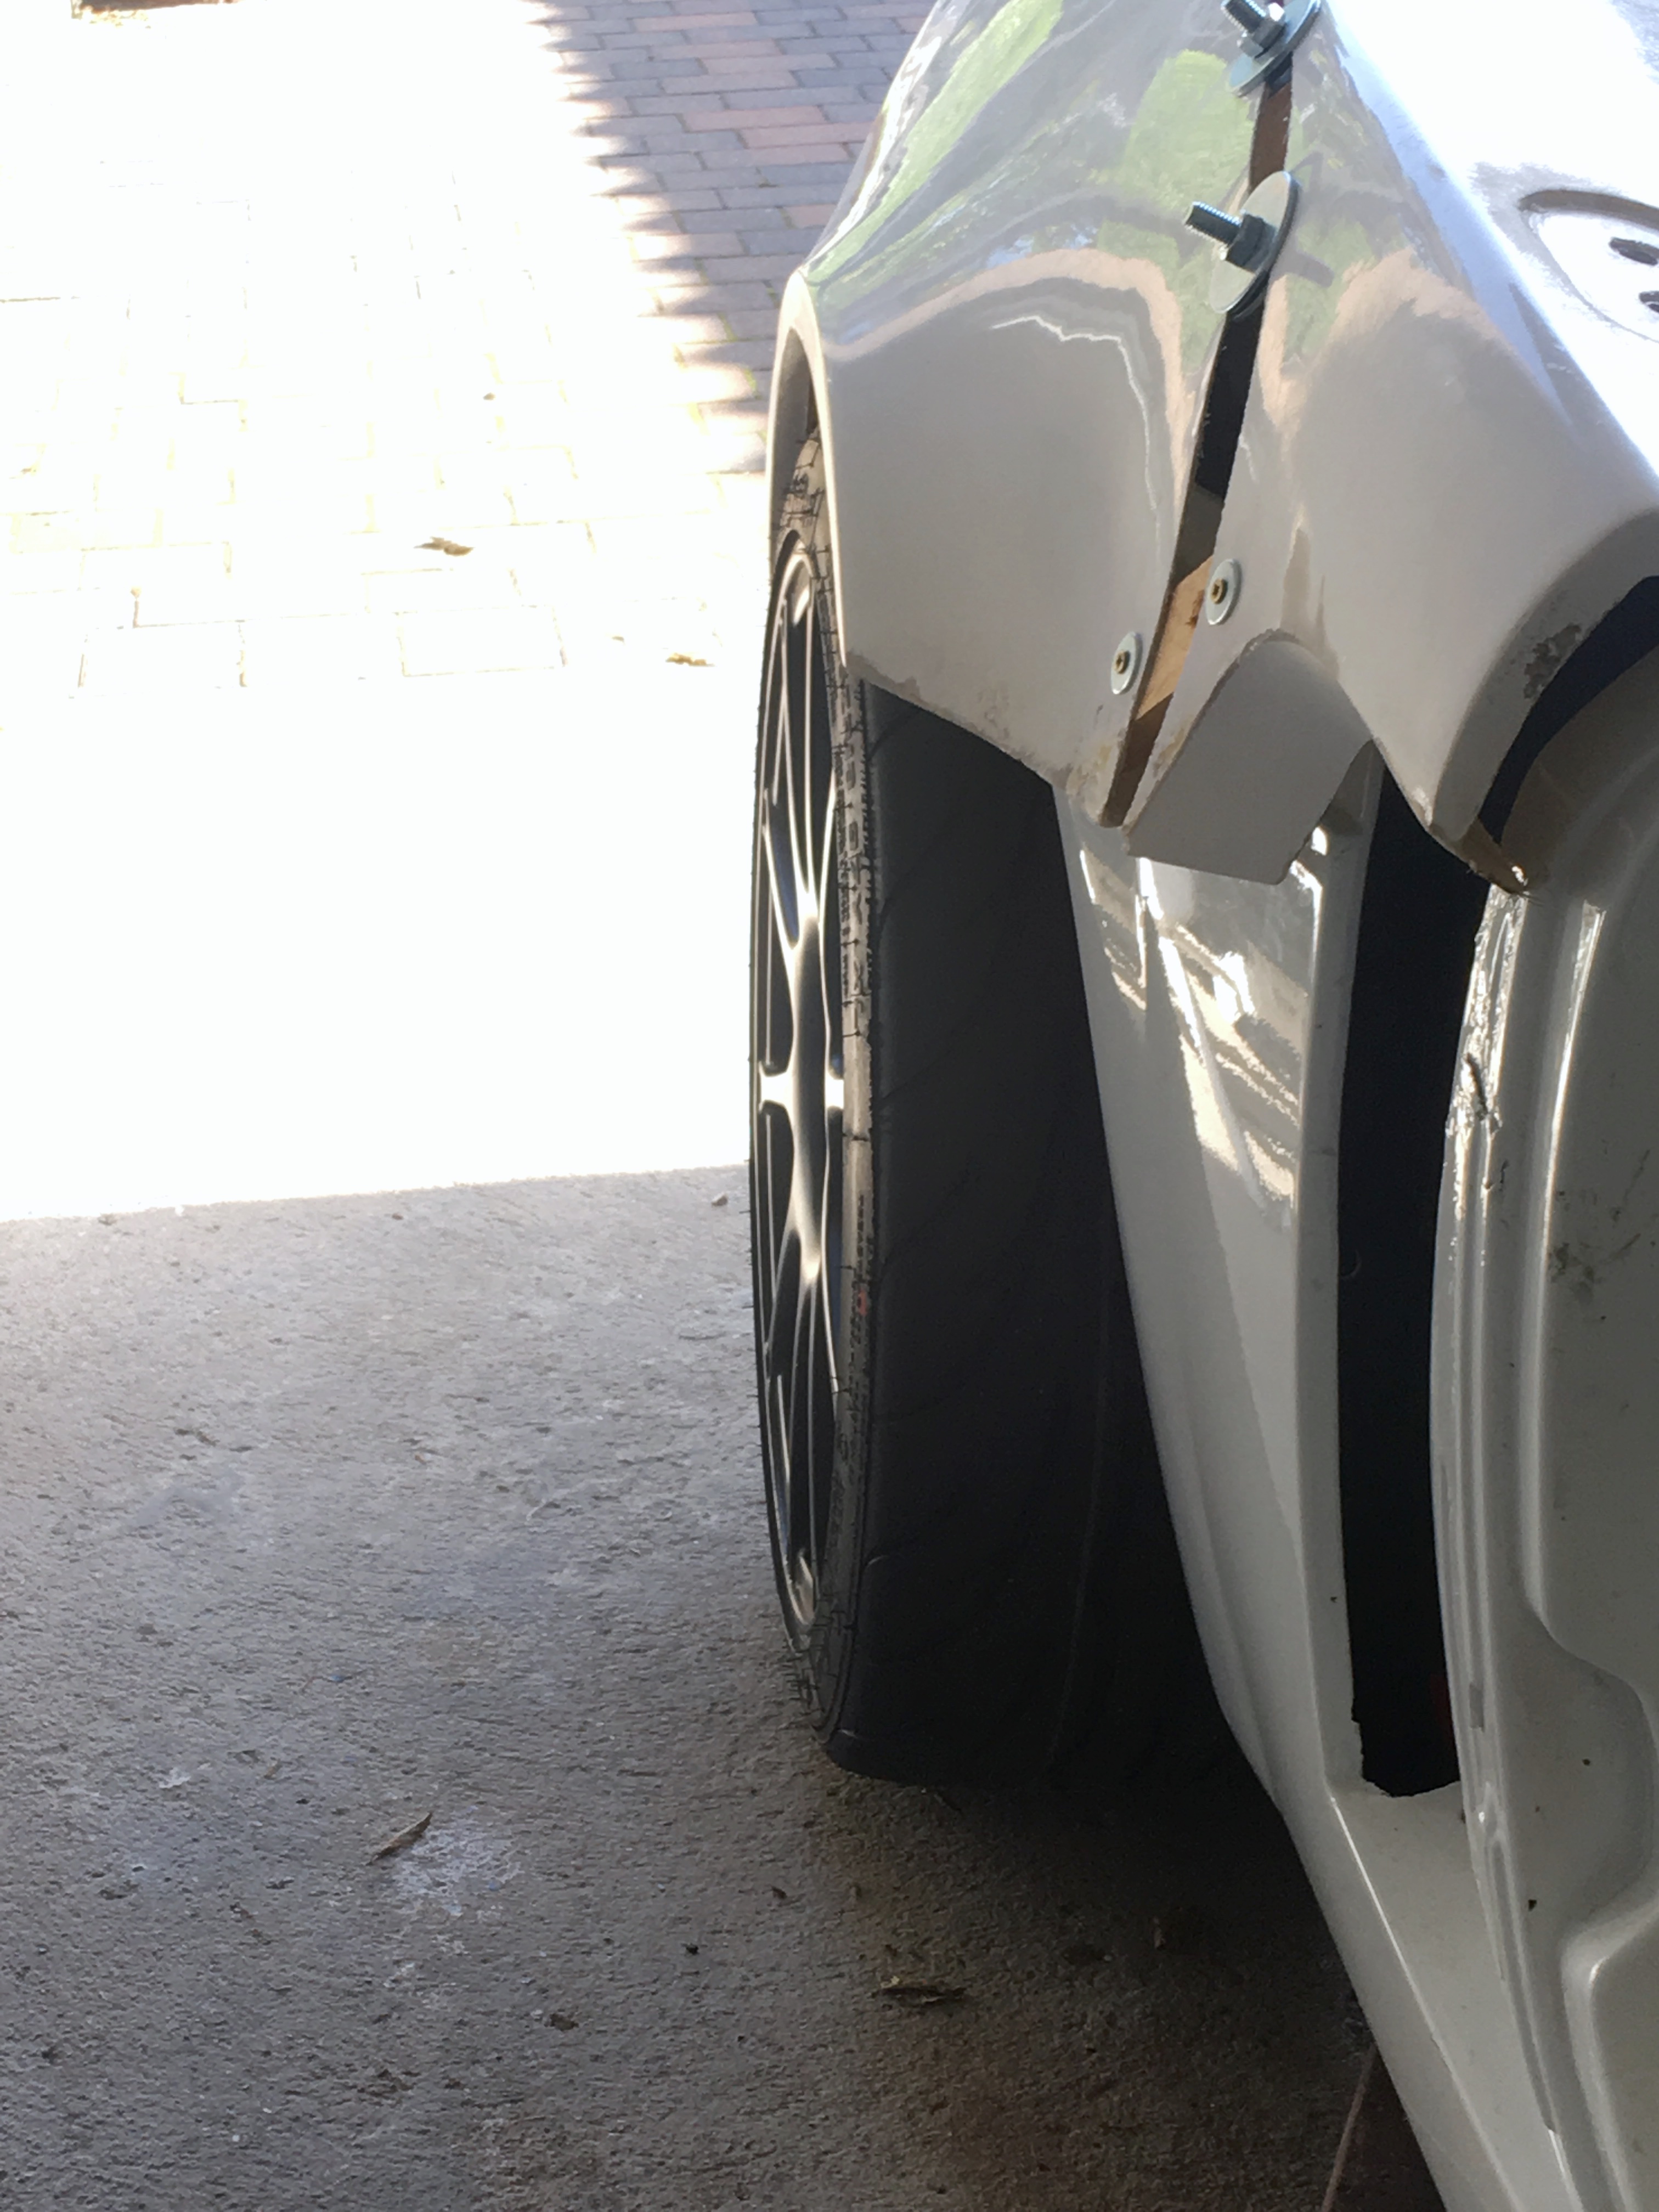
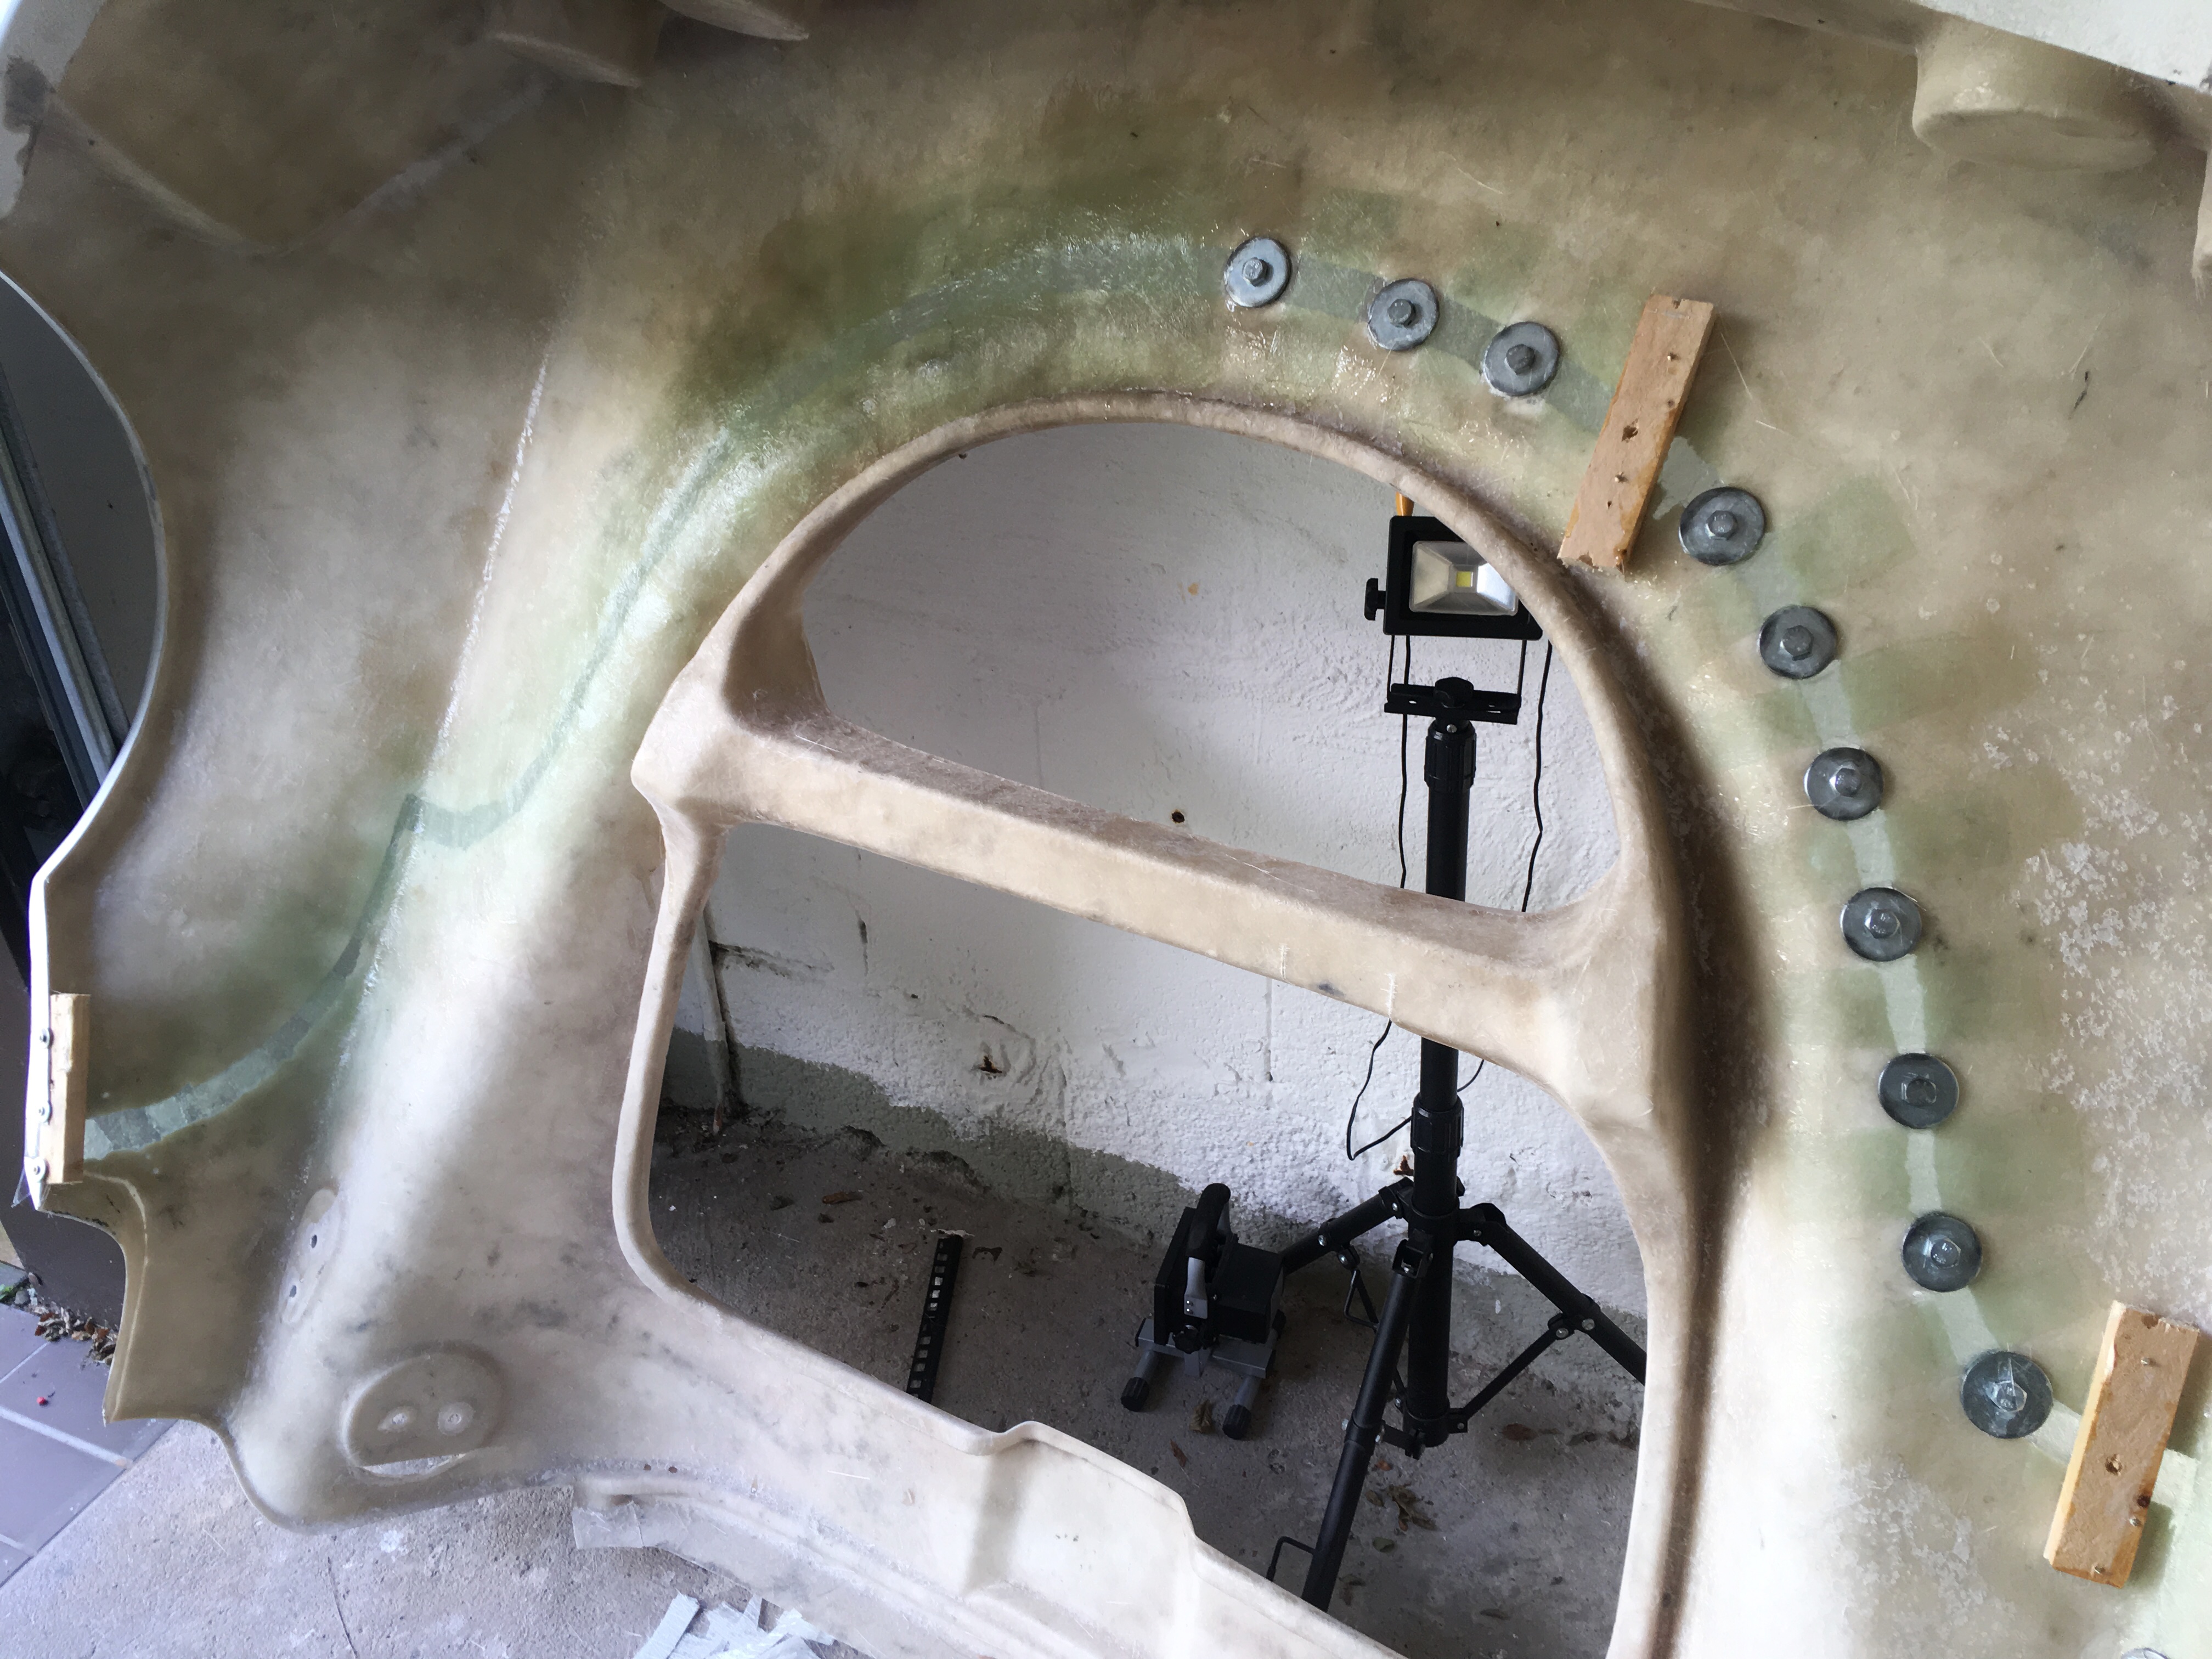
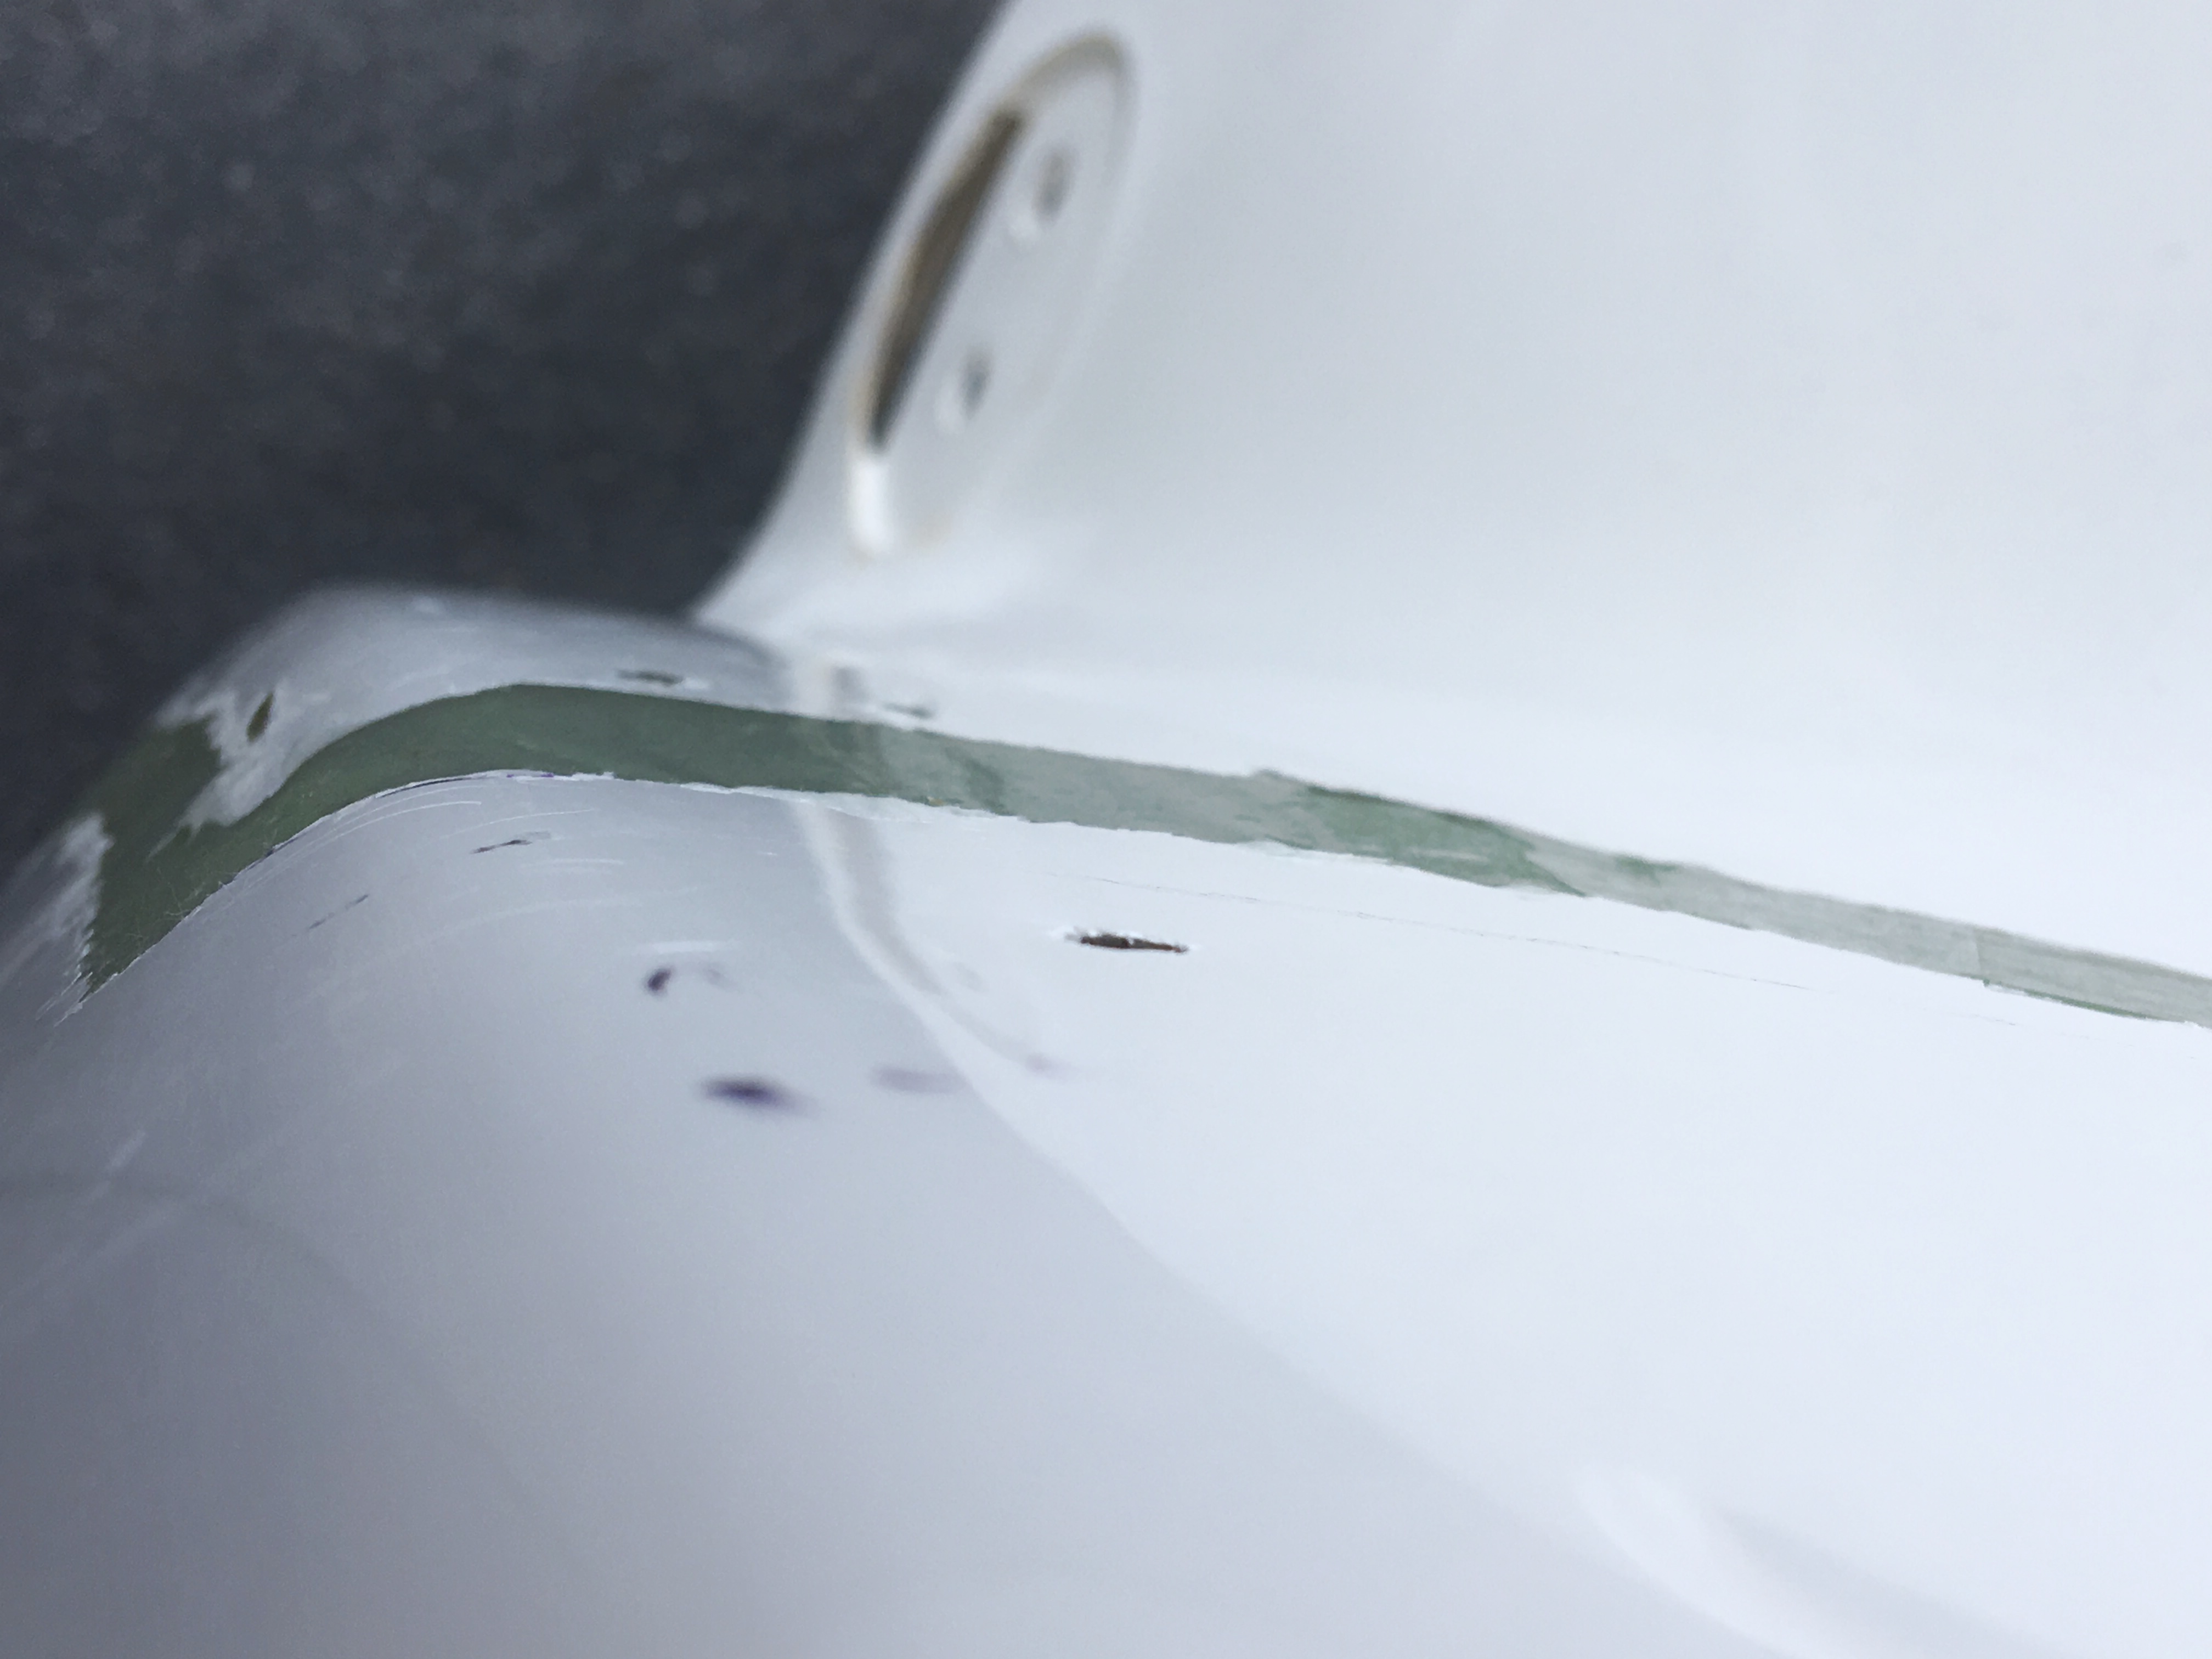
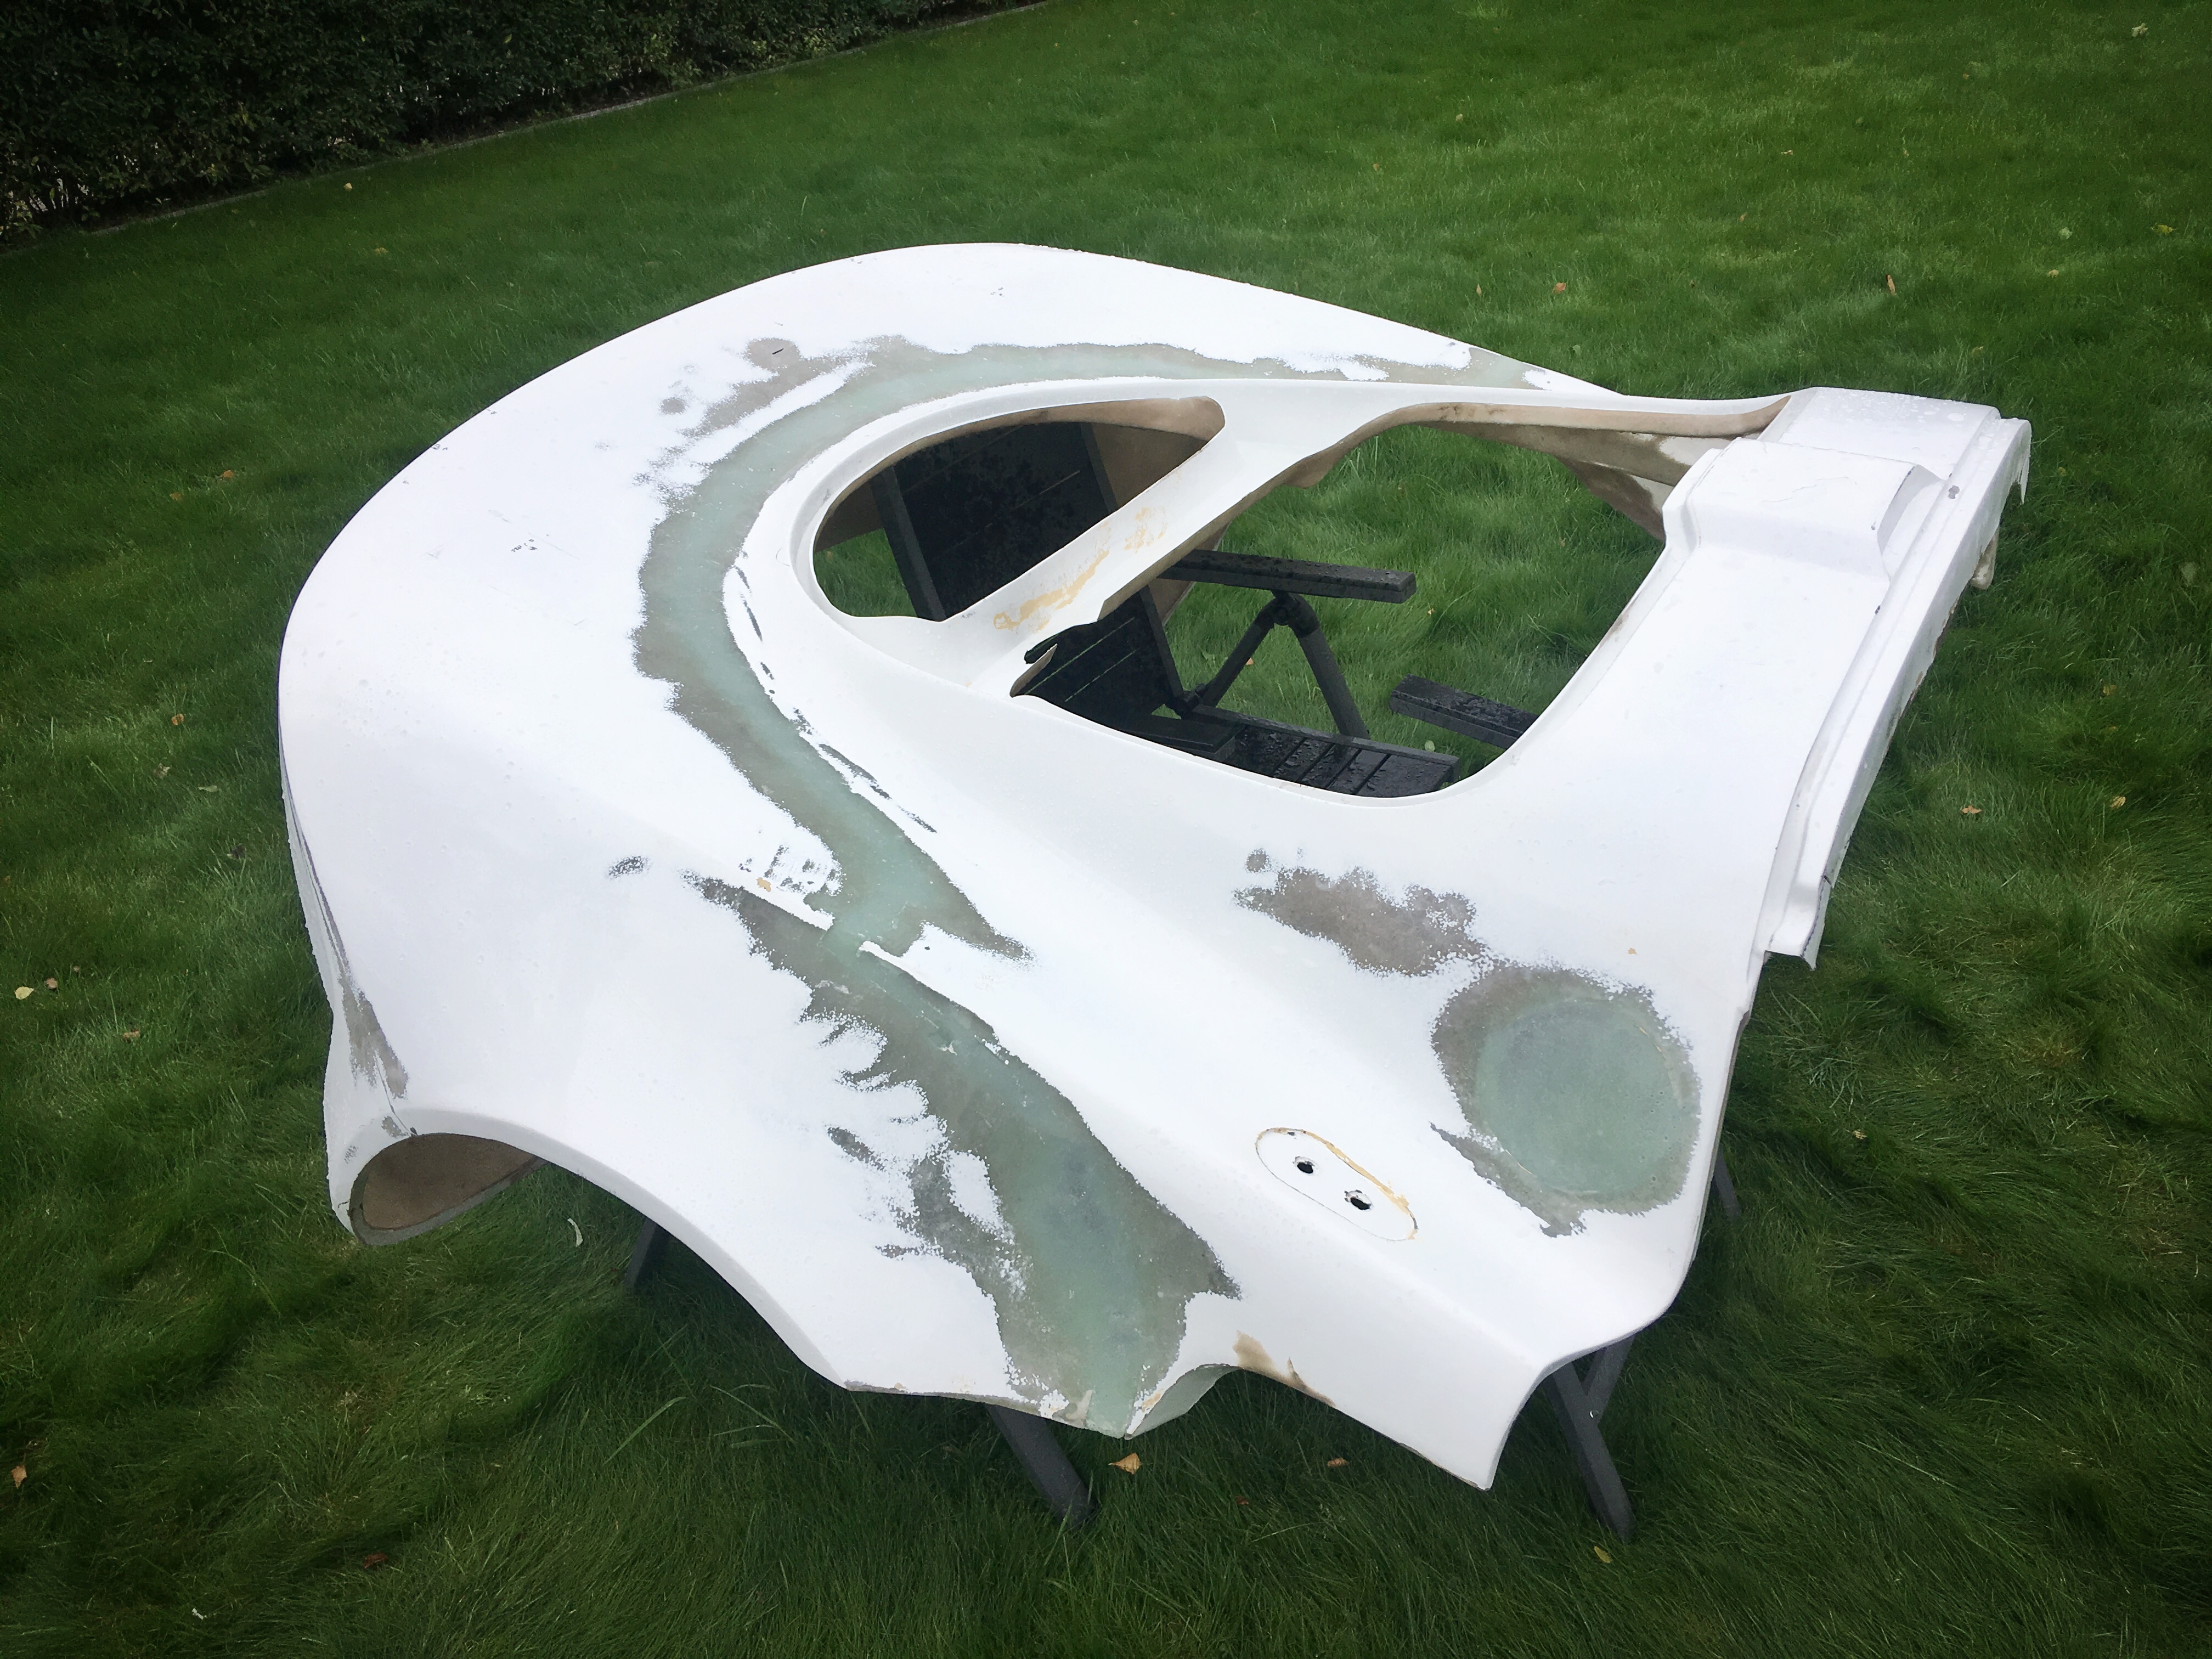
im going to try my hand at structural carbon composites to reinforce the rear clam across the bumper and reinforce the rear arch location, as well as mounting to the rear chassis... i have 245gsm twill end-of-roll CF and some 2k epoxy resin sitting idle. i did some reading on the bonding of such a strong and rigid composite tube to something more soft and elastic like the polyester chopped mat body, and ultimately it seems the best thing is to sikaflex it together. ive previously used 255FC for other structural body components, and i think that would be the way to go again now. funny how it gets little notice in discussion of strong single part polyurethane adhesives. 292 is my usual go-to high strength adhesive, and 221 my 'do everything' adhesive...

255 - tensile: 870psi, lap/sheer: 580psi, elongation: ~400%
292 - tensile: 550psi, lap sheer: 360psi, elongation: >300%
221 - tensile: 260psi, elongation: > 500%

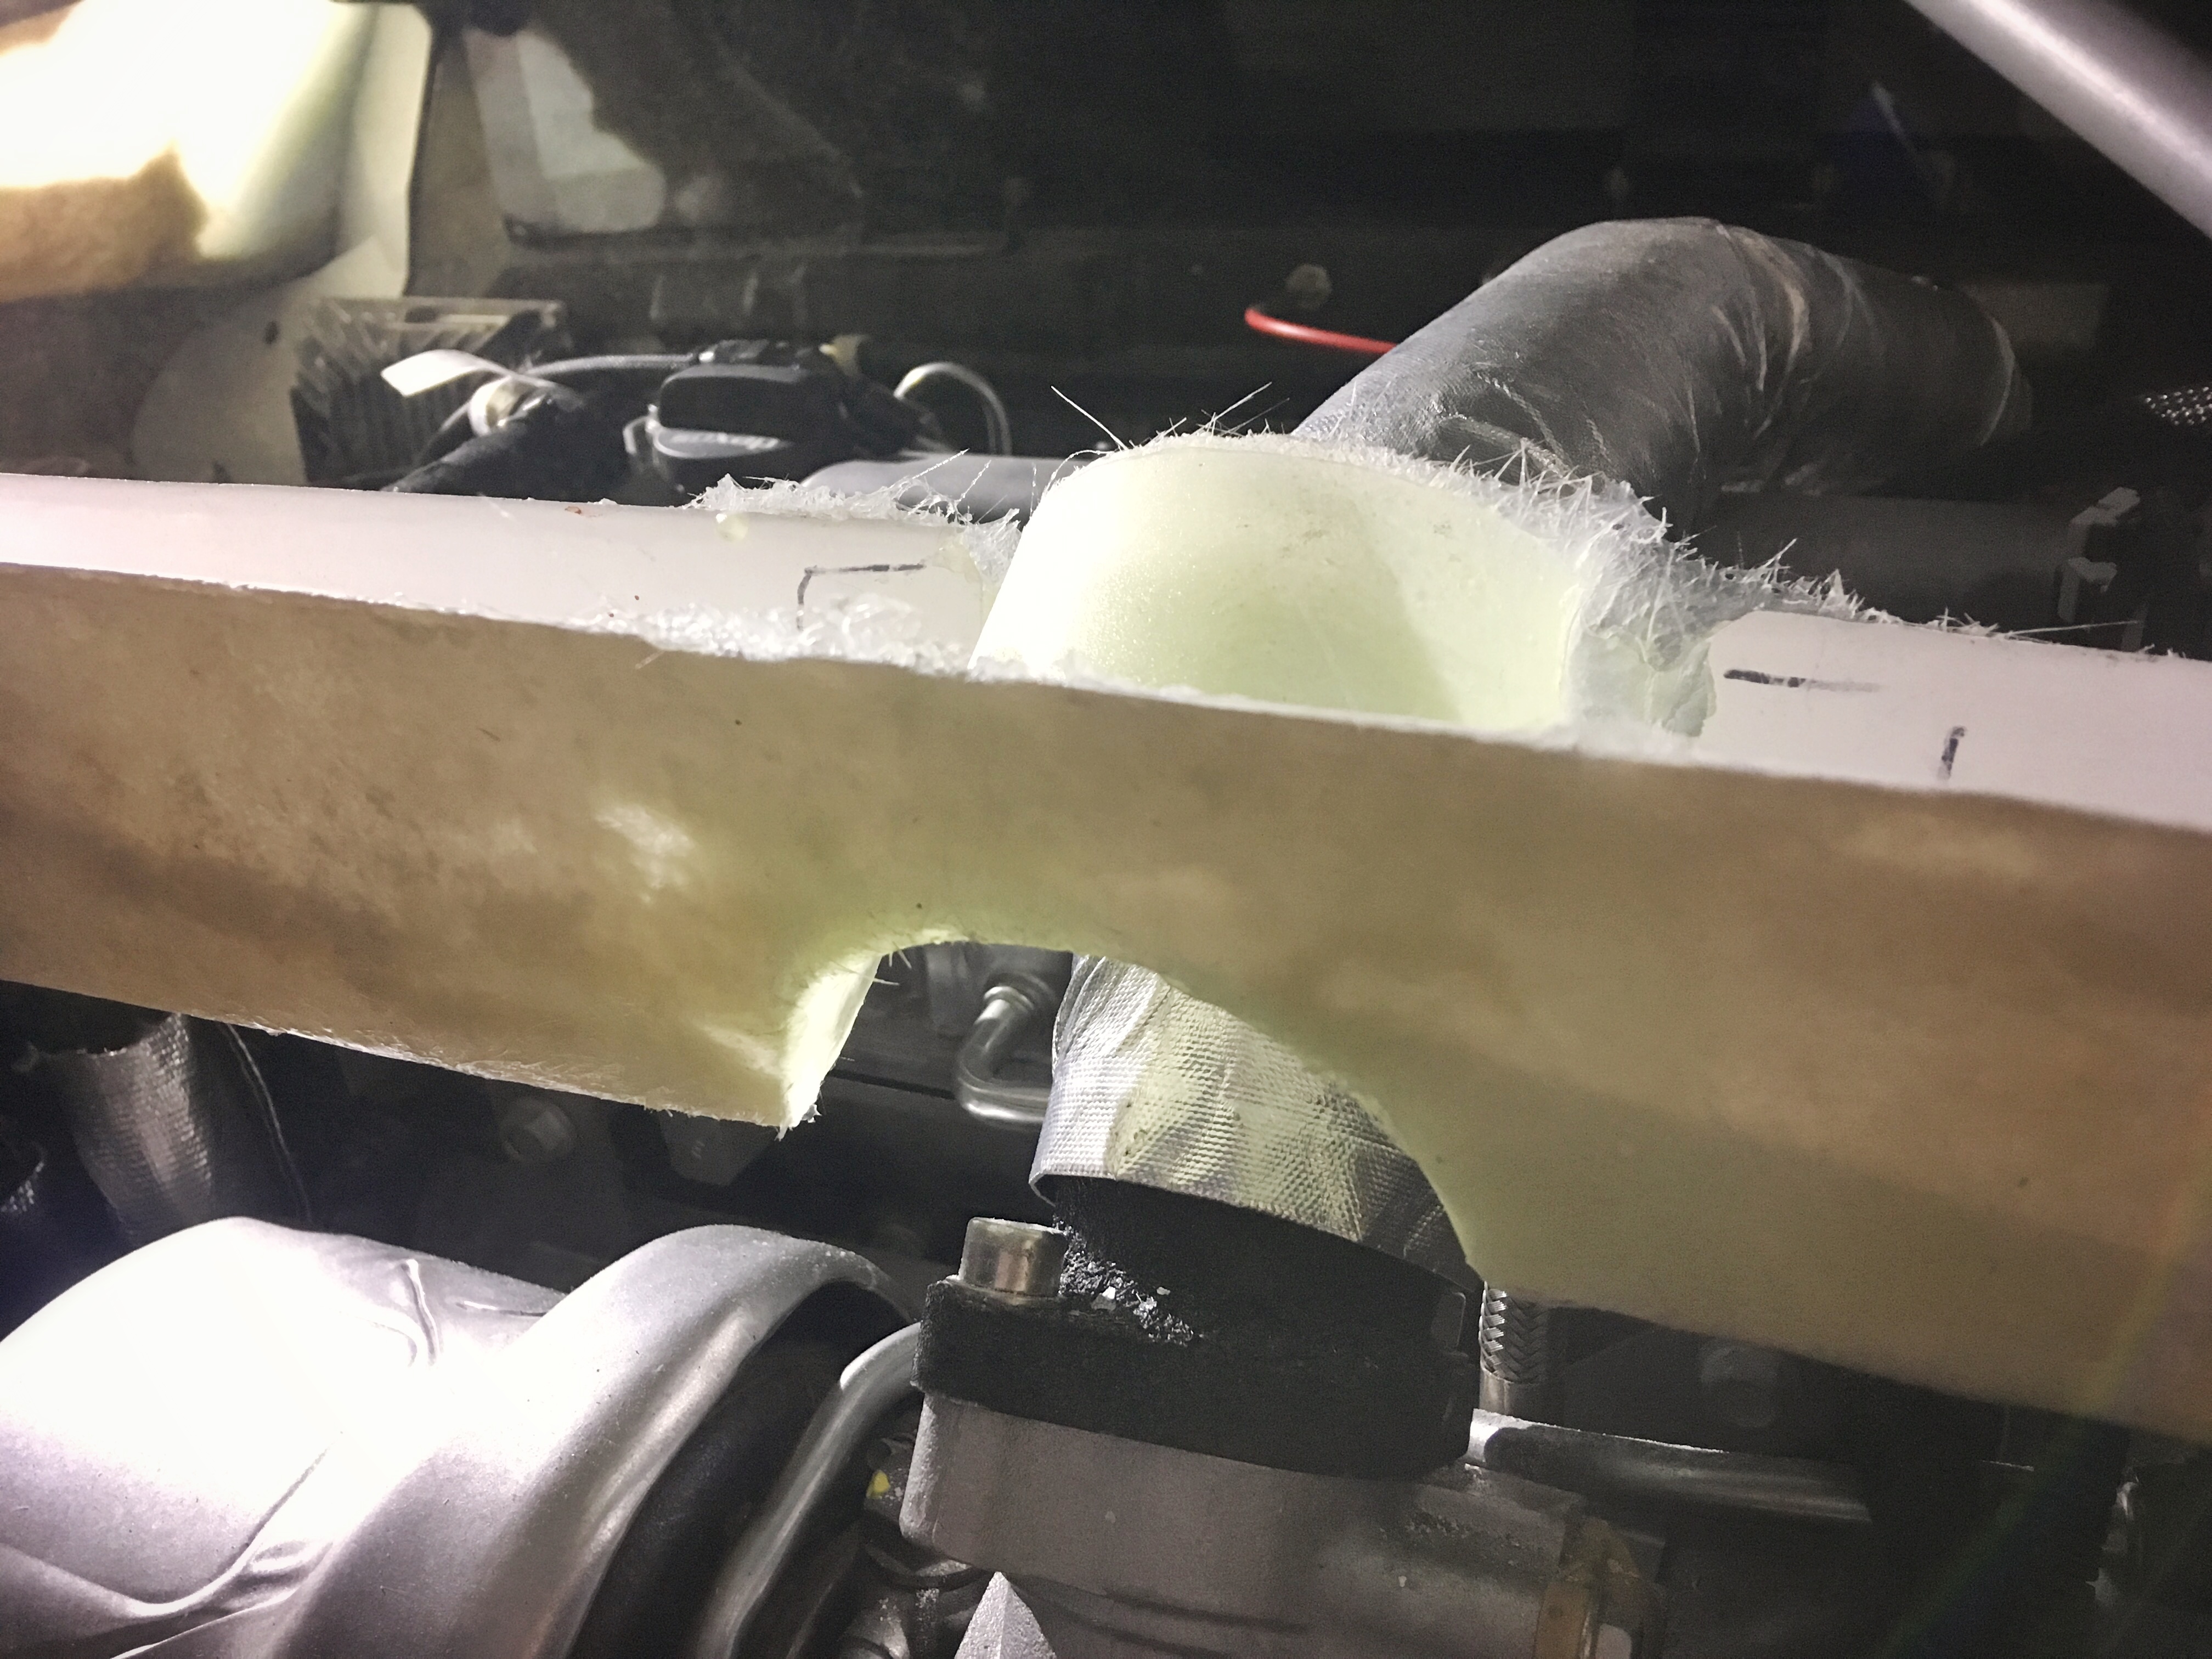
so, making the tube... i had the idea of thermo-forming some PVC tube. thats feasible to do in position on the car with a hotair gun. splice in some T fittings and send some tubes forward in the direction of the chassis mounts (as post above). ill transition those PVC tubes to alloy, and use a surface abrasion on the alloy to eventually bond the aluminium stalks direct to the epoxy.

so ive got that 245gsm twill. ill cut it into 10cm strips, run one length of twill longitudinally down the PVC , then wrap 2 further up and down in crossing 90deg laminates. so three layers at 45deg orientations. tie over the T junctions, wrap the aluminium. then use plain old packing tape to compress the wrap's form to the tube and get good impregnation (apparently it releases ok from epoxy).


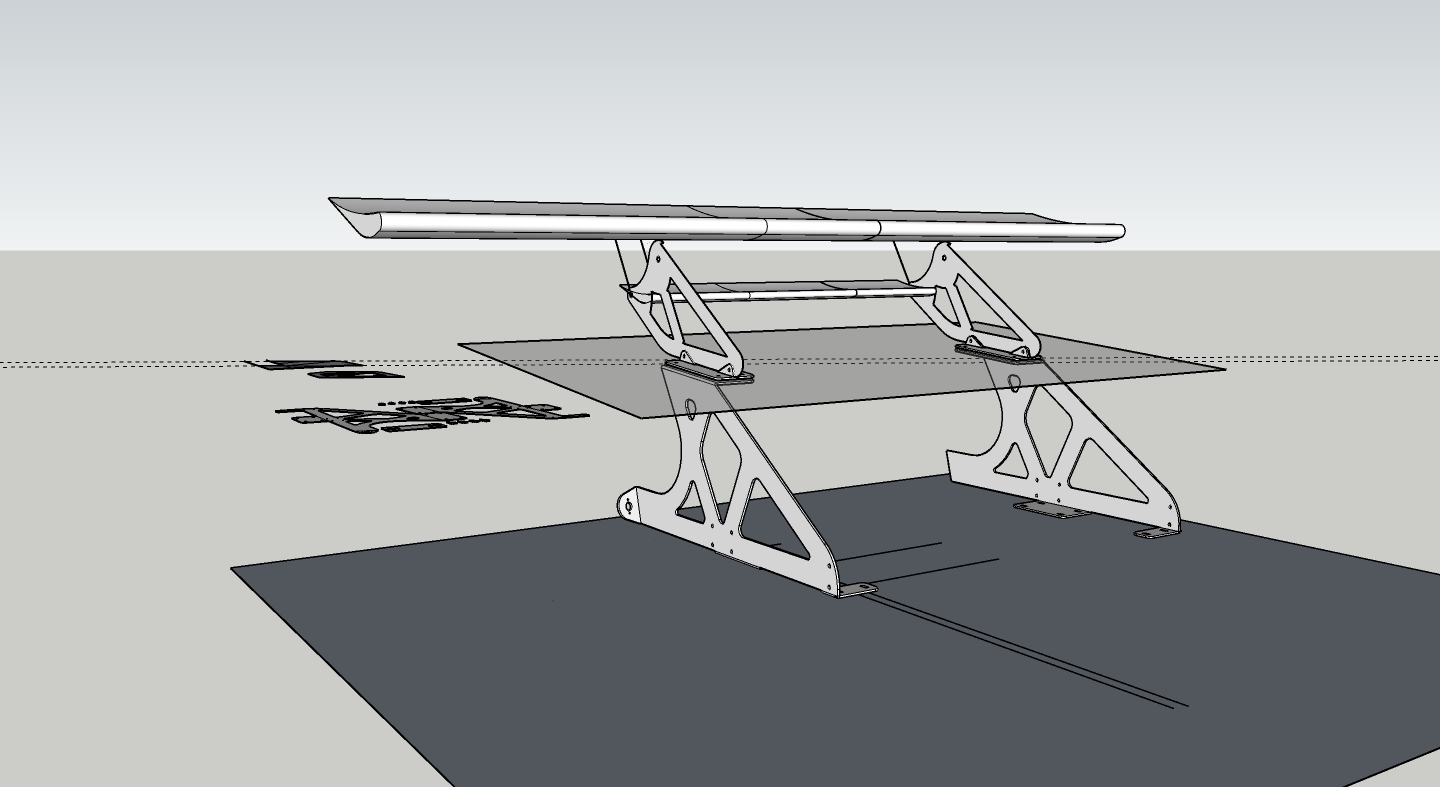
so, to mounting it, i had a moment of clarity, and came up with this... 2 longitudinal tubes coming forward from the clam, and picking up the wing/body uprights. ill use some aluminium hydraulic tube clamps, and that will let me adjust things in position, and button it all up.

need to tidy up the files a bit, and its off to the laser cutter guy

wing_support_v1.jpg

#1045 Doctor Ed

Doctor Ed

    Need to get Out More

  • PipPipPipPip
  • 1,188 posts
  • Location:Germany

Posted 22 September 2018 - 12:27 PM

rear clam going back together
 
approached it in halves due to working time of the resin (just using Poly/MEKP - same as the original construction). clamped using carriage washers i ground the edges of the gap down to paper thin. i first tried using duct tape as the backing/forming material - which was good to form to the required curves etc, but with the resin going off it went a little wavy (im guessing due to fabric/glue composition) and the final surface finish didnt stay smooth (will need some surform work). so lesson learnt and i did the rest with clear packing tape. no issues, a little harder to get to follow the curves and gaps, but nothing terrible, and no reaction with the resin. initially alternated glassing with the clamp position, and following green cure removed the clamps and completed the glasswork. 4 progressive layers.
 
IMG_1325.JPG

Edited by Doctor Ed, 22 September 2018 - 12:27 PM.


#1046 Doctor Ed

Doctor Ed

    Need to get Out More

  • PipPipPipPip
  • 1,188 posts
  • Location:Germany

Posted 22 September 2018 - 01:17 PM

for a complete cut-n-shut i think i got the panel alignment pretty spot on:
 
IMG_1329.JPG

Edited by Doctor Ed, 22 September 2018 - 01:17 PM.


#1047 MAXR

MAXR

    I’m jealous of Batman’s driving skills

  • PipPipPipPipPipPip
  • 2,719 posts
  • Gender:Male
  • Location:Hampshire/Berkshire
  • Interests:Tennis, Golf, classic Ferrari's

Posted 22 September 2018 - 03:05 PM

Well done, It’s going to look seamless!

#1048 Doctor Ed

Doctor Ed

    Need to get Out More

  • PipPipPipPip
  • 1,188 posts
  • Location:Germany

Posted 24 September 2018 - 03:39 PM

Here’s the sole offending curve. The general surface profile is pretty spot on, but stretching a compound curve 30mm in one direction was never going to be without issues.

Absolutely nothing a bit of filler and a surform can’t make perfect. Flowcoat over the top :)

IMG_1353.JPG

IMG_1354.JPG

IMG_1351.JPG

#1049 Nev

Nev

    Nipper's Minion

  • PipPipPipPipPipPipPipPip
  • 11,587 posts
  • Gender:Male
  • Location:Bristol
  • Interests:Rock climbing, skiing, kayaking, surfing, mountaineering, budgies, chess, practical mechanics.

Posted 24 September 2018 - 04:33 PM

Whats the green coloured filler - epoxy resin?


#1050 Doctor Ed

Doctor Ed

    Need to get Out More

  • PipPipPipPip
  • 1,188 posts
  • Location:Germany

Posted 24 September 2018 - 06:04 PM

its just polyester resin that's not 100% cured yet (green phase cure)


Edited by Doctor Ed, 24 September 2018 - 06:08 PM.


#1051 ChrisS1

ChrisS1

    Club OEM

  • PipPipPipPipPipPipPip
  • 8,360 posts
  • Gender:Male
  • Location:South Walers

Posted 25 September 2018 - 07:47 AM

Looking great.

Bet that took a while to complete.

#1052 Doctor Ed

Doctor Ed

    Need to get Out More

  • PipPipPipPip
  • 1,188 posts
  • Location:Germany

Posted 25 September 2018 - 10:11 AM

yep, fast is not how i would describe it :)


#1053 Doctor Ed

Doctor Ed

    Need to get Out More

  • PipPipPipPip
  • 1,188 posts
  • Location:Germany

Posted 25 September 2018 - 09:14 PM

tried something new today... i needed to cut out reprofile 2 big ass holes on each side left over from the dry-break fuel system mounts. again a compound convex curve. so got some relatively thick (~5mm) thermoplastic sheet and the heatgun out. got the basic form of the thermoplastic made based on the section of body immediately next to the hole, then did some minor 'in position' forming to get the contour a little better fitted (tricky as when soft it was easy to let the plastic form into the hole rather than ride flush over it). used hot glue to then seal  and hold the thermoplastic form to the surface (releases cleanly and easily from the existing gelcoat). 

 
in retrospect the hot glue stood the form off from the surface around 0.5mm which means ive now got an chunk of sanding to do getting the new surface back down to properly flush. but again, the profile is right, so the difficult part is 90% done :)
 
IMG_1372.JPG
 
IMG_1371.JPG

Edited by Doctor Ed, 25 September 2018 - 09:14 PM.


#1054 Doctor Ed

Doctor Ed

    Need to get Out More

  • PipPipPipPip
  • 1,188 posts
  • Location:Germany

Posted 26 September 2018 - 10:35 AM

125mm rubber velcro sanding plate on the grinder. pack of 60grit discs, windy day (fcuk you neighbours!) and off we go. ive never sanded fibreglass like this before, and jesus, its amazing. the control is brilliant, the rate of material removal is predictable and very finely adjustable with hand/disc position. and whilst i was initially a bit held back running the disc dead flat on the panel surface (normally a big no-no for me with an angle grinder) holy sh*t *sun ray pieces through the clouds, illuminating me with enlightenment* once the focussed material removal is done with the disc angled into the workpiece, laying it dead flat on the panel surface and moving it in circles like a buffing machine is next level! the rate of removal slows, and it blends complex contours like a fcuking boss. it doesn't flatten anything at all, it rolls the highs and lows and almost instinctively take out unwanted high spots whilst maintaining the curve and profile of the piece in general. such a pleasure to work with.

 
the only dodgy area is the one i previously noted, and this simply needs filling and contouring, nothing too outrageous. otherwise i think ive blended the stretch almost spotlessly. the results now, before even a hint of filler or proper block sanding, are really really good. hosed it down and did the stevie wonder over it, and it feels great. feeling really good about filling it and blocking it
 
IMG_1392.JPG
 
IMG_1393.JPG
 
IMG_1394.JPG


#1055 Doctor Ed

Doctor Ed

    Need to get Out More

  • PipPipPipPip
  • 1,188 posts
  • Location:Germany

Posted 26 September 2018 - 11:08 AM

next job, change the scoop:
 
g3osziotgdomdln1dhec.jpg


#1056 Doctor Ed

Doctor Ed

    Need to get Out More

  • PipPipPipPip
  • 1,188 posts
  • Location:Germany

Posted 27 September 2018 - 08:04 AM

ideas on the wing support structure.

 
lower components are below deck, and are the main support for the rear of the bodywork. upper components bolt to this in usual deck-mount fashion. its all rather swept to connect the wing to the chassis, hopefully the supports cam transfer the load ok. wing is dual element, with the lower plane designed to drive the diffuser (about 100mm above deck surface, overhanging the trailing edge) main chord is just a single plane. i don't want to overcapitalise on rear aero at this stage
 
wing_support_v2.jpg


#1057 Rosssco

Rosssco

    Scary Internerd

  • PipPipPipPipPipPip
  • 4,180 posts
  • Gender:Male
  • Location:Aberdeen

Posted 27 September 2018 - 02:52 PM

Ideal use of garden furniture  thumbsup


#1058 Doctor Ed

Doctor Ed

    Need to get Out More

  • PipPipPipPip
  • 1,188 posts
  • Location:Germany

Posted 27 September 2018 - 10:38 PM

Did some further experiments with thermoplastic molding (just reused the last molds, heat and repeat!). Made a cutout for the turbo outlet pipe

IMG_1424.JPG

IMG_1425.JPG

#1059 MAXR

MAXR

    I’m jealous of Batman’s driving skills

  • PipPipPipPipPipPip
  • 2,719 posts
  • Gender:Male
  • Location:Hampshire/Berkshire
  • Interests:Tennis, Golf, classic Ferrari's

Posted 28 September 2018 - 04:10 AM

Great work!

...Plastic fantastic!

#1060 Doctor Ed

Doctor Ed

    Need to get Out More

  • PipPipPipPip
  • 1,188 posts
  • Location:Germany

Posted 28 September 2018 - 05:54 AM

And got enthusiastic with the angle grinder and removed the forward section of the scoop.

IMG_1426.JPG

IMG_1427.JPG

IMG_1428_2.JPG

IMG_1429_2.JPG

IMG_1431.JPG

IMG_1432.JPG


2 user(s) are reading this topic

0 members, 2 guests, 0 anonymous users