Might be available singular / cheaper options.

Lotus on Crack


Posted 03 April 2018 - 10:23 PM
Super Member
Posted 03 April 2018 - 11:08 PM
Very kind, thank you !
https://www.amazon.co.uk/dp/B0002SRG66
Might be available singular / cheaper options.
Scary Internerd

Posted 04 April 2018 - 08:35 AM
Not sure you had the end of the bolt sticking out, but when mine did this, I filed down both sides of the bolts flat, and used and adjustable spanner to remove. Just took some time to file them down properly..
Billy No Mates
Posted 10 April 2018 - 10:55 AM
Rear wishbones are all stripped down. Should I be removing the old bushes and ball joints before getting them powder coated or do they act as a good mask?
Attempted to strip the fronts the top suspension bolt of one is truly bonded to the Quantum bush without the room for a club hammer that broke the join I had on the rear lower ones.
Decided the front clam needs to come off for more access to it... it needs to come off at some point anyway. Took a dremel to the arch bolts without much drama.
Both of the bottom door front clam bolts are rounded though, so I think that will be more dremel action - sounds like a world of pain reading other threads about them on here.
Billy No Mates
Posted 10 April 2018 - 03:22 PM
Super Member
Posted 10 April 2018 - 04:36 PM
Billy No Mates
Posted 10 April 2018 - 05:53 PM
The bottom clam bolts aren't the worst either! You should hopefully be able to get a dremel disc (certainly worth the official ones and the easy click change system here) on the heads pretty easily and take the sides off. Once removed, you can remove the remains in whatever your chosen 'stud-out' method is. Replacing you can either re-cut the thread on the insert or get rid of the insert when it freely spins and replace with a fresh one. There is access to the underside too but this is in a non-visable area so as with all jobs is a royal PITA. The ones under the windscreen are horrible. One of mine was rounded by a garage that replaced the radiator when it went years ago. WRT the bushes and ball joints, I removed my old ones and then masked up with masking tape once they had been blasted. I get on well with the powdercoaters that I use and was able to have a chat with them prior to the work being done. The stuck bolt in a bush on the suspension is what caused me to do the first refresh. I only wanted to replace the toe links but the bush inner and old toe link were so fused together there was no way they were coming apart easily. Keep going though, the hard part is taking it all to bits. The putting it together is the fun bit as everything is new and all does up nice and easy.
Thankfully the windscreen ones came out quite nicely with a bit of care. Good to hear the bottom ones have a few options. I'll take them into the powder coaters with them in then and see what they prefer. Yep, can't wait for the reassembly... will also mean my bank balance will have stopped the hemorrhaging. Just ordering a Tullet manifold and cat section from Joe.
Billy No Mates
Posted 10 April 2018 - 05:55 PM
You may have to drill some in. As mentioned replace by new sealed nuts, or make a hole in the sill for direct access... I have a picture somewhere if you don't see what I am on about.
Given the state of the passenger sill that might be the best option. Hopefully a mole grip will get whatever is left out cleanly once I've been at it with the dremel.
Super Member
Posted 10 April 2018 - 06:04 PM
Billy No Mates
Posted 17 April 2018 - 07:42 PM
Latest bundles of joy are the front clams bolts that in the back of the wheel arch... one spinning the fixing, the other rounded. Anyone around North Herts experienced in getting clams off that haven't been off before? Was determined to do this myself but I'm losing the will to live with this clam. There's a good pub opposite me to redeem immediate beer tokens ha.
Super Member
Posted 17 April 2018 - 08:05 PM
Billy No Mates
Posted 17 April 2018 - 08:42 PM
The ones behind the arch liner in front of the door. Might be able to fit a dremel cutter in the clearance hole, will see tomorrow.
Super Member
Posted 17 April 2018 - 08:45 PM
Billy No Mates
Posted 17 April 2018 - 09:34 PM
Mercifully the upper door ones came out nicely. The bottom door ones, both sockets rounded. Then there're the two mentioned above.
All the wheel arch screws were terrible, made a right mess of one. Still can't separate the the suspension bolt from the Quantum bush, meaning this is stopping me getting the wish bones out. In attempt to do something to add to the parts ready to go back on pile, I managed to break apart a caliper - ElizP thankfully supplying another, but the 3 I have had a nice yellow splash of paint.
Lotus on Crack
Posted 17 April 2018 - 11:11 PM
Scary Internerd

Posted 18 April 2018 - 07:27 AM
Is the top quantum bolt/bush seized?
Would take the bottom wishbone out, the top one and then you have room to angle up the shock upwards to access/remove the 2 shock-bracket M8 bolts...
Billy No Mates
Posted 18 April 2018 - 07:31 AM
I like that. I'll try that then order a heat gun. Cheers.
Need to get Out More

Posted 18 April 2018 - 07:34 AM
Attempted to strip the fronts the top suspension bolt of one is truly bonded to the Quantum bush without the room for a club hammer that broke the join I had on the rear lower ones.
If it's only the top that's stuck then you should be able to take the wishbones and upright off normally?
It's not in the way for disassembly of those parts.. You access the (upper) wishbone bolts 'behind' the damper bracket mount with a long/thin 17mm/M10 socket.
Once the wishbones and all ohter bits are off, flip/pivot the damper up and undo the damper bracket itself from the ali chassis (short M8 bolts and nuts)
Take damper+bracket to workbench and go to town with your favorite bolt removal tools.. 
Bye, Arno.
Billy No Mates
Posted 18 April 2018 - 11:56 AM
That's tonight's plan then.
Billy No Mates
Posted 19 April 2018 - 07:27 AM
Thanks chaps, just left with the steering arm hanging off of the track rod. No flat on the track rod to stop the whole joint spinning.
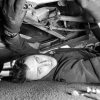
Here's a grubby picture before the clean


0 members, 1 guests, 0 anonymous users

