i can't say i noticed it when they first went on Then again Ferrodo have a pretty long and boring bedding in procedure which i was attempting to follow.

Interesting Discussion On Seloc About Corrosion On Lotus Cars
Started by
robin
, Jan 08 2012 04:49 PM
93 replies to this topic
#82

JG
-

-

- 13,617 posts
Newbie
- Gender:Male
- Location:West Berks
Posted 01 June 2012 - 01:11 PM
oh and the zinc isn't up to track temperatures  it does flake off.
it does flake off.
#83
Jon Fuller
-

-

- 149 posts
Member
- Gender:Male
- Location:Shepperton, Middlesex, UK
- Interests:Boats, Planes, Cars & Bikes.
Posted 03 June 2012 - 03:43 PM
Whilst ACF50 is very good (we use it on the aircraft, but as I understand it this is more because it is less flammable than WD40) it doesn't even get close to this stuff for 'staying put' and giving continued defence against corrosion or water ingress. We use this in the marine side and its bloody marvellous. its (I think) lanolin based and leaves a very waxy layer behind once the solvents have gone. Doesn't seem to get washed away at all even when used on the boat below the waterline and in high speed water flow. Can't praise it enough. I use it liberally wherever long term lubrication and protection are needed...perfect for the job in hand on this thread.
http://2.imimg.com/d.../tectyl-506.pdf
seems your favoured oil guru stocks it too.
http://www.opieoils....ose-506-wd.aspx
JF
#84
-JK-
-

-
- 256 posts
Super Member
Posted 04 June 2012 - 04:37 PM
If you live near one of their shops Transair Flight Equipment do ACF-50 for a reasonable price:best place for ACF50? demon tweaks want £8.00 delivery
http://www.transair....erosol-Can 8632
Their delivery is reasonable as well and works out a bit cheaper than Demon Tweaks.
I picked some up from Staverton Airport today as it's just down the road from me. Also picked up one of these while I was there:
http://www.transair....-Sun-Visor 6880
Cut it in half and it makes two handy little sun visors

Anyone fancy a group buy
 :
:http://www.transair....RUM-ACF-50 4699
Edited by -JK-, 04 June 2012 - 04:41 PM.
#85
TheStotts
-

-
- 1,130 posts
Need to get Out More
- Location:Northampton
Posted 07 June 2012 - 02:35 PM
Managed to take a few pics over the weekend - NSFJG 
Before cleaning:
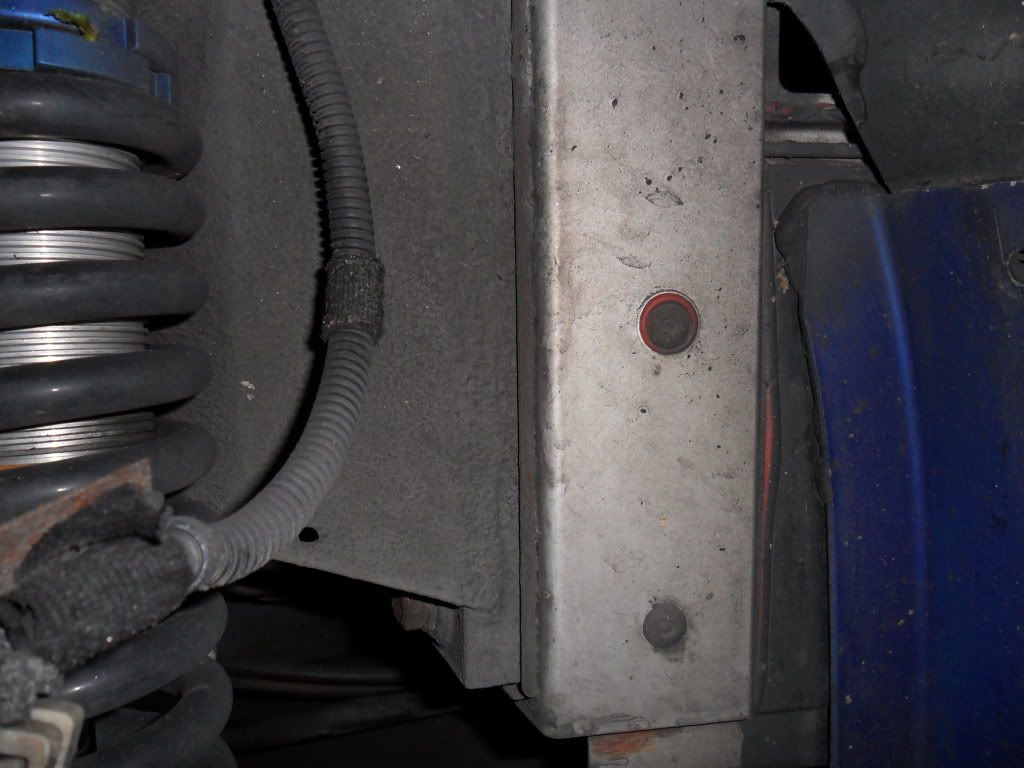
After a bit of a clean:

Looking at some of the pictures on Seloc I was expecting far worse. Did need quite a bit of cleaning but there is minimal pitting. Will buy a brass brush to remove the rest of the dirt then coat with AFC50 or Tectyl 506 (thanks again for the links).
Am I right to relax about this or does it still need an expert eye? Hopefully I'll get time to look at the hidden faces this coming weekend. Oh and this little fella gave me a hand. Didn’t make tea though

Before cleaning:
After a bit of a clean:
Looking at some of the pictures on Seloc I was expecting far worse. Did need quite a bit of cleaning but there is minimal pitting. Will buy a brass brush to remove the rest of the dirt then coat with AFC50 or Tectyl 506 (thanks again for the links).
Am I right to relax about this or does it still need an expert eye? Hopefully I'll get time to look at the hidden faces this coming weekend. Oh and this little fella gave me a hand. Didn’t make tea though
#86
fezzasus
-

-
- 7,689 posts
Whipping Boy
- Gender:Male
- Location:Oxford
Posted 07 June 2012 - 02:42 PM
Looking at some of the pictures on Seloc I was expecting far worse. Did need quite a bit of cleaning but there is minimal pitting. Will buy a brass brush to remove the rest of the dirt then coat with AFC50 or Tectyl 506 (thanks again for the links).
Am I right to relax about this or does it still need an expert eye? Hopefully I'll get time to look at the hidden faces this coming weekend. Oh and this little fella gave me a hand. Didn’t make tea though
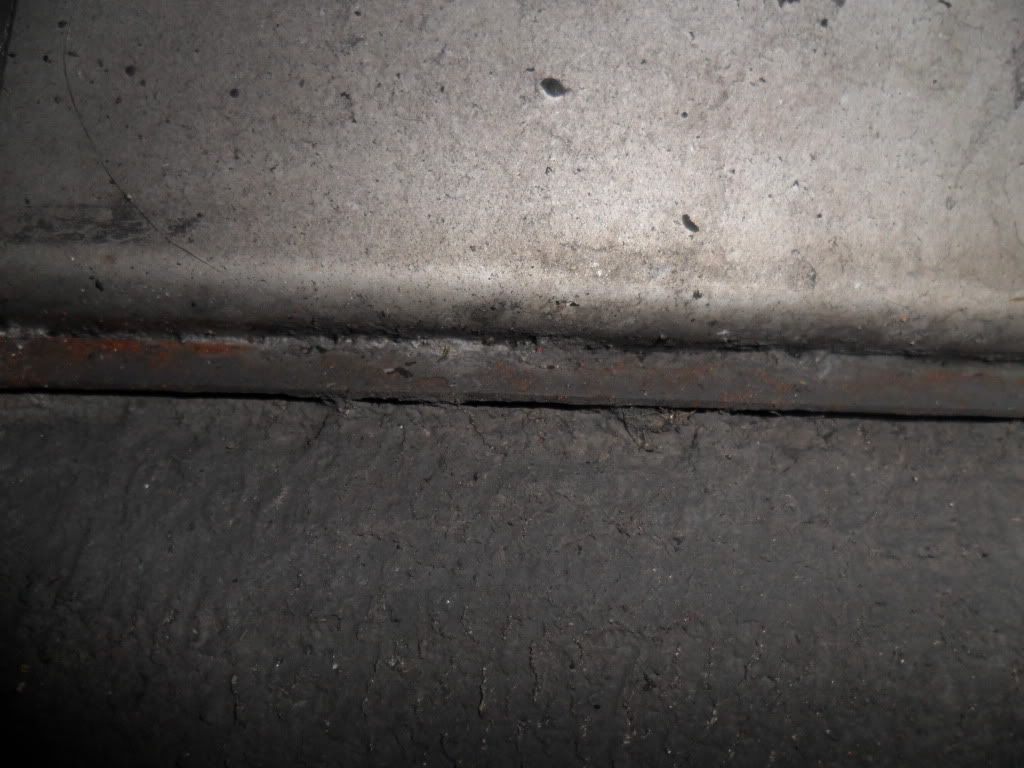
It looks okay, but I wouldn't expect the rear subframe to tub join to be much of a problem due to the massive surface area and the insulative shim they put between the two. I'd focus on the front upper wishbone mounts and the glued washers.
A wire brush will remove the remaining gunk.
#87
TheStotts
-
-
- 1,130 posts
Need to get Out More
- Location:Northampton
Posted 07 June 2012 - 03:31 PM
It looks okay, but I wouldn't expect the rear subframe to tub join to be much of a problem due to the massive surface area and the insulative shim they put between the two. I'd focus on the front upper wishbone mounts and the glued washers.
A wire brush will remove the remaining gunk.
Thanks, it’s a relief to hear they don’t look too bad

I was concentrating on this area first as Steve said there were early signs of corrosion between the chassis and rear sub frame. Will definitely have a good look at the front suspension mounts too.
Edited by TheStotts, 07 June 2012 - 03:32 PM.
#88
FLD
-

-
- 13,717 posts
WANNABE MY LOVER
- Gender:Male
- Location:Near nantwich
- Interests:Tugging my todger.
Posted 07 June 2012 - 03:31 PM
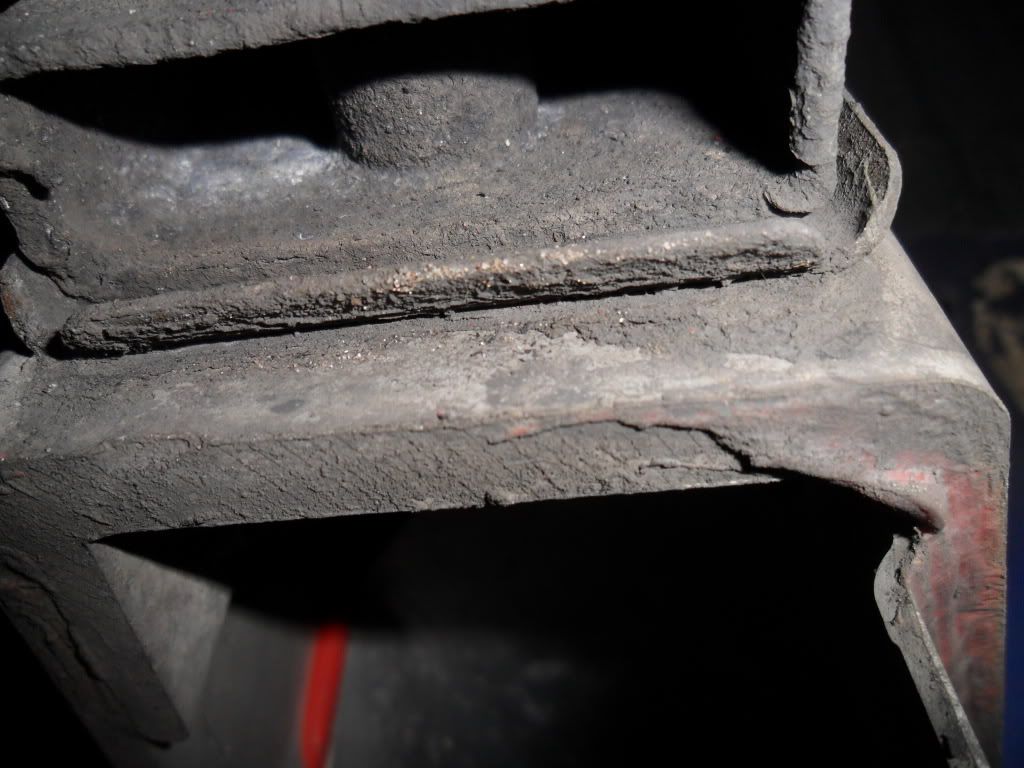
Insulative shim? The one thats made of steel? Pfft. I would be tempted to split the joint, clean it all out, ACF50 it, then coat the shim liberally in duralac on both sides and reassemble. Duralac will splurge out all over the place but at least you'll know its all covered. Then keep a keen eye (and ACF50) around the edges. Thats what I did on mine when I swapped the subframe over. My shim pieces had a touch of rust and I found on small pit (<0.5mm) on the side of the alloy tub. Galvanic corrosion is a swine. 
#89
Andrew aka Stuwy
-

-
- 8,731 posts
Made In England
- Gender:Not Telling
- Location:At Sea
- Interests:most things are intersting
Posted 07 June 2012 - 03:54 PM
this is the lalala I'm not listening topic...
#90
FLD
-
-
- 13,717 posts
WANNABE MY LOVER
- Gender:Male
- Location:Near nantwich
- Interests:Tugging my todger.
Posted 07 June 2012 - 03:58 PM
this is the lalala I'm not listening topic...
Then crunch, car falls in half?
#91
joshua
-
-

- 181 posts
Member
- Gender:Male
- Location:Bath
Posted 07 June 2012 - 08:13 PM
If I ever have my subframe off I'll put it back with aluminium and gavanized steel sacrificial shims in place of the steel one. This way neither the chassis of subframe need suffer.
#92
simsy
-

-
- 957 posts
Need to get Out More
- Gender:Male
- Location:Woodford, Cheshire
-
Interests:Working on sports cars. Motocross bike riding. Power boating in small rib
DOB is not real...
Posted 08 June 2012 - 12:11 PM
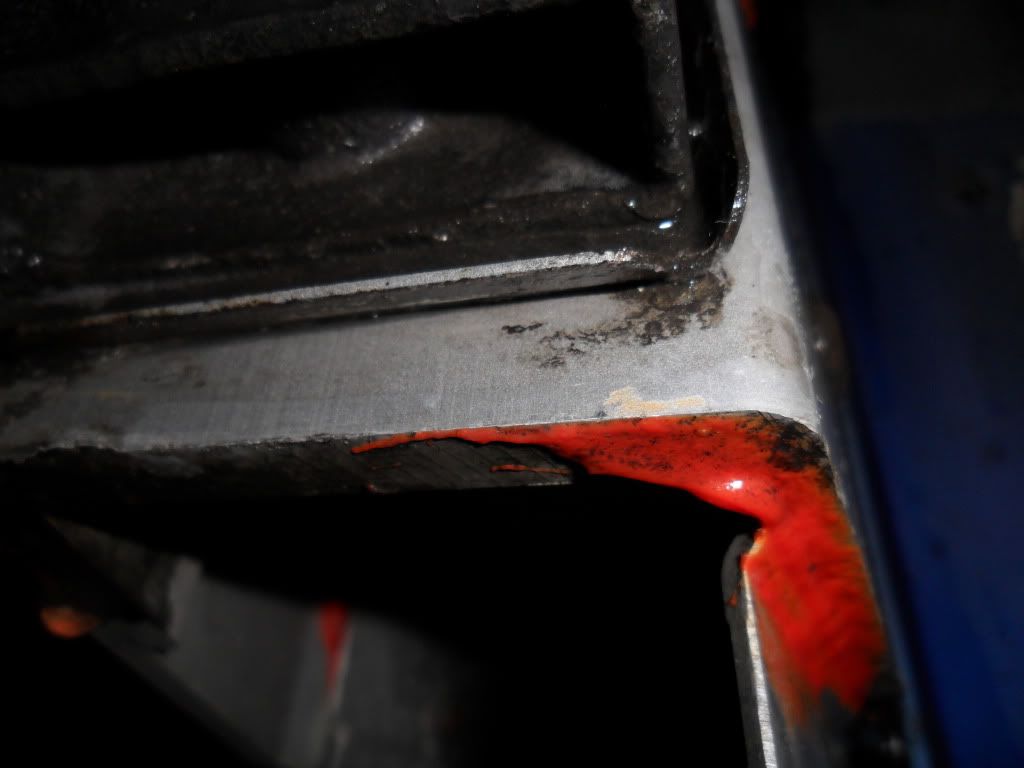
Repairing front top wish bone mounts...
Option
1 - new chassis (been done by some ) Only an option on a very high value car.
2 - weld (aluminum tig or mig) a new fabricated aluminum piece into the area. (seen this repair, it works for most bonded washer ripped out issues after crash. The intense heat does not remain far in aluminum, as in the high temperature soon conducts away to a none adhesive damaging level. 20- 25mm away from a tig weld the adhesive material looks fine.) Original chassis aluminum welds well.
3 - Lotus in their wisdom predrilled unused 8mm holes in the aluminum box section 80mm in from the bonded washer mounts. This allows you to carefully fabricate a new tight fitting box section from thin material and insert it into the damaged area, using bolts to hold it in place. Tricky, and needs care, and additional bonding adhesive to help lock the new section in place and improve cosmetics. Careful marking and drilling of the new mounting holes to ensure correct geo.
4 - Fabricate a new mounting system and rivet in place. As in some pictures here. Euro space engineering details would guarantee good results. Looks flimsy, but so does a light aircraft.
5 - remove entire box section and re-bond a donor piece back in using good adhesive. I imagine very neat results, but a lot of work and you are trusting your adhesive to perform. Effects the good undamaged side, if you have one.
I did 3 personally, results were good and car ran 1000's of hard miles while I owned it with no issues.
Note: I also used a longer mounting bolt on the front mount and with a spacer bridges to the undamaged box section just in front of the original mount (holding the crash structure) to up the strength and help the repaired area spread the load.
.
A repaired chassis is not the same as an original, even if its done well. Its always on your mind that you are driving a repaired structure.
Edited by simsy, 08 June 2012 - 12:17 PM.
#93
Andrew aka Stuwy
-
-
- 8,731 posts
Made In England
- Gender:Not Telling
- Location:At Sea
- Interests:most things are intersting
Posted 08 June 2012 - 02:42 PM
this is the lalala I'm not listening topic...
Then crunch, car falls in half?
wont happen to me
I'm special

#94
Cookies220
-

-
- 2,721 posts
- Gender:Male
- Location:Beds.
Posted 10 June 2012 - 08:17 AM
Bloody hell - this sounds worrying  Ordered some ACF50 from e-bay £13.85 inc delivery. Gonna have a look today.
Ordered some ACF50 from e-bay £13.85 inc delivery. Gonna have a look today.


1 user(s) are reading this topic
0 members, 1 guests, 0 anonymous users

