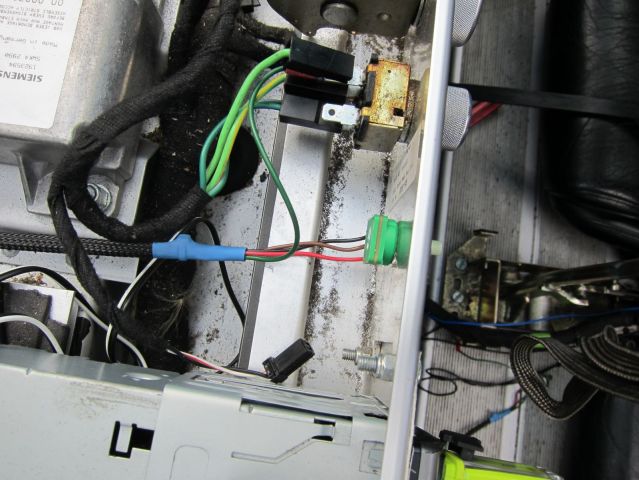
Also how the wire loom from the new heater switch runs down the driver side - just to the left of the bonnet catch

Edited by vocky, 20 November 2012 - 12:01 PM.

Moderator

Posted 20 November 2012 - 11:55 AM
Edited by vocky, 20 November 2012 - 12:01 PM.
Need to get Out More


Posted 20 November 2012 - 02:08 PM
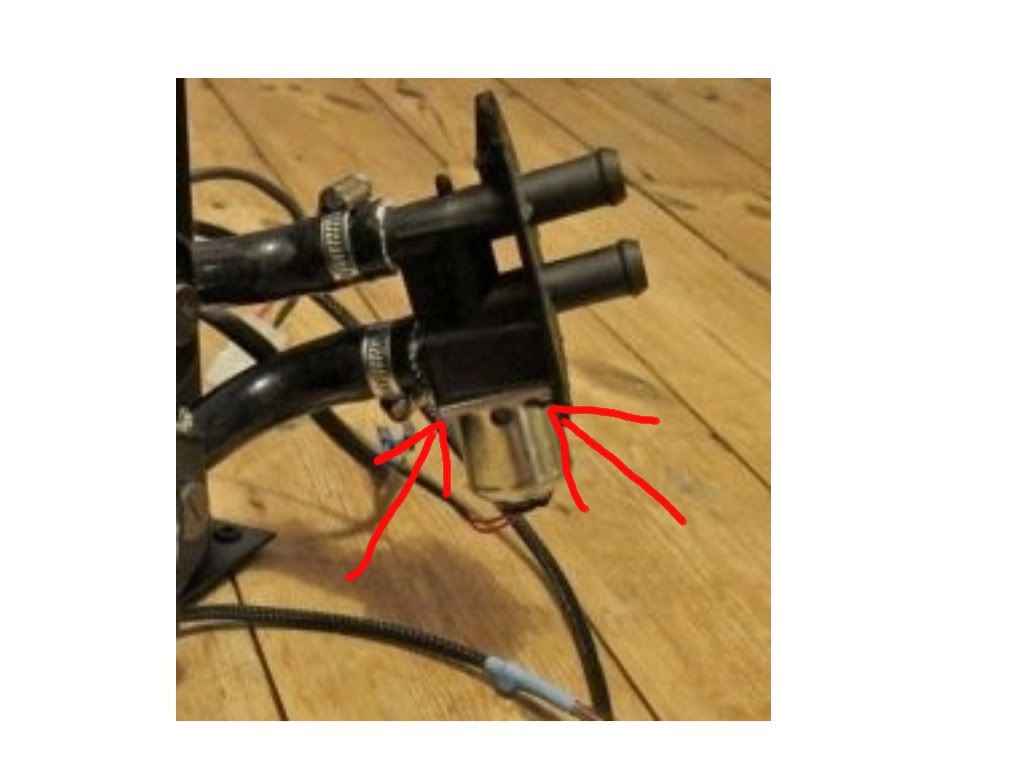
Can someone with the correct position of pipes please send me a photo to replace in the guide?
Moderator
Posted 20 November 2012 - 02:47 PM

RaceMode
Posted 20 November 2012 - 02:56 PM
Thetan level 15

Posted 24 November 2012 - 09:35 AM
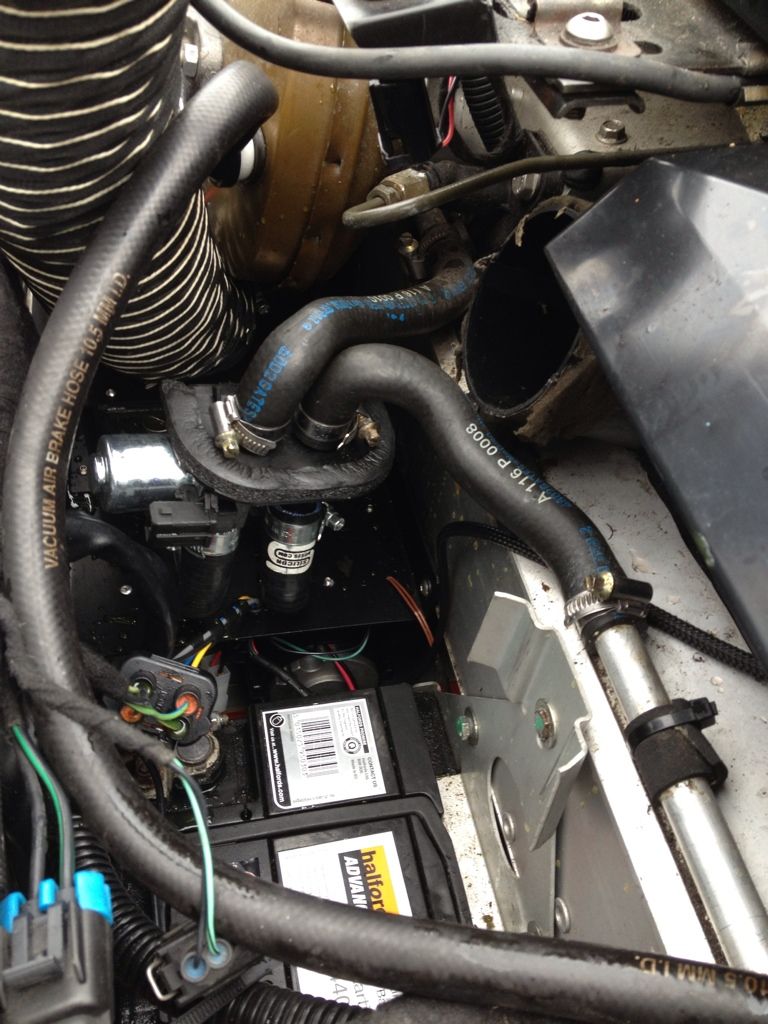
always makes me laugh , the brake fluid reservoir held on with a cable tie, thanks lotus

There must be some way outa here

Posted 13 January 2013 - 04:59 PM
Scary Internerd
Posted 02 February 2013 - 12:50 PM
2. Pull off the all green wire on the top of the fan speed selector (middle dial), attach the green piggyback connector and reconnect.
Whipping Boy
Posted 02 February 2013 - 05:15 PM
Scary Internerd
Posted 03 February 2013 - 09:08 AM
5 mins this morning has seen the connector issue solved and the old heater unit out. sleep works wonders 
Whipping Boy
Posted 03 February 2013 - 10:03 AM
thumbsup/>
5 mins this morning has seen the connector issue solved and the old heater unit out. sleep works wonders :beat:/>
Turbo's are for girls and throttle bodies are too slow

Posted 03 February 2013 - 10:45 AM
Scary Internerd
Posted 03 February 2013 - 01:01 PM
Edited by TazN, 03 February 2013 - 01:02 PM.
Whipping Boy
Posted 03 February 2013 - 03:15 PM
Does it matter . What way pipes go on ,and valve is I wouldn't think so but took car out yesterday and heater started blowing cold ?
Edited by fezzasus, 03 February 2013 - 03:41 PM.
Whipping Boy
Posted 03 February 2013 - 03:42 PM
Think my will has finally broken. I managed to get the new unit in place and finally got the rad bolted on to it - this alone has taken me 2 hours this morning as the holes wouldn't line up only for me to take everything back out and find they then started to align properly...
30mins tea break and I managed to get it all put back in and get the rad bolted on to it! Then the last of the 4 bolts rolled under the unit and disappeared completely. Magnetic reacher has come up empty as has taking photos of under the unit.
B&Q tomorrow for an M5 bolt suitable...
...

Posted 05 February 2013 - 10:45 PM
Whipping Boy
Posted 06 February 2013 - 07:20 AM
...
Posted 06 February 2013 - 08:10 AM
Looking at the unit it will matter. If the valve is the wrong way (like in my original photo) then water will force the valve open and get into a bypass loop. Make sure it's set up so the pass. side hose is at the front and the drivers side is at the rear.
Whipping Boy
Posted 06 February 2013 - 08:13 AM
Edited by fezzasus, 06 February 2013 - 08:14 AM.
Scary Internerd

Posted 26 February 2013 - 07:37 PM
I'm getting heater blindness, you're right. should be pass side at the rear and drivers side at the front.
Made In England

Posted 26 February 2013 - 10:02 PM
I'm getting heater blindness, you're right. should be pass side at the rear and drivers side at the front.
Could a mod/admin update the original thread to show the pipes connected the correct way round as above?
I'm sure I'm not the only one to have followed the original instructions and then realised that I've done it wrong AFTER it's all back together


0 members, 0 guests, 0 anonymous users