Jump to content


Photo

Vxt Heart Transplant.

engine swap audi tfsi

  • Please log in to reply
169 replies to this topic

#1 Crabash

Crabash

    Scared

  • PipPipPipPipPip
  • 1,686 posts
  • Gender:Male
  • Location:Durham

Posted 22 December 2013 - 09:04 PM

Before I start can I please ask that you don't post until I get it all up, there's quite a bit. I will let you know when I'm done. Thanks.
 
The time has come to reveal my project, a few people knew basically what was coming, some had a vague idea but for the most part I have kept quiet as it turned into a little bit more than I originally intended due to a few things Duncan and myself came across while carrying out some fairly basic jobs. Therefore I didn't want to have massive gaps in the build thread when both Duncan and I were busy with work or home life.
 
A bit of background... (Feel free to just look at the pics if this bores you :P)
 
I bought my VXT in March 2005 after one of those 24 hour test drives Vauxhall were offering in 2004, I booked it for a Friday in August 2004 which meant they couldn't actually pick it up until Monday, result.
No mileage restriction and the whole weekend to have fun and fall in love with it, I even left a note on my front door on the Monday saying "I had to pop out, will be 10 mins max, sorry". Then proceeded to drive 3 of my local roads that took under 10 mins to get a loop in, all morning until they arrived to pick it up. Managed 1160 miles that weekend and would have been more except for my mate being too lazy to get out of bed earlier each morning.
 
That began a hunt lasting 6 months. It had to be a Black VXT, with low miles.
I found it by somehow getting into a database of cars purchased at auction for network Q, it even told you which dealership each car was being sent to. I phoned up Nidd Vale of Harrogate and told them I was interested in the Black VX220 Turbo they had, they said "we don't have any VX220's in stock", I put them right and arranged a viewing.
It was outstanding, 300 miles on it and had apparently been bought by a dealership owner who couldn't get on with the car, don't know how true that was but hey ho.
Anyway enough about that....
 
I used the car as a road car for 2 years before I actually took it on track, although I had done a bit of tracking with driving experiences and had owned a pretty tasty 620 V Twin Gokart for a few years. Then.....
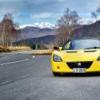
Dover, 6.30am waiting for ferry with worried Lotus owner :P
 
Posted Image
 
[font="calibri, sans-serif;"]On the way to the ring in 2007.[/font]
 
Posted Image
 
And one of my first laps.
 
Posted Image
 
What I found was the car was great fun but needed a different driving style to what I was used to. Also there was not enough noise from exhaust to give me a good sense of what the engine was doing.
Being a bit skint with repayments for the car I went the cheap route, DIY airbox mods and a second hand Milltek back box. That would have to do until the car was paid for.
It did give me what I wanted at the time though. To be honest I had no issue as such with the way the car performed so i left well alone and used it, daily and on track when I could afford it.
Fast forward to 2010........
 
By 2010 my debt had been cleared for almost a year and I had saved some cash back up.
So stage 1 of mods began. I wanted to improve cornering and overall feel on track while making it look a little different to the norm here in the UK.
I went for Hofmanns spec NTR's at first, while there I got a few little jobs done like new RC5+ pads (I had previously tried 1144, EBC Yellow, Pagid) and a new handbrake cable along with the GEO and corner weighting set.
I had bit of a shakedown at Mallory like this and although it was better I was not totally happy with the setup, maybe just didn't suit me, but identified braking was compromised too much in favour of cornering for me.
 
[font="calibri, sans-serif;"]Next was Tillet B5 Carbon seats, custom self made harness bar, a pair of Willians harnesses, a Sparco Suede Steering wheel with a spacer to improve my driving position, Spitfire rear toe links and EP uprated ARB.[/font]
 
Posted Image
 
And Finally a set of ATS DTC'S shod in R888's. I reset the geo myself based on the data from seloc wiki and previous setting using a bit of deduction to get what I wanted. I did it with poles and string and it worked fine to be honest.
 
Posted Image
 
All was ready for the summer holiday to... you guessed it the Nurburgring for the 4th year running.
Anyone recognize the house? And yes thats the same guy as in the picture from 2007, he had changed the Elise for an Exige S (250bhp) by this point. It took him a whole 3 years to move from looking at the rear wheel to the front :D
 
Posted Image
 
[font="calibri, sans-serif;"]Had a great time turning much faster and in my opinion and my passengers much more enjoyable laps, both because of the ability of the car and the seat harness combo allowing driver and passenger to forget about being thrown around. The rear wheels bouncing under braking in bumpy zones (I have referred to this in more detail in other threads quite a few times) was annoying although didn't affect cornering it was confidence sapping.[/font]
 
Posted Image
 
However what I now found was I was mixing it with some pretty fast cars due to the cornering ability, and getting held up a lot in corners where my cars strength was, consequently being left on the straights by much faster cars only to catch them again at the next corner. More obvious at the Ring than most places. Even though it's not a race it's very annoying getting your flow disturbed all the time, as I'm sure some of you know, people at the Ring don't all observe the rules very well and refuse to give you the space they should.
So I had a goal if not the funds to do it, time to save up again....

Edited by techieboy, 08 January 2014 - 12:18 PM.


#2 Crabash

Crabash

    Scared

  • PipPipPipPipPip
  • 1,686 posts
  • Gender:Male
  • Location:Durham

Posted 22 December 2013 - 09:22 PM

January 2012, some money saved but starting to think I will have to lower my expectations, then 2 strokes of luck,

February, PPI claim << substantial.

March, free car from my granddad, well apart from the £360 to get it back on the road after being garaged for 4 years. Volvo S40 1.6 W reg 55k :)


Time to get on with what I'm going to do.

I looked at what CS and MMG had to offer, I could basically afford a Garrett conversion with lots of nice bits, however I had concerns, may not have been a worry but they worried me.


-Power delivery of 300bhp plus zlets based on others experience.


-Requirement for engine rebuild with more "exotic" parts, and increased repair costs should I cook an engine.


-Questions over ageing F23 gearboxes handling the power for very long.


-Possibility of needing (wanting) a standalone ecu to resolve some of the above.


With all this in mind I thought why not drop DG a line, see if I can save any cash or build it better for similar cash. I would have liked to do it myself but realistically I don't have the space to work and the time to devote what with splitting my time between 2 homes and work, plus I'm getting older and can't be arsed.


Anyway we discussed options and costs of zlet route, but at the end of the day I still had concerns which I feel have been vindicated of late.

Which brought us onto the VAG engine and gearbox conversion, namely the 2.0Tfsi as fitted to various VAG cars with 260ish bhp as standard. I did not take this decision lightly, did a lot of fact finding and tried out cars with this engine in a tuned form.

Lukes was already underway (I won't comment on Lukes car, it's not my business, except to say that I did speak to Luke quite a lot as you would expect) which meant I had to wait a while anyway. That was fine with me, I/we had things to find and buy to enable it to happen.

So by November 2012 we had the main things we needed to get started, from the beginning I knew it was a project and not a conversion so to speak, it would have its own hurdles but also if all went well it should make a very quick, more drivable and more reliable car. Sure there would be problems but due to the nature of the project Duncan was giving me a lot of time for free for solving these issues.


[font="calibri, sans-serif;"]And so it begins.[/font]


Posted Image


As these things go progress seemed slow at first, quite a bit needed stripping from the car and there were lots or trial fits, brackets to make and remake, etc.

At this point Duncan was doing all the work alongside other ongoing projects, repairs etc. This was something I had agreed was fine, I did not want it rushed!

After he had the basic "make the engine fit" work done it all had to come back out for all the things that need doing to make it work. Fuel lines, cooling, charge and intake routing, electrics etc etc etc.

At this point I was informed a few times about the amount of rust falling on Duncan while taking parts off, and I was thinking about what I would do besides the actually engine transplant. Best I go down and have a look now it was in lots of bits.

Once there Duncan pointed out a few areas that were looking quite bad with corrosion, mostly where you would expect, wheel hubs, wishbones, some pitting in some area's of the aluminium, a corroded brake pipe in the usual place and the obvious heavy deposits between the chassis and subframe, (something that has been referred to on this forum lately). There were other area's too and the paint bubbling on the rear clam.

At this point I took the decision to get as much sorted as possible while it was in so many bits. Also I would go down and help once a fortnight on my weekends off work to help out, also I wanted to feel like I did at least some of the work myself.

[font="calibri, sans-serif;"]I would also take as many parts as I could away to refurb at home that were either not economical or not worth replacing.[/font]


So off came the subframe....


Posted Image


Posted Image


Posted Image


And the front end was stripped.


Posted Image


I took a load of parts home and refurbed them, and made a decision on what I would replace and what I would just clean up, re paint or whatever.


Get new ABS brackets.


Posted Image


#3 Crabash

Crabash

    Scared

  • PipPipPipPipPip
  • 1,686 posts
  • Gender:Male
  • Location:Durham

Posted 22 December 2013 - 09:26 PM

Modified and refurbed chargecooler mount.


Posted Image


Refurbed subframe shims.


Posted Image


Refurbed ABS cradle.


Posted Image


Refurbed steering arms.


Posted Image


Refurbed Hub carriers.


Posted Image


New Hub/bearing units, bit of paint protection added.


Posted Image


Refurbed uprights.


Posted Image


EP ARB was looking a state, refurb.


Posted Image


#4 Crabash

Crabash

    Scared

  • PipPipPipPipPip
  • 1,686 posts
  • Gender:Male
  • Location:Durham

Posted 22 December 2013 - 09:31 PM

Was feeling proud :P


Posted Image


Front calipers had severe corrosion on the mounting pillars, prob would be fine but...


Posted Image


I had always planed on a suspension upgrade, 46Race trackday pro spec (helpers front and rear).


Posted Image


A few pics of the subframe after cleaning, etching and painting with high temp paint.


Posted Image


Posted Image


Posted Image


Posted Image


Mesh added to the heater intake.


Posted Image


#5 Crabash

Crabash

    Scared

  • PipPipPipPipPip
  • 1,686 posts
  • Gender:Male
  • Location:Durham

Posted 22 December 2013 - 09:34 PM

Thermal Velocity heat shielding


Posted Image


The bodywork had severe paint bubbling and a few places where chunks of the GRP had popped off along with the paint looking tired and dull. Also a few stress cracks showing.


So after that was sorted.


Posted Image


Posted Image


Posted Image


Posted Image


Posted Image


There were lots of other things done that I don't have photos of.


Pro Alloy 48L fuel tank.

Pro Alloy charge cooler.

Bulkhead access panel.

Roll hoop braces modified and tarted up.

Finally getting round to painting my jonnyboy hardtop after 3 years.

Obviously renewing just about any bolt you can think of.

SS fastenings for the clam etc.

New rivnuts where possible.

New rubber mounting bobbins.

New EP wishbones, balljoints and OEM bushes.


The list seems endless, I don't think we missed much on our quest. I'm sure Duncan can remember stuff I missed, feel free to add comments mate.

So barring the things I have forgot, which are probably numerous the car was sorted and ready to take the engine transplant and associated wiring and plumbing a few headaches were surely in our future...


Edited by Crabash, 22 December 2013 - 09:35 PM.


#6 Crabash

Crabash

    Scared

  • PipPipPipPipPip
  • 1,686 posts
  • Gender:Male
  • Location:Durham

Posted 22 December 2013 - 09:38 PM

Although Duncan had been working out and making various bespoke parts all along I have kept it in an easy to follow format.

Duncan needed to get lots of parts made, most of which required a bit of trial and tweak or bespoke made on the car then sent for final welding, bending, cutting, machining etc.

Here are just a few of them.


Part of charge pipe.


Posted Image


Posted Image


Down pipe.


Posted Image


Posted Image


Posted Image


And Zircotec performance white ceramic coating.


Posted Image


Posted Image


Posted Image


Posted Image


#7 Crabash

Crabash

    Scared

  • PipPipPipPipPip
  • 1,686 posts
  • Gender:Male
  • Location:Durham

Posted 22 December 2013 - 09:42 PM

Ceramic coated intake pipe, one piece construction.


Posted Image


Posted Image


Posted Image


Trial fit of engine and box, again. And alignment.


Posted Image


Posted Image


Lotus 211 shifter assembly and Motorsport cables.


Posted Image


Duncan next sorted out the routing of pipes and wires, all done very neatly with as little wasted material as possible.

I might add here that at every stage we used the best we could find for the task at hand. I.e. the fuel lines are all clipped with A2 SS rubber lined P clips, any hose clips are again high quality A2 or A4 SS and so on. ACF 50, Corrosionblock, Duralac used everywhere we felt the need or had seen the results of being unprotected. it might not last but anything that might help seems worthwhile to me.

I was quite fussy when it came to this kind of stuff. I think it rubbed off on Duncan too :)


Posted Image


#8 Crabash

Crabash

    Scared

  • PipPipPipPipPip
  • 1,686 posts
  • Gender:Male
  • Location:Durham

Posted 22 December 2013 - 09:50 PM

Then hopefully the final fitting of the engine and start to bolt all the bits on.


Posted Image


Posted Image


Still there were more parts to make now the engine was in the correct place


Temp sensor housing.


Driveshafts.


Support brackets for gear cables.


The rest of the exhaust. At my request the tail pipes left short for an idea of mine. It has removable end pieces that could be interchanged for ones with db reducers welded in very quickly if I find trackdays to be an issue.


Posted Image


Posted Image


Posted Image


A very nice OEM looking mounting of the VAG header tank to the roll hoop brace.


Posted Image


Posted Image


Support bracket for filter end of intake pipe.


Posted Image


Posted Image


#9 Crabash

Crabash

    Scared

  • PipPipPipPipPip
  • 1,686 posts
  • Gender:Male
  • Location:Durham

Posted 22 December 2013 - 09:53 PM

More heatshielding.


Posted Image


Posted Image


Charge cooler pipe hiding from heat and heatshielding again.


Posted Image


Vag ECU etc.


Posted Image


To name but a few.


Also the fuel tank to fit along with pump.


At this point a lot of small jobs that take lots of time cropped up, adjusting gear linkage at least near enough to get it on the rollers, setting the wheels to somewhere near straight with the good old poles and string. Initially with very little camber as this was only to make it drivable on the rolling road.


#10 Crabash

Crabash

    Scared

  • PipPipPipPipPip
  • 1,686 posts
  • Gender:Male
  • Location:Durham

Posted 22 December 2013 - 09:59 PM

Time to visit EFI parts and let Chris work his magic with the wiring, he managed to make the VAG and GM ecu's work along side each other, which eliminated the potential problem of certain signals to the dash. Oil pressure and water temp were a concern and we thought it might need aftermarket gauges. As I didn't want a dash from the enterprise I was pleased.


A couple of problems did come to light though while at EFI parts.


The fuel pump works differently to the VX, I'll let Duncan explain but I think essentially the VAG ECU uses a demand based system. Until this was diagnosed the pump was over heating.


It was also discovered that the VAG fuel filter has a second pressure regulator built into it, hence impossible to run it properly on the rollers at that time. However everything was working and within parameters.


Once back at Duncan’s these problems were sorted and all the other bits could be put back on the car, clams, covers, new tyres to fit etc.


Also the ECU was programed with a "smooth" version of the Revo stage 2+ software which churns out 375bhp in FWD applications.


The car passed it’s MOT on Friday, after which Duncan did some final checks and put a reduced power smooth map on there for me for the drive home, being all new and not driving a VX for 18 months I was going to be very steady.


[font="calibri, sans-serif;"]Ready to take home if a little dirty.[/font]


Posted Image


And finally I picked it up yesterday, it was a long trip and sure there are things I need to finish, need to sort out the bulkhead liner and sound proofing, gear selector cover, and there is still some air in the brakes I suspect trapped in ABS unit as they were bled several times.


I have three people to thank as although they all got paid I believe they went above and beyond for the money they charged. While I realise this had a lot to do with being the guinea pig and them being genuinely excited about this project, I still appreciate them going the extra mile.


Chris @ EFI Parts - Thanks, fantastic job with the wiring and quality of work the usual very high standard


Dave Hardwick - Thanks, for all the welding work of which is as good as it gets! Also for the exhaust back box and helping with some of the fabrication work, willingness to play around with stuff as and when we needed it. And the speed with which you accommodated us shows your true passion with these cars.


Duncan (AKA DG) Thanks to you most of all, I know my car turned into a lot more than you or I intended, you have bent over backwards for me, and the attention to detail was second to none.


I am under no illusions, this is a project and I expect some issues to arise, hopefully we have thought of everything. I intend to put a few gentle miles on and let it settle, look for issues and monitor everything.

Then next year when weather picks up get a full geo done before returning to a rolling road for a test run and possible fine tuning.


Initial impression is it’s very fast, and smooth, the engine is very flexible pulls clean and strong from under 2k rpm in 6th, I admit I was a pussy and didn’t really open it up, did try a 4th, 5th, 6th gear burst but only took to 4.5k in 4th then much less in 5th and 6th I want to keep my driving privileges thanks. I will wait until I have proved it a bit and get a proper geo put on, before turning up the boost as I have also got a switch box that allows me to run several maps. I suppose I can get those tailored to what I want those maps to be but that’s something for the future.


Clutch will take some getting used to.


Having an open foam filter and no airbox does make it rather loud on the induction side, but that is being addressed with some sound proofing and an idea for muffling the air filter sound.


To be honest I think both myself and Duncan could have gone on forever finding things we could do better but you have to draw the line somewhere.


Finally a little bit of info on the mapping.

Overview

The standard throttle mapping on the majority of modern vehicles is setup to be very responsive to minor throttle input. This makes the vehicle feel more powerful as you get a sudden surge when you initially press the pedal. For general daily driving this is a great setup and makes driving quickly almost effortless. 

When you start using a vehicle on the track or for spirited driving on your favourite country roads the standard throttle mapping can become a hindrance. Add the additional power that our customers run over a stock vehicle and for some the standard throttle mapping can be over sensitive. This is where a linear throttle map is beneficial. 

A linear throttle map is setup to give closer to a 1 : 1 ratio between the throttle angle and engine load.  This gives the driver much more control as it allows for a much wider range of throttle modulation. 

The below graph is indicative of the differences between stock and linear throttle:


Posted Image

Posted Image


Software Overview

·         Switch-able performance software (Boost/timing/fuelling)

·         Anti-theft mode

·         Speed limit removed

·         Increased rev limit from 6800rpm to 7000rpm


Performance Data


Power (bhp)

Power (kW)

Torque (lbft)

Torque (Nm)

Stock OE

240

179

221

299

Stage 1

305

227

312

423

Stage 2

335

250

310

420

Stage 2+

367

274

353

479

# Dyno tolerance +/- 5%

Yours further to the stage 2+ having the autotech uprated HPFP has an custom uprated throttle intake pipe http://revohardware....ipe-for-20t-fsi in fact your is shorter also than the link to upgrade and a bit bigger to match boost hose size from turbo / CC. Then you have the custom shorter exhaust with no cats, uprated intake http://revohardware....m-20tfsi-k03k04 but with big ITG filter and insert for correct MAF housing size. Along with very short direct boost / CC setup is where your will make more power than the normal based stg2+ oem cars even with similar mods. Estimate 375bhp but will will not be able to confirm until RR time.


So there we have it, might not be to everyones taste but I like it so far and to be honest I loved renewing or refurbing everything, very rewarding!


Post away ;)

 hmmm formatting didn't work on power figures, sure you can work it out :P


Edited by Crabash, 22 December 2013 - 10:03 PM.


#11 Lou_m

Lou_m

    Addicted to Hooning

  • PipPipPipPipPip
  • 1,904 posts
  • Gender:Male
  • Location:Fife
  • Interests:Cars, motorsport, cycling

Posted 22 December 2013 - 10:06 PM

Some project! Thanks for sharing thumbsup


#12 ciderbooze

ciderbooze

    Need to get Out More

  • PipPipPipPip
  • 1,216 posts
  • Gender:Male
  • Location:Sunny skelton
  • Interests:cars, fishing, beer, football.

Posted 22 December 2013 - 10:11 PM

Been waiting for this post since we were talking at croft. Your turn to drive next time ;) . Looking forward to seeing it in the flesh.

#13 Boombang

Boombang

    Saxo boy

  • PipPipPipPipPipPip
  • 3,022 posts
  • Gender:Male
  • Location:Brentwood, Essex

Posted 22 December 2013 - 10:15 PM

Do you know how engine and box weights compare? Audi vs Vxt?


#14 Thealastair34

Thealastair34

    Need to get Out More

  • PipPipPipPip
  • 988 posts
  • Location:Wakefield

Posted 22 December 2013 - 10:15 PM

Impressive, looked great in the dark last night

#15 Bumblebee

Bumblebee

    .....

  • PipPipPipPipPipPipPip
  • 7,592 posts
  • Gender:Female
  • Location:York

Posted 22 December 2013 - 10:18 PM

Been looking forward to you posting all your project up. Looks good,look forward to hearing more about it when it's fully Complete oh and my passenger ride ;)

#16 Rickwoo118

Rickwoo118

    Scary Internerd

  • PipPipPipPipPipPip
  • 5,800 posts
  • Gender:Male
  • Location:Stamford

Posted 22 December 2013 - 10:19 PM

Blimming ek.....that's some project. I dread to think how much that build cost? Sounds like you are pleased with the finished article. Take it easy!

Edited by Rickwoo118, 22 December 2013 - 10:20 PM.


#17 Crabash

Crabash

    Scared

  • PipPipPipPipPip
  • 1,686 posts
  • Gender:Male
  • Location:Durham

Posted 22 December 2013 - 10:22 PM

Been waiting for this post since we were talking at croft. Your turn to drive next time ;) . Looking forward to seeing it in the flesh.


Will give you a shout soon.


#18 Crabash

Crabash

    Scared

  • PipPipPipPipPip
  • 1,686 posts
  • Gender:Male
  • Location:Durham

Posted 22 December 2013 - 10:23 PM

Do you know how engine and box weights compare? Audi vs Vxt?


Not got exact weights but it's around the same and we lost a bit of weight from the rear during the conversion.


#19 Crabash

Crabash

    Scared

  • PipPipPipPipPip
  • 1,686 posts
  • Gender:Male
  • Location:Durham

Posted 22 December 2013 - 10:23 PM

Been looking forward to you posting all your project up. Looks good,look forward to hearing more about it when it's fully Complete oh and my passenger ride ;)


I keep my promises.


#20 Crabash

Crabash

    Scared

  • PipPipPipPipPip
  • 1,686 posts
  • Gender:Male
  • Location:Durham

Posted 22 December 2013 - 10:25 PM

Blimming ek.....that's some project. I dread to think how much that build cost? Sounds like you are pleased with the finished article. Take it easy!


Well i never intended on doing all the refurbing but once in bits it seemed crazy to not sort the rust and renew parts that required major work to get at so I took the view do it once and do it right.


Also tagged with one or more of these keywords: engine swap, audi, tfsi

0 user(s) are reading this topic

0 members, 0 guests, 0 anonymous users