Jump to content


Photo

Fitting the ProAlloy Charge Cooler


  • Please log in to reply
96 replies to this topic

#61 Duncan VXR

Duncan VXR

    Scary Internerd

  • PipPipPipPipPipPip
  • 5,273 posts
  • Gender:Male
  • Location:Lincolnshire
  • Interests:Anything to do with making cars faster and better than the original

Posted 12 November 2008 - 09:47 AM

No! :D

Went out tonight to put the lights/HIDs in - Duncan is coming around tomorrow to wire up the CC pump. Just got to put a couple of bits of trim back and the "ear". Jobs done! - cant drive it until i have my ohlins back (spacer issue) :(

And retrieve the 13mm spanner i dropped tightening the lights up... :rolleyes:


Yep going round straight after work to wire in the relay and pump - all wiring routed and should not take long :) could have finished on Saturday but was getting late and did not want to rush finishing ;)

Just got to find the spanner Paul dropped last night fitting the headlight :D:D:D lol ;)

Leave him for a few days and he could not help himself :)

Paul I will drive it ;) sod the spacers :D:D:D passive steer ftw

#62 siztenboots

siztenboots

    RaceMode

  • 26,610 posts
  • Gender:Not Telling
  • Location:Surrey
  • Interests:french maids

Posted 12 November 2008 - 09:49 AM

I hope you fitted the gear box breather pipe using an totally overkill for the job method of attachment , once the chargecooler tank goes in , to refix the GB hose is a PITA job.

#63 cheeky_chops

cheeky_chops

    Whipping Boy

  • PipPipPipPipPipPipPip
  • 7,922 posts
  • Gender:Male
  • Location:Solihull
  • Interests:my car, snowboarding and drinking

Posted 12 November 2008 - 10:17 AM

I hope you fitted the gear box breather pipe using an totally overkill for the job method of attachment , once the chargecooler tank goes in , to refix the GB hose is a PITA job.


GB breather was fitted 1st month of ownership thumbsup

What will be a total PITFA will be fitting the ohlins remote canisters back in the boot (hopefully this weekend) as the hole is very close/where (forgot to look) the tank is :( thumbsdown thumbsdown

edit: i take it its best to drain the CC system if you need to remove the tank?

Edited by cheeky_chops, 12 November 2008 - 10:18 AM.


#64 cheeky_chops

cheeky_chops

    Whipping Boy

  • PipPipPipPipPipPipPip
  • 7,922 posts
  • Gender:Male
  • Location:Solihull
  • Interests:my car, snowboarding and drinking

Posted 12 November 2008 - 10:21 AM

Also access to the retaining nut on the offside headlight is now tight. Rather than using the original nyloc nuts on my headlights I have replaced them some time ago with ordinary stainless steel nuts and a split washer. This makes it easy to run the nuts quickly down the thread with your finger and in this situation with the newly restricted access; only having to use a spanner for the final tightening turn was very helpful.


Amen to that! :beat:

#65 Muncher

Muncher

    Scary Internerd

  • PipPipPipPipPipPip
  • 4,494 posts
  • Gender:Male
  • Location:Ipswich

Posted 04 June 2009 - 07:09 PM

Right I am just preparing to install my chargecooler... Couple of questions... I really don't think my driver's sill cover is going to come off without breaking, I stuck it down with sikaflex last time and it's not shifting. Is it possible to fit the hoses through without taking it off? My idea was to cut a similar sized hole to the two which are cut, but have it right down low in the sill and use that for navigating past the pieces of foam, and then for pulling the hoses up to the two holes above it. I could then just put a rubber cover over the hole. Thoughts? Next, fitting the pre-rad... When I fitted the pro alloy rad the first time around I had difficulty replacing the surround over the top of it and getting the holts to line up on the sides. People seem to say it will fit but it's one of those things that I'm struggling to see how... Third point, the wiring for the fans, can someone confirm the polarity in terms of colours as I am crap at electrics.

#66 techieboy

techieboy

    Supercharger of Doom

  • 22,914 posts
  • Gender:Male
  • Location:Bedford

Posted 04 June 2009 - 07:23 PM

I think Exmaanta? cut an access hole in the bottom of the wheel arch to get a straight run through and then feed them up the void to come out of the drilled holes at the top of the wheelarch. Looked like a good solution for ease of pulling/pushing, especially if you can't remove the sill trim. The ProAlloy rad and pre-rad fitted a treat on my car (2001) without any problems at all, so can't really help on that front. Removed the rad, bolted it together and refitted with no issue, other than I had to cut up some foam lagging to fill some of the gaps where the was no OEM foam. Blue on ProAlloy fan loom goes to black on car loom and vice versa (so arse about face). Easiest thing to do is to disconnect the plug for the OEM fan and swap the pins in the socket over, to match the ProAlloy loom and maintain colour co-ordination.

#67 vocky

vocky

    Moderator

  • 11,969 posts
  • Gender:Male
  • Location:Earth

Posted 04 June 2009 - 07:26 PM

silkaflex :rolleyes: I just paid £120 for a new sill cover from the dealers :blink: the fan wiring is, well odd :wacko: Blue and black wires from the new fans and blue and black wires in the original fan plug, now you would think that the blue goes to the blue and the black to the black, wrong, they need to be crossed :beat: I removed the pins in the plug and swapped them over to keep the wiring neat. The only way you will get the pipes through the sills is to cut a hole in the end of the sill, not ideal, might be worth buying a new sill :rolleyes:

#68 Muncher

Muncher

    Scary Internerd

  • PipPipPipPipPipPip
  • 4,494 posts
  • Gender:Male
  • Location:Ipswich

Posted 04 June 2009 - 08:09 PM

Cheers guys, I think I am going to cut a small access hole in the end of the sill, makes more sense. I think it will be easier to force past the bits of foam that way too.

#69 Exmantaa

Exmantaa

    Scary Internerd

  • PipPipPipPipPipPip
  • 3,982 posts
  • Gender:Male

Posted 04 June 2009 - 09:20 PM

Sill access hole:Posted Image

#70 Exmantaa

Exmantaa

    Scary Internerd

  • PipPipPipPipPipPip
  • 3,982 posts
  • Gender:Male

Posted 04 June 2009 - 09:22 PM

Inside view on the foam piece with cut/melted-out hose holes:Posted Image

#71 Exmantaa

Exmantaa

    Scary Internerd

  • PipPipPipPipPipPip
  • 3,982 posts
  • Gender:Male

Posted 04 June 2009 - 09:23 PM

Closed access hole. (epoxy glue, still to be painted black):
Posted Image

#72 FLD

FLD

    WANNABE MY LOVER

  • PipPipPipPipPipPipPipPip
  • 13,717 posts
  • Gender:Male
  • Location:Near nantwich
  • Interests:Tugging my todger.

Posted 05 June 2009 - 07:32 AM

I've just done this. I found no need to cut an access hole!! If you look at the front of the sill at the bottom theres a smallish blind grommet about 14mm. I took this out then used a length of dowel to push the piece of foam to one side. Dead easy! For the back piece I just reached down the sill from the rear arch and pulled it to one side. When it came to threading the pipes along the sill I pushed a piece of old tube along from the back and threaded the CC pipes down through the new top holes. I lifted off the sill cover and taped them together through the access gap at the front of the sill and just pulled it through. I was worried about this bit as I was told it was the hardest bit of the SC conversion. This was one of the easiest bits, I've had nightmares elsewhere. On another note...Sikaflex (or generic PU 238) is sensitive to heat. if you heat the aluminium (ie heating the back of the joint) you can slice the glue relatively easily. Lube the blade with WD40 or silicone spray to stop the glue grabbing it. I think taking the sill off and properly supporting the pipes is the correct way to do this really. You could even go to the length of making up some alloy pipes for inside the sill.

#73 FLD

FLD

    WANNABE MY LOVER

  • PipPipPipPipPipPipPipPip
  • 13,717 posts
  • Gender:Male
  • Location:Near nantwich
  • Interests:Tugging my todger.

Posted 05 June 2009 - 07:34 AM

One other thing too that might be handy. I fused the CC pump by adding a fuse to the fusebox and I had the relay slotted into the ones already in the boot. Just makes it look more OE. Let me know if you want some pointers on this one.

#74 Muncher

Muncher

    Scary Internerd

  • PipPipPipPipPipPip
  • 4,494 posts
  • Gender:Male
  • Location:Ipswich

Posted 05 June 2009 - 08:18 AM

Mixed views then! Am I right in thinking the only reason to take the sill cover off is to be able to pull the hoses upwards to the 2 holes? Exmantaa - How did you cut out/melt the holes in the foam?

#75 The Batman

The Batman

    Super Moderator

  • 30,267 posts
  • Gender:Male
  • Location:FLD mum's bed

Posted 05 June 2009 - 08:34 AM

i have the pro alloy charge cooler rad and thought it was crap really....... 1) the wiring is a straight plug in 2) had to cut 2 pieces of the crash box off 3) it made the alignment of the rad housing off which then miss aligned the clam :rolleyes: right pain in the ars but needs must and all that crap!

#76 MartinS

MartinS

    I only bought it for one summer. 14 years ago and now its gone&#

  • PipPipPipPipPipPip
  • 5,173 posts
  • Gender:Male
  • Location:Rustington, West Sussex
  • Interests:Track days
    Pubs
    Sausages

Posted 05 June 2009 - 08:47 AM

I'm just jealous that you had proper black silicon piping wher4eas Courtenays ent me clear piping that was 'supposedly'as good and realistically shouldbnt even be used on a car, my garden hose is in retrosepct much better made. I thought the chargecooler was well made and didnt seem bad value, whereas the header tank cost almost as much and is basically just a very simple tank, that could be replaced with way cheaper and just as effective, options. Good effort on the how do it front, takes time to do that stuff as you go. Martin s

#77 The Batman

The Batman

    Super Moderator

  • 30,267 posts
  • Gender:Male
  • Location:FLD mum's bed

Posted 05 June 2009 - 08:54 AM

that header tank did make me laugh :lol: 
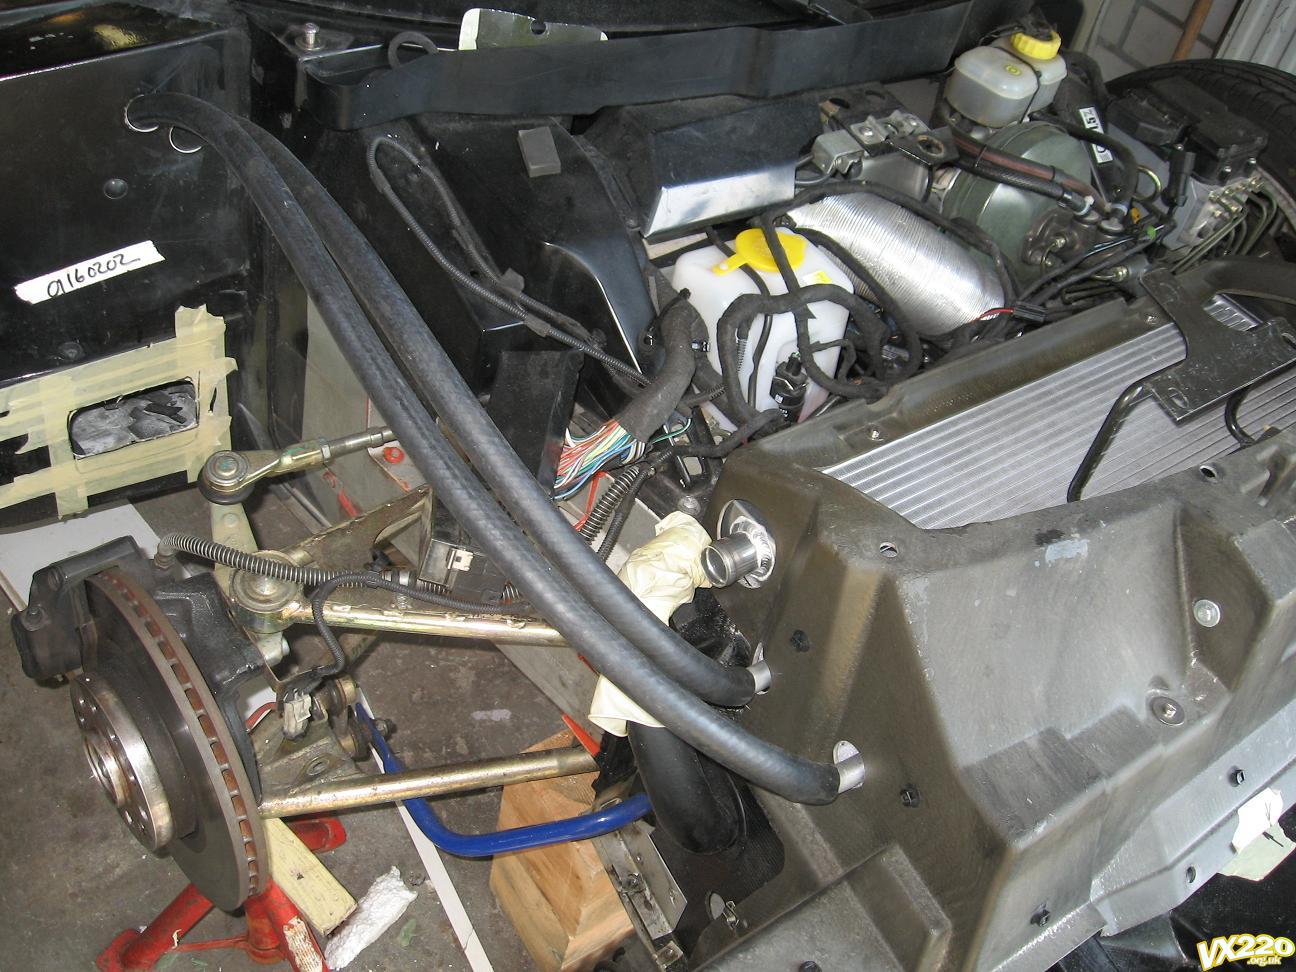
Martin, go down to halfords and buy some piping from there is exactly the same as my black solid stuff but it only costs £2 a metre! :o

#78 FLD

FLD

    WANNABE MY LOVER

  • PipPipPipPipPipPipPipPip
  • 13,717 posts
  • Gender:Male
  • Location:Near nantwich
  • Interests:Tugging my todger.

Posted 05 June 2009 - 08:56 AM

I nearly ended up with the clear hose too as this was really holding up my order (rediculously slow). By the power of google I turned up CBSonline and ended up with proper black radiator hose on my door step the next morning. Now theres a proffesional outfit. WRT the quality of the rads, they aren't bad. A little extra effort with the welding would be nice. The core isnt top notch, I had a radtec rad made a while ago and that ha double the fin density and was better made. You need to remove the two plastic bits from the top of the crash box. These support the na rad (the rad surround is made of cheese). The tubby has bits of foam in here to support it so any high density foam should do. Muncher - yep, only reason to take the sill cover off is for the threading of tubes but its nt exactly hard to get off. Two screws and a pull! (sounds like the perfect sat night).

#79 Muncher

Muncher

    Scary Internerd

  • PipPipPipPipPipPip
  • 4,494 posts
  • Gender:Male
  • Location:Ipswich

Posted 05 June 2009 - 09:03 AM

I nearly ended up with the clear hose too as this was really holding up my order (rediculously slow). By the power of google I turned up CBSonline and ended up with proper black radiator hose on my door step the next morning. Now theres a proffesional outfit. WRT the quality of the rads, they aren't bad. A little extra effort with the welding would be nice. The core isnt top notch, I had a radtec rad made a while ago and that ha double the fin density and was better made.

You need to remove the two plastic bits from the top of the crash box. These support the na rad (the rad surround is made of cheese). The tubby has bits of foam in here to support it so any high density foam should do.

Muncher - yep, only reason to take the sill cover off is for the threading of tubes but its nt exactly hard to get off. Two screws and a pull! (sounds like the perfect sat night).


Yeah, trouble is mine is stuck down, so probably won't come off without breaking. After getting a £325 shittping/customs bill yesterday I am not in the mood to buy another sill cover :P

#80 Exmantaa

Exmantaa

    Scary Internerd

  • PipPipPipPipPipPip
  • 3,982 posts
  • Gender:Male

Posted 05 June 2009 - 09:51 AM

Mixed views then!

Am I right in thinking the only reason to take the sill cover off is to be able to pull the hoses upwards to the 2 holes?

Exmantaa - How did you cut out/melt the holes in the foam?


Everybody can off course do it how they like, but I really didn't like the idea of demolishing those foam inserts in the sill. Not the strongest points of a vx. :closedeyes:

I used a suitable piece of thin walled pipe for this. (Had a hover pipe lying around that had the right diameter) Heated up the pipe with a torch and melted nice round holes in the front foam block. (Do a test first on a styrofoam piece for right temperature!)

For the 2nd block in the back I extended my pipe with a piece of thinner metal tube. (few weld spots) Heat up again, guide quickly through the front holes and melt the holes in the back foam block.
That long thin metal tube is then perfect to pull the cooling hoses from the back to the front.


1 user(s) are reading this topic

0 members, 0 guests, 0 anonymous users


    Facebook (1)