Jump to content


Photo

My Repair And Improve Project - Pic Heavy


  • Please log in to reply
97 replies to this topic

#41 T VXT

T VXT

    Super Member

  • PipPip
  • 433 posts
  • Gender:Male

Posted 02 May 2015 - 03:31 PM

Ok so here's the progress
 
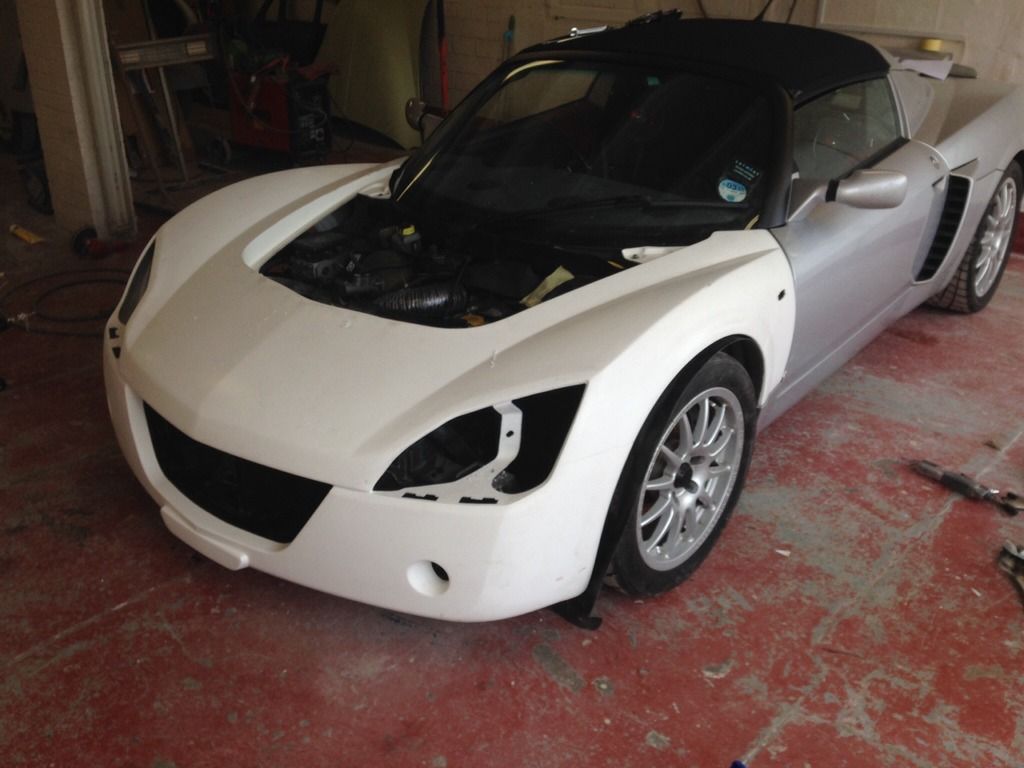
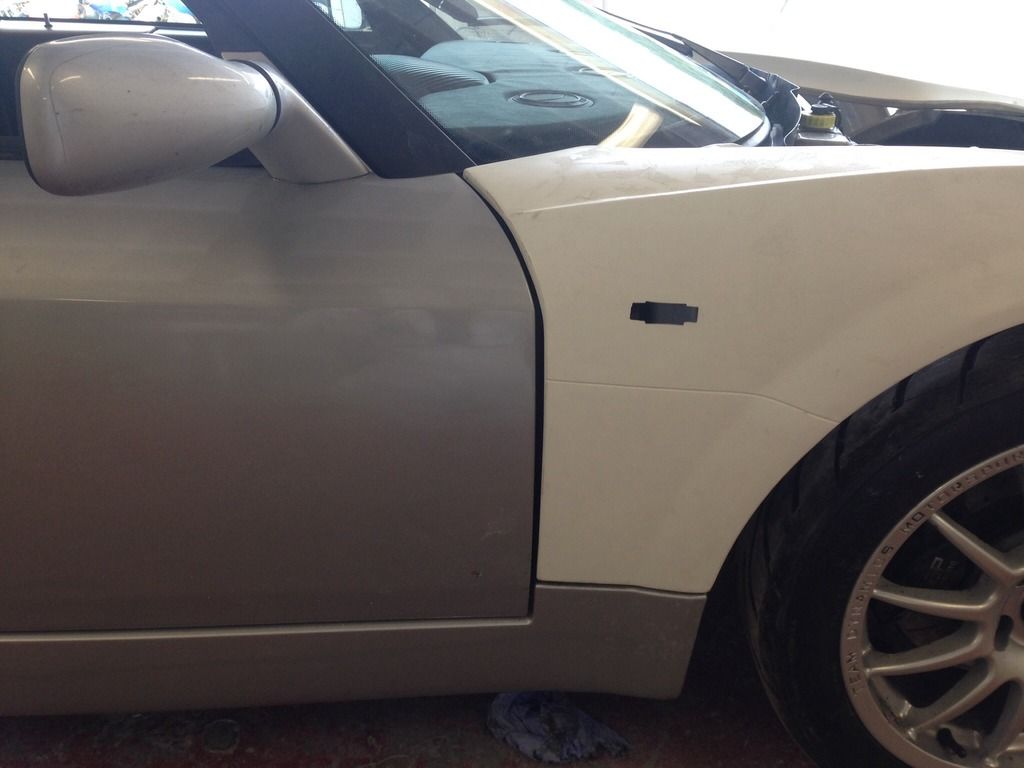
Test fitted clam, my bodyshop man (Steve Bellamy 07867 788397, S.J.B. Bodyshop) made a couple of very minor amendments to the clam so it's perfectly flush with the doors, but he is fussy ;) - I think this is the before photo.
Posted Image

Posted Image

#42 T VXT

T VXT

    Super Member

  • PipPip
  • 433 posts
  • Gender:Male

Posted 02 May 2015 - 03:34 PM

Paint and honeycomb grill for the front clam

Posted Image

I will fit a carbon vee and splitters when they arrive from the current group buy.

Edited by T VXT, 02 May 2015 - 03:35 PM.


#43 T VXT

T VXT

    Super Member

  • PipPip
  • 433 posts
  • Gender:Male

Posted 02 May 2015 - 03:41 PM

Then all back together...

Posted Image

Posted Image

#44 ollie2007

ollie2007

    Sir drink a lot

  • PipPipPipPipPip
  • 1,308 posts
  • Gender:Male
  • Location:Inside my turbo its a beautiful place you know
  • Interests:Working on the VX ,alcohol, drunk street fighting with Rudy. life doesn't get much better than that

Posted 02 May 2015 - 03:50 PM

Looking good, keep going looking forward to seeing the full resurrection 👍👍👍👍👍

#45 T VXT

T VXT

    Super Member

  • PipPip
  • 433 posts
  • Gender:Male

Posted 02 May 2015 - 04:14 PM

Well you didn't have to wait long......

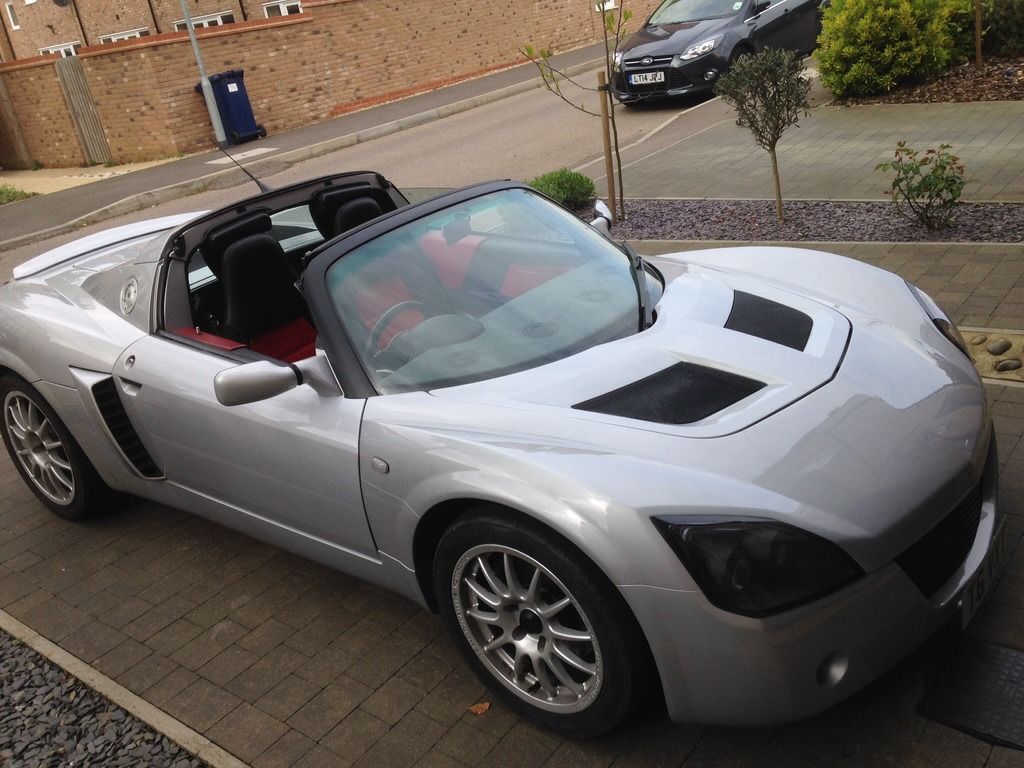
MOT this morning - passed no advisories
Taxed

Then 50 miles with the top off in the sun  B)

Posted Image

Drives great, feels better than before as everything has had a good going over. This might be placebo as I'm just very happy to have it back :D.   And I haven't even started the suspension refresh work yet.

As I haven't driven it in a while, it's pretty savage! Had a fun play with a McLaren and it was faster but by a lot less than you would expect (and before anyone says, he was trying.... ;))


#46 Captain Vimes

Captain Vimes

    Scary Internerd

  • PipPipPipPipPipPip
  • 2,755 posts
  • Gender:Male
  • Location:South East
  • Interests:Motorbikes, VX220, Procrastination

Posted 02 May 2015 - 10:49 PM

Great work! It didn't seem to take long to get it all sorted. :thumbsup:

#47 CocoPops

CocoPops

    SuperCharged Karting Super Hero

  • 17,177 posts
  • Gender:Male
  • Location:Thatcham, Berks

Posted 03 May 2015 - 07:01 AM

Slight colour mismatch? Bonnet and door are different colour to front clam. I assume only the clam was painted and there was no blending into adjoining panels?

#48 fezzasus

fezzasus

    Whipping Boy

  • PipPipPipPipPipPipPip
  • 7,689 posts
  • Gender:Male
  • Location:Oxford

Posted 03 May 2015 - 07:04 AM

I think it's the angle. Silver in particular takes on different tints from different angles (doors and clam aren't on the same plane) Look at the doors vs. the rear clam - same difference


#49 T VXT

T VXT

    Super Member

  • PipPip
  • 433 posts
  • Gender:Male

Posted 03 May 2015 - 07:31 AM

Spot on fezzasus, When they are clean you can notice it on silver cars, due to the angles. Both doors had a couple of minor imperfections at the front, so where repaired and blended down the doors. This was with the same colour as the bonnet and clam. If you look at my profile pic (of the car pre bump) there looks a difference between the bonnet the clam. But the colour is the same. Maybe I should have remembered this and gone orange......

#50 T VXT

T VXT

    Super Member

  • PipPip
  • 433 posts
  • Gender:Male

Posted 03 May 2015 - 07:37 AM

It didn't seem to take long to get it all sorted. :thumbsup:

Bump happened on 4 Feb, so within 3 months. 5/6 weeks of this was insurance delay and silly offers. When it was sitting in my garage looking sorry for itself, It actually gave me the chance to do lots of minor jobs, which I had been meaning to do for ages.

Edited by T VXT, 03 May 2015 - 07:40 AM.


#51 mbes2

mbes2

    Someone say Plasti Dip?

  • PipPipPipPipPipPipPip
  • 8,507 posts
  • Gender:Male
  • Location:Feering, Essex
  • Interests:"Keep it standard"
    "Yes, I built it"

Posted 03 May 2015 - 09:27 AM

Welcome back dude! :-) Trees are not friends

#52 Andrew aka Stuwy

Andrew aka Stuwy

    Made In England

  • PipPipPipPipPipPipPip
  • 8,731 posts
  • Gender:Not Telling
  • Location:At Sea
  • Interests:most things are intersting

Posted 06 May 2015 - 12:42 PM

thumbsup thumbsup thumbsup


#53 jonnyboy

jonnyboy

    The hardtop guy

  • PipPipPipPipPipPipPip
  • 8,288 posts
  • Gender:Male
  • Interests:Lightweight sportscars, Brunettes, Petrol & Beer.

Posted 06 May 2015 - 01:31 PM

Looks fantastic!


#54 T VXT

T VXT

    Super Member

  • PipPip
  • 433 posts
  • Gender:Male

Posted 12 May 2015 - 04:49 PM

Small update. All of this stuff is off:

Posted Image

I might keep the Gaz as a spare set. And the car is currently floating

Posted Image

All the wishbones and hub carriers are at the shotblasters/powdercoaters :happy:


#55 Graeme Lambert

Graeme Lambert

    Scary Internerd

  • PipPipPipPipPipPip
  • 5,543 posts
  • Gender:Male
  • Location:Steeple Claydon, Buckinghamshire

Posted 12 May 2015 - 08:24 PM

Good work Kirk, are you doing all this yourself?


#56 T VXT

T VXT

    Super Member

  • PipPip
  • 433 posts
  • Gender:Male

Posted 14 May 2015 - 10:00 PM

I have done as much of the work myself, but have needed help from my bodyshop/paint guy and MBR.

I have some more updates, but first. This is what I was doing this time last week near the Grand Canyon. The only way to treat a hire car....

Posted Image

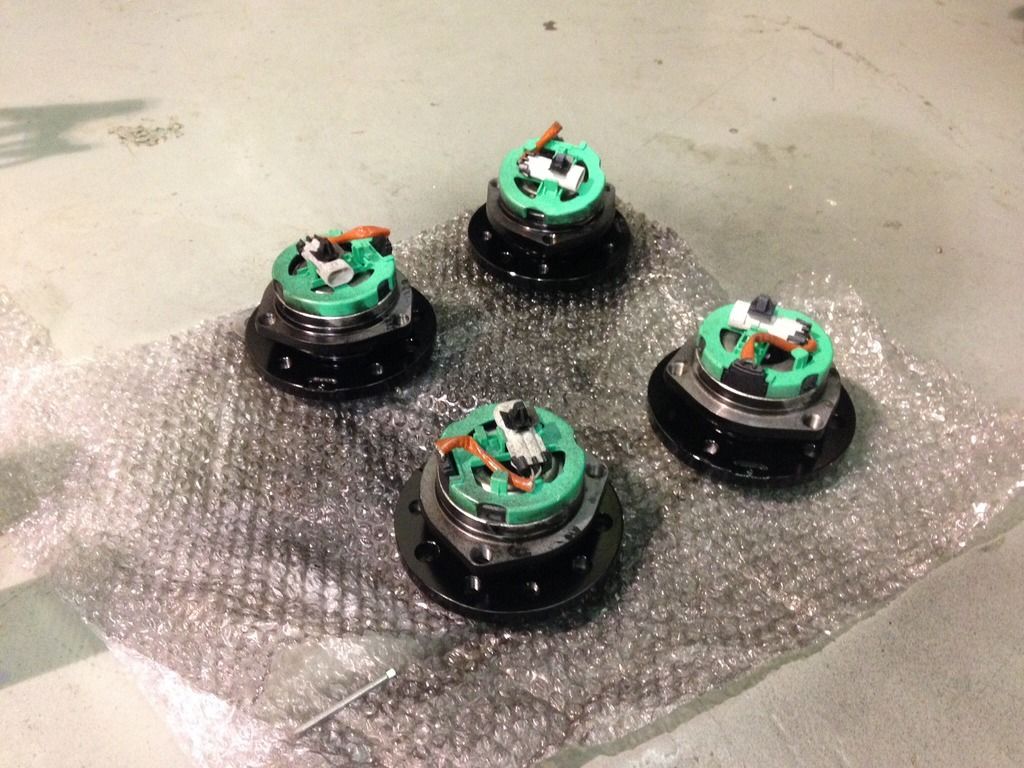
Anyway back to it, the new hubs have been zinc sprayed then coated black to keep them looking good for as long as possible.
Posted Image

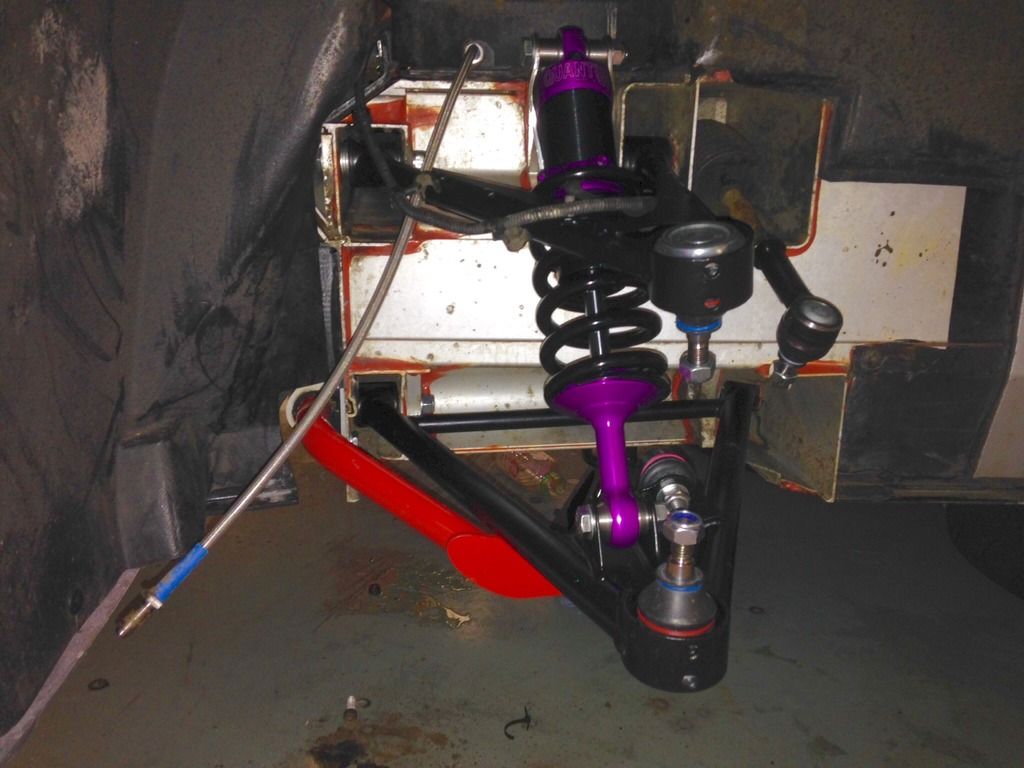
The wishbones and hub carriers are back from the powdercoaters. All the new ertacetal bushes and ball joints have been fitted.

This meant today the front end has gone from this:
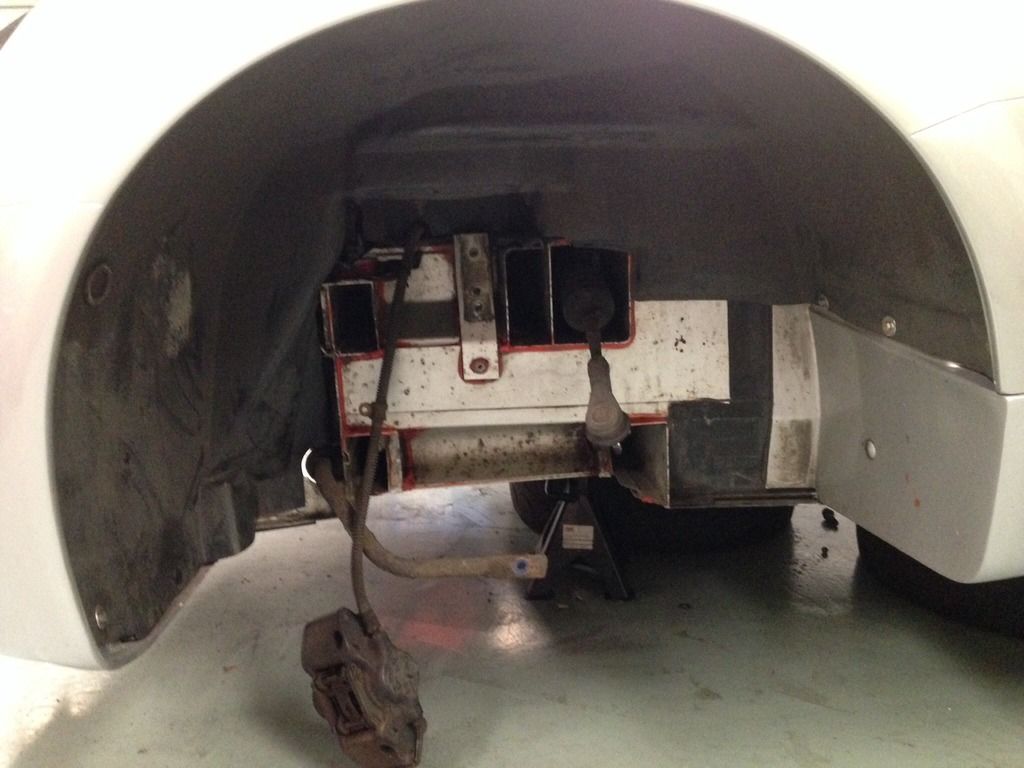
Posted Image

to this:
Posted Image

Braided lines are on but the calipers are off for a refurb. Still lots to do but good progress thumbsup


#57 D-DAWG83

D-DAWG83

    Billy No Mates

  • PipPipPipPipPip
  • 1,276 posts
  • Gender:Male
  • Location:Milton Keynes
  • Interests:Cars, motorsport, music and films

Posted 14 May 2015 - 10:27 PM

Amazing job there, must be really satisfying to see it in a right old state, to looking great again. Iv also got a silver VX, and wondering how to make it stand out more. Are the bits you wrapped in carbon film, tub protectors, glues onto the tub? Tried taking one off the other day, after removing the front and rear fixing, and couldnt seem to.


#58 T VXT

T VXT

    Super Member

  • PipPip
  • 433 posts
  • Gender:Male

Posted 15 May 2015 - 01:19 PM

The sill covers do come off but they are held on by a bit glue and some hard foam insulation stuff. Removing them for the first time is a balancing act of breaking the glue seal without cracking the sill covers. Most people get them off without issue.

You can see the glue in this photo:
Posted Image


Wrapping the sill covers is not the quickest/easiest job in the world to do, especially wrapping it with one piece of vinyl. You will need to be very patient. I wasn't an expert and each one took my about 1.5 - 2 hours.

And as it is only vinyl, dragging sharp heels across it will mark it. But mine still look good after nearly 3 years.

#59 D-DAWG83

D-DAWG83

    Billy No Mates

  • PipPipPipPipPip
  • 1,276 posts
  • Gender:Male
  • Location:Milton Keynes
  • Interests:Cars, motorsport, music and films

Posted 15 May 2015 - 03:57 PM

Im guessing that mine have not been removed before, as I removed the 2 screws holding it in, and it did not want to move, and seemed like something was holding it in place, so i guessed it was glues down.


#60 T VXT

T VXT

    Super Member

  • PipPip
  • 433 posts
  • Gender:Male

Posted 18 May 2015 - 07:51 PM

Another busy day....

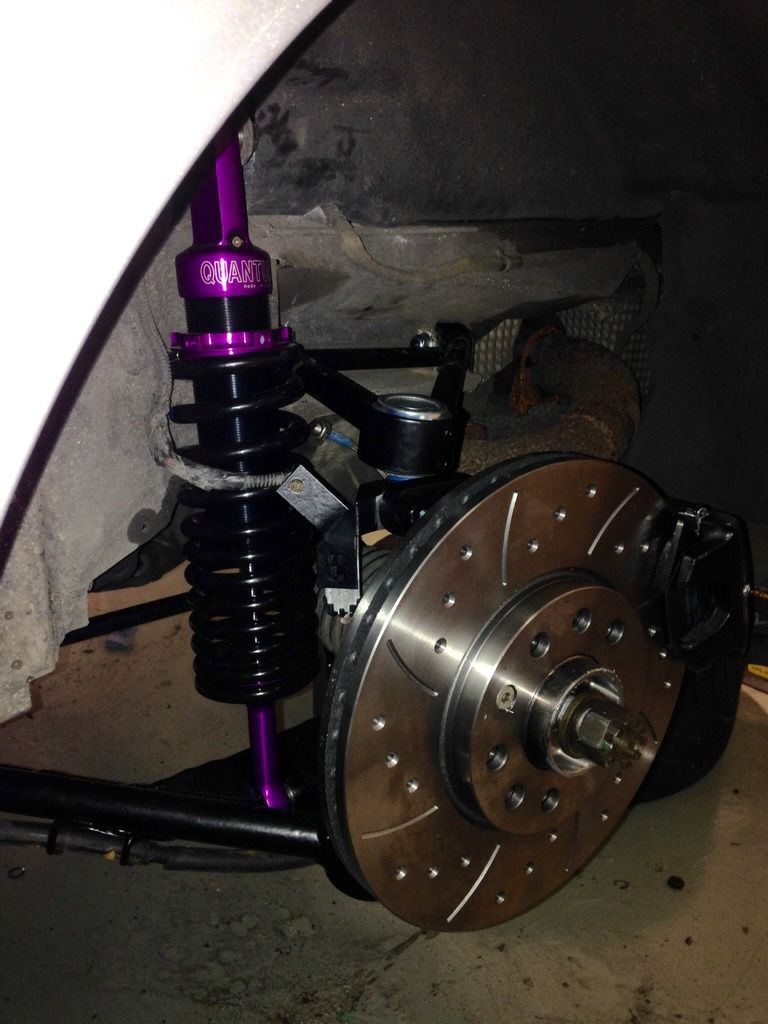
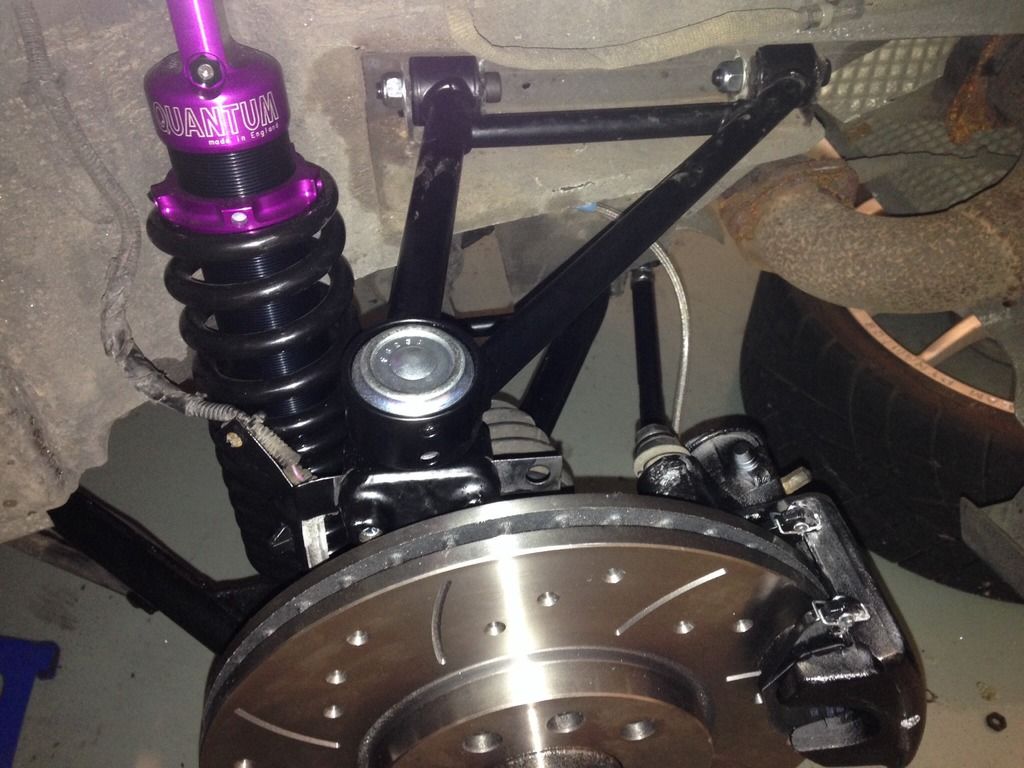
The wishbones and hub carriers are back on the car, which look great. The new discs and pads have been fitted with the freshened calipers, here are some pics of the rear:

Posted Image

Posted Image

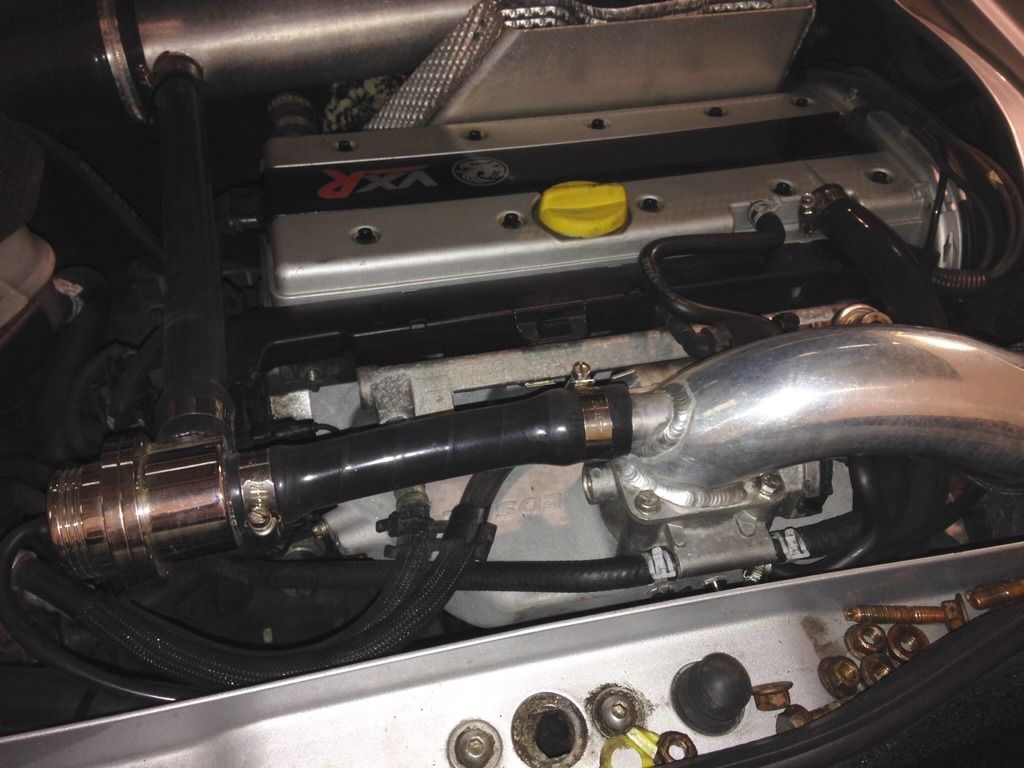
The EDS manifold with longer studs for the thermal gasket is all fitted and ready to go. Not much to see but it all looks clean and tidy.

Posted Image

Next, double check everything is as it should be, get the wheels back on ready for suspension setup and geo. Then off for a map tweak ensure it's running safe with the extra airflow from the new inlet manifold. Hopefully it will get a few more horses at the top end too.

Edited by T VXT, 18 May 2015 - 07:52 PM.


0 user(s) are reading this topic

0 members, 0 guests, 0 anonymous users