Good stuff
Not sure if Coventry or Dave's are nearer but doing more vx work again now the kids are getting bit more manageable lol
Give us a shout if I can help
DG

Cressey's Car(S)
Started by
cressey
, Jun 12 2015 06:52 PM
91 replies to this topic
#61
: post #61")
Duncan VXR
-

-

- 5,284 posts
Scary Internerd
- Gender:Male
- Location:Lincolnshire
- Interests:Anything to do with making cars faster and better than the original
Posted 03 July 2015 - 06:16 PM
#62
cressey
-
-
- 966 posts
Need to get Out More
- Gender:Male
- Location:Derby
Posted 03 July 2015 - 06:30 PM
Good call on the adjuster. Can you tell I'd had a skinfull the night before? I'm also not sure on the helpers. Don't really see why it'd matter but the rears are at the bottom. Maybe that's one for when I get it on axle stands for next week. Currently got the remap booked for the 11th but may have to reschedule as I don't think I'm going to have it rebuilt in time.I'm not 100 % but shouldn't the helper springs be at the bottom of the shock? Also turn the bit with the knob on 180 degrees so it can be adjusted easily
#63
cressey
-
-
- 966 posts
Need to get Out More
- Gender:Male
- Location:Derby
Posted 03 July 2015 - 07:05 PM
Great stuff. Thanks for the offer Duncan. Apologies but not entirely sure where your expertise lie. Am I right in thinking you've built a few engines for people/tuned them?Good stuff Not sure if Coventry or Dave's are nearer but doing more vx work again now the kids are getting bit more manageable lol Give us a shout if I can help DG
#64
oakmere
-

-
- 2,143 posts
Scary Internerd
Posted 03 July 2015 - 08:44 PM
Just to check the adjusters on the GGP2 should be at the bottom front and back.
So the fronts look correct but just checking what you have done at the back?
#65
CHILL Gone DUTCH
-

-
- 13,727 posts
I ADMIT BATMAN THINKS HE IS QUICKER THAN ME
- Gender:Male
- Location:UK
Posted 03 July 2015 - 08:52 PM
you do no when I said turn the bit with knob 180 degrees
I did mean just turn the lower bit and not turn the shock over
I also think the helpers should be at bottom
#66
cressey
-
-
- 966 posts
Need to get Out More
- Gender:Male
- Location:Derby
Posted 03 July 2015 - 08:57 PM
Yeah I knew what you meant Chris. Twist the shock 180 rather than turn it over.
So the tears are wrong then? The piston on the Billies is normally at the bottom with the main damper body at the top. Does it really matter? Can't see why it would make much difference.
#67
CHILL Gone DUTCH
-
-
- 13,727 posts
I ADMIT BATMAN THINKS HE IS QUICKER THAN ME
- Gender:Male
- Location:UK
Posted 03 July 2015 - 09:00 PM
All knobs at the bottom facing in 👍
#68
cressey
-
-
- 966 posts
Need to get Out More
- Gender:Male
- Location:Derby
Posted 03 July 2015 - 10:09 PM
Okay. Will sort next week. Cheers Chris. Guessing it's one of those things that's been discussed 50 times already. If only I could use the search function.
#69
oakmere
-
-
- 2,143 posts
Scary Internerd
Posted 03 July 2015 - 10:31 PM
Yes it dose matter for the ggp2.
Why the adjusters facing in Chris?
#70
cressey
-
-
- 966 posts
Need to get Out More
- Gender:Male
- Location:Derby
Posted 04 July 2015 - 05:03 AM
Guess facing in for ease of access. Why does it matter though? Anything to do with the fracturing issues?
#71
CHILL Gone DUTCH
-
-
- 13,727 posts
I ADMIT BATMAN THINKS HE IS QUICKER THAN ME
- Gender:Male
- Location:UK
Posted 04 July 2015 - 07:13 AM
Yep just ease of access
#72
Arno
-

-
- 1,238 posts
Need to get Out More
- Gender:Male
- Location:Netherlands
Posted 04 July 2015 - 12:51 PM
The piston on the Billies is normally at the bottom with the main damper body at the top. Does it really matter? Can't see why it would make much difference.
AFAIK Gaz golds are twin-tube dampers which, unlike monotube dampers like the OEM Bilsteins and others like Quantum, Nitron, etc., can not be run 'inverted' as the oil and gas charge will end up in the wrong locations and this exposes the restrictor ports in the inner tube of the damper body to the gas charge making them do little or no damping as the gas has no problem flowing through the ports.
It doesn't break 'em, they just won't work very well ad a damper when fitted upside-down. So these have to be run in the 'traditional' way with the the damper body downward and the piston rod up.
Original consideration for the 'inverted' damper setup on the Elise starting with the S1 is that it reduces unsprung mass as the (heavier) damper body is not 'riding' the wishbone but the lighter piston rod side is. Also monotubes tend to have a much more linear response as they heat up in use so the car keeps the same feel.
Bye, Arno.
#73
cressey
-
-
- 966 posts
Need to get Out More
- Gender:Male
- Location:Derby
Posted 08 July 2015 - 09:25 AM
Hi Arno. Cheers for your reply. Just to clarify, I believe the Bilsteins are run with the damper body attached to the chassis and the piston side attached to the wishbone.
Are you saying that the Gaz's should be fitted with the damper body (adjuster end) attached to the chassis and the piston end to the wishbone? Thanks.
Edited by cressey, 08 July 2015 - 09:26 AM.
#74
Rosssco
-

-

- 4,185 posts
Scary Internerd
- Gender:Male
- Location:Aberdeen
Posted 08 July 2015 - 09:39 AM
Hi Arno. Cheers for your reply. Just to clarify, I believe the Bilsteins are run with the damper body attached to the chassis and the piston side attached to the wishbone. Are you saying that the Gaz's should be fitted with the damper body (adjuster end) attached to the chassis and the piston end to the wishbone? Thanks.
No. Gaz need to be fitted with the adjuster / damper body end attached to the wishbone.
Bilsteins are montube, hence can be fitted inverted from factory.
#75
cressey
-
-
- 966 posts
Need to get Out More
- Gender:Male
- Location:Derby
Posted 08 July 2015 - 01:44 PM
Excellent. That's what I wanted to hear as it's much better for clearance and makes everything easier to adjust. Cheers guys.
#76
cressey
-
-
- 966 posts
Need to get Out More
- Gender:Male
- Location:Derby
Posted 12 July 2015 - 11:35 AM
Little update,
Took the silver one to be VIC checked last Saturday. It went through without issue so I excitedly drove straight to the Post Office with my V5 application and road tax application. "I'm sorry sir but there appears to be an error code. You'll have to ring the DVSA." Turns out the owner from many years ago never informed the DVSA that he'd sold the car so it'll be stuck on my drive for another 2 weeks while they process all this crap. 
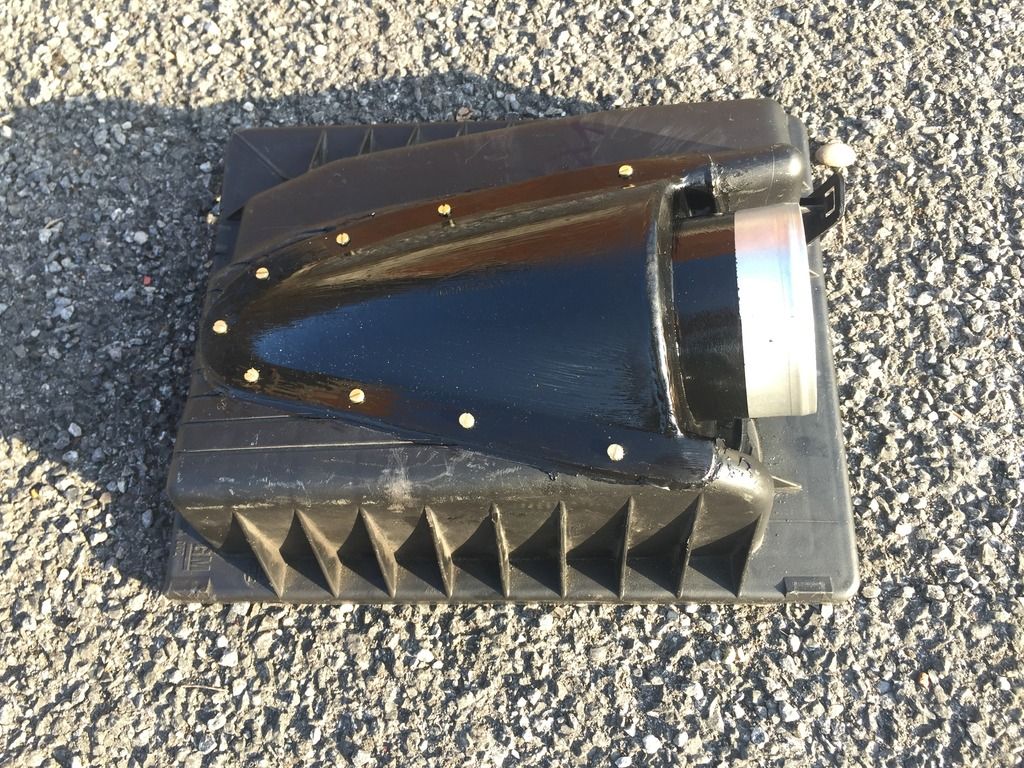
I've been busy working on the blue one every night this week getting it ready for Stage 2. Finished designing my intake system and airbox to improve the airflow to the turbo. The benefits of the new intake setup against the original is shown in the highly professional sketches below.
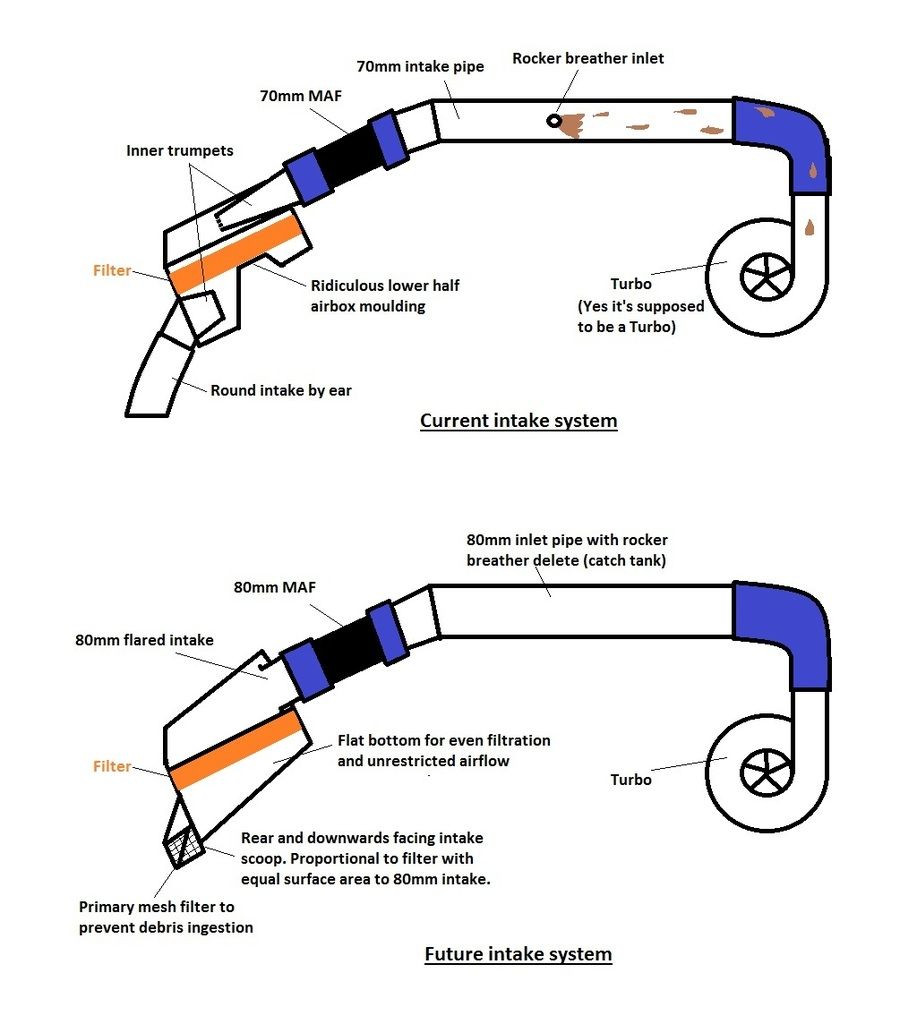
The main goals were to improve water ingestion protection, improve debris ingestion, reduce the number of section changes, encourage even filtration and create an even flow rate from the initial intake all the way to the turbo. I've done this by adding an 80mm intake pipe, 80mm MAF and 80mm airbox outlet to improve the airflow volume. I've then added a scoop that faces rearwards and downwards which is proportional to the filter and of equal surface area to the 80mm pipe to encourage laminar flow and to equalise flow rate. I opted not to go for a 'ram-air' style scoop for water ingestion purposes and I've added a mesh to stop it sucking leaves and stones into the airbox. This system will be complemented by a Dave Hardwick high flow plenum and a full Larini system. The rocker breather will also go to a catch tank. The airbox is now built but before you read on I should warn you, it's not exactly pretty.
You sure you want to do this? Don't say I didn't warn you.
Key things I learned are -
- Just because you have Hammerite and a brush, it doesn't mean you should use it. It actually looked neater in bare metal. Wish I'd sprayed it if anything
- When calculating the length of time a job should take, use the following equation. Time required = (estimated time x 2) x 2.
- Measure twice, cut once. Made a slight cock up in my measuring when marking the cut outs for the mounting clips.
- Stop being such a tight arse, just buy one from Dave Hardwick.
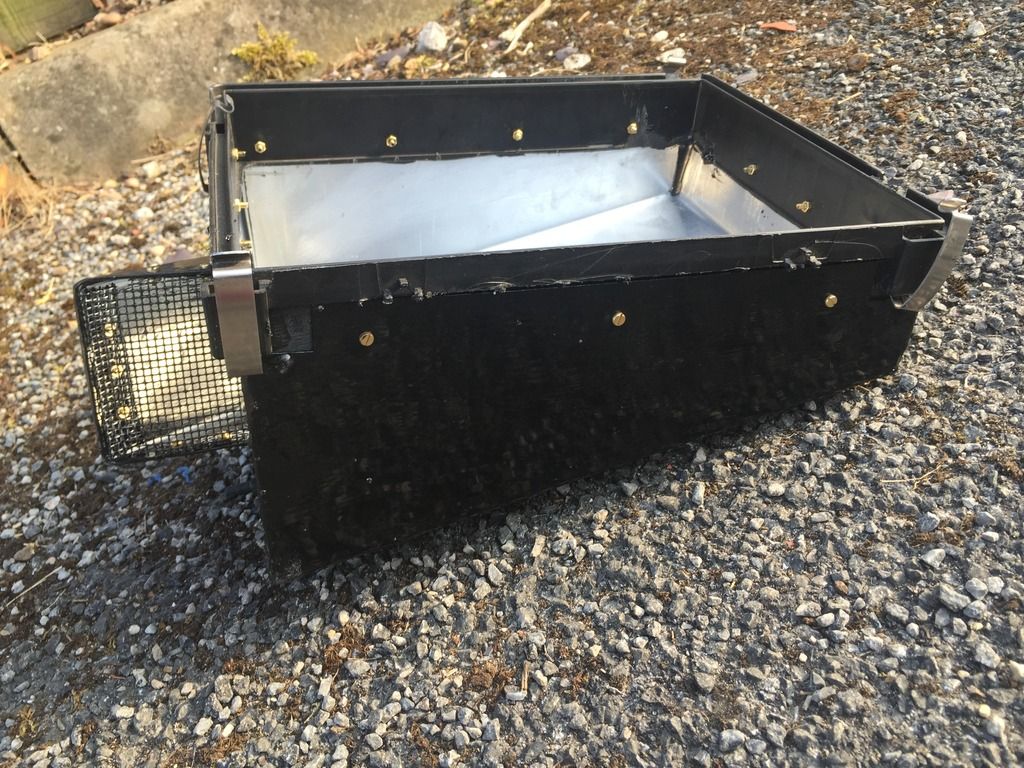
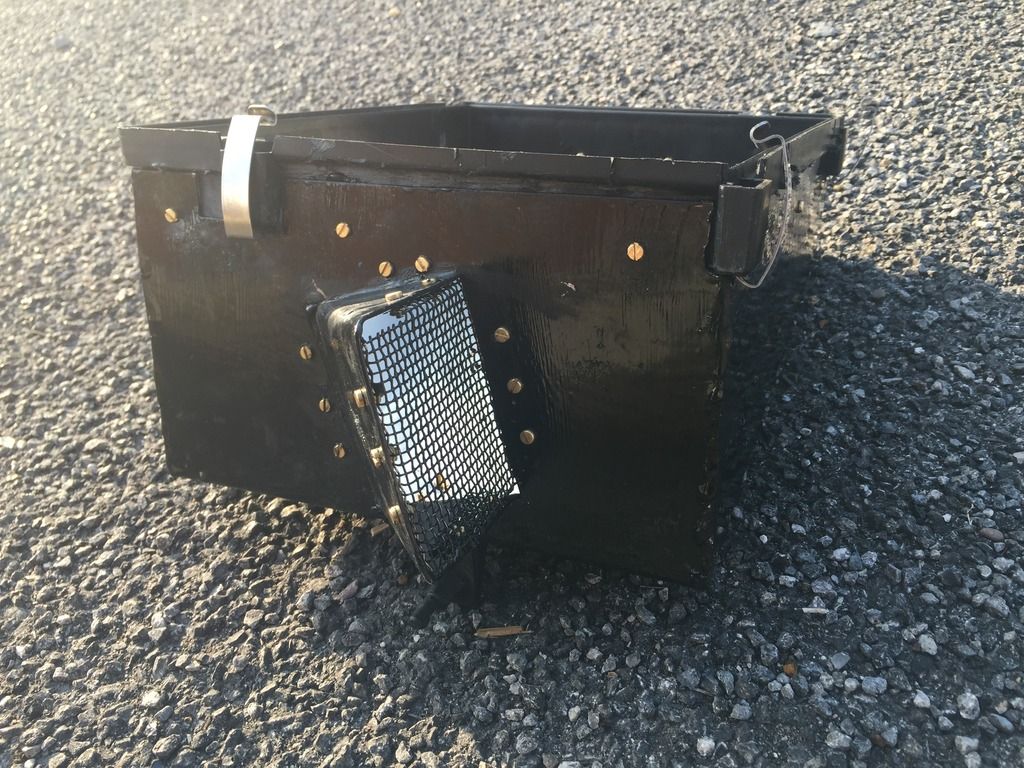
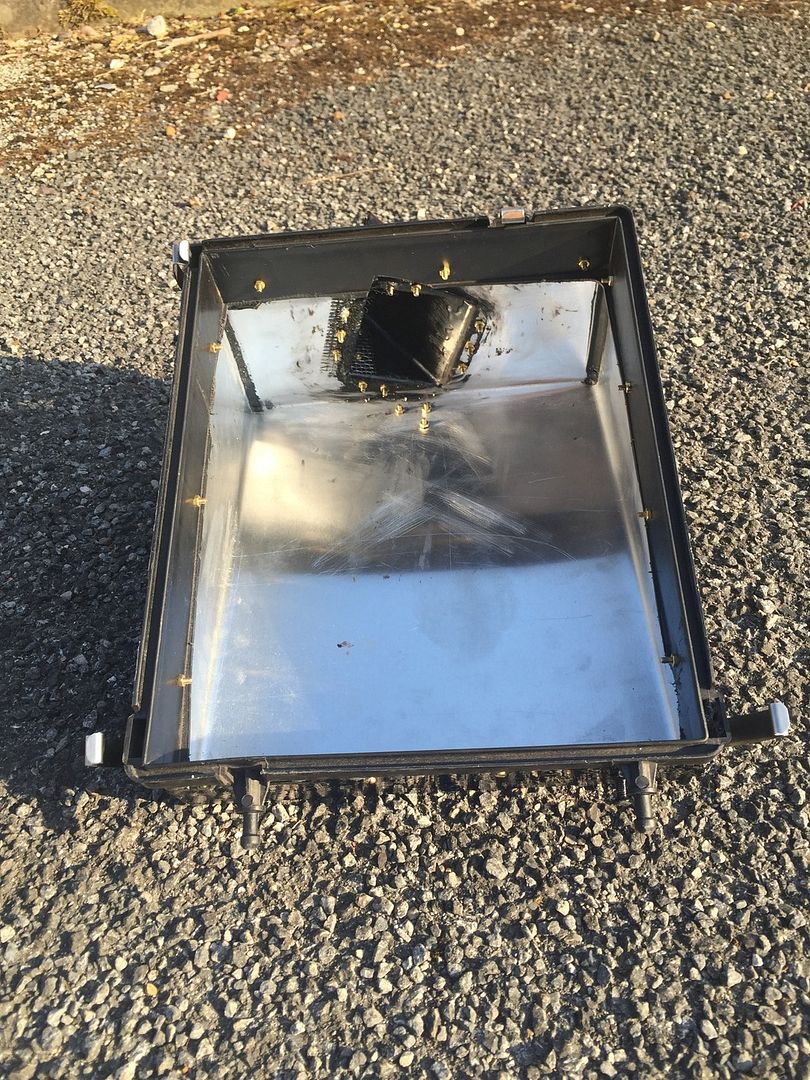
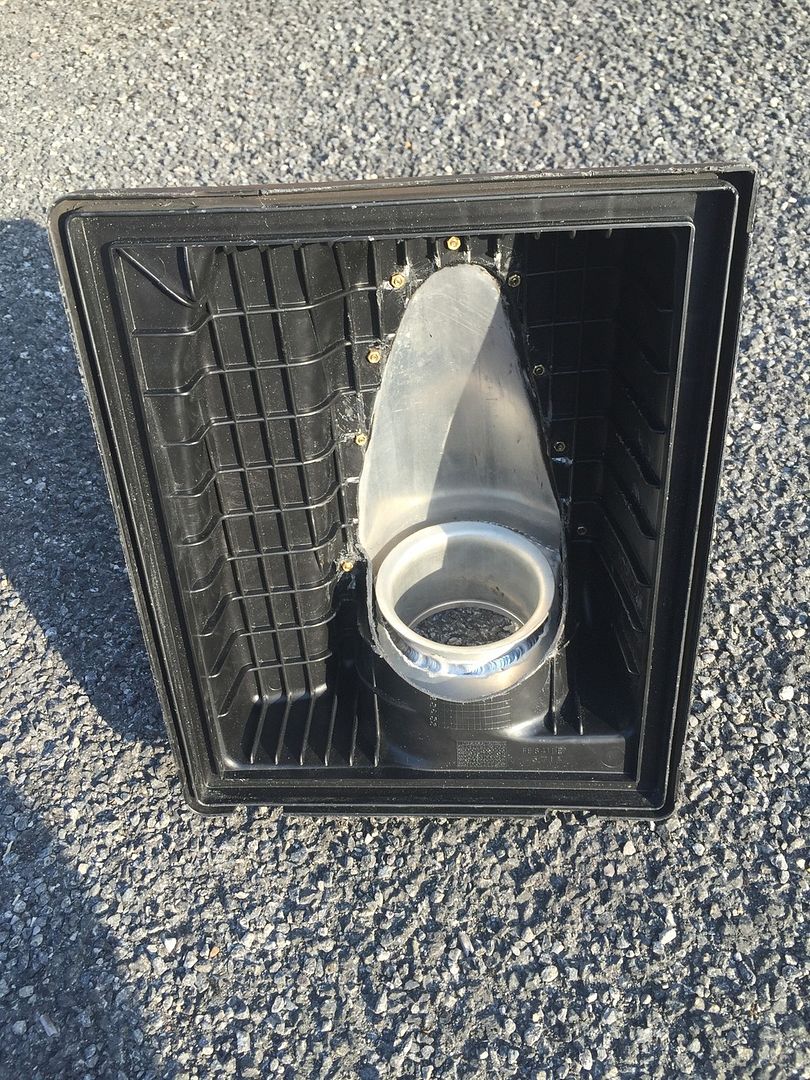
Here's a few pics of the work in progress. I hope you'll appreciate my master bodgery of a folding technique.
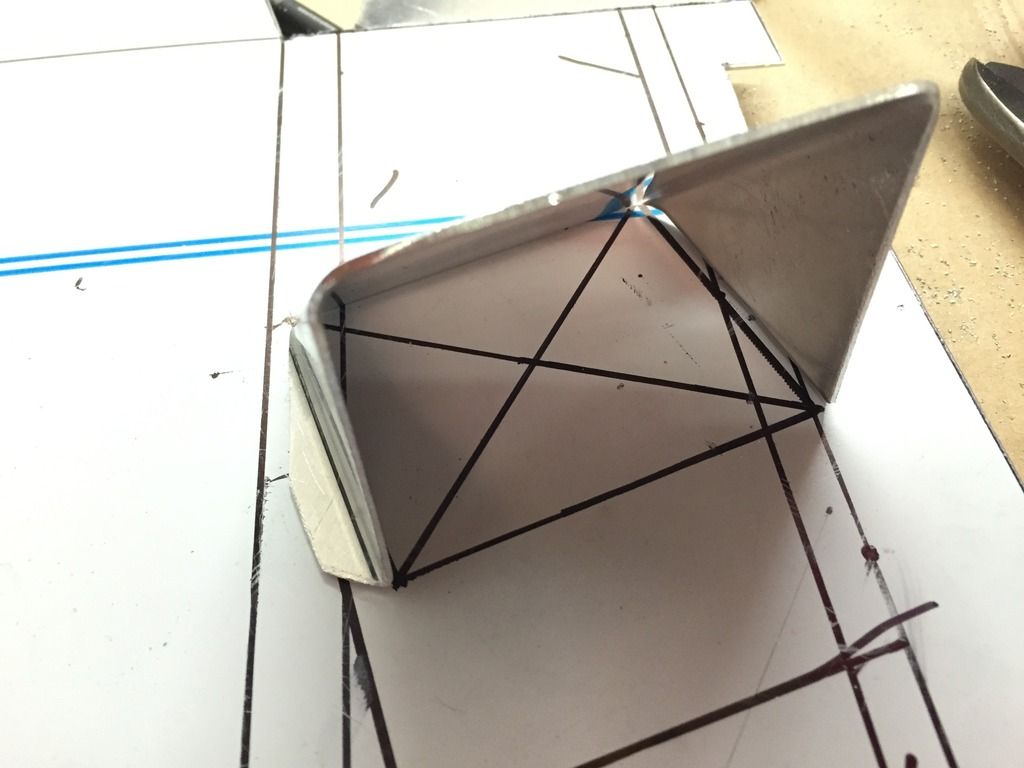
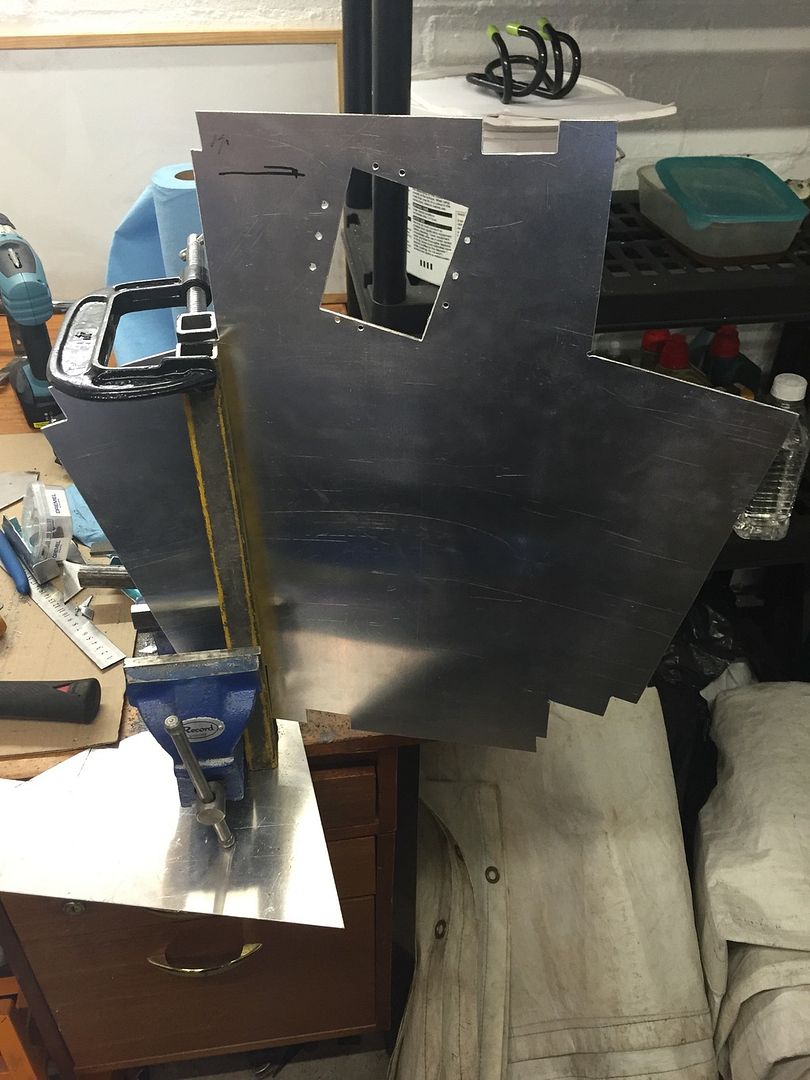
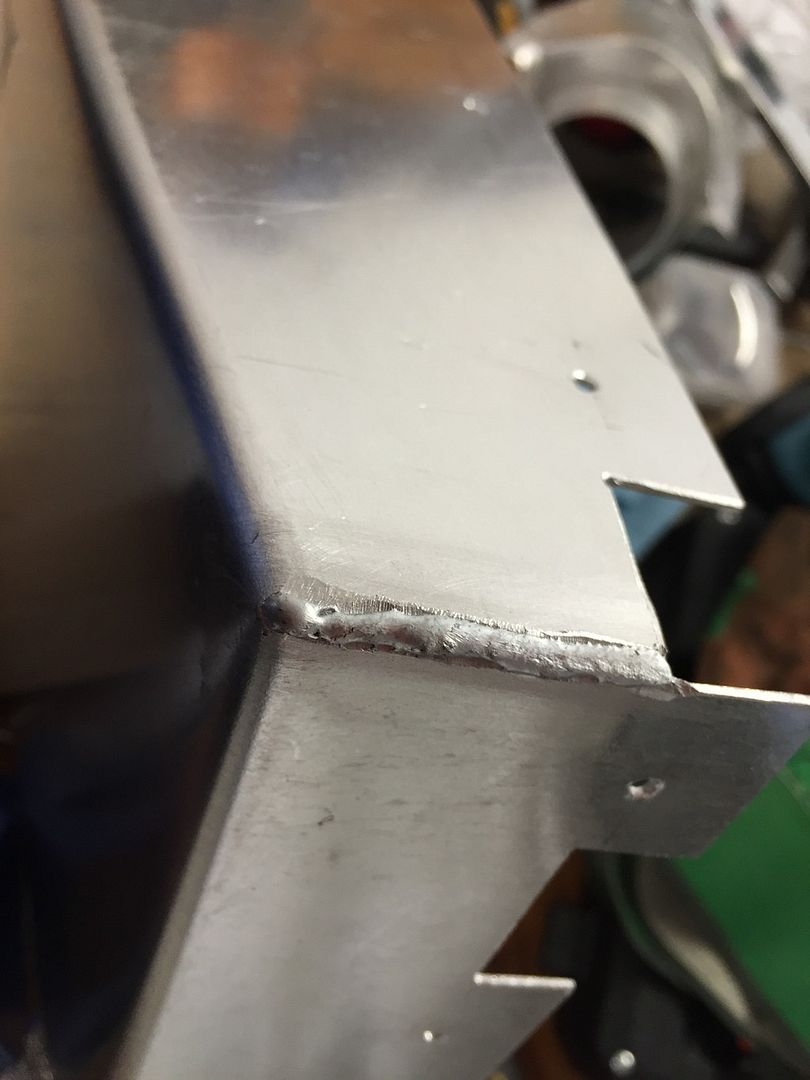
I had intended to TIG weld the seams but got suckered into buying this next generation Braze rod from the guy at Machine Mart. It was okay but wasn't especially easy to work with and clearly not as strong as a welded joint. This was probably the neatest one I managed. I've ended up putting a fillet of tiger seal on the inside corners of the box to ensure it's airtight.
The car was booked to be mapped on Saturday morning by CC Tuning in Burton. On Thursday evening I set about fitting the Larini system. All manifold studs and the Lambda sensor were doused in easing oil and left for 24 hrs before removal was attempted. Despite this, all 3 manifold studs sheared and the Lambda sensor is well and truly stuck. I had a little cry, cancelled my appointment and the car remains on axle stands until I rediscover the desire to work on it again. Current situation is, I have 2 VX's, it's hot and sunny and I can't drive either of them.
#77
Arno
-
-
- 1,238 posts
Need to get Out More
- Gender:Male
- Location:Netherlands
Posted 12 July 2015 - 05:40 PM
Better make 250% sure that those small (brass?) nuts on the inside of the top of the airbox are supeglued or overwise permanently secured in place. You don't want any of those vibrating loose and getting sucked into the turbo or engine intake (in bits by then probably..)
Bye, arno.
#78
cressey
-
-
- 966 posts
Need to get Out More
- Gender:Male
- Location:Derby
Posted 12 July 2015 - 06:36 PM
Yeah I know what you mean. The threads have been peened to prevent the nuts from working loose. I'd hope they'd also get caught in the MAF before reaching the Turbo if they did manage to break free.
#79
cressey
-
-
- 966 posts
Need to get Out More
- Gender:Male
- Location:Derby
Posted 18 July 2015 - 12:01 PM
A few developments.
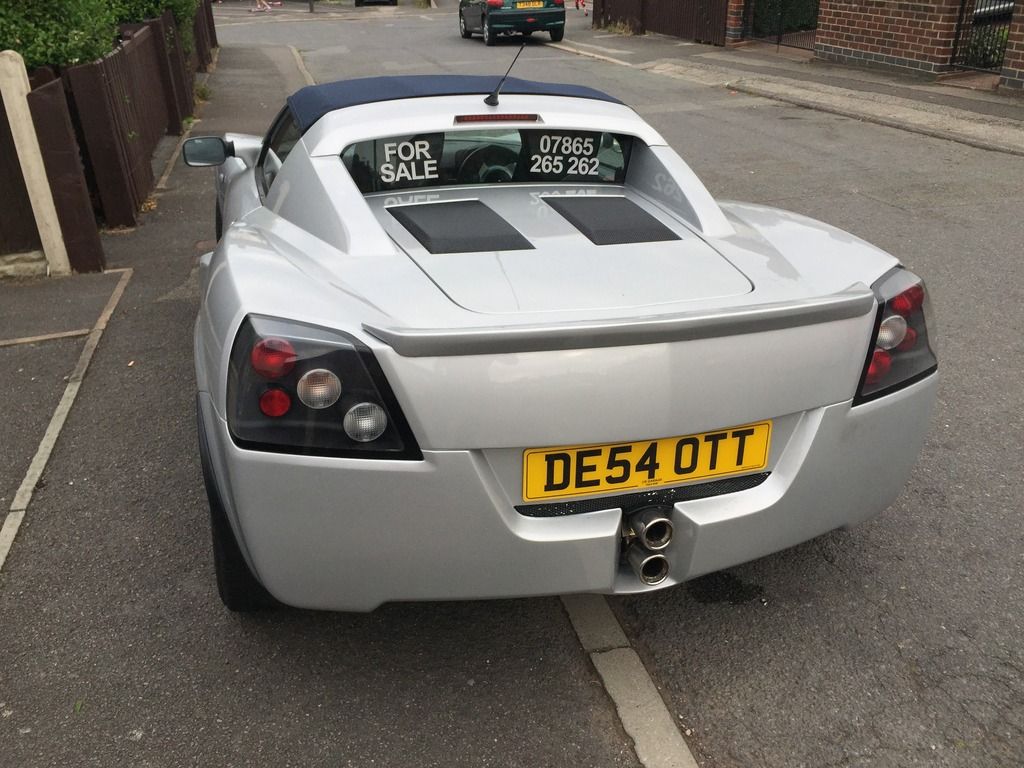
The silver one is now on the road!!! Really nice to be driving it as the blue one has been off the road for a couple of weeks now. Just need to get the cam belt, complete service and inspection done by MMG and it'll be complete. Unfortunately, I've come to the realisation that having 2 is a bit OTT and my heart just won't let me sell the blue one. It would also need quite a bit of bodywork doing to make it saleable so decision has been made. It'll be on Pistonheads in the next week or two but some of you may have already seen it on the Facebook page.
I've been under the blue one every night for the last few nights trying to remove the old exhaust system. Every bolt I've touched has sheared which has been a friggin nightmare when I've only got axle stands to work on. Removing the O2 sensor also required easing oil, heat, a vice and a mate with more muscles than me. I've finally removed all the broken studs etc and now have a little more motivation as I can actually start fitting stuff!. Today's challenge.
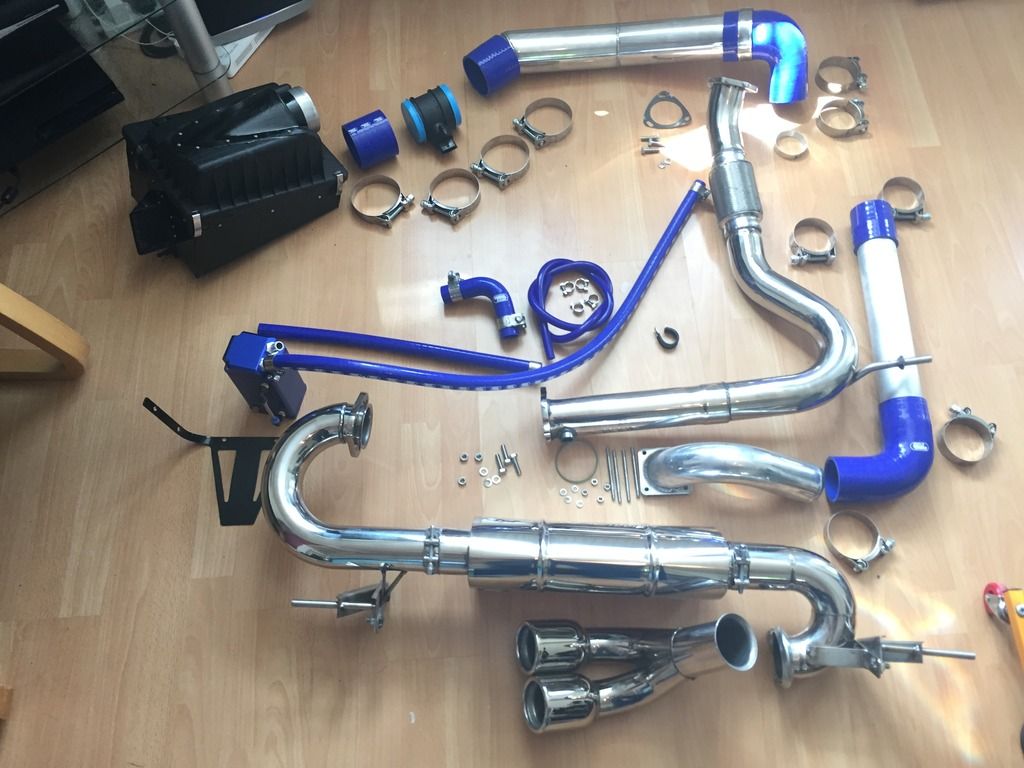
The Mrs had been wondering why we're so skint at the moment so I've created the following equation to help explain.
Petrol head + impulse buyer = 2 x VX's + this lot = No money - Any chance of a new suit for the wedding this week.
#80
Zoobeef
-

-
- 11,103 posts
Joes bedroom assistant.
- Gender:Male
- Location:Retford/Bovington
Posted 18 July 2015 - 12:14 PM
Nice shiney bits there.
Do you not fancy doing the cambelt and service yourself? Money saving to be had there.


0 user(s) are reading this topic
0 members, 0 guests, 0 anonymous users

