Jump to content


Photo

Volvo T5 Engine Transplant


  • Please log in to reply
314 replies to this topic

#121 vxt5

vxt5

    Member

  • Pip
  • 199 posts
  • Gender:Male
  • Location:s wales

Posted 15 February 2015 - 02:24 PM

Small update for you guys not had a lot of time to work on the car the last month or so due to work etc but we have managed to complete some small jobs.. I try to take pictures during the work and showing the processes but often I forget whilst attacking the jobs so some pics may not be of the finished article.....

I bought a set of 330 rotors and aluminum bells from "the batman" they'd been sat around for a while so decided to clean them up a bit..

Before
Posted Image
Posted Image

During
Posted Image

After
(Need to take pic)

We decided to get the lower arms completed so I finished cleaning them up
Posted Image
And give them a lick of paint. I also bought the parts I needed to comeplete the tie rods at this point.
Posted Image
To make the new smaller tie rods we cut the existing ones down to size and tapped them using the standard size . At first we was going to usr a rose joint inboard and a ball joint outboard but later decided to go for the rose joints on both ends.

#122 vxt5

vxt5

    Member

  • Pip
  • 199 posts
  • Gender:Male
  • Location:s wales

Posted 15 February 2015 - 02:39 PM

Small update for you guys not had a lot of time to work on the car the last month or so due to work etc but we have managed to complete some small jobs.. I try to take pictures during the work and showing the processes but often I forget whilst attacking the jobs so some pics may not be of the finished article.....

I bought a set of 330 rotors and aluminum bells from "the batman" they'd been sat around for a while so decided to clean them up a bit..

Before
Posted Image
Posted Image

During
Posted Image

After
(Need to take pic)

We decided to get the lower arms completed so I finished cleaning them up
Posted Image
And give them a lick of paint. I also bought the parts I needed to complete the tie rods at this point.
Posted Image
To make the new smaller tie rods we cut the existing ones down to size and tapped them using the standard size . At first we was going to usr a rose joint inboard and a ball joint outboard but later decided to go for the rose joints on both ends.

#123 vxt5

vxt5

    Member

  • Pip
  • 199 posts
  • Gender:Male
  • Location:s wales

Posted 15 February 2015 - 03:32 PM

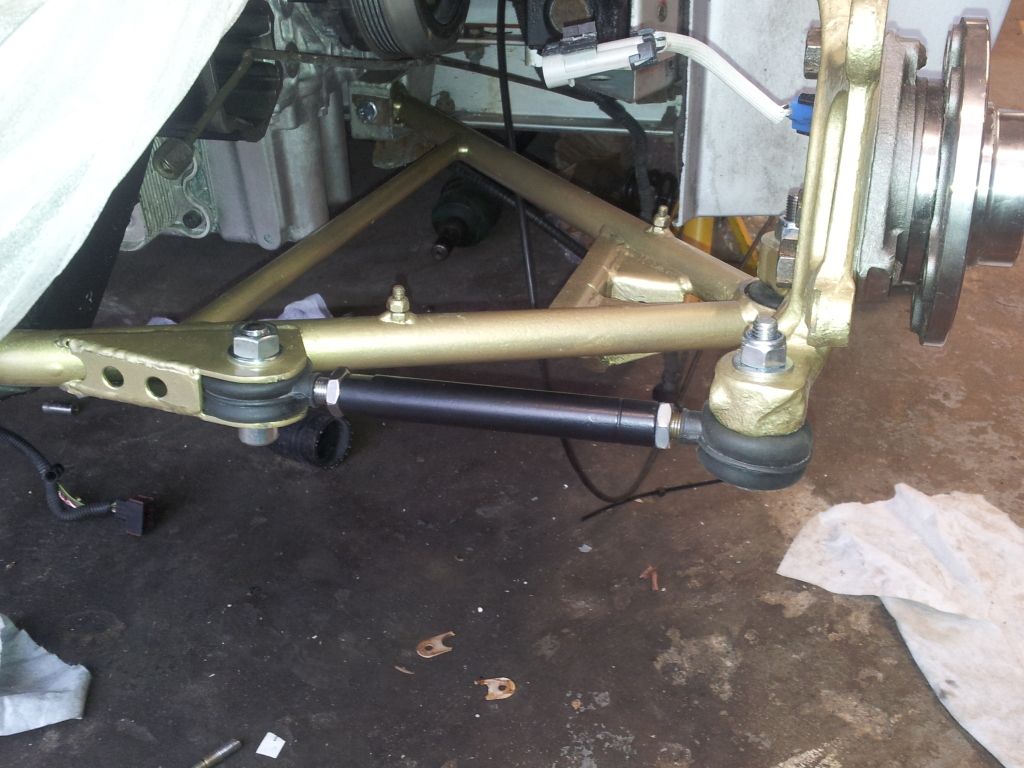
Heres the complete tie rods with rose joints on both ends.
Posted Image

Just need to finish the brakes on the back end and get some new coilovers and ill be happy with it...

New rear discs (ebay jobbys for now)
Posted Image

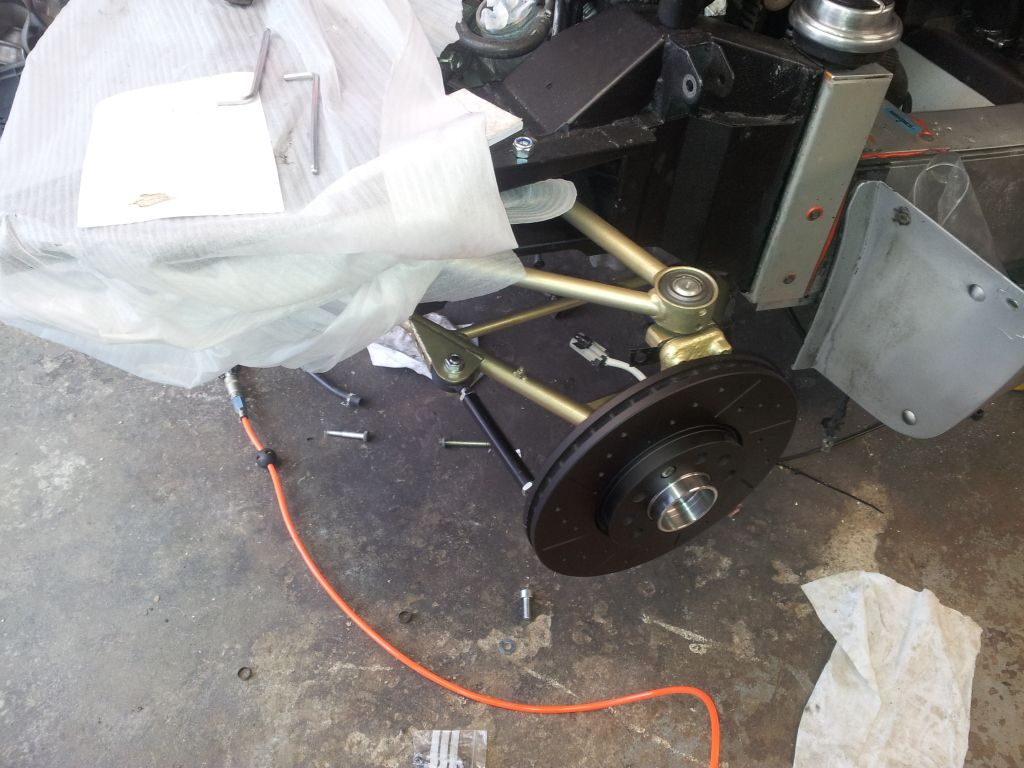
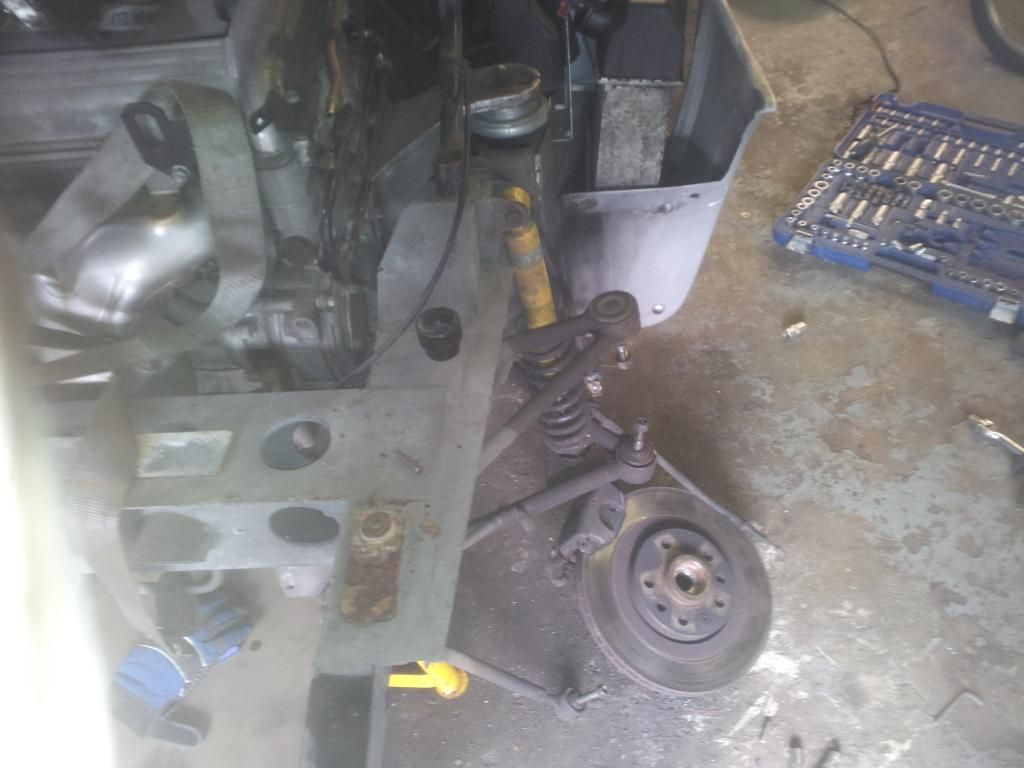
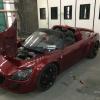
And an old pic for comparison of change..
Posted Image

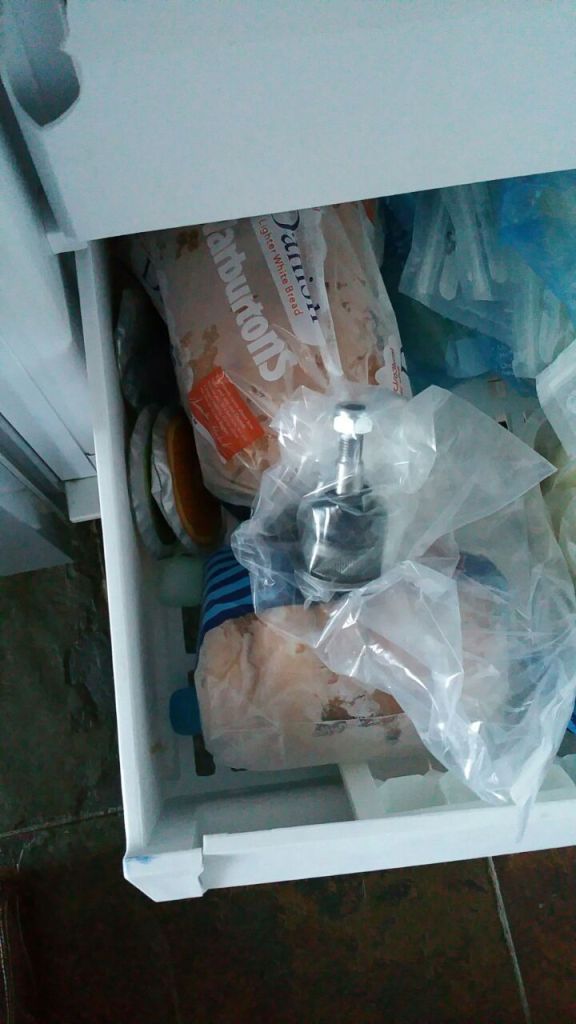
Also we was having trouble with the one ball joint being a very tight fit so a lil tip for anyone in the future.... pop it in the freezer overnight, it worked a treat....
Posted Image

Moving on I connected up my clutch line by reworking the existing pipe line, it still needs to be attatched with a p clip or the like...
Posted Image

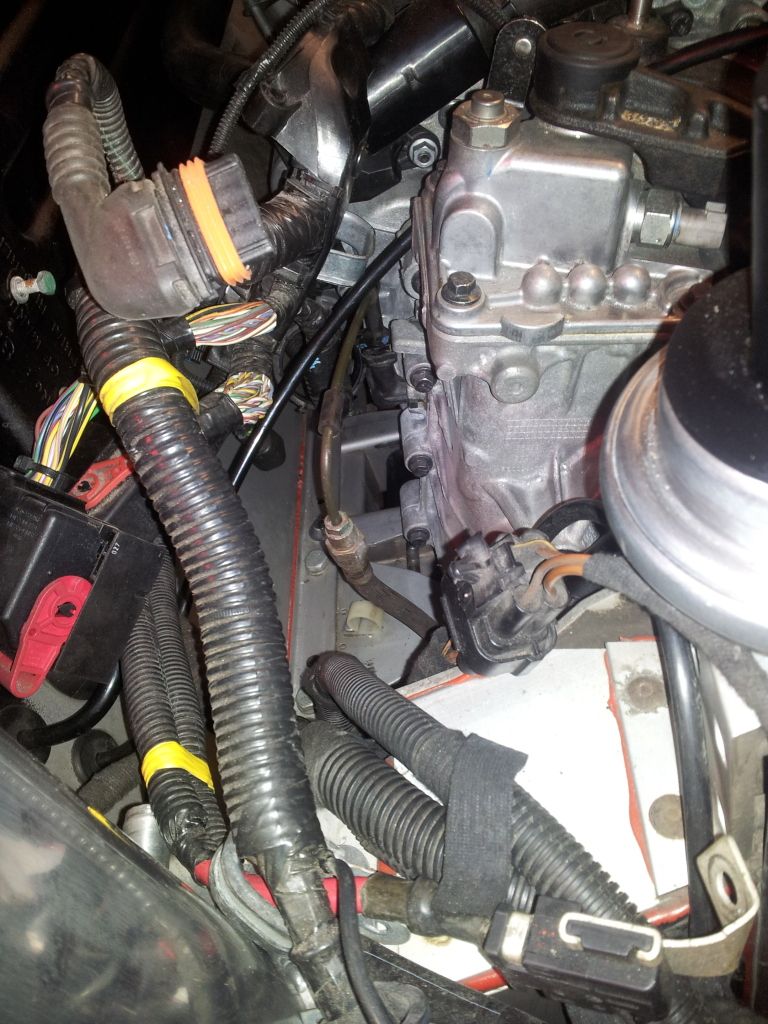
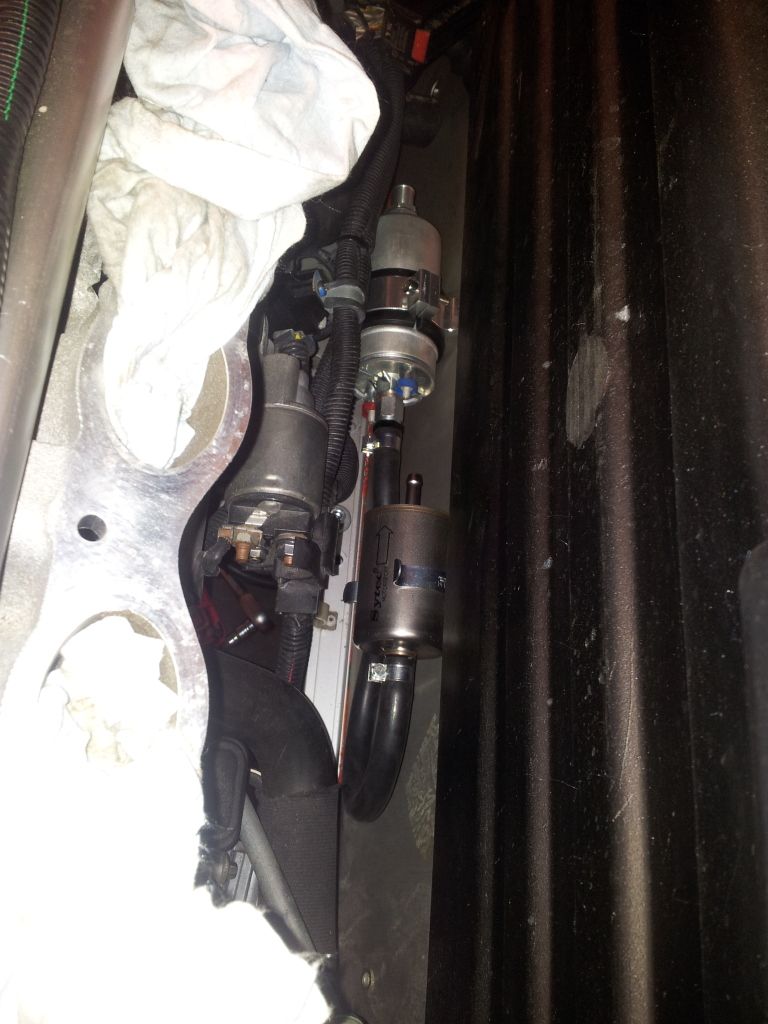
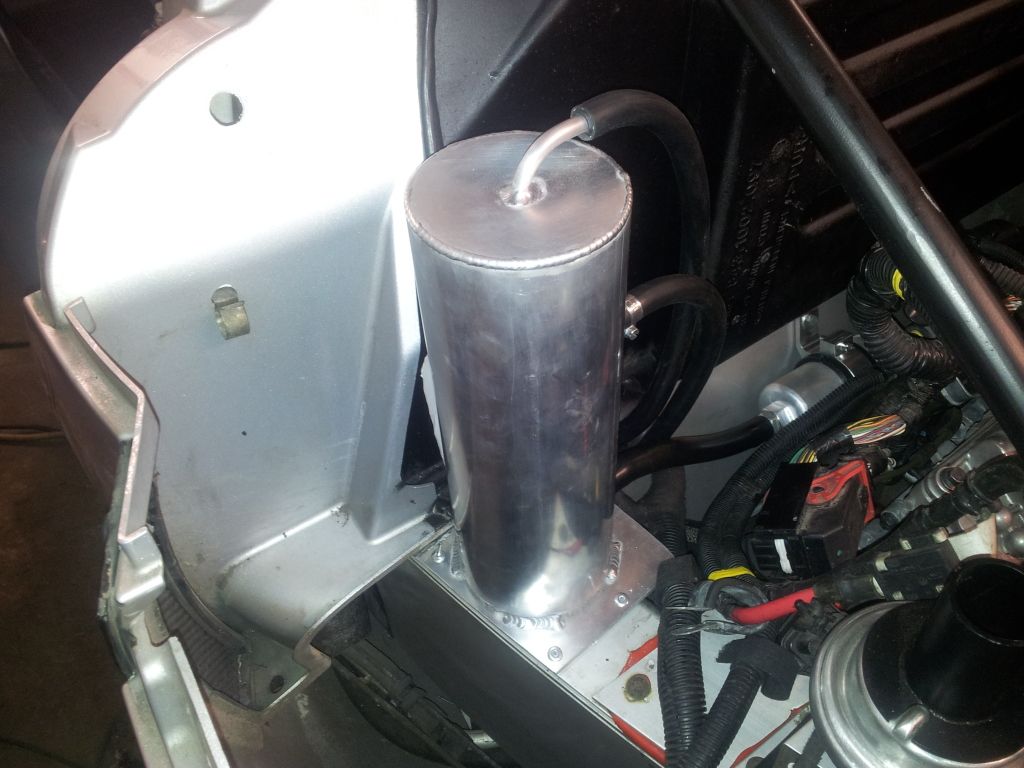
Onto fitting the fuel system.... ordered a 2litre swirl pot. Not sure buy it may be overkill? Seems pretty big but decided to fit it anyway. Along with the bosch 044 pump and sytec fuel filter I bought previously... while fitting the new hose lines to the tank I decided to enlarge the access hole. Out come the 3" hole cutter and a couple of seconds later the carpets full of aluminium filings :( (didnt think that one through)
Posted Image
Makes access do much easier.... eventually got everything in only to ralise I didnt order enough hose clamps
Posted Image

Posted Image

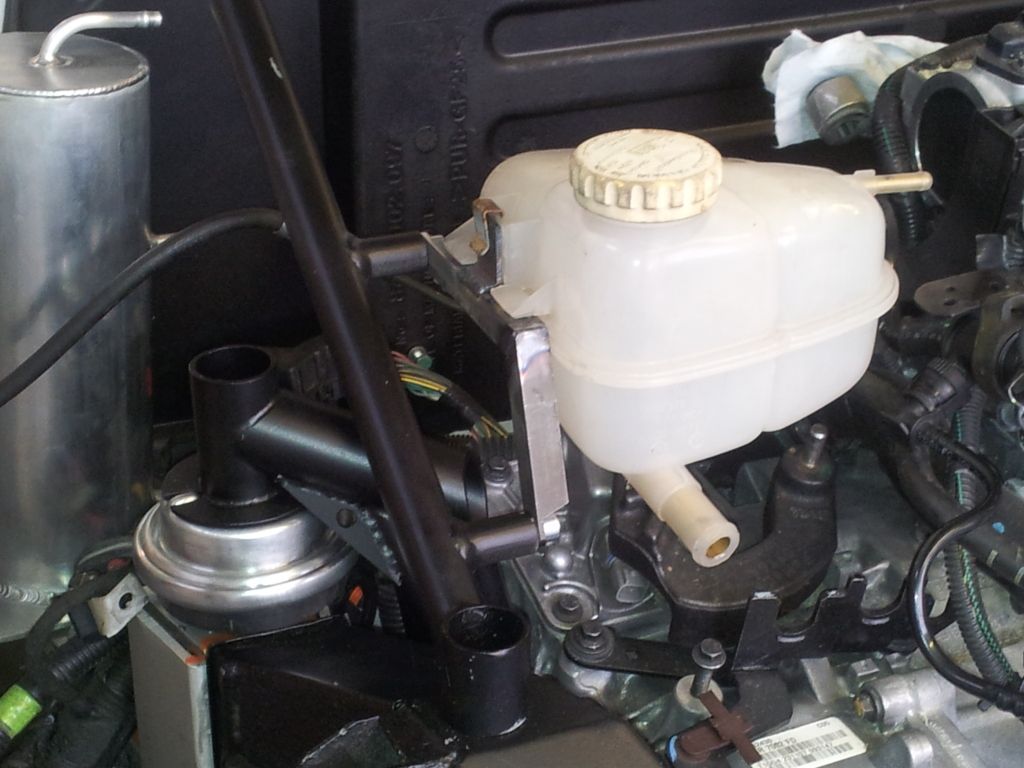
My mate matt knocked up a new expansion tank bracket which is much smaller than the standard one and works a treat. Tucks it in a lot closer to the roll bar support and access should be fine here as im hoping to have a hinged clam :)..
Posted Image
rite now were working on a linkage for the gear selector cables as the standard selector works in opposite directions.... progress is slow atm but by plodding along with the smaller jobs one at a time I guess the whole thing will come together eventually :)

#124 vocky

vocky

    Moderator

  • 11,969 posts
  • Gender:Male
  • Location:Earth

Posted 15 February 2015 - 09:55 PM

now were working on a linkage for the gear selector cables as the standard selector works in opposite directions.... 


if it's the sideways selection you can simply move the gear lever pivot point to the opposite side of the gear lever assembly, this is how Lotus did it with the vauxhall 6 speed in the Europa.


you will need to adjust stuff and alter the gear lever angle, as it will point forwards, but perhaps simpler than trying to make something at the gearbox end.


Europa gear lever assembly;


Posted Image


Edited by vocky, 15 February 2015 - 09:57 PM.


#125 vxt5

vxt5

    Member

  • Pip
  • 199 posts
  • Gender:Male
  • Location:s wales

Posted 15 February 2015 - 10:39 PM

now were working on a linkage for the gear selector cables as the standard selector works in opposite directions.... 
 

if it's the sideways selection you can simply move the gear lever pivot point to the opposite side of the gear lever assembly, this is how Lotus did it with the vauxhall 6 speed in the Europa.
 
you will need to adjust stuff and alter the gear lever angle, as it will point forwards, but perhaps simpler than trying to make something at the gearbox end.
 
Europa gear lever assembly;
 
Posted Image


We had thought of this and taken a brief look at it. It is the side to side movement that needs to be switched but when looking at the selector it seem a lot of work to switch the pivot angle of the stick........ do you know of anyone who has done this before or do most people opt for a different selector? Thanks for your Input vocky

#126 don.hasi

don.hasi

    Super Member

  • PipPip
  • 320 posts
  • Gender:Male
  • Location:Germany

Posted 15 February 2015 - 11:09 PM

Very interesting :) How have you cleaned up the wishbones ? They look very tidy :)

#127 Arno

Arno

    Need to get Out More

  • PipPipPipPip
  • 1,238 posts
  • Gender:Male
  • Location:Netherlands

Posted 16 February 2015 - 08:58 AM


Posted Image


Is the swirlpot held on by pop-rivets? Not sure I'd trust those to keep 2L of filled fuel can in place with 'enthousiastic' cornering and shock loads. :o


Might want to consider swapping these for M6 or M8 rivnuts insertied in the chassis beam and regular bolts in these to secure the base of the tank to the chassis. :tt: 


Bye, Arno.


#128 vxt5

vxt5

    Member

  • Pip
  • 199 posts
  • Gender:Male
  • Location:s wales

Posted 16 February 2015 - 10:02 PM

To clean up the arms I tried many tools but mainly I used a poly abrasive disc this was gentle enough that it wouldnt bite into the metal but abrasive enough to remove all the grime and surface corrosion

#129 simonlpearce

simonlpearce

    Need to get Out More

  • PipPipPipPip
  • 933 posts
  • Gender:Male
  • Location:Midlands

Posted 17 February 2015 - 12:47 PM

Great to see yet more updates, she really is looking a lot better than she was!  :)  B)


#130 vxt5

vxt5

    Member

  • Pip
  • 199 posts
  • Gender:Male
  • Location:s wales

Posted 18 February 2015 - 09:05 PM

Thanks Arno i did express the same concern when I first thought of using rivets to fix the swirl pot down but once i done it and felt how solid it was my mind was at ease. Now youve mentioned it, i Think im going to have to get my self a rivnut tool.

#131 vxt5

vxt5

    Member

  • Pip
  • 199 posts
  • Gender:Male
  • Location:s wales

Posted 18 February 2015 - 09:12 PM

Great to see yet more updates, she really is looking a lot better than she was!  :)  B)

Cheers sim, this was just meant to be an engine conversion like we mentioned, but its somehow turned into a restoration project at the same time. Weve ended replacing nearly every nut and bolt weve come across, not that it was needed but I couldn't face putting old rusty bolts back on after tidying everything else up. :)

#132 Mopeytitan

Mopeytitan

    Billy No Mates

  • PipPipPipPipPip
  • 1,908 posts
  • Gender:Male
  • Location:Yeovil, Somerset
  • Interests:Cars, Motorbikes, well anything mechanical.
    My dogs (love my dogs).
    F1.

Posted 18 February 2015 - 09:58 PM

Great to see yet more updates, she really is looking a lot better than she was!  :)  B)

Cheers sim, this was just meant to be an engine conversion like we mentioned, but its somehow turned into a restoration project at the same time. Weve ended replacing nearly every nut and bolt weve come across, not that it was needed but I couldn't face putting old rusty bolts back on after tidying everything else up. :)

One of those situations where it's might aswell since your there :lol: Looking good btw

#133 vxt5

vxt5

    Member

  • Pip
  • 199 posts
  • Gender:Male
  • Location:s wales

Posted 18 February 2015 - 11:10 PM

Had a couple hours down the garage yestaday so we managed to strip the old drive shafts and start on the new ones. We cut and shut them for now just to check fitment. Theyre spot on so ill have these made up asap and will install them with new cv joints at the same time...
Posted Image

#134 vxt5

vxt5

    Member

  • Pip
  • 199 posts
  • Gender:Male
  • Location:s wales

Posted 18 February 2015 - 11:11 PM

Posted Image

Edited by vxt5, 18 February 2015 - 11:13 PM.


#135 vxt5

vxt5

    Member

  • Pip
  • 199 posts
  • Gender:Male
  • Location:s wales

Posted 18 February 2015 - 11:15 PM

Thnks mopeytitan

#136 Rudy

Rudy

    ZZZzzzzz.....

  • PipPipPipPipPipPip
  • 3,375 posts
  • Gender:Male
  • Location:.

Posted 18 February 2015 - 11:35 PM

Posted Image

Loving the gold :wub:

Excellent thread, just lost 20 minutes of my evening immersed in this. Not surprised your replacing everything whilst accessible, you'll have a brand new car when finished. Dread to think of the hours you've put in so far but you'll have a totally unique car at the end of it........if there is an end to it!

#137 vxt5

vxt5

    Member

  • Pip
  • 199 posts
  • Gender:Male
  • Location:s wales

Posted 19 February 2015 - 12:16 AM

Posted Image

Loving the gold :wub:

Excellent thread, just lost 20 minutes of my evening immersed in this. Not surprised your replacing everything whilst accessible, you'll have a brand new car when finished. Dread to think of the hours you've put in so far but you'll have a totally unique car at the end of it........if there is an end to it!
"If there is an end to it" thats what im worried about lol cheers rudy

#138 Mangham54

Mangham54

    Wannabe....

  • PipPipPipPipPipPipPipPip
  • 12,034 posts
  • Gender:Male
  • Location:Baaaaarrrrnnnnssssllleeeeyyyy

Posted 19 February 2015 - 12:47 PM

The alignment between the gearbox and hub looks quite out of line (horizontally, as well as the typical vertical articulation)... Will that not induce additional heat into the CV joints and cause premature fatigue?


Edited by Mangham54, 19 February 2015 - 12:47 PM.


#139 Mopeytitan

Mopeytitan

    Billy No Mates

  • PipPipPipPipPip
  • 1,908 posts
  • Gender:Male
  • Location:Yeovil, Somerset
  • Interests:Cars, Motorbikes, well anything mechanical.
    My dogs (love my dogs).
    F1.

Posted 19 February 2015 - 02:36 PM

The alignment between the gearbox and hub looks quite out of line (horizontally, as well as the typical vertical articulation)... Will that not induce additional heat into the CV joints and cause premature fatigue?      

I thought that at first but no shocks fitted so at full droop will look bad (regarding vertical)

#140 vxt5

vxt5

    Member

  • Pip
  • 199 posts
  • Gender:Male
  • Location:s wales

Posted 19 February 2015 - 07:57 PM

Hi would someone be so kind to edit my earlier post and insert this pic instead of (need to take pic) in the top post on this page thanks.
Posted Image

The pics of the driveshaft does look quite angled but as mentioned they are sat at theyre lowest point without suspension. Ive taken some more pics with the suspension on and at different points in its travel.

Posted Image


Posted Image


Posted Image

Posted Image


3 user(s) are reading this topic

0 members, 3 guests, 0 anonymous users