your vx spends more time being taken apart then driven lol

My Little Adventures...
Started by
The Batman
, Feb 08 2009 06:53 PM
534 replies to this topic
#401

Jameshs
-

-

- 3,511 posts
Scary Internerd
- Gender:Male
- Location:Copthorne, Nr Gatwick
- Interests:Cars and Rock Climbing
Posted 21 December 2009 - 12:32 PM
#402
The Batman
-
-

- 30,267 posts
Super Moderator
- Gender:Male
- Location:FLD mum's bed
Posted 21 December 2009 - 12:33 PM
your vx spends more time being taken apart then driven lol
i have come to learn that, thats the way i like it

unless im on track

#403
The Batman
-
-
- 30,267 posts
Super Moderator
- Gender:Male
- Location:FLD mum's bed
Posted 28 January 2010 - 04:06 PM
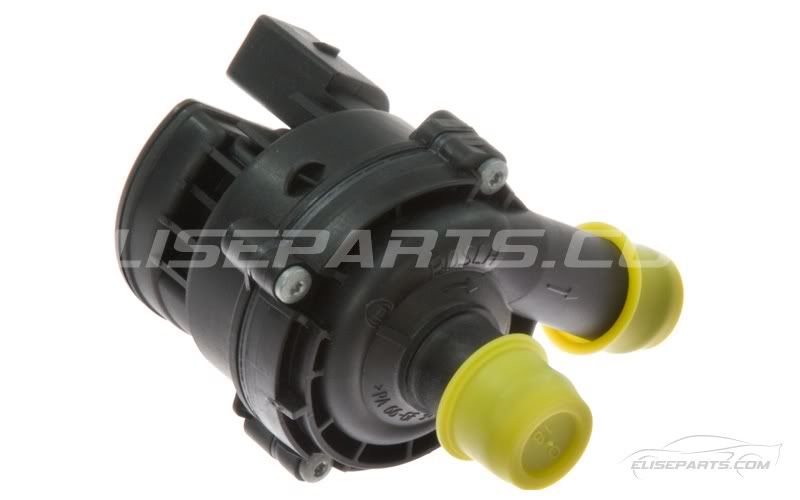
well as my bosch charge cooler pump decided to die, i bought a new audi one 

will be running without a heat shield box around the silencer, instead will be using nimbus material around the clam to save it from bubbling just as a precaution
will be running without a heat shield box around the silencer, instead will be using nimbus material around the clam to save it from bubbling just as a precaution
#404
rik
-

-

- 2,187 posts
Scary Internerd
- Gender:Male
- Location:Northwest
Posted 29 January 2010 - 04:12 AM
well as my bosch charge cooler pump decided to die, i bought a new audi one
think I have this one seems to work well

they couldve used different coloured wires though
 same on mine
#405
The Batman
-
-
- 30,267 posts
Super Moderator
- Gender:Male
- Location:FLD mum's bed
Posted 29 January 2010 - 05:44 AM
yeah, i emailed the guy back and he said the wire nearest the flat side is live, also stated that it will only run one way!
will be good fun, just one the beast back on the road so can take it round a cheeky track to kill off my 888s!
#406
The Batman
-
-
- 30,267 posts
Super Moderator
- Gender:Male
- Location:FLD mum's bed
Posted 03 February 2010 - 05:14 PM

all pretty much back together will be finished tomorrow
only problem is the front is seating really low (without the splitter on!) and the rear is seating fairly high (unless i have forgotten how it looks together
) i put shorter stronger springs on the front and same length stronger springs on the back, which i imagine havent compressed as much due to be harder springs which is why it is seating high at the back?
the exhaust is pretty impressive!
#407
The Batman
-
-
- 30,267 posts
Super Moderator
- Gender:Male
- Location:FLD mum's bed
Posted 26 February 2010 - 03:19 PM
thought i would invest in a new wiper arm and blade as the flat blade i have is wank! so i bought a nice shiny S2 one

then as my little vx lets in a little bit of water! i have bought front and rear seals from the tubby/s2:

also will be 'treating' the soft top is some special way with autoglym kit, so if it leaks anymore water then
then as my little vx lets in a little bit of water! i have bought front and rear seals from the tubby/s2:
also will be 'treating' the soft top is some special way with autoglym kit, so if it leaks anymore water then
#408
BRG_Pete
-

-
- 285 posts
Super Member
- Gender:Male
- Location:Camberley
Posted 26 February 2010 - 09:01 PM
...so if it leaks anymore water then
Good luck with the leak proofing. The new front seal sorted out the passenger side a treat... but created a new leak on the drivers side
. All OK now though It's worth making a note/marking where the existing seal travels, then you have a marker for the new one.
With the weather like it is you shouldn't have to wait too long to test it out.
#409
The Batman
-
-
- 30,267 posts
Super Moderator
- Gender:Male
- Location:FLD mum's bed
Posted 26 February 2010 - 09:03 PM
how did you fix the new leak?
hmm yeah thats probably a really good idea! how did you mark it? permanant marker sort of thing?!
#410
BRG_Pete
-
-
- 285 posts
Super Member
- Gender:Male
- Location:Camberley
Posted 26 February 2010 - 09:15 PM
There was a tiny gap, where the sticky back wasn't flush with the frame. Just needed pressing in place.
I didn't mark it . It was the point where I was standing there with the new seal poised to take off the orange tape when I thought... yep would have been a good idea to mark up the position of the old one.
I would close the door and take a look at how the window fits with the current seal, then decide if that is spot on or if the new seal should be higher or lower. Then maybe use something like Gaffa tape or some decent masking tape to give you a guide.
Peel the old one off slowly and try to take as much off the old glue with it. I then used some bostick glue remover and a tea towell to completeley clean the surface - not much fun.
I think I fitted a corner first then removed the orange strip bit by bit as I went along.
Picture here just in case it helps - pic
I didn't mark it
. It was the point where I was standing there with the new seal poised to take off the orange tape when I thought... yep would have been a good idea to mark up the position of the old one.I would close the door and take a look at how the window fits with the current seal, then decide if that is spot on or if the new seal should be higher or lower. Then maybe use something like Gaffa tape or some decent masking tape to give you a guide.
Peel the old one off slowly and try to take as much off the old glue with it. I then used some bostick glue remover and a tea towell to completeley clean the surface - not much fun.
I think I fitted a corner first then removed the orange strip bit by bit as I went along.
Picture here just in case it helps - pic
Edited by BRG_Pete, 26 February 2010 - 09:18 PM.
#411
The Batman
-
-
- 30,267 posts
Super Moderator
- Gender:Male
- Location:FLD mum's bed
Posted 26 February 2010 - 09:22 PM
why am i thinking... "should have put up with the water"
thanks for the pictures, hopefully will be attacking it tomorrow and hopefully no fires  thanks for the advice
#412
The Batman
-
-
- 30,267 posts
Super Moderator
- Gender:Male
- Location:FLD mum's bed
Posted 28 February 2010 - 02:50 PM
busy weekend fitted both turbo seals fitted, s2 wiper arm and blade and even treated the soft top to a autoglym clean and protector treatment
am happy with the outcome, plus the soft top now looks brand new!
am happy with the outcome, plus the soft top now looks brand new!
#413
leevx2.2
-

-
- 4,830 posts
Turbo's are for girls and throttle bodies are too slow
- Gender:Male
- Location:Bedford
-
Interests:Taking apart vx220s for fun
getting p!!sed
genraly playing with large power tools
Posted 28 February 2010 - 04:17 PM
Joe how much did the new seals cost as might do mine as they have seen better days and leak to.busy weekend fitted both turbo seals fitted, s2 wiper arm and blade and even treated the soft top to a autoglym clean and protector treatment
am happy with the outcome, plus the soft top now looks brand new!
#414
The Batman
-
-
- 30,267 posts
Super Moderator
- Gender:Male
- Location:FLD mum's bed
Posted 28 February 2010 - 04:19 PM
wiper arm
rear roof seal
front roof seal
i have orded new black plastic clips aswell to replace the horrible metal bits that the soft top clips into
rear roof seal
front roof seal
i have orded new black plastic clips aswell to replace the horrible metal bits that the soft top clips into
#415
The Batman
-
-
- 30,267 posts
Super Moderator
- Gender:Male
- Location:FLD mum's bed
Posted 06 March 2010 - 02:56 PM
right right, been a busy boy! fitted these shiny plastic bits, which weigh less

then fitted a new charge cooler pump they are coming out my ears at the moment
then raised my front suspension by 30mm
then fitted a new charge cooler pump
they are coming out my ears at the moment then raised my front suspension by 30mm
#416
rcvaughan
-

-
- 3,115 posts
Ex-VXer
- Gender:Male
- Location:California
- Interests:Work cars: Play cars
Posted 06 March 2010 - 03:12 PM
Keep up the good work! I've been busy with mine too- jusf wish my effin clam would come back from paint so I can start driving the thing again!
#417
The Batman
-
-
- 30,267 posts
Super Moderator
- Gender:Male
- Location:FLD mum's bed
Posted 06 March 2010 - 04:18 PM
yeah you must be gutted, my front clam is going to go soon though
front end respray will look good though!
still not sure whether to put that horrible armourfend on or not though...
front end respray will look good though!
still not sure whether to put that horrible armourfend on or not though...
Edited by joe_589, 06 March 2010 - 04:19 PM.
#418
MrSimba
-

-
- 5,197 posts
Scary Internerd
- Gender:Male
- Location:UK
Posted 06 March 2010 - 06:03 PM
yeah you must be gutted, my front clam is going to go soon though
front end respray will look good though!
still not sure whether to put that horrible armourfend on or not though...
If you don't it won't stay looking good for too long...
Just ask DG!

#419
The Batman
-
-
- 30,267 posts
Super Moderator
- Gender:Male
- Location:FLD mum's bed
Posted 06 March 2010 - 06:06 PM
lol will get the whole clam done so it doesnt look terrible lol
#420
JonnyVX
-

-
- 506 posts
Super Duper Member
- Gender:Male
- Location:Wolverhampton, West Midlands
Posted 09 March 2010 - 10:52 AM
lol will get the whole clam done so it doesnt look terrible lol
Get Covertech to do it they did mine and simbas in 1 piece you can't tell its on! Plus you will always get a chip between the 3 pieces if you get armourfend!


1 user(s) are reading this topic
0 members, 1 guests, 0 anonymous users

